How to repair a cooker hood?

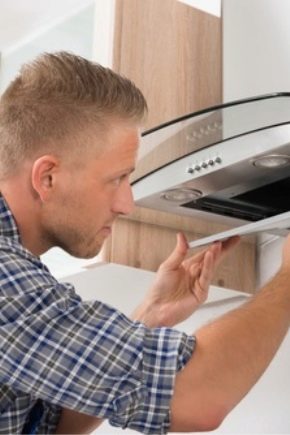
It is quite possible that the exhaust equipment does not start or for some reason loses its performance. You don't have to grab the phone right away to call the wizard. With basic technical knowledge and desire, you can repair your cooker hood yourself. Having chosen a similar way to solve the problem, it is required to identify the cause of the device malfunction.
Causes
In a situation when your hood in the kitchen is already about ten years old and not so long ago it began to draw out air unsatisfactorily, then you do not need to think about repairs, it is easier to purchase a new device. But what if the newly purchased device has not worked for even a year, and the fan is no longer able to cope with its duties or has stopped functioning altogether? The first step is to establish the cause of the breakdown, and then eliminate it on your own.
Let's consider the main causes of breakdowns.

Improper use of the home ventilation system
First, you need to clean the grease trap (strainer) at least once every 3 weeks. A complete replacement of the carbon filter should be carried out every 12 months or when the indicator on the panel notifies about it (in the latest modifications there is a specialized lamp).
Second, it is forbidden to start the exhaust device over a working stove if there is nothing on it. The heated air is capable of causing damage to the system in a short time, which in the future will be relatively difficult to restore with your own hands.
Third, the hood should be started 2-3 minutes before the start of cooking and stopped 10-15 minutes after stopping cooking. Otherwise, the fan may not have enough time to remove the volume of vapors, which may result in an undesirable aroma in the room.

Broken or broken contacts
The operation of the hood entails a slight shaking, which can provoke a break in a weak contact on the control unit (CU) or somewhere in the circuit. This happens infrequently, and then only for products from China.
Incorrect installation
With improper installation, the exhaust system in the kitchen may stop working, which happens for reasons such as a poor wiring connection in the terminal block (terminal block) or a large bend of the corrugation (duct). Correct installation and connection of the device will increase the service life of the household hood. The distance from the gas stove to the hood must be at least 75 cm, and from the electric stove - at least 65. The corrugation must have a short length and a minimum number of turns. By adhering to these simple rules, the technique will last longer.


Electrical wiring problems
It may be that the outlet simply stopped working or knocked out the machine in the switchboard.
All these factors can become a circumstance for the breakdown of the hood and its further repair. As a consequence, take all aspects into account so that a similar situation does not appear again in the future.
How do I troubleshoot?
Alas, even with the most diligent attitude to technology, breakdowns are possible. Let's analyze the most common problems and the possibility of self-repairing kitchen hoods.

The light does not turn on
Undoubtedly, such a problem is not critical, nevertheless, the lack of backlighting can create significant discomfort.
If the backlight stops functioning, you can use the following tips.
- Start the hood and check that the fan is running.
- Check the health of the bulbs (they could just burn out). Usually, to eliminate this problem, it is enough to replace the burned out lamp, which can be bought at a special electrical equipment store.
Nevertheless, there are times when the problem lies in the malfunction of the power button, in this case, you should check its serviceability using a tester and, if necessary, change to a new one.

Weakly pulls
In this situation, odors are ineffectively removed, condensation forms on the windows. The reason may be both the general, inadequate ventilation condition in the house, and malfunctions in the device itself.
To identify the cause, apply the method described below.
- Test the draft in the ventilation duct at home. If it is missing, you must contact the appropriate utilities. You will not be able to clean or restore the ventilation duct on your own.
- Check the degree of contamination of the filter elements. If necessary, change the charcoal filter and rinse the grease filter.
- Damage to the fan blade (blade) can be a factor that the exhaust device does not pull well enough. It is required to disassemble the device and change the part.

Does not work
This is the most undesirable situation - there is no backlight, and the electric motor does not start. In such episodes, in order to repair the device yourself at home, you must have basic knowledge of electrical engineering and have at least a little experience with electrical appliances.
- If you see that the fuse has blown, you need to replace it with a new one.
- Sequentially test the voltage in the socket using a screwdriver-indicator, a circuit breaker (machine) on the electrical distribution board, the integrity of the plug and cable. If everything is normal, you need to look for problems in the hood itself.
- Ring the entire electrical circuit with a multimeter (tester). You need to start with the power key on the panel - maybe some contact has moved away. Next, ring the fuse, which protects the device from voltage surges, then the capacitor - it should not be swollen. If everything is OK, check the motor windings. If an open circuit is detected, it is better to purchase a new motor, repairing the old one does not make sense.


The fan is noisy
Often, the increased noise level is the result of poor build quality, which is typical for cheap products from China. In this situation, only replacing the device will help. Owners of good quality devices also often ask themselves the question of how to reduce the noise level during the operation of the device.
Experts recommend trying these techniques.
- Make sure that the device is properly fixed to the wall and the components of the kitchen furniture. A small gap can provoke the occurrence of shocks and noise during operation. To eliminate this, it is required to tighten the fasteners.
- Carry out a survey of the air duct - often its contamination increases the noise level of the electric motor.
- Slip pieces of soundproofing material or foam rubber under unsuccessful areas.


Do not switch speeds
Even inexpensive samples of exhaust equipment are capable of operating in several speed modes. As a rule, these are 2-3 speeds. When no change in the number of revolutions is observed with the electric motor turned on, we can confidently say that this is a malfunction of the control unit. You can make sure by examining it visually with the protection dismantled or by ringing a multimeter.
If the assumptions turned out to be correct, the best solution would be to replace the board with a new one, without trying to restore the old one.Repairs can, of course, be done, but it is unlikely that the working reserve will be enough to exclude another breakdown after a short time interval.

Care Tips
As a rule, there are no problems with the care of the outer surface of the hood, moreover, when it is a built-in modification. Open components are treated with a sponge with a grease dissolving agent, then wiped dry. If you do this systematically, and not from time to time, it will take several minutes to clean the device.
Everything is clear with the outer surface, but the device also needs to care for the internal components - filtering devices. They need to be washed, replaced, otherwise the effectiveness of air purification will begin to decline.

Filter elements: cleaning and replacing
The hoods are equipped with two types of filters: fat (grease-absorbing) - protects from fumes of fat and various debris, and coal - absorbs odors. Grease-absorbing filter elements are made of metal or acrylic. Iron filters do not require replacement.
They are taken out, washed and cleaned by hand once a month, or washed in a dishwasher every 2 months. The main thing is to correctly select the temperature of the water in the dishwasher. If temperature is not important for stainless steel filter elements, then aluminum filters become dark at elevated temperatures.
The acrylic filters change according to how intensively the hood is applied. Their average service life is 3 months. Note that some modern models of hoods are equipped with sensors that will promptly warn about the need to replace the filter element. Filters that have served their time are taken out and thrown away, there is no need to wash them and reinstall them, since such an element will no longer realize its purpose at the proper level.
The charcoal filters are replaced approximately every 12 months.


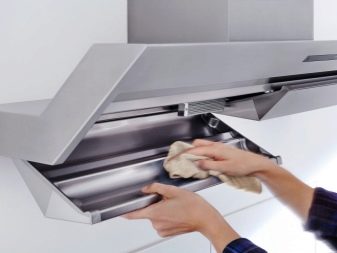
Proper cleaning of the hood consists of several steps.
- Disconnect the power supply to the hood.
- Detach grease filter.
- Wash accessible parts of the device on which fat deposits have collected.
- If the device is not installed, be sure to wash all accessible areas with a special product for stainless steel products. Never use cleaning agents containing abrasive components and hard sponges - they will scratch the shell of the device.
- Wipe the keys on the control panel with a soft cloth soaked in detergent.
- Wipe all components until completely dry with a napkin.
- You can connect the device to the electrical network.
Constant and proper care of the cooker hood makes it possible to obtain the effect for which it is acquired, and at the same time, it will help to increase its working life. Expensive household appliances are purchased, as a rule, not for a year, therefore, it depends on care for the most part what their appearance will be after a few years. And the reliability of the functioning of all components is guaranteed by the manufacturer.


For information on how to repair a kitchen hood yourself, see the next video.


The comment was sent successfully.