How to make a vibrating plate with an electric motor with your own hands?
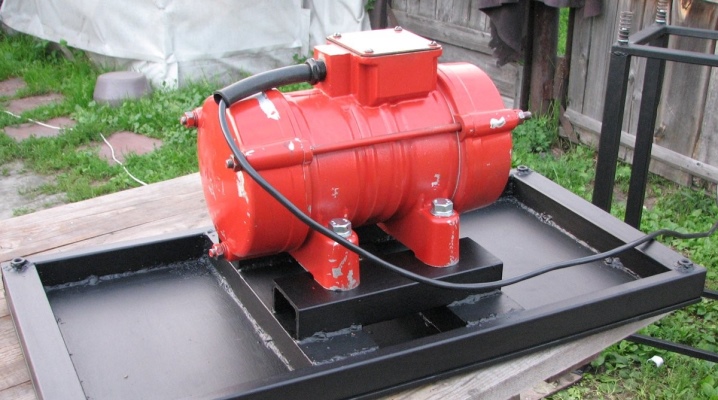
Tamping the ground under a garden path, preparing a site for building a foundation, compacting the soil at the bottom of a ditch or ravine - a vibratory plate is needed for such work. From this article, you will learn how to make a vibrating plate with an electric motor with your own hands.

Features of homemade models
For small work in summer cottages or in confined spaces, it makes no sense to buy an expensive device, because it will rarely work. But the task also needs to be performed efficiently. Therefore, making a vibrating plate with an electric motor with your own hands will be the best solution.
Homemade designs have a number of advantages:
- full compliance with the requirements - you yourself choose the size and weight of the vibrating plate;
- simplicity of design and high reliability;
- low manufacturing cost.
There is only one drawback with self-made cars - assembly requires tools and some free time. And the materials are likely to be found in the attic or in the basement.

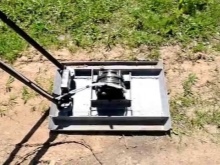

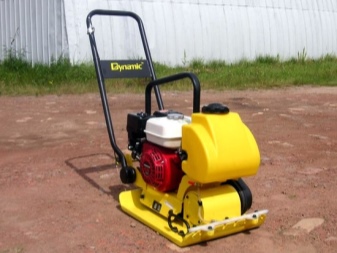
The structure of this machine is very simple.
- Actually, the stove itself... There are folds on the front and back, which are needed to pass the irregularities of the soil.
- Vibrator... This is a roller that is installed with an eccentricity. It is the imbalance during rotation that creates vibration.
- Engine... Doesn't need a description.
- Frame... An electric motor is fixed on it through shock absorbers.
- A pen... With its help, turns are carried out.
- Remote Control. Required to turn on and off the electric motor.
- Wheels... Needed for transportation of plates.
Now you can select blanks and tools for further assembly.
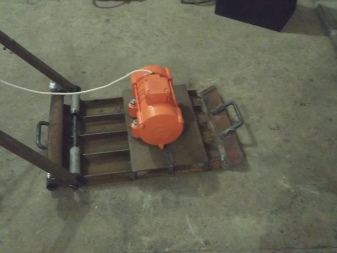


Required tools and parts
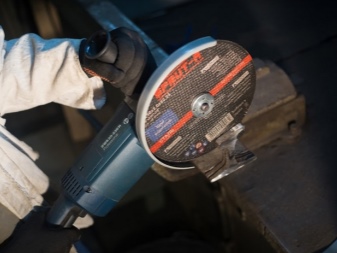
For self-production of a vibrating plate, you will need the simplest tools that you will definitely find in your workshop:
- grinder with cutting disc;
- welding machine and electrodes to it;
- hammer or small sledgehammer;
- set of wrenches;
- marking tools (tape measure, ruler, marker, etc.);
- protective equipment is required: welding mask and gloves;
- possibly a blowtorch.
This set is quite enough to get the job done.


Of the details, you will need the following.
- Electric motor... For the simplest machine, a single-phase asynchronous motor with a rated voltage of 220 Volts is suitable - it can be taken from a washing machine, refrigerator and other household appliances. Moreover, it is very easy to connect to the network. If you want to regulate the speed, take a universal collector motor (UDC) or a direct current machine (MPT). They will need a rectifier, such as a diode bridge. A variable resistor must be connected in series to the control circuit - with an increase in its resistance, the engine speed drops.
- Wires and connectors for connection (in the simplest case, a two-wire cable and a plug will do).
- Metal sheet 8-10 mm thick (you need to make the plate itself from it). Conventional carbon steel is an excellent solution. Alloyed is too expensive. You can use gray or ductile iron - just make sure there are no cracks or pits in it. It is not recommended to take white cast iron - it is too fragile.
- Channel bars or square profiles for frame assembly.
- Round pipe with a diameter of 20 mm for the handle. For a person of average height, the length of the handle should be about 120 cm, so the length of the workpiece is 3 m.
- A set of hardware: bolts М10-М12, nuts and spring washers to them.
- Parts from cars are needed to damp vibration. Almost any silent blocks, springs, engine mountings, parts of springs, etc. will do. As a last resort, rubber bumpers can be cut from car tires.
- Other little thingsthat will come in handy in the process.
When all the parts have been found, you can start assembling.


Assembly stages
Do not rush to pick up the tools right away - first, carry out the calculations.
Vibratory plates are divided into 4 groups.
- Lungs - weight up to 75 kg. Suitable for pressing soil to a depth of 15 cm. They are used in adjoining areas when arranging paths, laying tiles and other simple work.
- Average - weight 75-90 kg, ramming depth - up to 25 cm. Used for laying asphalt and paving slabs.
- Medium - weight up to 140 kg. Working depth - up to 160 cm. Needed for strengthening communication ditches, laying multiple layers of asphalt and similar tasks.
- Heavy - weight 140 kg or more. These are professional machines used by builders.
For infrequent use, a slab weighing up to 75 kg will be optimal. If more is needed, increase the size and power of the electric motor. In this case, the design does not fundamentally change.


Then select the motor - for 100 kg of plate weight, you need a power of 3.7 kW or 5 liters. with. If it is less, the machine will bury itself in the ground, if it is more, it will not be able to ram.
If the motor is unregulated (for example, single-phase), calculate the transmission mechanism.
- Eccentric speed – 180 rpm Then there will be exactly 3 hits per second on the ground.
- Find out the motor frequency - it is indicated on the plate or in the passport. For example 1000 rpm. Then calculate the diameter of the pulleys.
- 1000/180 = 5.5 - gear ratio... This means that the pulley on the eccentric must be exactly 5.5 times the pulley on the engine.
When all calculations are completed, we proceed to manufacture.
Observe safety precautions when working with tools.


First, we collect the working part.
- Cut a workpiece with a size of 720x400 mm from a sheet with a thickness of 8 mm. Round sharp edges.
- The front edge should be bent by 100 mm and the back edge by 70 mm. To do this, in the places of the fold with a grinder, make an incision 5-6 mm deep and bend along it. Next, weld the incision. Or, alternatively, heat the fold with a blowtorch.
- Reinforce the fold with gussets if necessary. The working part is ready.
Secure the electric motor through rubber shock absorbers. This can be done in several ways.
- In the places where the motor is fixed, weld 2 channels or profiles to the plate (the motor is fixed on them with paws). After that, either drill holes in them and fix the motor with bolts, or weld the bolts themselves (then the motor is fastened with nuts). In any case, there must be a thick rubber gasket between the frame and the engine.
- You can weld the corners, to which the Tavr is fixed through the shock absorbers. Then the motor is fixed to the brand with bolts.
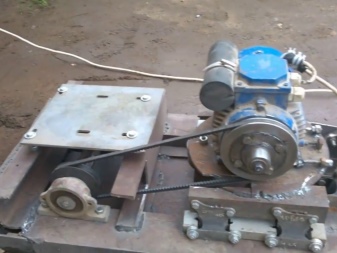
Next, you need to make a vibrator. It is an eccentric shaft.


For imbalance, a heavy metal plate must be fixed to it (if it is made replaceable, the vibration can be adjusted). Here is a very conventional drawing.
Important! The shaft and motor pulleys must be strictly on the same straight line.

After that, install the bearings (sliding rather than rolling is better - they are more durable in vibration conditions). It is good if you have insert bearings - they are easily fixed on the plate (bolts need to be welded under them). If they are not there, make a clip from the profile.
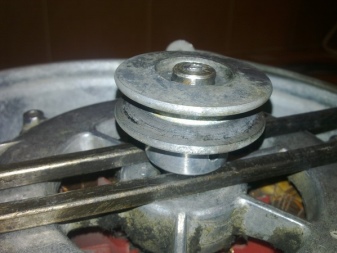
Next, install the shaft and connect it to the motor. A V-belt transmission is ideal for this (it does not transmit vibrations to the engine), better - double. And don't forget to lubricate all moving parts well.
Be sure to cover the drive with a protective cover. If the belt breaks, the worker will not be harmed.

Then assemble and install the handle. Pivot it to prevent vibrations from being transmitted to the hands of the worker.The axis of rotation of the hinge must be perpendicular to the movement of the machine, moving the handle to the sides is not allowed (otherwise the machine will be impossible to control). Add springs or shock absorbers to the hinge.
Prime and paint the product. The lower part may not be processed - it will still be erased on the ground.
Now you can start testing. But first, a few rules.


Operating rules
No matter how simple the design is, it must be handled correctly.
- Before switching on, check the insulation resistance of the motor with a multimeter. It must be endless.
- Lubricate all moving parts with machine oil or grease before work.
- Check all fasteners. They should be tight.
- Repeat these inspections and checks periodically. Don't forget to add fresh oil.
- Never use the machine on hard surfaces such as asphalt and concrete.
- It is advisable to connect the vibrating plate to the network through an RCD (residual current device). Then, if the motor overheats, the machine will automatically shut down.
- Wet ground is easier to ram. If the machine does not have a special sprinkler, water the plot of land with water before use.
- Store the device in a dry place.
During operation, the plate will move independently. You just have to guide it with the handle. And so that each time it does not unfold, the engine can be made reversible.

How to make a vibrating plate with an electric motor with your own hands, see the video below.


The comment was sent successfully.