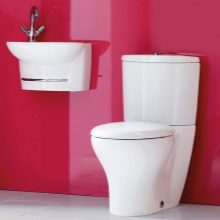
Rules for choosing and adjusting the toilet bowl flush mechanism
Every person has used the system for draining water in the toilet at least once in their life. However, not everyone knows how it works. It is a mechanism that is mounted on the inside of the cistern. For complete comfort when using this plumbing device, it is necessary to select, install and configure the mechanism correctly. All these nuances will be detailed below.
general characteristics
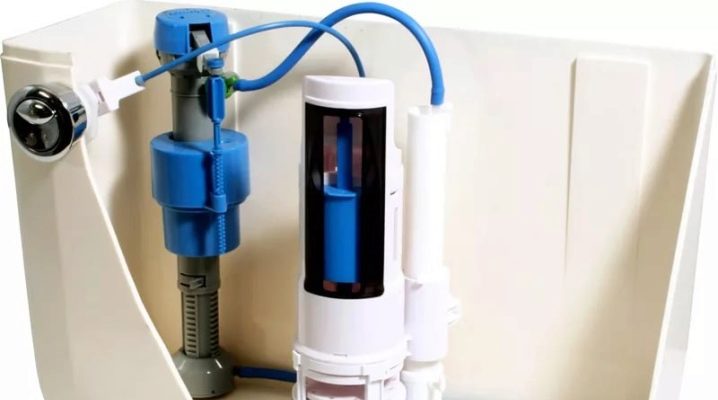
The drainage system with double action is characterized by: drain / overflow mechanisms connected in one device. The functionality of the water supply and discharge system is needed so that several parts work in an interconnected mode.
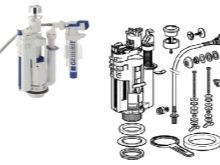
Different mechanisms look different, although it is safe to say that the difference between them is not very great.
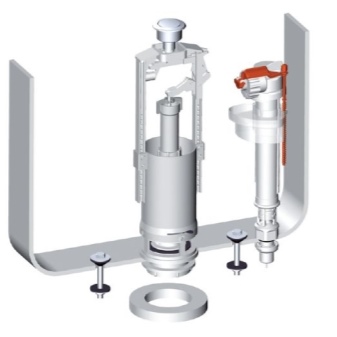
Let's describe the standard equipment.
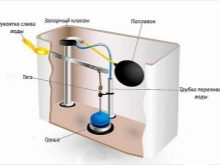
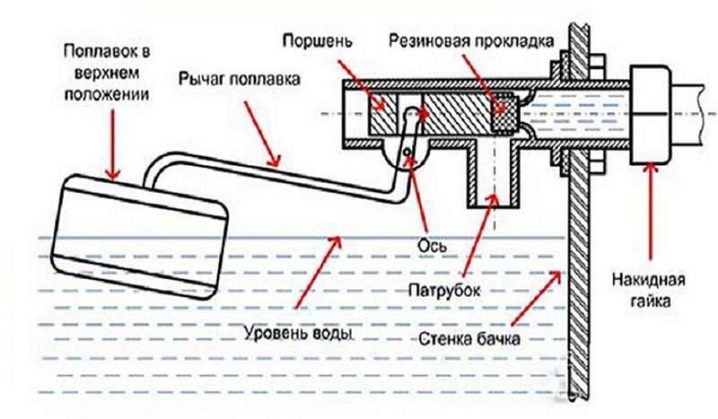
- Filling (inlet) valves. They are made up of a threaded pipe, which is inserted into the bottom of the tank or into its wall. The thread makes it possible to tightly contact it with the tank using nuts, which ensures that there are no leaks. Opening / closing for the water intake is controlled by a locking mechanism that is attached to the rocker arm.
- Rocker - this is a lever for activating the intake valve, it adjusts it. The free end of the rocker arm is fixed, or equipped with a float (hollow plastic plug), or - a check valve. When the inlet valve is triggered, or when the float floats up, the rocker arm rises, and the free clearance of the filling hydraulic valve is blocked.

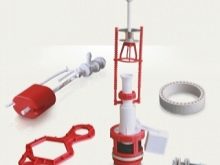
- Draining - in normal position, it is closed by means of a valve / plug. The valve / plug is a flat or semi-circular flexible plate that connects the pivot-type joint to the main structure.
- At the top is push-button or lever-type mechanismthat controls the drain valve. When it is used, the upper device is lifted with a pull (the rods are ropes, or the levers, or the plastic frame are the rods), and a passage for the flow is opened. Pouring is done with sufficient intensity to flush everything in the sink into the sewer pipes.

Various arrangements of these elements are allowed. Older models, equipped with old water intake systems, equipped with overflow monitoring systems and flush systems operated by lever / buttons, were installed as separate mechanisms. Today they are produced as a single complex. They are easier to install and maintain, but much more difficult to repair.
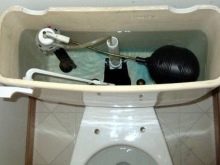
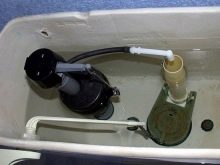
Drainage system device
Flush cisterns are not very complex in design. These are ordinary water tanks, inside which a mechanical shut-off system is inserted.
How does such a system function:
- the drain is controlled;
- it is controlled how the tank is filled when the water is drained into the sewer;
- stops the flow of water into the tank when a certain level is reached;
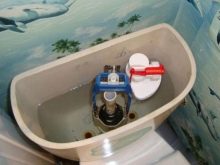
Functioning of the water tank filling mechanism:
- Through the filling valve, which is located in the bottom of the tank or in its wall, water is drawn inside.
- The process of increasing the water level in the tank is monitored by safety and control mechanisms (float, valve). When water reaches a certain level in the tank, it stops flowing, as the filling valve is blocked.

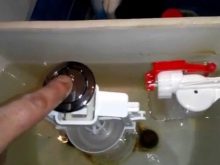
Functioning of the water tank drain device:
- If you need to drain the water, press the button at the top of the tank or pull on the chain, depending on the device. So, the hydraulic valve in the bottom will open and the water will pour out.
- Devices with two buttons operate in exactly the same way. If you press a small amount, a small amount of water is released, and when you press a large one, the tank is completely emptied. Two-button mechanisms are more economical, they help to regulate the amount of flushed fluid, therefore, almost all modern models are equipped with a similar device.
- When the water is released, its level becomes lower and control mechanisms are activated to automatically open the hydraulic inlet valve.
We can say that any picking up and down plumbing system functions according to a similar principle, and this does not depend on its complexity. Of course, there are small details, but if you understand the general principle of operation, it will be easy to install or quickly repair an unfamiliar system, to eliminate the breakdown.
Features of choice
In order to comfortably use the toilet, one of the important points is to have a convenient drain, therefore, it is necessary to carefully approach the choice of plumbing models.
There are factors that deserve special attention.
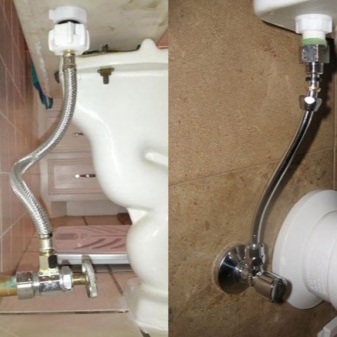
The filling valve offers two placement options:
- Below - the location of the pipe in the bottom of the water tank. In this case, the tightness of the connection is very important. Two gaskets are responsible for it.
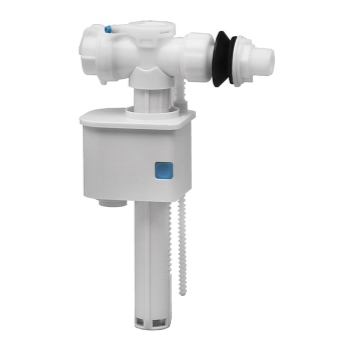
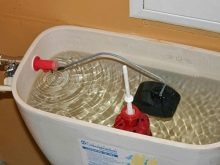
- From the side - nozzles and valves are brought into the tank through the side wall, the hole is located almost on the upper edge of the wall. This passage is made conditionally tight, since the maximum water level, as a rule, does not reach it.
Side connection
Considering all the "pros and cons" of connection options, we recommend options with water inlet from below, as it is more efficient and comfortable. It makes less noise when the tank is full. For the same purposes, anti-splash systems are used, their shut-off valves are more reliable in operation.
The disadvantage of such a connection can be called the presence of gaskets, since their broken tightness will immediately entail the most sad consequences.
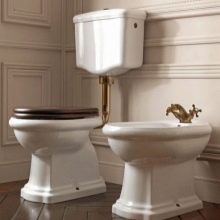
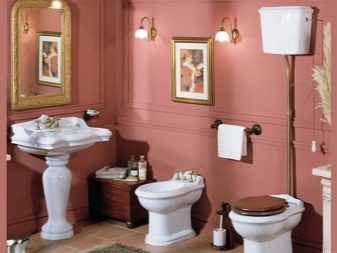
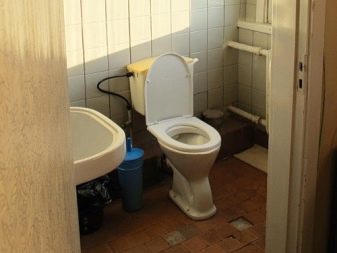
Vintage plumbing using levers or chains à la Tips.
- Plumbing equipment, which was used during the Soviet era, was equipped with a lever to which a chain or string was attached. Today, in modern plumbing, this can only be found in plumbing equipment, in the "old" style.
- The button is a universal solution in any system. The advantage is the short stroke and the ability to control the volume of the drained liquid.
- In a dual-mode tank, a two-button option is used, respectively. One is made responsible for draining certain volumes, and the second for ensuring that the tank is completely empty. Such systems save water, but at the same time, setting up and repairing it is more difficult.

The push-button systems of toilets working in two modes can be one-button or two-button. You can pay attention to the types of mechanisms that provide overflow control.
There is a much wider variety of options, but for simplicity, let's focus on the following classification:
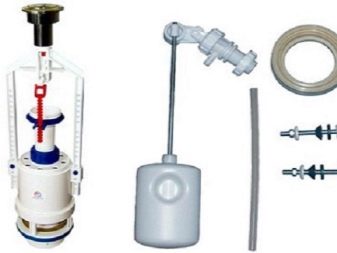
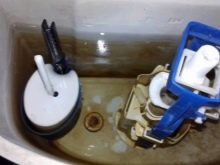
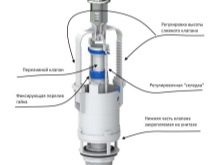
- The simplest types of hydraulic valves are float valves. The float system can be characterized as follows - the shut-off valve is controlled using a rocker arm / balancer, or levers that are connected to the float.
- The membrane system can be characterized as follows: when the filling of the tank is completed, the membrane is subjected to water pressure, and this, in turn, activates the shut-off device.Nowadays, the popularity of plumbing with membrane-type fixtures is growing, but more and more often they are beginning to be recommended to be abandoned in favor of lever systems.
Analysis of technical characteristics and features of operation provides the following information:
- The membranes fail suddenly, and it is not always possible to guess this moment; at some point, the overflow blocking is simply turned off. If there is good sound insulation in the bathroom, it is too late to hear the murmuring sounds of water pouring onto the floor, and the consequences can be extremely dire.
- If the mechanism breaks down, it will be problematic to repair it, even if there is a spare membrane. Also, it will take a lot of time to adjust the mechanism after the membrane has been replaced. And even this is not a 100% guarantee of a clear actuation of the diaphragm valve.


It can be considered the optimal way out in such a breakdown to replace not the membrane, but the entire system at once, at least for a simple float type.
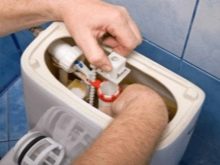
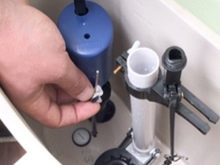
Installation
When these or those lead to the need to replace the drain fittings on their own, it is quite possible to do this.
You should work in accordance with the algorithm.
- A filling is purchased that corresponds to the connectors of the existing tank. A very important parameter will be where the inlet holes are located (top, side), their sizes, different diameters of the drain holes and overall dimensions. It would be ideal if the names of the manufacturer of the toilet bowls and the filling for the cistern are the same.
- The water is shut off, all the liquid remaining in the tank is removed.
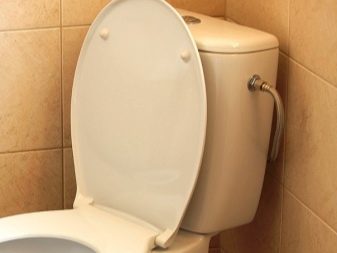
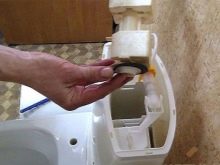
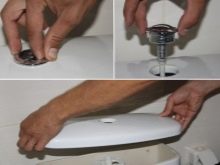
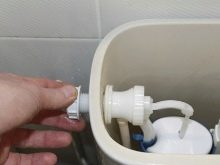
- The drain button is recessed, the retaining ring is carefully unscrewed. Now we can disassemble the tank lid.
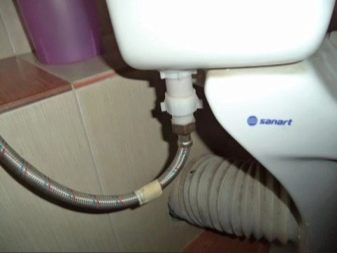
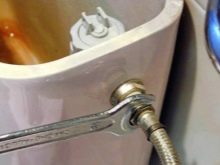
- The water hose is disconnected.
- The nut is unscrewed, which fixes the branch pipe, and it is removed.
- When the option with a vertical liner from below is implemented, it is recommended to place some kind of jar under the hole, where the residues that did not spill out when draining will drain.

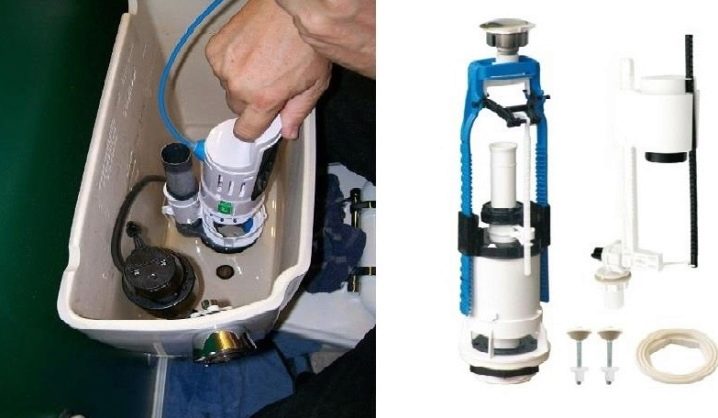
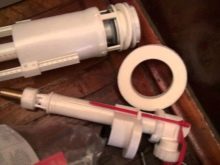
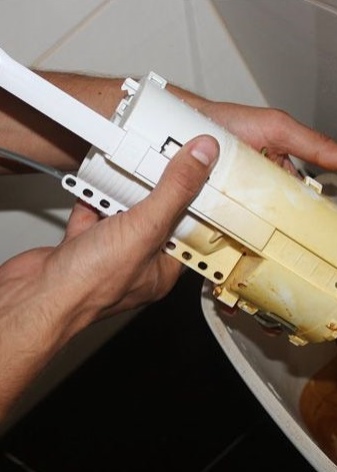
- All "filling" is dismantled, it should be removed.
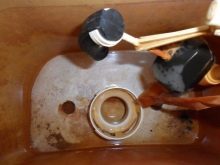
- The fasteners with which the tank were fastened are unscrewed, they are dismantled. The bottom of the spillway device is removed together with gaskets that ensure the sealing of the connection.
When the dismantling is complete, the inner surfaces in the tank and the openings of the bowl are wiped to remove plaque. At the same time, the channels of the side parts of the bowl are cleaned, which provide drainage. During operation, such places are inaccessible, but here it is quite possible to carry out preventive measures.


Of course, you will have to perform the reverse sequence of actions to reinstall the mechanism:
- Install the bottom of the drain system in the hole, not forgetting the sealing gaskets.
- Refit the water tank, align and secure with the retaining bolts. Poor quality fasteners tend to rust, so all rusty parts are recommended.
- The installation of the "filling" of the drain device should be completed by fixing it in the drain hole.
- Insert the water filling valve into the wall from the side, and fix it with nuts and rubber bands.

- Connect the water supply to the outlet branch pipe of the filling valve. Switch on water for and check function.
- Adjust, if necessary - adjust the level of the overflow height (approximately 2 cm below the level of the upper hole) and the rod that connects the drain device and the buttons.
- With the correct functioning of all systems and in the absence of a leak, you can proceed to the installation of the cover. Fix it by screwing the bezel of the buttons.
The existing design differences between the tank options and their "fillings" cause small deviations from the algorithm, although almost all tanks are designed according to similar schemes, therefore, the tank fittings are mounted in this way.
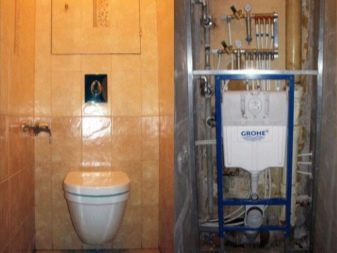
Exceptions can be made for built-in toilet models, which have a cistern located inside the wall in a sliding niche.
Therefore, in the presence of such a device in the apartment, it is not recommended to engage in self-repair, but entrust this complex operation to specialists.

Service
The fittings for the cistern are inexpensive. Despite this, sometimes they manage with simple repair measures instead of buying it, or acquire some individual parts, and only then change them with their own hands.
If a malfunction occurs, open the tank, gain access to the internal mechanism and see what is the cause of the breakdown. Even with a superficial acquaintance with the system, in order to understand the reasons, a few drains or sets of water into the tank are enough.
Refer to the table to quickly diagnose and fix the problem.
Malfunction | Actions |
Overflow control failure |
|
Filler valve leaking |
|
Breakage of the button that drains water (does not return to its original position) |
|
When the cistern is filled, there is a weak water pressure |
|
Helpful hints
From time to time, the water level of the tank has to be adjusted for various reasons: if it constantly leaks, or in order to save, or to increase the flush power.
To achieve this, a number of measures must be taken.
- Older systems used a side water connection and used a common thick metal wire as a lever (to connect the valve and float). To change the level of the float in them, in order to block the water inlet hole with a membrane, it is enough to bend it.When bending upward, the amount of water that is required to close the valve increases, respectively, knocking it down - it decreases.

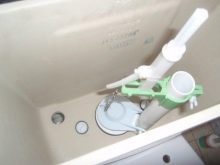
- Modern systems, in which the lateral supply is implemented, does not use a wire as a lever, but a plastic stem and, of course, it does not bend. The required amount of water in the tank is achieved by adjusting the position of the float. This part is fixed by means of a threaded connection or latches, which must be released to move the float. To increase the volume, you need to move it towards the valve body to reduce the length of the lever.
- Systems in which the bottom water supply is implemented, the adjustment is easier. It is necessary that a plastic rod that limits the amount of water by connecting the arm and float is longer or shorter. As standard, the stop is equipped with a thread to fix the float, and a standard plastic nut is used to adjust the height of the level.
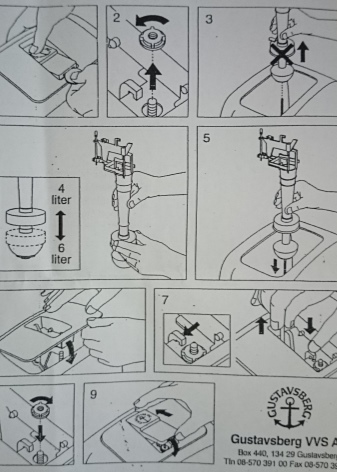
For information on how to set up fittings in the cistern, see the video below.


The comment was sent successfully.