Features of adjusting the float for the toilet
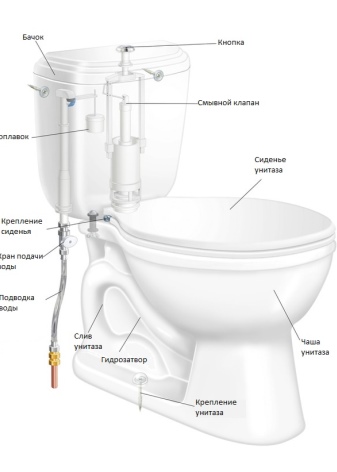
The toilet seems to be a fairly simple device, but only for those who have never been interested in its internal components. In this article, we will try to understand the device and drain mechanism in stages and study the main problems and malfunctions that may arise during the operation of plumbing equipment.
Types of floats
It is worth noting that the flush cisterns have undergone many changes over the past few years. Now they are not near-ceiling "inhabitants" of bathrooms, but quite peacefully coexist next to the toilet. Today, on the building materials market, you can find two types of tanks: stationary and hidden.
Their main differences lie in three nuances.
- Material. Stationary models are most often made of the same material as the toilet itself. It can be sanitary ware, ceramics, porcelain, natural or artificial stone. Hidden structures are made only of dense plastic.
- Water supply. The former can be arranged with both a bottom and a side system. The cisterns in the installation receive water only from the bottom.
- Draining. The cisterns, installed on the toilet shelf and being a single whole with it, drain the water with a push-button or stem trigger. Concealed plastic devices have a one- and two-button system.
At the same time, the push-button drain systems of both tanks differ only in nuances. So, for example, in stationary containers there is only one button, which with the first pressure flushes the water into the toilet, and with the second stops its flow.
Hidden structures have two buttons for these purposes, one of which supplies fluid at full capacity, and the other - almost half as much.
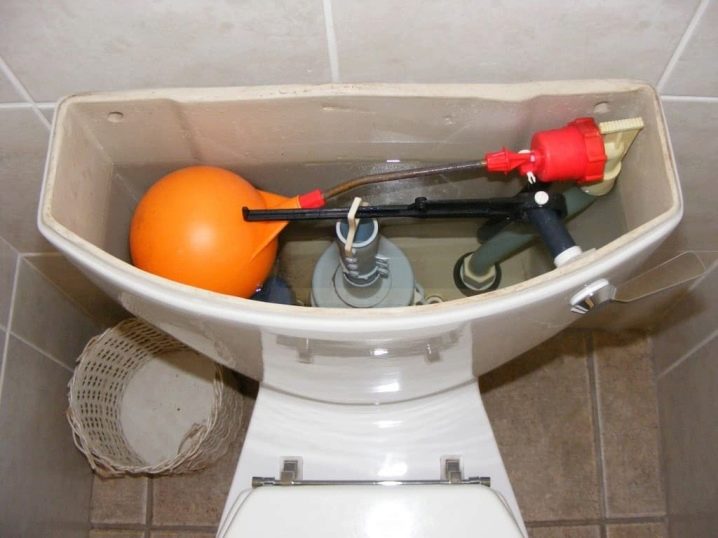
All this is made possible by one important detail in the drainage mechanism - the float. This part is called so because of the peculiarities of its design, which keeps it always afloat, like the fishing tackle of the same name.
Toilet floats are of two types:
- ball;
- "Cup".
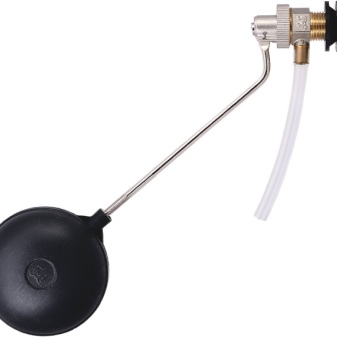
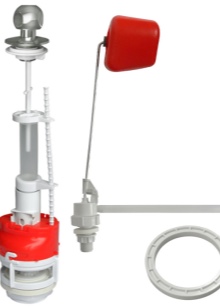
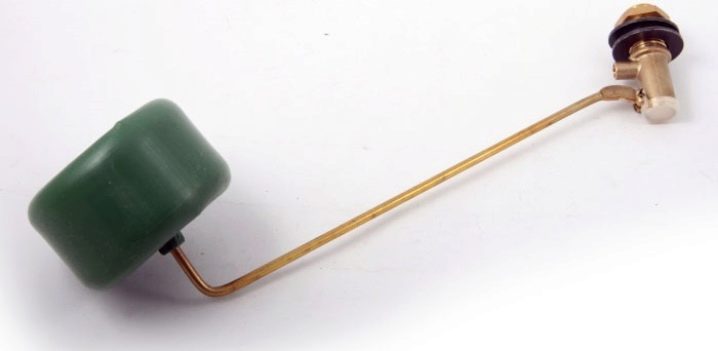
The first type has recently been used extremely rarely. It remained in those rare models of cisterns that were located under the ceiling of the toilet room. To drain in such a structure, it was necessary, as in a fairy tale, "to pull the string." But it was not the door that opened there, but the valve, which released a powerful pressure of water from the tank through the pipe directly into the toilet bowl.
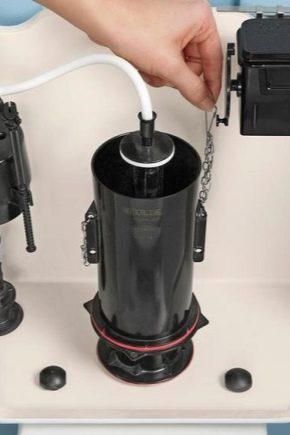
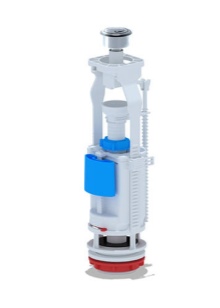
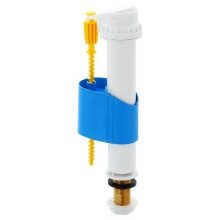
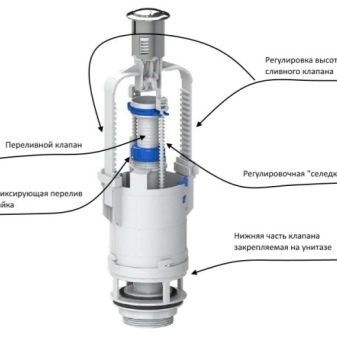
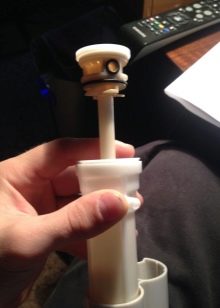
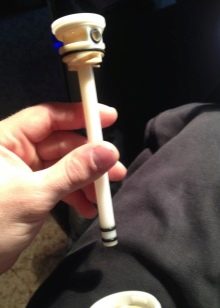
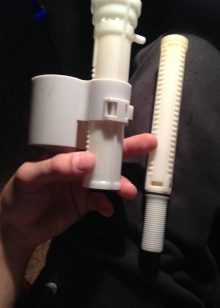
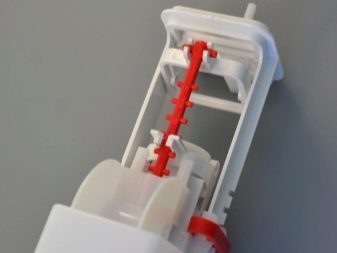
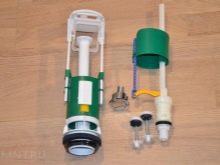
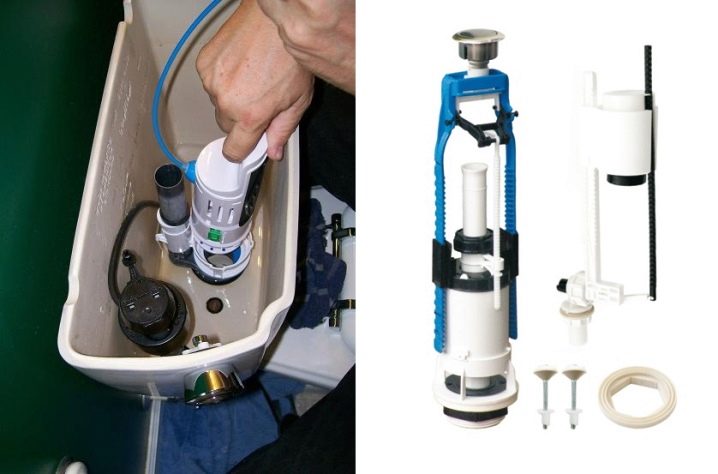
In modern drainage designs, a plastic device called a "glass" is increasingly used. It is a rectangular namesake of kitchen utensils, turned upside down and lowered into the water to a certain level. Such a float can be adjusted using a plastic screw, which lowers and raises it to the required height, which determines the level of filling of the cistern with water.
It is also necessary to understand that this part is part of the complex that makes the drain work.
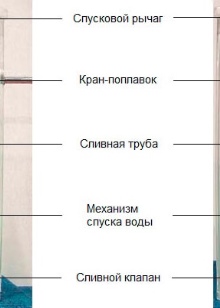
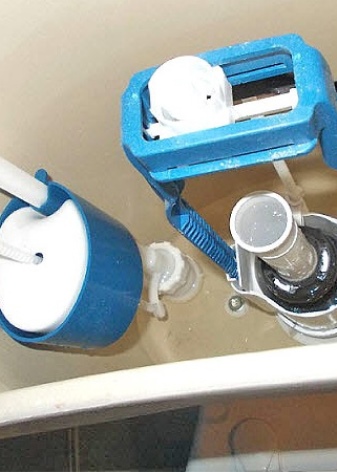
Another important design element is the float valve. Their interaction is inextricably linked with each other. Therefore, the breakdown of one will necessarily entail abnormal functioning of the other.

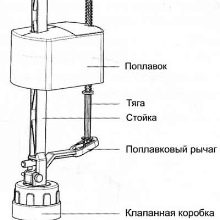
Principle of operation
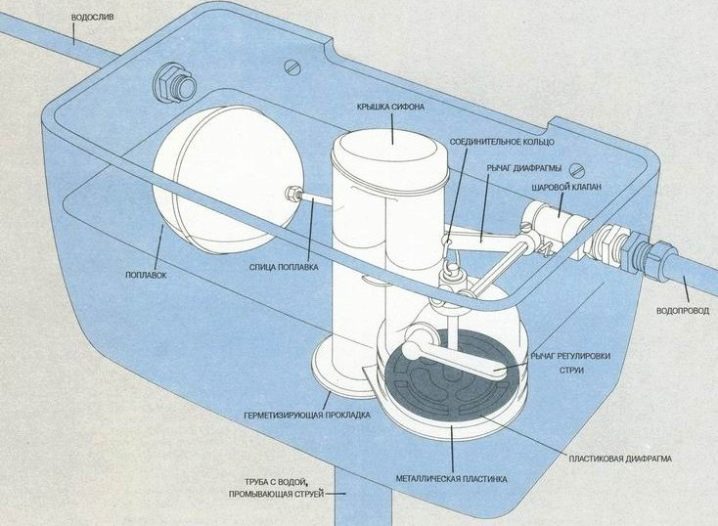
In order to accurately determine the principle and meaning of the float in the cistern, let us pay attention to the structure of the entire mechanism. There are three main systems working inside the tank: filling, drain and overflow.The collection of water in modern models occurs in two possible versions: from the side or from the bottom. Most Russian manufacturers prefer the first option. If you come across a copy with a lower system for collecting water into the tank, then you are the happy owner of an imported model with a more comfortable and quiet filling process.
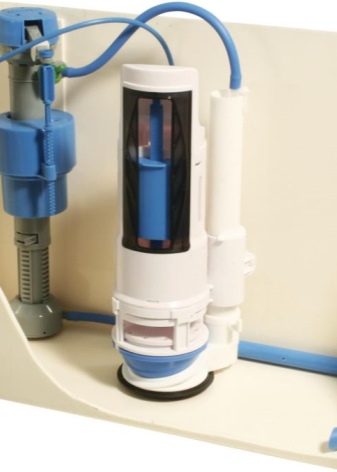
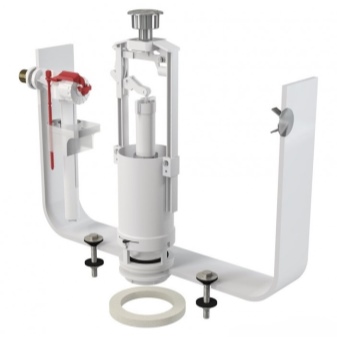
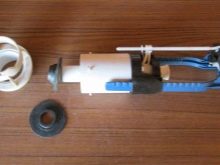
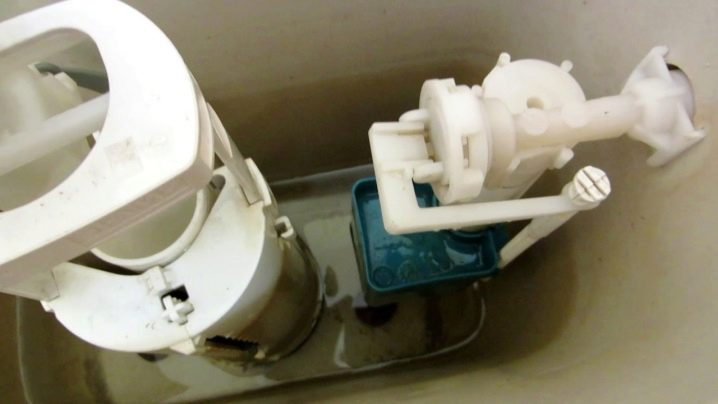
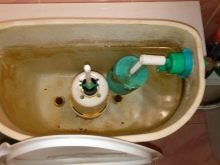
The lateral system is represented by the so-called float valve, consisting of two main parts: a body with a membrane that blocks the flow of water into the toilet when it is not necessary, and the float itself. The latter is connected to the upper point of the valve body with a special jumper. Therefore, when the water level in the tank changes, and the float rises or falls, the piston that closes the hole also starts to move. Pay attention to the layout of the items inside the side-pouring cistern.
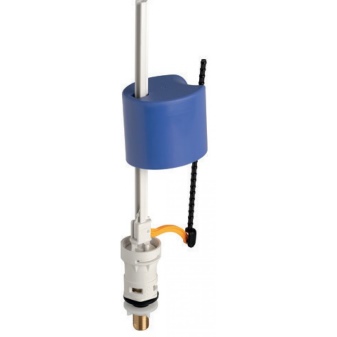
Let's figure out how the water supply system works from below. The principle is the same as the previous one. There is one small difference, which is that the float, like on a rail, moves along a special plastic rod.
The drainage system works in such a way that the central piston, connected to a button or lever on the outside of the tank, rises, dragging the shut-off valve with it. This opens the drain hole and water flows into the toilet bowl.
The overflow system has a very important function. Despite this seemingly intimidating name, it actually prevents excess water from leaking out through the top of the cistern. This is usually the top of the piston that fills with fluid and drains it out through the drain. This happens if the automatic stop of dialing for some reason did not occur.
Breakdowns and elimination methods
Unfortunately, breakdowns are far from uncommon in modern drain structures. But you will not change the entire tank if the malfunction can be established and corrected with your own hands. To do this, you need to familiarize yourself with the main causes of a breakdown in the drain tank.
Very often, problems arise with the float:
- water collection does not occur;
- constant flow of water along the back wall of the toilet;
- insufficient amount of water to drain.
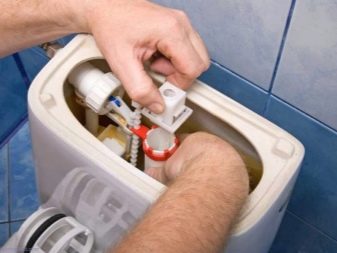
All this is very easy to fix, even if you do not have plumbing knowledge and experience. To repair a drain tank, into which no water is collected at all, the cause of the breakdown should be determined: a skewed float, clogged inlet valve, float fouling with mucus and plaque. The first reason is eliminated quite simply and quickly. The "culprit" should simply be put in the right position and check whether he is now letting water into the system.
If the toilet cistern is broken for the second reason, certain actions must be taken.
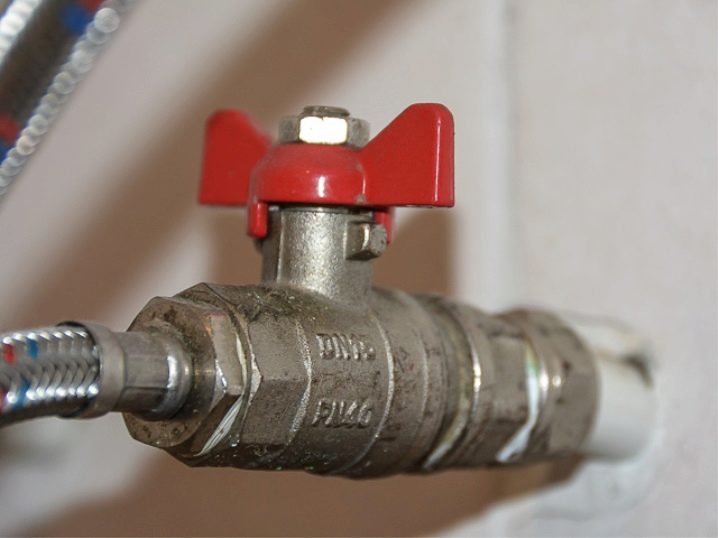
- Disconnect the water supply. First of all, you should make sure that the cause of the breakdown is the float, and not the water hose. Unscrew it from the tank and turn on the water. Check if there is sufficient water flowing out of it. It is more expedient to do this above the bathroom or above the toilet itself, so as not to pour water on the floor. If all is well here, go to the second step.
- Unscrew the valve and simply clean the place of its connection with the water supply hose. For this, it is best to use a long wire that will not bend during the repair process. At the final stage of cleaning, you can open the water so that it rinses off the remaining dirt.
- The final step is to do a full set and drain of the cistern a couple more times to make sure that the problem has been corrected.
The problem with the lack of water supply has been solved, you can safely use your cistern for a long time until you decide to replace the entire structure.
In the event of a breakdown associated with poor-quality water entering the tank, plaque and mucus often form on the float.These ingredients prevent it from fully rising and falling, which interferes with the natural collection of water from the mains. To eliminate this problem, you need to remove the float from the rod and rinse it thoroughly under running water. After installing it back, check the water collection process.
An incessant waterfall in the toilet bowl is now recognized as very common.
This happens for four main reasons:
- the gasket in the valve is deformed or unusable;
- the gasket is not pressed sufficiently against the valve outlet;
- broken hairpin;
- breakage of the valve itself.

Each problem has its own way of solving it. Start by opening the toilet cistern. If you can see immediately from above that water enters the valve through the overflow, try raising the float slightly. Has the leak stopped? Then one simple action will save you from the problem. Rotate the float arm to find the most effective position.
If the float rises and water is still flowing, continue your exploration. The next step is to disassemble the drain valve itself. It usually contains a metal stud that secures the lever. It may be damaged. This problem can be solved only by replacement.
The best option in this case is a piece of thick copper wire.
After examining the valve itself, make sure there are no cracks or additional unnecessary holes in it. This is also the reason that the cistern does not hold water inside. The leak can be eliminated only by replacing the valve itself.
In order to find the right one, you should take the old one with you to the store as a sample.
Pay attention to the gasket located between the bottom of the drain valve and the outlet directly. Since this part is always made of rubber, its deformation and loose fit is quite likely. Because of this, the valve does not completely close the drain hole and water constantly leaks. The problem will be solved only by its rubber gasket.
Sometimes contamination of the valve itself still occurs, which is solved by its timely flushing.
An insufficient or, conversely, an excessive amount of liquid during draining can be easily adjusted. To do this, you just need to set the level of the float so that water does not collect above its position. This is done by manipulating the pull of the floating element. Previously, these parts were made of brass, so the position of the float could be corrected by slightly bending the spoke. Today it is mostly plastic. Therefore, the float simply moves along the ratchet with a special screw, which fixes its position.
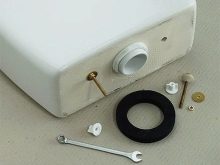
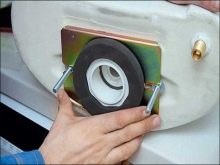
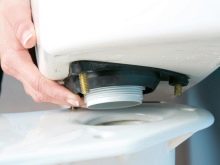
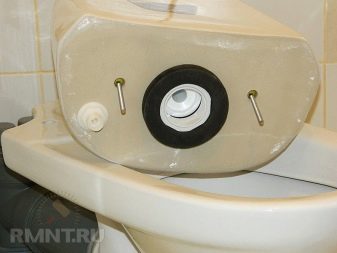
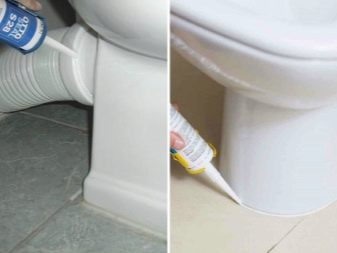
There are also problems that are not related to the float, but can be confused with it. For example, when there is a leak between the cistern and the toilet shelf on which it is installed. Many people mistakenly believe that the reason is also a worn gasket or a faulty valve. However, after cleaning or replacing the latter, the leak will not be repaired. This is such a common problem caused by prolonged use of the plumbing structure. The bolts that secure the cistern to the toilet could rot. Because of this, there is a loose fit of the upper part to the lower one and, as a result, the presence of a leak.
The opposite process is observed if, installing the plumbing device with your own hands, you retighten the same bolts. Then, at the exit from the tank to the toilet, you will find a very meager stream of water that will not wash away the waste products of a person. The solution is to loosen the bolts.
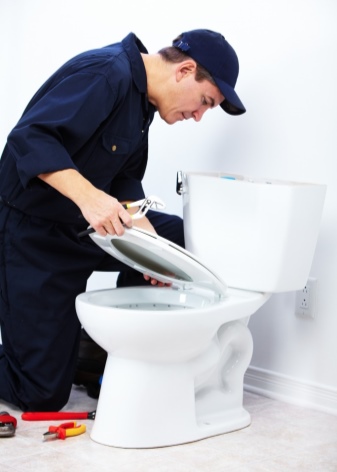
If, after all, the problem is in the drain system and you need to replace the float and valve, the advice of professionals will become a real lifesaver in this matter.
How to choose?
Of course, first of all, you need to choose the right fittings for the cistern.If you do not pay enough attention to this issue, you can get a leak of an already new system after at most 7 days after repair. When choosing the main toilet device, you should be guided by the quality and capacity of the tap water supplied to you.
Depending on this indicator, there are four types of float valves.
- For low water pressure. This type is made using a kind of water supply amplifier.
- For water flowing at medium speed and power.
- For maximum power delivery.
- Stabilizer valve. If you have an unstable water pressure at home, then this device will help to normalize any power of fluid entering and leaving the drain tank.


Of course, the amount of water constantly in the cistern also plays a role in the selection of such an important part as the float valve. For example, if you are using suspension designs with a double flush button, you might be better off choosing a piston for medium head. Its power is enough to supply a large amount of water to the toilet bowl, or less.
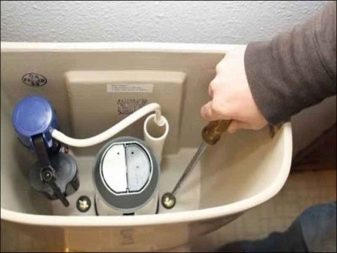
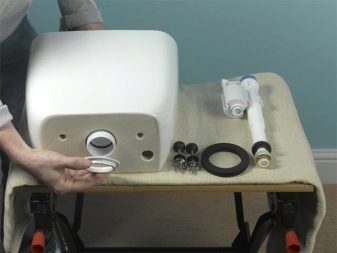
When all the procedures for selecting a float valve have been completed, you can proceed to self-installation. How this can be done as quickly and comfortably as possible, read on.
How to install?
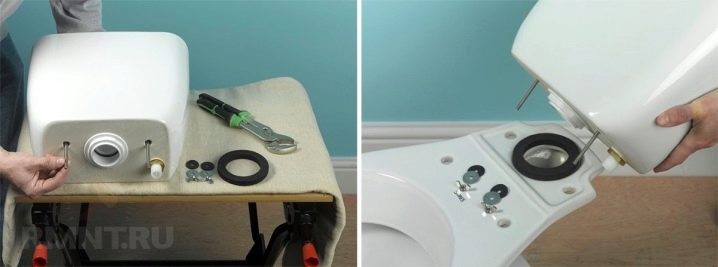
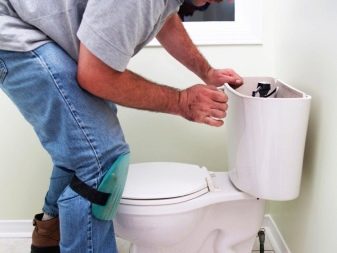
The basic techniques for installing a new drain valve with side connection and button are step-by-step instructions.
- Unscrew the button counterclockwise. Thanks to it, the tank lid is attached to its base.
- Remove the filler cap.
- Shut off the water supply.
- Drain off all the water that remains in the cistern.
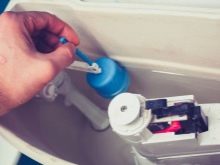
- Remove the flexible water supply pipe (if the tank is equipped with a side supply, this will be easier). Use an adjustable wrench.
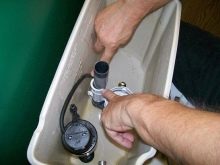
- Install a new float station.
- Adjust the required water level in the tank.
- Replace the water supply pipe.
- Run water into the waste tank.
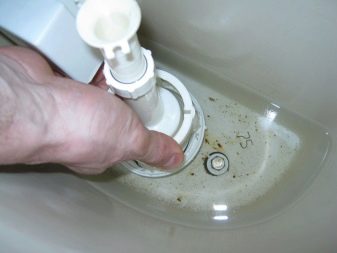
After completing all the manipulations to install the float valve, check how the water is drawn into the tank, whether it leaks, does not stall, not fully typed. Remember one important point: the float in the tank must be level. Distortions can lead to flush system malfunctioning and an unpleasant shopping experience.
Also, do not forget to adjust the level in the tank. When adjusting, pay attention to the fact that the valve must be in the water. Otherwise, going too far with the level, you may find yourself completely without the possibility of draining. But everything is very easy to set up back. Of course, professionals handle this kind of task very easily. The amateur will have to work with both hands for now.
It is not known whether you will enjoy the work done, but some basic recommendations from professionals will help you get out of this as comfortably and easily as possible.

Recommendations
Summing up, it should be noted that the problems associated with the leakage of the tank or insufficient water supply to it are solved practically by referring only to the float and the valve.
- The main problems in the water supply or drainage of the cistern are due to a malfunction of the float, valve or membrane (gasket).
- It is quite possible to repair a broken part. In cases where this is not possible, you need to replace the spare part with a new one.
- When buying a valve, you should pay attention to a number of nuances so as not to be mistaken with the choice. The first step is to find out how water is supplied to the tank: the installation of the system is done with a side connection or bottom. The next question is the flush system itself: push-button (piston), lever or lift.
- Be sure to remember that if there is even the slightest uncertainty in your actions, do not take risks. Find a professional who can make your life easier by solving your plumbing problem quickly and easily.
I would also like to return to the question of the types of floats: "ball" and "glass". The first group often has such a type of breakdown as the ingress of water into a sealed container. This happens when a crack forms in the ball. The way out of the situation will be to drain the water from the container and seal the gap. Most often, hot melted plastic is used for this, which is applied to the crack. Thus, the ball is "sewn up" and can still serve for some time. But, unfortunately, it should be understood that such a measure is not lifelong. Subsequently, you will still have to replace either the ball or the drain system as a whole.
Very often, during operation, the volume of water in the cistern exceeds all conceivable limits. Sometimes the problem is associated with an increase in the pressure of the fluid supply to the system. In another case, the culprit is a plastic tube inside the tank, through which water does not flow like a waterfall, but quietly descends down an additional chute, practically without making any sounds. Thus, if there is a sudden increase in the sound of water collection, pay attention to this small tube.
Please be aware that this can only happen with side feed models. The lower eyeliner is initially devoid of this problem, since water enters the lower part of the tank immediately, which significantly reduces the noise level.

To reduce the risk of leakage through the fastening bolts connecting the cistern to the toilet shelf, experts advise treating these places with silicone sealant immediately after assembling the structure. This will extend the life of these fasteners.
The internal filling and the principle of operation of the cisterns of hidden structures practically does not differ from the stationary ones described. In addition, their body is always made of high-strength plastic without a single seam. In this regard, it is necessary to pay attention to special precautions.
In order for the flush valve in hidden structures to last longer, it is best to ensure that the tap liquid is fully filtered throughout the home, and for flushing the toilet too. Check the water level in the tank several times a year. Despite their high strength, even these structures can leak. And the closed type of installation does not allow timely detection of a breakdown. Also check the tightness of the connection between the tank and the drainpipe.
Be sure to arrange scheduled checkups for your drainage device several times a year. As the quality of our tap water is poor, parts can get dirty very quickly. This factor is the cornerstone of most breakdowns. In order for the float, valve and all their components to serve you as long as possible, rinse and clean them at least twice a year. Then you can not only prevent wiping of the membrane or gasket, but also clogging or mechanical damage to the valve.
A detailed study of the device of the cistern, the causes of breakdowns and ways to eliminate them allow you to get by with minimal casualties in the process of fixing the plumbing fixture. To do this, it is absolutely not necessary to call a specialized specialist or completely change the drain system - the toilet cistern. You can easily fix such a malfunction with your own hands, without waiting for the arrival of the master.
In the following video, you will learn how you can regulate the water pressure in the toilet cistern.


The comment was sent successfully.