Description of paving slabs "rhombus" and its installation

Park paths, sidewalks, pedestrian areas and squares on city streets are often paved with tiles. The masonry can be simple or patterned, and the color can be gray or bright. The most interesting patterns are obtained from diamond-shaped paving stones of different shades.


Peculiarities
People began to equip roads and paths a long time ago. At first, ordinary stones were used for these purposes - they were not even processed. One can imagine how many inconveniences the roads, "equipped" in this way, caused to travelers. Later, the stone began to be processed, trying to make its surface as smooth as possible. But it was a rather time-consuming process, and therefore was completely unsuitable for paving large spaces. And only with the advent of new technologies, people learned how to make concrete tiles.
Paving slabs can be of different shapes: rectangular, square, polygonal.
Diamond-shaped tiles have become widespread - with its help, unusual designs and patterns are easily obtained.


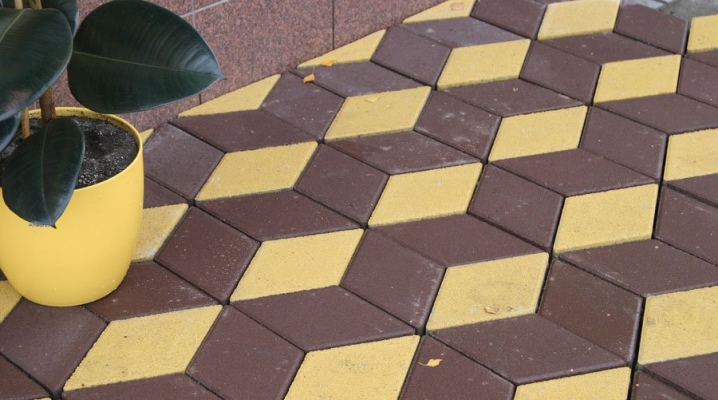
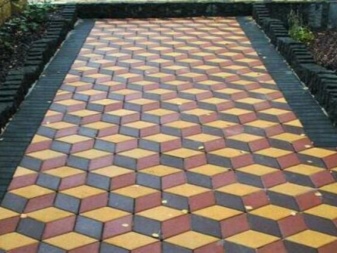
The main advantage is equal sides. Due to the perfect symmetry, it is almost impossible to make mistakes when styling. Besides, paving slabs "rhombus" are ideal for creating patterns with a 3D effect - for this you need to use elements of 3 colors.
But there are also disadvantages: in any case, the tiles will have to be cut to fit with the curb, to design the edge of the track. You can use additional elements (triangles with an obtuse or acute angle), but builders do not like them very much because of their high cost.


How are tiles made?
Any paving slabs are created from a concrete mixture. Many consider the production process so simple that it can be organized at home, for example, on your own site. This option is acceptable if you need to pave a couple of meters of path in the garden. But industrial equipment is used to produce large quantities. It is important to follow the technology - otherwise the finished product will be of poor quality and will not have wear resistance.
There are 2 production technologies: vibrocompression and vibrocasting.

Vibrocompression
At the first stage, the concrete mix is prepared. For this, concrete mixers are used: one if the tile is single-layer, and two if it is 2-layer. The second layer is often colored: pigment is added to the concrete mixture. When the mixture is ready, it is placed in the matrix of the vibrating press. It is the main machine for the production of paving slabs. It is at this stage that the configuration is given to it. The whole process is automated. In a special form, the mixture vibrates and at the same time is squeezed by a press - hence the name of the technology. Everything happens pretty quickly: in about 5-6 seconds.
Finished products are transported along a conveyor to a palletizer. Pallets are stacked one on top of the other - up to 6-9 rows, after which they are sent to drying. The tile dries in a separate room, where it is treated with warm steam. It is allowed to dry the finished product in the same room where it is produced, but then the composition must contain Portland cement. Only in this case can the quality and durability of the finished product be guaranteed.


Tiles can be removed from pallets not earlier than after 6-8 hours. Paving slabs made using vibrocompression technology have the following features:
- its rough surface provides an anti-slip effect - this is important for regions with snowy winters (most of Russia);
- it has a porous structure - water does not stay on the surface, but seeps through the tiles and goes into the soil;
- it is resistant to high temperatures: it does not melt under the sun and does not emit toxic substances.

Vibration casting
The production process using this technology is similar to vibrocompression, but has its own characteristics. Vibration is also used here, but on a vibrating table. This technology is cheaper, but the production process is longer. Vibration casting can be used to make glossy tiles.
The process begins with the preparation of a concrete mixture - 1 or 2 concrete mixers are used. Next, the mixture is poured into a mold.
First comes the color layer (if the tile is colored), the vibrating table is switched on for 3-10 seconds. After that, the second layer is poured to the edges of the mold, and the vibration is turned on again for 5 seconds.

Finished products are placed on pallets, which are stacked on top of each other. Sheets of plastic are laid between the pallets. For 1-2 days, the tiles must be left alone: they must not be touched, much less moved. After 2 days, the paving stones can be removed from the mold. To do this, it is heated in a water bath to 70 ° C. If this step is ignored, chips and cracks may appear. The tiles are stacked on pallets with the right sides facing each other. It will take up to 3 weeks for final hardening (less in winter).
The main disadvantage of tiles made using vibrocasting technology is a smooth surface. This makes it difficult to use in winter: it becomes slippery.

Characteristics and types
Paving slabs are used to decorate paths in parks and garden plots, for paving sidewalks and squares. Standard sizes:
- thickness 60–70 mm;
- length - 329 mm;
- width - 190 mm.
It should be borne in mind that they may differ from manufacturer to manufacturer. As a rule, tiles are sold in square meters: with standard sizes 1 m2 contains 40 pieces. However, paving stones differ not only in size. It can be rough or smooth.
The first option is more preferable, as it is less likely to slip.


Paving slabs can be monochromatic, most often gray, or two-colored, with the addition of pigment to the top layer. The color options are varied: red and yellow are often used, brown and blue are slightly less common. Using different colors, you can lay out not a simple track, but with a beautiful pattern. There are practical options with a relief on the front surface. This solution further reduces the possibility of slipping. There are even glowing tiles, but this type is quite expensive.
Along with the tiles themselves, you can buy additional items. They are in the shape of an isosceles triangle with an obtuse or acute upper angle. The size is half a standard rhombus. This solution was invented to reduce costs, but in fact these elements are expensive - it is cheaper to cut the tiles themselves if necessary.

Styling options
One of the main advantages of diamond tiles is that it is difficult to make mistakes when laying. The only way is to combine the edges with each other, it is impossible to displace the seams. At the same time, many interesting and beautiful patterns can be obtained from the tiles in the form of a rhombus. All drawings are based on 2 shapes:
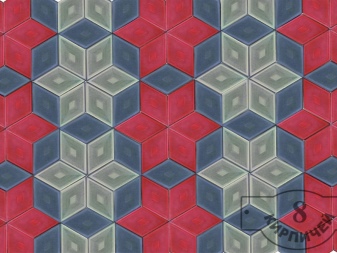
- hexagon - it turns out if you put 3 tiles side by side;
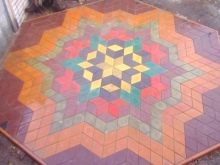
- hexagonal star - consists of 6 tiles.
Everything else depends only on the designer's imagination - you can get complex and very beautiful drawings. There are several layout options.
- Star. Six tiles of the same color are connected at one point with sharp corners. The contour of the resulting star is framed by tiles of a contrasting color, there should also be 6. This layout option is suitable only for a large surface. Stars can be stacked in the correct order or scattered randomly over the surface to be shaped.


- Hexagon (cube). To get this pattern, the tiles need to be aligned with obtuse corners.

- Drawing with 3D effect. It is laid out from hexagons.The visual volume of the picture is given by a combination of 3 colors. If you place one light tile under 2 dark tiles, you get a shadow effect. Such masonry is similar to a flight of stairs. You need to be careful when choosing a color: not all combinations give a 3D effect.


It is quite difficult to lay out such pictures with your own hands: you need to be very careful and follow the exact order of the calculation. It is better to entrust this work to professionals.


The comment was sent successfully.