How to make a do-it-yourself joinery vice?

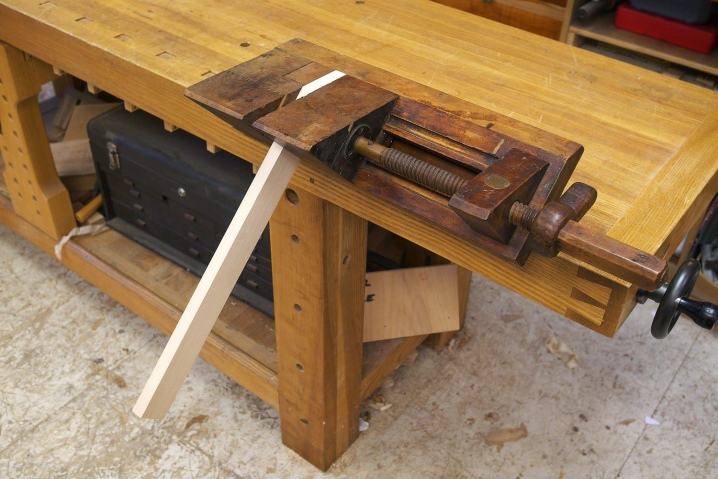
Wood vise is one of the main tools of the carpentry workshop. With the help of a simple device that is easy to use, you can quickly and safely process boards, bars, as well as drill holes, grind edges, remove roughness, and give the product the desired shape. Only thanks to the carpentry yews the master can carry out a large amount of the required work.

Features and characteristics of the tool
Modern carpentry vices are not much different from similar devices that were used in the last century. They still have the inherent versatility, reliability, required efficiency in terms of comfort in the process of performing both simple and complex jobs. However, there are situations when they break down, become unusable, for example, at the end of the operational period.
In order not to spend your own money on buying a new vice, you can make a convenient device yourself.
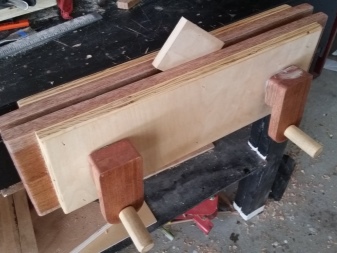
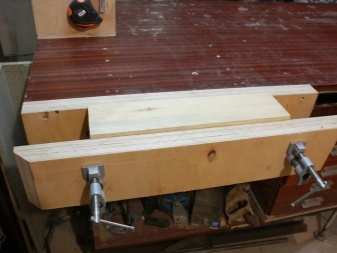
The principle of operation of carpentry yews does not differ structurally from the operation of similar tools designed for processing metal products. Therefore, the basic details are very similar:
- two jaws - movable and fixed;
- metal parts - two guides, a lead screw, nuts;
- handle made of metal or wood.
The vise is attached to the surface of the workbench with bolts and nuts or long self-tapping screws.
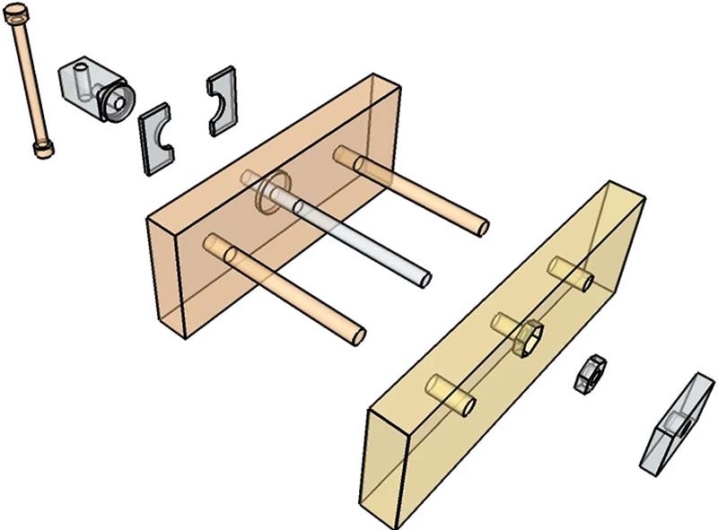
Joinery vices are different. Some models are widely used for woodworking in the manufacture of products in large quantities in factories, other devices are practical and convenient to use in everyday life, for example, in order to create original crafts: pens, wooden toys and other joinery. It is advisable to make a simple adaptation with your own hands for the implementation of any creative ideas.

Carpentry vices for a workbench differ in the following basic criteria:
- size (large, small);
- design (clamping, screw, longitudinal, quick-clamping);
- the material used;
- fastening method.
A large number of joinery vices are produced at domestic and foreign enterprises, but the cost of the products is quite high, which is an additional bonus in favor of making such a tool on your own.

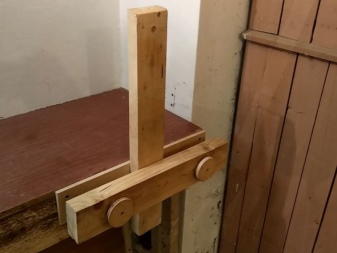
Before starting the process - the main assembly - it is necessary to select the model of the future vice.
If you plan to use the product exclusively for household needs, for example, creativity, you should decide on the key parameters: size, shape, optimal grip width. A you should also provide for a method of attachment to the workbench.
What do you need?
Depending on the purpose, intensity of use and use at home, it is necessary to select the size of the blanks before the process of making a simple carpentry vice. Therefore, the key question remains open. To assemble a functional tool with your own hands, you will need a number of materials:
- wire;
- self-tapping screws;
- metal studs (2 pcs.);
- nuts (4 pcs.);
- plywood sheet;
- die with a holder for threading.


In addition, wood blocks of a certain size should be prepared in advance. The ideal material for the bars is hardwood.
In addition, you need to prepare the tool:
- square;
- fountain pen or pencil;
- hacksaw;
- electric drill;
- sandpaper;
- PVA glue or its equivalent;
- drills of different diameters.


Before starting the manufacture of bench vice, it is advisable to draw a sketch (ideally a drawing), dimensioned in order to simplify the assembly steps and eliminate typical errors. A visual drawing should be clear so that in the process of work there are no doubts about the correctness of the actions.

Manufacturing instruction
When the blanks and tools are prepared, and the dimensional drawings are at hand, the first step is to make jaws for a simple vice. Here you should select plywood, timber and cut out the parts according to the selected length and width. Take a square, fountain pen, or pencil and mark the holes. The workpieces are better secured for increased comfort and safety. Clamps can be used.
At the next stage, it is necessary to drill 2 holes, and in the plywood separately - along the edges of the ends - drill an additional 6 holes. They are designed for self-tapping screws. And in order to then drown the caps into the material, it is necessary to slightly ream the finished holes with a larger diameter drill.

Screw the prepared plywood blank to the bench table, and drive 2 nuts into the holes from the inside.
To make homemade handles, you need a pair of ring crowns. One is small and the other is medium. Attach the fixtures to the tree and mark the diameters with a pencil. Then, using a special nozzle, set the crowns and cut the blanks along the marks with an electric drill. Then take sandpaper and remove any burrs from the sharp edges.
Create small indentations in large diameter parts. For this purpose, you can use a chisel drill. Drive a nut into both blanks and screw in threaded studs into them. Insert a piece of wire into the pre-drilled holes in each stud, which will serve as a stopper. The resulting two circles now need to be glued using pre-prepared PVA glue, and for better reliability, reinforced with two self-tapping screws. This completes the manufacture of handles.

Now, from the finished parts, it is necessary to assemble a carpentry vice completely.
Let's consider how to make another model of a vice for carpentry work. You will need the same tools, and add a metal corner and a plumbing tee of the required size to the materials.
Such a vice is mounted as follows.
- Cut a piece of the corner of the required size.
- Drill a hole in the center for the lead screw, and at the edges - another hole with a smaller diameter.
- Cut the workpiece out of the prepared corner. Clean sharp edges with burrs.
- Take a stud with a pre-cut thread and a nut at one end.
- Use a plumbing tee - screw it onto the end of the stud with a nut through the central hole of the prepared metal workpiece.
- Next, you need to equip the workpiece with guides that are inserted into the holes along the edges. On the other side of the workpiece, screw in a nut and tighten tightly.
- Take two nuts, a metal strip and assemble the lead screw guide.
- It is advisable to fix the resulting structure on the trimming of a thick board.
- Lastly, the clamping jaws are cut from plywood, and the knob is cut from a wooden handle.


Now the structure needs to be assembled and tested.
To make a carpentry vice, you will need ordinary tools, wooden blanks, corners, bolts, nuts, which are sold in the assortment on the construction market. In order to follow the procedure and not make a mistake, the assembly stages of the future product must be indicated in the figure. Now we can draw the final conclusion - making a carpentry vice with your own hands is within the power of every man.
How to make a carpentry vice with your own hands, see below.


The comment was sent successfully.