How to make a welding angle clamp?
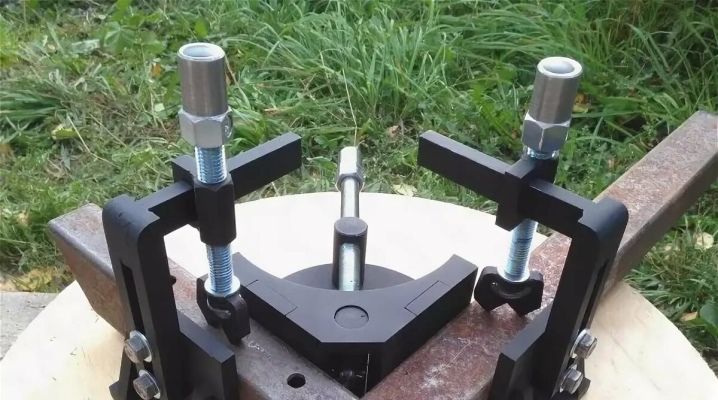
The angle clamp for welding is an indispensable tool for joining two pieces of fittings, professional pipes or ordinary pipes at right angles. A clamp cannot be compared with two bench vices, nor two assistants who help the welder to maintain the exact angle during welding, previously checked with a square ruler.


Device
A do-it-yourself or factory-made corner clamp is arranged as follows. Apart from its modifications, which allow welding two regular or shaped pipes at an angle of 30, 45, 60 degrees or any other value, this tool differs in dimensions for different pipe widths. The thicker the holding edges, the thicker the pipe (or fittings), with which you can connect its parts. The fact is that the metal (or alloy) being welded bends when heated, which inevitably accompanies any welding.

The exception is "cold welding": instead of melting the edges of the sections being welded, a compound that vaguely resembles glue is used. But here, too, a clamp is needed so that the parts to be joined are not disturbed according to the required angle of their relative position.
The clamp includes a movable and a fixed part. The first is the lead screw itself, lock and lead nuts and a pressing rectangular jaw. The second is a frame (base) fixed on a supporting steel sheet. The power reserve of the screw adjusts the width of the gap between the moving and stationary parts - most clamps work with square, rectangular and round pipes from units to tens of millimeters in diameter. For thicker pipes and fittings, other devices and tools are used - the clamp will not hold them when applying stuck points or segments of the future seam.

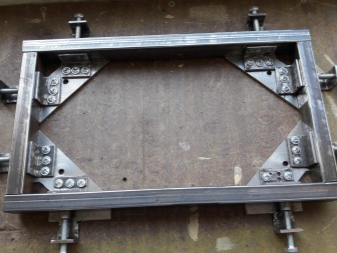
To rotate the screw, a lever inserted into the head is used. It can be movable (the bar moves to one side completely), or the handle is made T-shaped (the bar without a head is welded to the lead screw at right angles).
To immobilize products during welding, G-shaped clamps are also used, connecting a professional pipe or square reinforcement with a total thickness of up to 15 mm.


Thickness up to 50 mm suitable for F-clamps. For all types of clamps, a reliable table (workbench) with a strictly horizontal surface is needed.

Blueprints
The drawing of a homemade rectangular clamp for welding has the following dimensions.
- The running pin is an M14 bolt.
- The collar is a reinforcement (without curly ribs, a simple smooth rod) with a diameter of 12 mm.
- Internal and external clamping parts - professional pipe from 20 * 40 to 30 * 60 mm.
- The running strip of 5 mm steel - up to 15 cm, with a cut width of up to 4 cm is welded to the main plate.
- The length of each side of the corner of the outer jaws is 20 cm, and the inner ones are 15 cm.
- A square sheet (or half of it in the form of a triangle) - with a side of 20 cm, for the length of the outer jaws of the clamp. If a triangle is used - its legs are 20 cm, a right angle is required. The sheet segment does not allow the frame to break its right angle, this is its reinforcement.
- A box assembly at the end of the sheet steel strip guides the clamp's travel. Consists of 4 * 4 cm square pieces of steel, to which lock nuts are welded.
- Triangular strips reinforcing the moving part are welded on both sides. They are selected according to the size of the internal free space formed by the pressure jaw on the side of the lead screw. The running nut is also welded to it.


So, to make a rectangular clamp you need:
- steel sheet 3-5 mm thick;
- piece of professional pipe 20 * 40 or 30 * 60 cm;
- M14 hairpin, washers and nuts for it;
- M12 bolts, washers and nuts for them (optional).


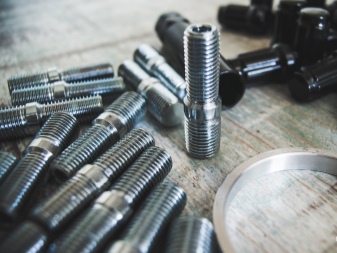

The following are used as tools.
- Welding machine, electrodes. A safety helmet that blocks up to 98% of the arc light is required.
- Grinder with cutting discs for metal. Be sure to use a protective steel cover to protect the disc from flying sparks.
- A perforator with a transitional head for conventional drills for metal or a smaller electric drill. Drills with a diameter of less than 12 mm are also needed.
- A screwdriver with a wrench attachment (optional, depends on the preferences of the master). You can also use an adjustable wrench for bolts with a head up to 30-40 mm - such keys are used, for example, by plumbers and gas workers.
- Square ruler (with a right angle), construction marker. Non-drying markers are produced - oil-based.
- Internal thread cutter (M12). It is used when there are solid pieces of square reinforcement, and it was not possible to get additional nuts.

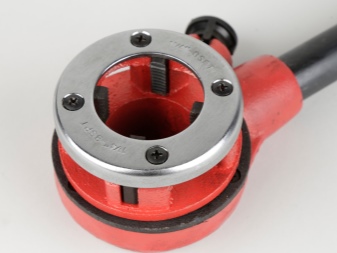
You may also need a hammer, pliers. Get hold of the most powerful heavy duty pliers.
Manufacturing
Mark and cut the profile pipe and steel sheet into its component parts, referring to the drawing. Cut off the desired pieces from the hairpin and smooth reinforcement. The sequence of further assembly of the clamp is as follows.
- Weld the outer and inner sections of the pipe to the sections of sheet steel, setting a right angle using a rectangular ruler.
- Weld the pieces of steel to each other by assembling a square U-shaped piece. Weld the lock nuts into it. Drill a hole in it from above, weld an additional fixing nut to the lock nuts and screw a bolt into it. If a piece of square reinforcement was used (for example, 18 * 18) - drill a blind hole in it, cut an internal thread for M1.Then weld the assembled box-shaped piece to the oblong steel segment, and the segment itself to the frame.
- Weld the spindle nut to the fixed part of the clamp - screw in the spindle opposite the locking one. After checking that the screw turns freely, unscrew it and grind the end that pushes its movable part back and forth - the thread should be removed or blunt. Fasten the knob at the free end of the screw.
- In the place where the screw is attached to the moving part, make a simple sleeve by welding a piece of a professional pipe or a pair of plates with pre-drilled 14 mm holes.
- Screw in the lead screw again. To prevent the pin (the screw itself) from coming out of the bushing holes, weld several washers (or steel wire rings) to the screw. It is recommended to lubricate this place regularly to prevent abrasion of steel layers and loosening of the structure. Professional mechanics install a threaded axle with a plain end instead of a conventional stud, on which a steel cup with a ball bearing set is placed. Also weld an additional nut - at right angles to the axis.
- When assembling the bushing, it is recommended to weld the top plate and secure the entire structure with a bolt last, when you are convinced that the clamp is working.
- Check that the fasteners and welds are secure. Test the clamp in operation by clamping two pieces of pipe, fittings or profile. Make sure the angle of the parts to be clamped is right by checking it with a square.

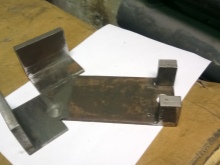

The clamp is ready for use. Remove hanging, bulging seams by turning them on the grinder's saw / grinding disc. If the steel used is not stainless, it is recommended to paint the clamp (except for the lead screw and nuts).
How to make a corner welding clamp, see below.


The comment was sent successfully.