How to replace the door seal on a Bosch washing machine?
Cuff wear in a washing machine is a common problem. Finding it can be very simple. Water from the machine starts to leak during the wash. If you notice this is happening, be sure to visually inspect the cuff for scuffs or holes. A worn-out elastic band can no longer effectively contain the water pressure during intensive rinsing or washing. Fortunately, replacing the hatch cuff of a Bosch washing machine yourself is not as difficult as it might seem at first glance. All you need for this is a replacement part and tools that everyone has at home.


Breakage signs
As mentioned above, the wear of the cuff in a washing machine is quite simple to determine - water leaks during operation. However, this is already an extreme stage of breakdown. Experts recommend inspecting the rubber pad after every wash. Pay attention to how worn out the part is, are there holes on it, perhaps it loses its density in some places? All of these signs should cause alertness. Because the next time you use it, even a small hole can come apart, and the cuff will simply become unusable. Then replacement of the part will be inevitable.


Causes
Careless handling, non-observance of operating rules and even a factory defect can cause the sealing gum to break, along with metal parts getting into the machine, careless washing of shoes and clothes with metal inserts. For machines that have been in operation for a long time, the cause of the inoperability of the rubber gasket can be a fungus that gradually corrodes the part. In almost each of these cases, it is possible to establish the cause of the breakdown without a specialist.

Dismantling
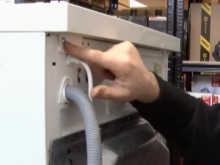
The first thing you need to do is remove the cover fixing screws of the washing machine. They are located on the back side. To do this, you need a regular Phillips screwdriver. After you have unscrewed all the screws, you can remove the cover. Now pull the powder dispenser out of the special compartment. It has a special latch, when pressed, the tray comes out of the grooves. Now the control panel can also be removed. Similar to the cover, unscrew all fastening screws and carefully detach the panel.
You will now need a flathead screwdriver. Use it to detach the plinth panel (at the bottom of the machine) on the front side. Now it is very important to remove the fastening of the rubber sleeve to the front of the washing machine. You can find it under the outer part of it. It looks like a metal spring. Her main job is to tighten the clamp.
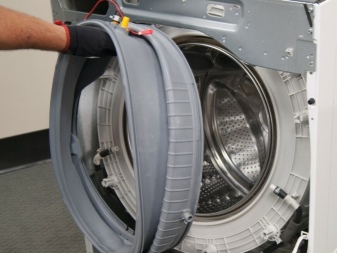
Gently pry up the spring and pull it out, freeing the gasket. Now fold the cuff into the drum of the machine with your hands so that it does not interfere with the removal of the front wall of the Bosch Maxx 5.


For to do this, remove the screws on the bottom of the washing machine and the two on the door interlock. Now you can start removing the front panel. Gently pull it towards you from below and lift up to remove it from the mounts. Move it aside. Now that you have access to the second cuff attachment, you can remove it along with the cuff. The clamp is a spring with a thickness of about 5-7 millimeters. Great, now you can start installing the new cuff and assembling the clipper.


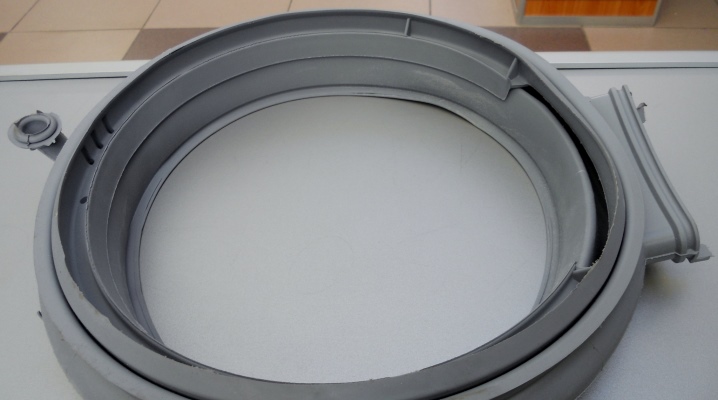
Installing a new seal
Before installing a new cuff in the clipper, pay attention to the small holes on one of its sides. These are the drain holes - you will have to install the part so that they are at the bottom and clearly in the center, otherwise the water will not be able to drain into them. Start the installation from the top edge, gradually pulling the cuff to the left and right sides. This will help you make sure that the holes are not misaligned.
After you have tightened the seal around the entire circumference, check again if the holes are located correctly, and only then proceed with the installation of the mount.
It is also best to start this process from the top. You need to lay the clamp in a special groove located on the far edge of the cuff. Stretch it evenly in both directions, this will make it easier for you to work.

Now you can start assembling the washing machine. Replace the front panel. Make sure that it fits clearly into the grooves and is fixed. Otherwise, in the process of work, it may fly off the mounts and be damaged. Tighten all screws well. Do not forget to slide the second retaining strap over the cuff. It should also fit snugly into the grooves specially designated for it. Replace the bottom panel and then the top. Screw on the cover of the machine and insert the dispenser.
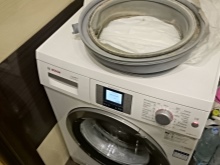
Great, you did it. Now you will no longer have problems with the leaking of the washing machine. This manual is also valid for Bosch Classixx washing machine models. It is just as easy to change the cuff on it. A new part can cost you from 1,500 to 5,000 rubles, depending on the supplier or store where you order it.
For more information on installing the cuff on the Bosch MAXX5 washing machine, see the video below.


The comment was sent successfully.