Do-it-yourself shelving
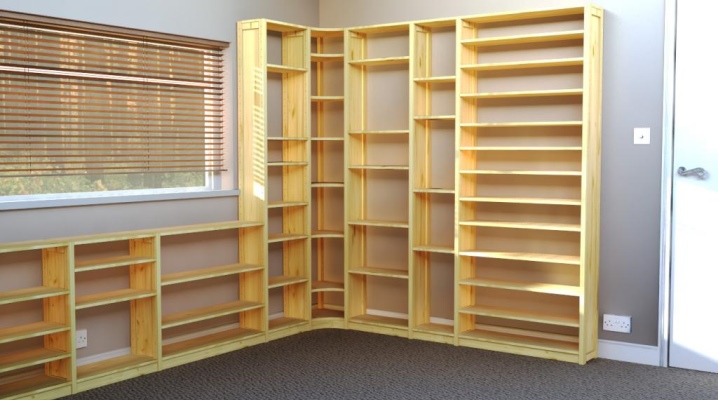
It is very important for many summer residents and even townspeople to know how to make a rack with their own hands simply, quickly and economically according to the drawings. There are various options for making such structures from plywood and boxes. You can make racks in a barn from scrap materials, including metal.


Choice of materials
A rack in an ordinary shed can be made from plastic boxes. However, such a solution is much more promising for an ordinary living room. It allows you to store a lot of things without spending a lot of money to buy.
The plastic is strong and reliable enough. It is not difficult to put clothes, shoes and much more in a box made of it.


Lovers of natural materials at hand can easily choose a different solution - to make a rack from a furniture board. The blanks are impregnated with stain, varnished. Furniture panels are as attractive as natural wood (solid wood). One-sided orientation of fibers in a solid material eliminates the growth of microscopic cracks. It is this problem that strongly affects the use of traditional natural wood.
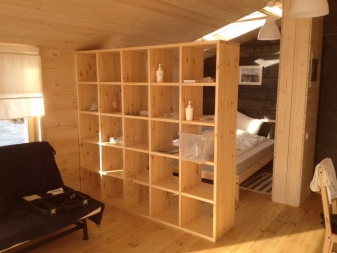

The size of the board can reach 200x60x1.8 cm. It is practically impossible to achieve the same effect when using traditional boards, and in addition to provide acceptable quality.
Arrays of this size also exist, but they are highly prone to knots and cracks.
The initial impregnation with an antiseptic allows you not to fear the effects of pests and dangerous microorganisms. Finally, the shield undergoes excellent hydrophobic treatment, which significantly increases its reliability and allows it to be used even in a utility block, where the humidity does not always meet the established norm.


Quite often, racks are made from lining. This material:
- much more aesthetically pleasing not only plastic structures, but also most types of natural wood;
- mounted without any noticeable problems;
- differs in low thermal conductivity;
- dampens sounds well;
- resistant to moisture, temperature changes and mechanical stress.


Some people make home furniture from MDF. This material:
- environmentally friendly;
- differs in the homogeneity of the internal structure and the absence of special inclusions;
- allows you to make bent structures;
- sufficiently resistant to moisture for use in the kitchen;
- may fade over time if exposed to a stream of steam;
- causes difficulties in the selection of paint for repair and restoration;
- gradually loses its elasticity and strength, regardless of the external finish and processing methods.
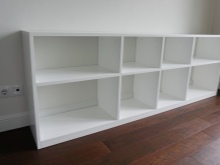


Rebar structures are distinguished by their reliability and mechanical resistance. They are especially well suited for loft-style interiors. The metal structure allows you to expand the placement of the racks compared to wooden counterparts. But even in this case, making the gap more than 0.8-1 m is not very justified.
Important. Metal (stainless) is much better suited for a humid environment than any wood, even treated with antiseptics.

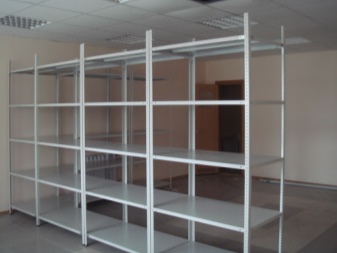
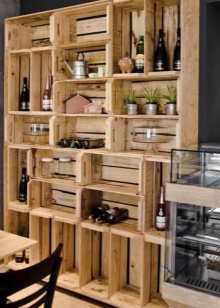
But working with metal almost always involves the use of a welding machine. If this option does not suit you, you can make a structure with your own hands from pallets (pallets). This is a very simple and reasonable solution.The cost price of pallet products is low, and almost any geometric shape can be created from them due to the ease of processing.
Another important advantage is the high strength of the pallets. In general, it is at least 500 kg. Sometimes it reaches 1000 kg. Even a relatively old pallet, which has been repeatedly used in warehouses for the transportation of goods, usually retains its external aesthetics.
Important. It is recommended to choose pallets of the "euro" type, since domestic counterparts are not good enough in terms of phytosanitary control.


Required tools
To make a rack, use:
- construction pencils (they are replaced with success and with ordinary pencils with a soft lead);
- tape measure (at least 0.5 cm markings, and ideally by millimeters);
- electric jigsaw;
- brackets or corners for mounting shelves;
- drill;
- drills (their section should be slightly smaller than the section of the self-tapping screws, there should also be one larger drill in the set);
- an ordinary hammer;
- Phillips screwdriver
- LBM with nozzles or rings having different grain sizes;
- self-tapping screws;
- sandpaper with various grain sizes;
- stains;
- varnishes of the required color;
- impregnation with fire retardant, bioprotective or combined (both at once) action.




Drawings and dimensions
First of all, it is worth mentioning collapsible frame options. These models are very mobile. Their parts are bolted together. The storage can be easily rearranged to the desired location. But there are also non-collapsible frame racks.
To join their parts, use:
- welded joints;
- self-tapping screws;
- nails (this is determined by dimensions and material).
At large sizes, such assemblies are virtually stationary. It is impossible not only to take them out through a door or window, but even to disassemble them. It will only be possible to break it, so dismantling is fraught with many difficulties.


As for the console versions, such racks are not equipped with sidewalls. But it provides for the attachment of the shelves to the solid rear wall.
Both options - traditional stationary and cantilever - can be placed in the closet and used for a variety of things. But, of course, the fixed type is more massive and capacious.
As for the folding models, they are closer to the stepladder. The dimensions are relatively small, and one cannot count on a decent capacity. However, the portability is even higher than that of the collapsible versions, and this largely compensates for the small capacity.


As for the shape, both in the pantry and in other rooms, rectangular and triangular types of shelving are optimal. The rectangle is generally a classic shape. You just need to choose, put either square legs, or lengthen the supports to support the entire structure at once. When drawing up a diagram, you should pay attention not only to the geometry, but also to the dimensions of the storage itself for things.
The height is preferably limited to 2 m. In this case, even most people of average height, without stepladders and stools, can reach the top shelf. As for the depth, it is entirely determined by the size of the items laid out.
Hanging or bulging things are not very good, but a huge half-empty space is hardly a rational choice. For storage of books, magazines, for flowers, shelves are needed 0.3 m wide and 1 m long.
It is undesirable to exceed the indicator in length, since then additional racks are needed to avoid subsidence.

For garages and sheds, for garden tools, for wallpaper and for illuminated seedlings, it is recommended to use shelves with a width of 0.4-0.5 m. It is also quite possible to add on them:
- tires;
- canisters;
- spare parts for machines and garden equipment;
- locksmith, carpentry and entrenching tools;
- fasteners;
- various clothes.
Important. When manufacturing parts of the shelving from OSB, fiberboard, plywood, it is advisable to focus on the width of the finished sheets.This will prevent unnecessary waste and waste materials.


Particular attention should be paid to the racks in the bath. All of them must be attached not only to the floor, but also to the wall, because otherwise it is impossible to ensure reliability. It is unlikely that someone will like the fall from the shelf to the floor. All such products are necessarily made of wood and carefully polished.
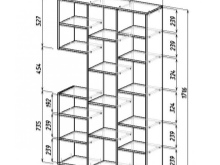
This is how a rack cabinet with a height of 1716 mm looks like, with a rear wall width of 1038 mm and a single section width of 324 mm. But this is a home-made budget-class shelving unit. The depth of the shelves reaches 500 mm. Their length is 1550 mm. For work, plywood with a thickness of 1.5 cm and pipes with a size of 2.5x2.5x0.2 cm are used.


Step-by-step instructions for making wood
First of all, to make a rack with your own hands, you need to decide on its design (appearance). Then you need to figure out the features of the technological performance (design diagram). The beam system has decent strength. But for the manufacture of such racks, relatively expensive materials are needed. And the skills of the performers are needed much more solid. It is also worth familiarizing yourself with the main properties and key options:
- modular;
- console;
- bridge and cantilever structures.
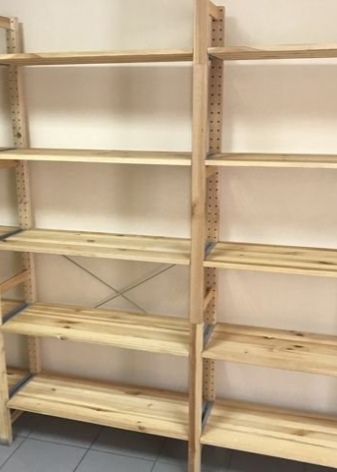

No matter how tempting the idea is to do everything simply and quickly, by eye, it is more correct to prepare drawings and sketches. Ignoring this requirement does not just get in the way of doing everything economically and attractively. There are often very serious additional costs involved.
Attention. Everything should be carefully checked already on the spot (during assembly) and make sure that all dimensions are observed. In this sense, a carefully prepared drawing will only be beneficial.


Shelves
For storage of small-sized and light things, it is advisable to abandon a full-fledged wooden or plywood shelf. Reiki can be used instead of these materials.
Important. If you have to store something heavy, at least periodically, it is better to refuse such a decision. For storing things in a shed or in a workshop, the usual thickness of 2.5 cm is quite enough. Thicker shelves should be made only when it is clearly clear what they might be needed for.
Frame
Making a wooden frame will go well if you use the usual assembly methods for carpenters - "in a quarter" or "in a half-paw". But sometimes parts are simply butted together if more complex professional methods cause difficulties. In fact, it turns out a little worse. The racks are made of timber, and the crossbars are made of ordinary boards. On the floor or on another horizontal, everything is pre-connected and tried on.
After making sure all connections are as expected, chalk marks can be made. Thanks to them, you will not need to adjust so much further. Drill holes at the designated points. Next, using a screwdriver, connect them with self-tapping screws. Joining to walls, and ideally to the floor and ceiling, will be done using metal plates.
It is recommended to prepare folds on the shelves; in the absence of a lathe, such an order will be readily fulfilled by any woodworker.


Assembly stages
To assemble the rack without damaging anything, it is advisable to fix the boxes with corner clamps for the duration of the work. Wooden shelving structures are often made from 50x50 mm planed bar. Oriented particle boards should be used for additional decoration. The assembly of the shelves and the frame between themselves should not take place on nails, but on self-tapping screws - this way it turns out much more reliable and stable.
Note: An auxiliary block can be used instead of an intermediate frame.
In this case:
- cut the racks and crossbars, making sure that the dimensions according to the drawing are observed;
- on flat horizontal platforms (floor or flat courtyard), attach the racks to the crossbars;
- mount the structure in its proper place using metal plates;
- prepare the shelves by cutting the OSB in the desired way;
- put the shelves on the frame using self-tapping screws.

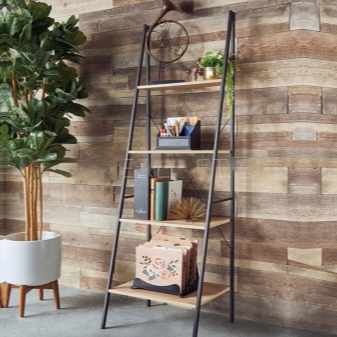
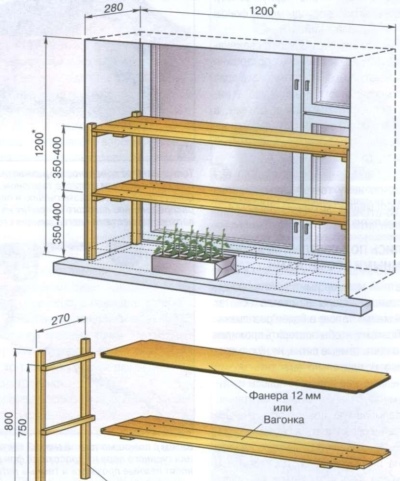
A separate topic is how to make a ladder rack with your own hands. For your information: instead of boards for this structure, you can take thick plywood. The number of shelves and their sizes are selected to your liking. But there are always two legs. It is better to measure the distance between the shelves with a ruler and a pencil to get more accurate.
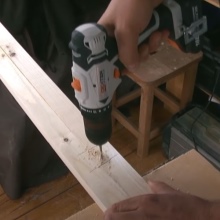
Since such a "ladder" is placed close to the wall, the shelves are placed at a certain angle. Only under this condition will they be parallel to the floor. From the bottom, the legs are cut in such a way that the structure does not loosen. The holes for the screws are pre-drilled with a drill.


Attention. The structure must be painted to make it look more attractive.
It is quite possible to make a ski rack with your own hands. The wooden support is attached to the base with self-tapping screws. The heads of the hardware must be carefully sunk into the depths. It is advisable to use flexural supports. Only then will it be possible to attach the skis themselves correctly. Equipped with height-adjustable brackets.

How to make metal?
A home-made cheap rack for a dacha or a country house can be built not only from wood, but also from metal.
There are quite enough options for such designs. There are no special requirements. Craftsmen have almost complete freedom in making the necessary elements.
Important. It is not very reasonable to take the word "metal" literally - it is perfectly acceptable to use wood or various plastic panels for decoration.

Since welded storage is monolithic, everything should be thought out in advance. And for this reason, a metal rack without a drawing is even more difficult to make than from wood. The mobility of such products is also zero. Such a solution is advised to be used rather for utility rooms. Bolted storage systems are much more decorative and enjoyable.
But bolted connections will require you to grip the drill many times. You need to attach a metal rack to a reinforced concrete wall for hardware with a length of at least 70 mm. For brick, wood and wood concrete, you can limit yourself to a length of 45 mm. The bases of large structures are “skids” based on large corners. With a medium-sized frame, the ends of the racks are connected to steel dimes attached to the floor.
The frame itself is made of metal, if the height of the rack is large, it is advised to attach it to the ceiling.
Important. All blocks should be placed either parallel or at a 90 degree angle. You should not use drywall elements. Backdrops are made from fibrous, particle boards and oriented boards. It is better to design shelves from boards or steel panels.

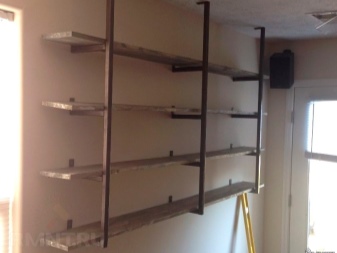
Steel parts are advised to be coated with a hydrophobic paint. Wooden parts are saturated with an antiseptic and covered with a layer of varnish. For your information: if the storage will be used not in a living room, but in a shed or in an attic, then ordinary paint can be used instead of varnish. You can improve the decorative qualities of the rack by:
- application of edges;
- registration with thick paper;
- use of plastic panels.
A rack for an aquarium, or even for several aquariums at once, is a little more difficult to make. It is desirable to make it from metal to ensure resistance to moisture. Because strength is critical, welded connections should be preferred over bolted connections. It is advisable to make partially collapsible structures. Typically, aquarium racks are divided into 2 or 3 levels. Therefore, a couple of lower aquariums are placed on a solid part, and the third is placed at the top.

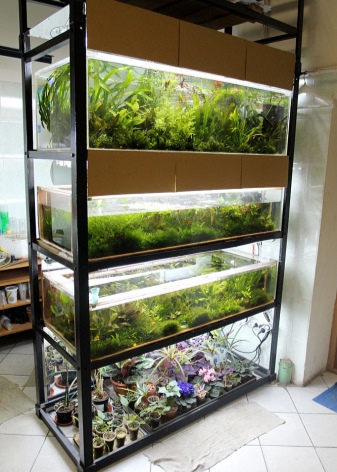
Recommendation: if handled carefully, chipboard can be used instead of metal. And even better, chipboard resistant to liquid spills.
But it should be borne in mind that in terms of bearing capacity, the particle board is much inferior to metal, that is, you need to take thicker models. It is impossible to achieve real savings in this way. Instead of countertops, it is often advised to take a moisture-resistant 36 mm postforming, which can have almost any color.
For information on how to make a wooden rack with your own hands, see the next video.


The comment was sent successfully.