Features of racks for wheels and an overview of their types

In order to maintain the reliability and safety of car wheels, as well as extend the service life, they must be stored according to certain rules. Many motorists have a small garage room, and there is simply not enough space for seasonal rubber storage. Racks for tires became a way out of this situation.
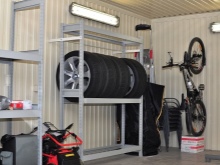
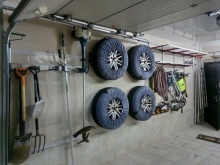
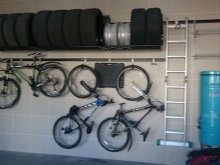
Description
Structures that improve storage conditions include wheel racks, shelves or wall hooks. All these devices are made of metal or wood, they are presented in the form of a solid base - a frame, and the device itself usually has the form of a stationary rectangle of five frames connected to each other.
To avoid an accidental fall of the structure, special attachment points are installed on the walls. The wheel stand differs in that it is possible to move it around the room. Outwardly, they are very similar - the stand looks like a shelf with legs or like a metal rack.
When installing hanging shelves, much attention is paid to the supporting details, because the weight of such a structure (together with tires) is very large. Car wheel hooks look like metal pins on the wall.


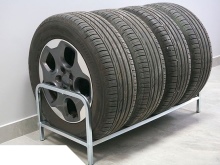
Many car owners, who have free time and money, install a specialized wheel cabinet in the garage. Such a structure can be placed not only on the floor, but also on the wall, which will significantly save space. Also in the closet, you can create an optimal microclimate for rubber. The risk of dirt and dust or accidentally overturned oil cans is minimized.
When choosing a way to store wheels, you need to consider whether they will be placed without disks or with disks.
- Rubber without discs cannot be stacked on top of each other, since this position deforms the tire located at the very bottom.
- Tires with discs are stacked in a pile, here the entire load falls on the disc, and the rubber will not deteriorate.
- Wheels with discs do not stack horizontally because the disc will deform the bottom of the rubber. In this way, tires can be stored without discs.
- Periodic change of the tire support point is also an important storage point. You need to turn the wheels once every 2-3 months.


Species overview
According to the method of installation, there are 3 types of racks for storing rubber in the garage.
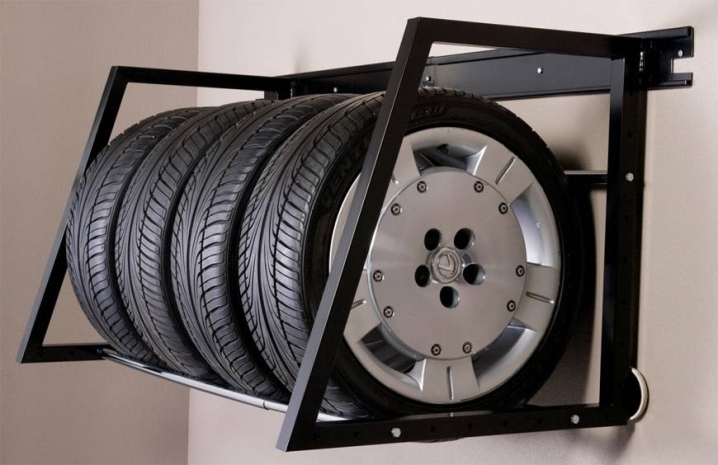
- Floor standing - the structure is installed on the floor, and for reliability it is supplied with fasteners to the surface of the wall or ceiling. Floor racks for tires are manufactured in two versions - stationary and mobile. Stationary frames are firmly mounted to the base, their movement is impossible. Mobile ones are equipped with special wheels, which allows you to move the rack around the garage, roll it out onto the street.

- Wall or hanging, - here the equipment is mounted on the wall and does not touch the floor.

- Combined - such a structure is presented in the form of several sections, some of which are installed on the floor, and some are mounted on the wall.

According to the option of placing tires, there are:
- shelf - tires are stacked in a vertical plane;
- modular - the rack is equipped with special brackets on which the tires are hung;
- rotating - on such a device the wheels are stored directly with the disks, they are put on the vertical axis one after another, a kind of "well" is obtained.
The racks also differ in the material of manufacture.


Metallic
Such structures are installed in the garage, on the balcony or in any utility room. In addition to tires, tools or car parts can be placed on a metal rack, this design is universal. Devices purchased in the store are very easy to assemble and adjust in height.

Wooden
Shelves made of wood are usually homemade structures. In the case of wooden models, you need to remember that the wheels with disks are heavy, so the material must be strong enough. Wooden blocks can be purchased both in the store, and you can take the "abandoned" available materials.

Dimensions (edit)
Standard shelf dimensions for 4 rubber wheels:
- height - 200 centimeters;
- length - 150 centimeters;
- width - 80 centimeters.
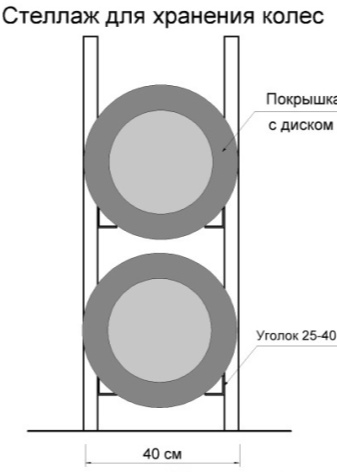
The rack is installed from the wall surface at a distance of 10-20 centimeters - this is done so that the rubber does not touch the surface. Two parallel beams (metal or wooden, it all depends on the material of manufacture) are mounted a meter from the floor - this is a shelf for tires. The top and bottom of the rack can be covered with any material - for example, wooden boards, plywood. These shelves are convenient for storing various tools or car parts. When installing the frame, it should be remembered that the wheels rest on the longitudinal beam during storage.
To prevent the tires from deforming about the angle of the rail, it is installed so that the tire is in contact with a flat surface. Or a round metal profile is used as supports.

How to do it yourself?
Before making any design, you must first draw up a preliminary sketch. The drawing indicates the dimensions of the structure, the distance between the parts of the structure, the diameter of the tires, as well as the length of the longitudinal profiles and their number (depending on how many wheels will be stored). Factory racks are usually made of metal profiles with uprights that can be adjusted to fit the wheels. The beams themselves are attached to the frame using special hooks.
If it was decided to make a design for tires on their own, then wood would be the most optimal material. To do this, you do not need to have special tools and equipment, as well as special skills.
Preparation for work
Before assembly, the place where the rack will be installed is determined. The surface is carefully leveled, if necessary, you can fill in a concrete screed. The wood is being prepared, it must be well dried, if necessary, it must be stitched. You should also buy compounds for treating wood from pests, rot and moisture. In addition to materials and space, you need to prepare all the necessary tools for work:
- saw-hacksaw;
- hammer;
- roulette;
- level;
- corner;
- screwdriver.

Cutting material
For the frame, racks and cross beams are cut. To do this, take a bar of 50x50 or 50x70 millimeters or a board measuring 150x40 or 150x50 millimeters. Shelves can be made from planed boards, plywood or chipboard. Racks are prepared in 4 pieces for each separate section. The width between them should be no more than 1 meter - this is done in order to avoid deflection from gravity. If a longer length is planned, you need to add additional racks.
Next, horizontal bars are cut for the end part and the long side of the structure, as well as transverse bars for the connection between the posts (they will also be the supporting part for the shelves). The last step is to size the shelves.

Assembling the frame
Immediately before starting work, it is recommended to make markings on the wall - the structure will be easier to assemble. The assembly technology is as follows.
- A stationary structure without a back wall is mounted directly to the garage wall, and the main front part is already assembled from it.
- If the future shelving is planned to be made on wheels, to increase the rigidity, the structure must be supplemented with struts diagonally. To do this, take a metal cable with a thickness of 3-5 millimeters, it is stretched crosswise on the back. The greater the weight of the tires, the more powerful the wheels are selected for the rack.
- The next step is to install the top and bottom piping. It is fastened with self-tapping screws, and for reliability, the joints are reinforced with metal corners.
- Further, the transverse beams are mounted, also on self-tapping screws.
- The last step is to install the shelves. Racks for storing tires do not need to be provided with shelves without fail, two strips are enough.
- After the assembly of the frame is completed, the structure is coated with special compounds or impregnations and painted with paint.


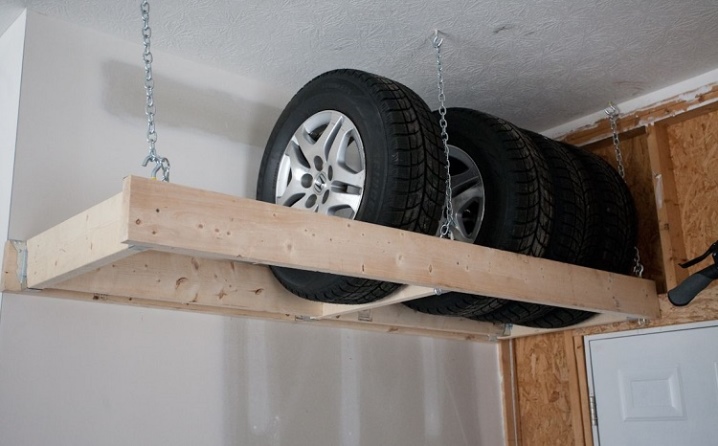
The garage space does not always allow placing a rack there; a shelf for wheels will be a way out of this situation. It is mounted on the wall under the ceiling. For a wooden structure you will need:
- wooden blocks;
- screwdriver;
- anchors.
The start of work with the shelf follows the same plan as the assembly of the rack - drawings and all the necessary materials and tools are prepared. Then all parts of the shelf are connected to each other with self-tapping screws, and the structure itself is attached to the wall with anchors. High-quality fixing of the shelf is one of the most important moments in the installation, it should not fall under the weight of the load.
After assembly, the tree is also treated with antiseptics and paint.

Operating tips
- The rubber should not touch the garage wall; for this, during installation, you need to leave a small gap between the wall surface and the tires, at least 5 centimeters.
- The distance between the vehicle and the wheel rack must be at least 0.8 meters. If the wheels accidentally fall, the risk of damage to the machine will be minimized.
- The place for installing the rack should be chosen away from aggressive substances (gasoline, oil) and sunlight.
- If the tires are to be stored horizontally, a small edge protector can be fitted along the outer edge of the shelf. It prevents the wheels from accidentally falling.
Any car enthusiast can assemble a wooden structure for storing rubber with his own hands. Especially if he is familiar with the work of a carpenter or knows how to use a hammer and saw. The cost of such a rack is much less than the factory one, and it will take a little time to assemble it.
For information on how to make a wheel rack with your own hands, see the next video.


The comment was sent successfully.