All about shtihels

Not everyone is familiar with the word "shtikhel", or rather, its meaning. If a person is shown this tool, he may be surprised - a strange name for an ordinary chisel. But master carvers know how a graver differs from a chisel, and why a good tool can literally become an extension of the master's hand.


Peculiarities
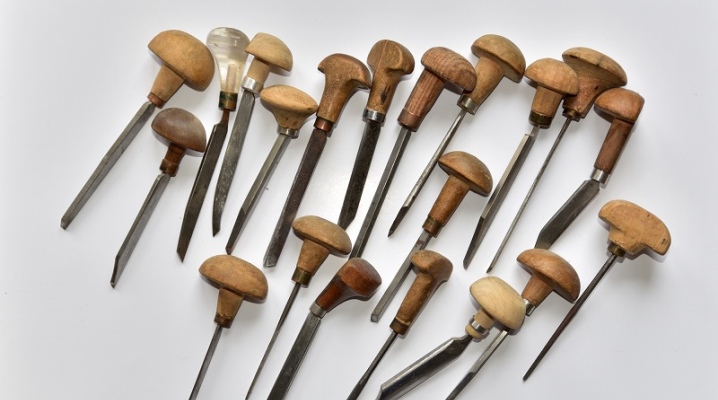
From German this word is translated as "cutter", which explains the functionality of the tool. The modern graver embodies the optimal combination of 3 parts: a blade, a comfortable handle, a ring. The handle is most often in the shape of a mushroom, turned on a lathe from birch, beech or other suitable wood. A strong bushing is placed on the thin tip of the handle, which protects the handle from cracking when attaching it to the blade. A blade shank is driven into the handle from the end ring. On the lower edge of the blade, a fragment of the handle is cut off. This helps the technician to hold the graver at a low angle to the metal surface, which helps to remove very fine chips.
What other features of the tool should be noted:
- the length of the handle is from 3 to 7 cm, the engraver always chooses it individually;
- in a set of cutters, all handles must be of equal size;
- blades are different both in shape and in section parameters;
- the main requirement for a tool is the stability of its working part, which can be achieved by good sharpening and competent hardening;
- when the cutting part wears out, the cutter must be reground.


People who decide to engage in engraving are primarily determined with the working surface. Woodcuts are not at all the same as metal engravings. For metallic transformation, brass and copper are often used. Cutting with a graver always starts by checking how sharp the cutter is. To do this, you need to lightly run the incisor along the tip of the thumbnail, draw precisely along the tangent, trying to cut off the edge. A good, sharp graver will cut the chips effortlessly.
There are several engraving techniques, they are mastered gradually, one after another. Most likely, the master will have a dominant technique that will be the most convenient and effective for him.


Views
And now - a small overview of the types of incisors.
Spitzshtiheli
This is the name of the cutter, which is triangular and pointed in cross-section, arched on both sides. The object has a flat back, a straight blade and side edges with a bulge. The blade is sharpened at an angle of 30-45 degrees. This is, one might say, the most demanded version of the grater. It is necessary for different types of manual work: this is markup, and outline, and the creation of image contours, and the formation of deep lines, strong strokes.
You will need it if you need to cut corners in type works, if you need to clean up and tweak something. They also make calligraphic inscriptions. If the tip of the cutter is deepened or, conversely, brought out closer to the surface, you can adjust the width of the groove.


Flachshtiheli
This cutter has a flat cutting edge (the word "flach" itself translates as "smooth" or "flat"). The back flat edge of the tool is parallel to the back. Flat and wide lines are applied to them, the planes are leveled, they also remove the material between the letters and lines. They can cut or level backgrounds, shave metal, and make glossy trims.


Messershtikheli
This tool will be the thinnest in the set. The cross-section of the tool is an extended acute-angled triangle, as is the case with the blade of a simple knife. By the way, "messer" means "knife". It does an excellent job of creating hair lines of sufficient depth. The tool is equipped with a straight blade, a wedge-shaped profile with straight walls and a blade edge radius of 0.1-0.2 mm. If Messerschtikhel number zero is purchased, it will be a triangle with an acute angle at the apex (in cross section) and a base of 2.5 millimeters, which ensures reliable operation of the device.


Bolstikheli
And this is a semicircular cutter, without which it is difficult to carry out strict fonts, to engrave letters, numbers and other symbols with round, semicircular and oval shapes. They engrave grooves, do erasures.


Shatirstikheli
This is the name of the thread cutter, which is very reminiscent of a flachshtihel. The back edge of the tool, as well as the cutting edge, has projections, teeth, allowing you to make a series of strokes in parallel. The tool copes with threadlike strokes, and also perfectly shades and shades. All of the above are the basic tools of the engraver, but the arsenal of graders is not limited to them, of course.
For example, a chamfering tool is used, which creates wide, accurate, not very deep lines, and also makes patterns of planar engraving. Yustirshtikhel is also used, although more often it is in demand in the jewelry field, because it can create a solid support under the stone. A grabstikhel has a diamond-shaped cross-section and a curved blade.
In the jewelry business, the electric stitcher and pneumatic stitcher are popular (the latter is often done independently, and even on the basis of author's schemes and experiments).


Dimensions (edit)
The size range of tools is quite large, some have at least two dozen size options. The width of the working part, the length of the blade and the size of the handle are taken into account in size. For example, a flat cutter may have a 4 mm width of the working part, 7 mm blade length and 82 mm by 40 mm handle length.


How to choose?
The cutter used for engraving must be stronger than the metal it is processing. Ideally, you should try working with a grater under the supervision of an experienced specialist. Hand engraving is a delicate craft, each engraver gets used to his instrument, but you can only understand how one is better than the other in practice. A beginner usually does not have the opportunity and extra funds for an endless search for a quality product: therefore, he helps out a master class from an experienced engraver.
Experts share their experience with novice carvers.
- The length of the grader always needs to be selected under your arm. This is a matter of convenience, so you have to try the tool in a small piece of cutting - and draw conclusions.
- Ideally, you need to make the first grader yourself.... Of course, not everyone goes for it, but nothing gives such an express course in mastering cutting as making tools for it independently.
- You need to look for answers on the forums and communities of carvers - there is constantly updated information on brands, sets, successful acquisitions.
- Have not tried - do not buy... This is an iron rule, because more than once it happened that loved ones acquired a set of cool gravers for a novice engraver, but his hands could not "work together" with them in any way.


Choosing a grader is like choosing a paintbrush. And there, and there are some standards, certain sets and options.
But even the best brushes from the best manufacturers are not suitable for everyone - again, it's about personal comfort. And excellent brushes do not guarantee a talented drawing. So they shtikheli - no matter how expensive they are, they will not replace the skill of cutting, its artistic component.


How do they work?
This is the most important point in this review: it is not enough to have a good tool (it does not matter, for wood, metal, or stone), technique and tool ownership are important in carving and engraving. Here are 10 tips for a beginner.
- The tool (if the master is right-handed) is held in the right hand so that so that the grip rests on the palm, and the thumb and forefinger grabbed the instrument's canvas one and a half centimeters from the frontal edge. Other fingers help grip the canvas and the handle of the product to the side and slightly underneath.
- The elbow is suspended during work, the support for the hand is just a thumb that slides along the working surface. He is also a brake, he is also a limiter for jumping out of the tool forward.
- At the start of engraving, the fingers are positioned so so that the large rested against the end of the index (right large and, accordingly, the left index). The frontal edge of the tool should pass between the fingers.
- The tool is inserted into the metal, observing an angle of 40 degrees to the surface... Then the handle goes down, already at an angle of 10 degrees, and you can engrave.
- The cutter always runs exclusively in a straight line from right to left, in small intervals it must be pushed forward.
- If you have to engrave curved lines, as well as round off turns, all this can be done only to a limited extent. Bends and turns are performed by the left hand, because it turns the work, which is fastened in a vice. And she turns towards the path of the instrument.
- Hand engraving is usually started with a bolt.... The beginning should be simple and safe, and therefore it is logical to practice not a straight-line movement, but a zigzag one. The tip of the tool is inserted into the upper metal layer, and it is pushed in a zigzag from the right, making a parallel tilt to the surface.
- When long and straight lines are engraved on metal, it will be convenient for a beginner to place a small brass plate under the cutter. Then the tool will work according to the principle of a lever, which is a good help for a beginner engraver in learning how to work.
- So that there are no breakdowns of the tool, in order to ensure the accuracy of its movement, the grater must be pushed forward in small steps.
- If the grader has crumbled, work is immediately stopped and the tool is sharpened.... If this is not done, the tool will easily fall off the line and even scratch the surface.
Only a few can independently master engraving. Most need lessons, even if they are in video format. But it is also convenient: you can return to the problematic moment more than once and repeat until the error is corrected.


Instrument care
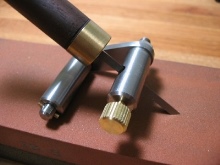
The main aspect of care is sharpening... Tools become dull quickly and often, it is normal, abnormal to postpone sharpening until later. The sharpened graver will easily cut into the metal, “obey” the right hand well, move in the direction of the image plan or inscription. A blunt graver is not just a risk of breaking the tool and scratching the metal, but also the threat of injury to the working hand during the engraving process.
The grinding and polishing stones should also be kept clean and in order. This can be diamond sharpening, corundum, Arkansas, and so on. Each master has his own preferences. Instruments, if they are from the same set, should be stored in their place. Naturally, everything is safe, without the risk of accidentally running into or stepping on the edge. Successful endeavors!


The comment was sent successfully.