DIY methods of making a snow blower

Snowblowers produced by modern industry are quite good. However, their price does not always suit people. In this case, or if some technical nuances are not suitable, it is advisable to make the mechanism yourself.


Design features
A self-made snow blower can have a rather different device. But in any case, there should be two main parts: collecting snow and throwing it into the right place. Gasoline or electric motors are mainly used as a drive. When choosing the design of the future snowblower, it is necessary to take into account how large the area will have to be cleaned. The simplest models are not efficient enough and do not always cope with clearing strong ice, snowdrifts.
If you need to put things in order over a wide area, devices with internal combustion engines are an indispensable solution. They are characterized by increased cross-country ability and can throw the snow mass far away.


Despite the significant severity of such structures, there is no need for physical effort to move them. Non-self-propelled snow blowers are most often used to clean up garden paths, sidewalks and flat roofs.
The maneuverability of non-self-propelled vehicles is quite high. But when it is necessary to remove a dense, thoroughly compacted layer, or when there is a lot of snow, or when it is wet, cleaning becomes very difficult. Moreover, the maneuverability of the apparatus also decreases. To compensate to some extent for this moment, it is required to use the lightest possible parts. If preference is given to gasoline models, this is not so important.

How to do it yourself?
For private use, an electrical unit may be the best choice. Very high performance for putting things in order near the home, next to the garage, and so on is simply excessive. There is not much difference in comparison with gasoline mechanisms, except for the drive. But much more difference is found between single-stage and two-stage options. In the first case, the snow mass is pushed out only by the force of a rapidly rotating auger, and in the second, an additional rotor is used. It is the rotary version that is considered preferable, since it reduces the level of wear and allows you to avoid various breakdowns. Even if stones or other solid objects get inside, they will not damage the parts of the snow blower.
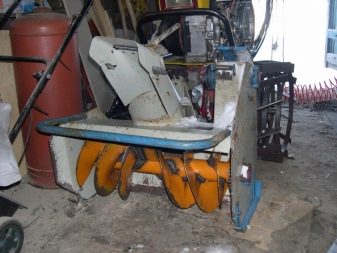
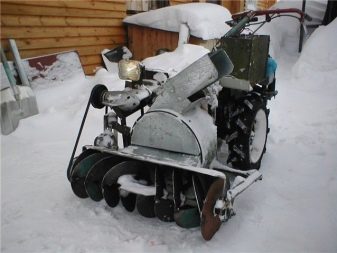
The snow auger is always placed in the front, at the bottom of the apparatus. It is certainly covered with a bucket-shaped body. This solution allows you to redirect the snow mass strictly in a given direction. The modern approach to the manufacture of augers implies the use of high-quality metal, because for this part of snow removal equipment, strength is in the first place. Externally, a monolithic apparatus resembles an oil rig or a large threaded screw. When the part is twisted, the snow is crushed and fed inside.
For greater protection of the device, where the auger turns quickly, a rubber cover is used.

In addition, when preparing drawings, one should not forget about the following points:
- the location of the engine and its dimensions;
- a chute along which snow will be thrown;
- wheels and axles for them;
- drive mechanism;
- control handles.


If the option with an electric motor is firmly chosen, you will need tools such as:
- drill for metal processing;
- Angle grinder with a suitable disc;
- hand hammer;
- welding machine;
- welding overalls;
- steel sheets (including roofing iron);
- reliable clamps;
- steel corner;
- metal pipes;
- bearings;
- plywood;
- bolts.


The auger assembly is created from two parts, such as:
- outer rings that will cut the snow;
- the shaft on which these rings are fitted.
A steel pipe ¾ is used to make the shaft. This pipe should be the same length as the bucket. Pins are welded on its edges. Later, they will allow the shaft itself to be inserted into the bearings. To create a two-stage snow blower, a steel plate is attached to the middle of the pipe. Its typical size is 12x27 cm. To the left and right of the plate, rings are placed, which must be made from a conveyor belt. Instead of this tape, 0.2 cm thick sheet steel is often used.
In most cases, 4 rings are made, the diameter of which should be the same (it is chosen according to the size of the shaft and the bucket). The rings will have to be cut into 2 parts. Then a spiral is bent from them. These parts are connected to the shaft by welding.


It is worth noting that the welded spiral must be a continuous line. If the snow blower is two-stage, the spiral element is tilted towards the center - then the work efficiency will be maximum.
But the creation of even a simple snow thrower does not end with the manufacture of the auger. Next, you need to make a roofing steel bucket. In a normal design, the bucket covers the bottom, left and right auger. But on top, it is slightly shifted forward. Sometimes the sidewalls are made of 1 cm thick plywood sheets.
Self-aligning bearings are placed on the sides. These parts should be protected as much as possible from contact with water, ice and snow. A gap of about 2 cm is left between the border of the auger spiral and the inner edge of the bucket. The gap is needed so that the two parts do not cling to each other. A hole is cut in the top of the bucket, where the outlet chute will be held. The diameter of such a hole is selected individually. It should be wider than the plate that guides the snow stream. The pipe should be bent from above, which will significantly improve the quality of work.

In both gasoline and electric models, it is worth paying attention to the frame on which the motor is placed. In most designs, the frame is made in the shape of the letter P. It is made from steel corners. When the main part of the frame is completed, take the welding machine and attach strips that allow you to fix the engine, auger unit and a bucket. Next, you need to drill holes to secure the wheels and control handle.
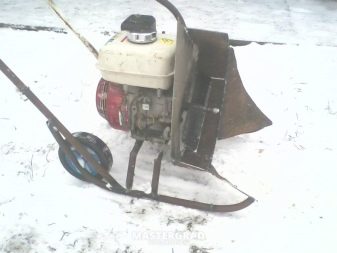
In homemade snow blowers for the home, the wheels are often replaced with skis. Only steel skis that fit like a regular sled will do. The distance from the frame should be minimal, then the device will work well.
When making wheels, you need to take care of the greatest possible adhesion of the tread to the ground. Of course, you only have to use winter tires. Summer samples do not tolerate frost well enough and show themselves from the worst side.
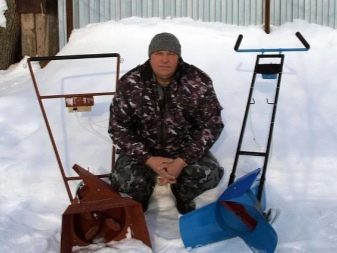
For the manufacture of handles, pipes are usually taken with a cross section of 0.5 inches. You need to attach them to the frame with bolts. Handles should be selected with the utmost care, no less thoughtful than scrapers. If the handles are uncomfortable, it will be extremely difficult to use the apparatus. The rotors are made of 4 rectangular plates connected together with rims around the perimeter, the axis is inserted into the middle.
No special motors are required. It is quite possible to get by with electric motors developing an effort of about 1 kW. The electric motor (and in the petrol version - the starter) is supposed to be protected from contact with liquid water, even just with snow. Failure to provide such protection could result in a serious short circuit.It is required to use only factory-insulated cables for powering the snow blower, designed for use in harsh outdoor conditions.


The connection of the motor to the auger can be done through a gearbox or a belt mechanism. If the geared version is selected, the axis along which the motor rotates must be at right angles to the shaft. This solution is more reliable, and the efficiency of power transmission is increased. But for a home, such a design is impractical. It is very difficult to make it, and in the event of a breakdown, the connection cannot be disassembled.
When using a transfer belt, the axle and shaft are parallel to each other. This solution is also more convenient due to the ability to adjust the tension of the belt. To connect all parts of the snow blower to each other, only special bushings or bolts should be used. Such an attachment, if the load becomes excessively large, collapses. But the motor, frame and other main parts remain intact.


For the greatest convenience and safety in work, it is necessary to put a headlight.
A glass partition is separated from an unnecessary automotive lamp. It is used to prepare a plaster cast. A glass cloth folded three times is applied to the resulting workpiece. Its layers are coated with epoxy resin, and then the workpiece is kept in a vacuum for a day.
After the final drying of the product, the slightest irregularities are removed with fine-grain emery. The future headlight is placed in the oven on a grill made of small slats, tightened with self-tapping screws. When the substance has melted, the workpiece is quickly removed. It needs to be laid out more evenly on the base of the headlight, which is returned to the vacuum again. After waiting for the end of drying, the headlamp is sanded, and then equipped with halogen lamps.


It is recommended to install the light source on the steering column (but some people think that it is more correct to provide a special position for the optics). The headlamp is mounted using a 1.5 m cable of a similar cross-section. The wiring is stripped and connected to the lamps at one end, and to the voltage regulating relay at the other. The rest of the wires are also stripped of the insulation at the ends to connect the relay to the generator and switch.
From the walk-behind tractor
To begin with, it is worth considering the homemade manual mechanisms. They almost always ride on wheels and not on tracks, since it is much easier to make a wheeled device and take care of it. It is maneuverable, easy to operate and fully functional equipment. Equipping the machine with a blade helps to effectively cope even with dense lumps of snow. The choice of a walk-behind tractor as the basis for a future car is justified by the simplicity of such a solution.
Begin with the preparation of the hull, projection blades and frame. The body usually comes with sheet steel or a billet from a barrel. In both cases, a hole is being prepared through which the snow will be dumped.
It is worth noting that the trimmer will have to be abandoned. Instead, a special rotor is installed. We must not forget that rotary devices do not cope well with ice clearing. Even worse, the crushed particles can cause injury.

The working edges of snow blowers converted from motoblocks can be smooth or serrated. The first option is preferable if you plan to remove freshly fallen snow. But when an impenetrable ice crust forms, only the jagged surface will help. The more difficult the job is, the stronger the material of the rotor impeller should be. It is made with three or six blades at your discretion.
If you only plan to sweep a small layer of fresh snow, you can equip the snow blower with conventional brushes. Most often, the swath is 1 m. Shovels with special knives are used to remove relatively thin, but already hardened snow. The strip to be captured has the same width.But the most effective solution is still the usual rotor.

From a gas cylinder
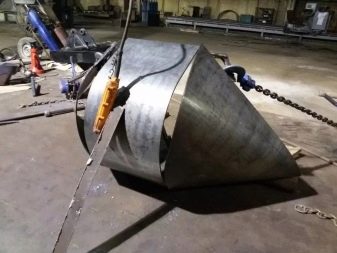
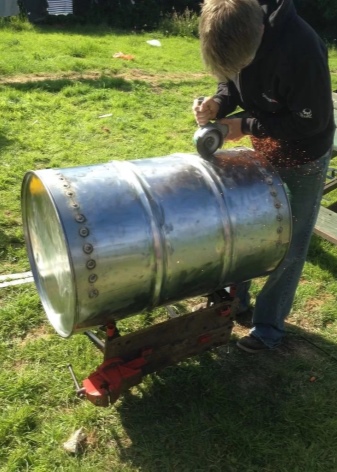
But it is not necessary to spend a walk-behind tractor to make a snow blower. An ordinary household gas cylinder can serve as a good substitute. Of course, you can start working only after emptying the container. The cylinder is sawn only in a rigidly fixed form. Violating this rule, it is easy to get injured by the grinder.
A shovel, which is made from a cylinder, is placed on various types of self-propelled or non-self-propelled equipment. It is sawn in such a way that a curved bucket is obtained. This shape will not allow the snow to be thrown far away. But for cleaning it from the yard or from the sidewalk, this is enough. Of course, before starting work, it is necessary to prepare drawings and strictly follow them.
The steel sheet is cut into 4 pieces. They will serve to make a chute, and the rotor for pushing snow into this chute can be removed from any gasoline cultivator. When cutting the balloon, it is necessary to leave the walls 10 cm wide. Insert the auger into the container. It is only necessary to connect it to the motor when the cylinder is firmly secured.


Out of a wheelbarrow
This field attachment is for non-self-propelled use only. The hinged shovel is attached with a pair of harness hinges and M8 category bolts. All work on preparing such a snow blower takes a maximum of 5 minutes. As practice shows, the device copes very well with cleaning open areas with an area of 50-300 meters.
It should always be borne in mind that when using a particular wheelbarrow, the dimensions of the parts may change.
To make a snow blower from wheelbarrows, repair waste is often used. Most often, dumps with a size of 80x40 cm are placed. But consumers may, of course, prefer a different size. The shovels are fastened at an angle of 45 degrees. Harness clamps are prepared mainly from steel with a thickness of 0.1-0.3 cm.

From a scooter
Not every scooter can be turned into a complete snow blower. A prerequisite is the presence of energy transmission through a rigid shaft and a gear unit. The body is made of a steel barrel, cut about 15 cm from the bottom. In the middle of the bottom part, a hole is prepared to accommodate the protruding part of the gearbox. A couple of holes are made from the edges - they are prepared to secure the flap.
The hole through which the snow will be thrown back is prepared from the side. It should be square. A sheet of tin will cover the open body, and the hole will be in the middle of this sheet. The rotor is made four-bladed; the remains of the barrel are used for the snow removal. The blade can be constructed from another sheet of metal.

Safety engineering
Regardless of how the snow blower is manufactured, it must be used with care. Prolonged use is only permitted when wearing sound-proof headphones.
It is forbidden to remove snow with self-made devices in loose clothing and shoes that can slip. Even if these conditions are met, it is undesirable to clean the area for more than 2-3 hours a day. Otherwise, the harmful effect of vibration, and in the case of a gasoline apparatus - also exhaust gases - will already become hazardous to health.


It is strictly forbidden to smoke when refueling a gasoline snow blower, and also to make open fires for other purposes. Before starting the engine, make sure that the containers with fuel are at least 3 m away. Before starting work, you should also do the following:
- check the tightness of the fuel equipment;
- evaluate the reliability of fastening of individual parts;
- determine if everything is idling normally.
Do not direct the snow stream towards windows and other fragile objects, people and animals. It is also undesirable to touch the exhaust device of the motor when it is running. During this time, the surface of the engines is very hot.Experienced snow blower owners always wear glasses and try not to climb even relatively gentle slopes unnecessarily, not to go down from them.


After the end of the work, the mechanism must be completely inspected from the outside, make sure it is in good working order and cleaned of all contamination.
For how to make a do-it-yourself snow blower with an electric motor, see the video below.


The comment was sent successfully.