How can currants be propagated?
Currants grow in many summer residents on the site. It is not so difficult to care for it, the bushes give a good harvest when all agrotechnical measures are carried out. Berries have a lot of vitamins and are considered quite useful. Therefore, summer residents often think about how to propagate currants. There are several ways, and each gardener chooses the best option for himself, starting from the conditions and characteristics of the region.
Reproduction methods by cuttings
Most often, many summer residents succeed in propagating currants by cuttings. For novice gardeners, this method is also quite affordable, especially since the process itself does not take much time, and does not look complicated at all. There are several options for making seedlings, from which fruiting bushes then grow.
Lignified
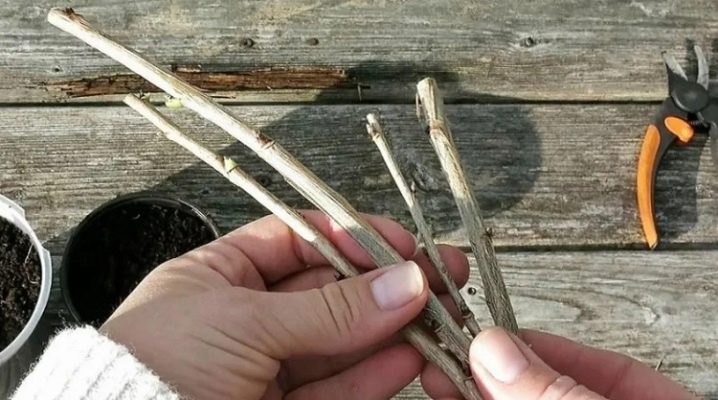
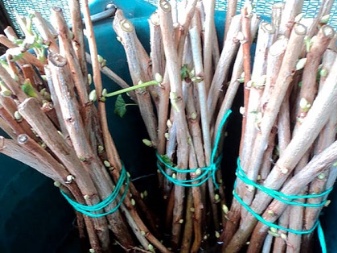
Usually cuttings are harvested in the fall, from mid-September to mid-October. Choose only healthy branches, without visible damage. And the tops are not good. It is considered optimal to cut the cuttings from the middle part of the branch. The stalk should be at least 15 centimeters long and contain 5-6 buds. The cut should be done at an angle of 45 degrees. Then they act in different ways. Let's consider each of them. In the first case, the cuttings are simply harvested in the required amount, and then they are put in storage until the arrival of a warm time, when the cuttings can be rooted. Some send the blanks to a cool place, for example, to the cellar, to the veranda, others put them in boxes and sprinkle them with snow.
With the approach of spring, summer residents are choosing one of the options. You can take a jar of water, put a stalk in it, and after two weeks roots should appear on it. The seedling can then be placed in the ground. If it is still cold outside, it can be planted in a pot at home and later placed outside. If the temperature permits, then the cutting can be immediately placed in open ground. Further, the seedling is looked after in the usual way: watered, fertilized, sprayed from pests. The first time you can keep it under a transparent cover. You just need to remove it once a day and air the plant for half an hour. After the seedling finally takes root in the open field and gives new leaves, the shelter can be removed.
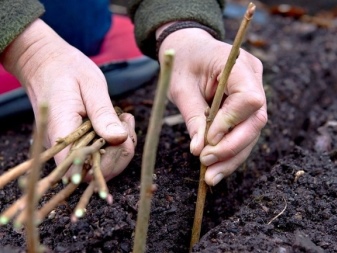
In the second case, the cuttings are placed in the soil at an angle of 45 degrees at a distance of at least 20 centimeters from each other. Fertilizers are preliminarily laid in the holes, the seedlings are watered abundantly. Then, arched structures are installed, and a black film is pulled over them. Then, once a day, it is opened and the plants are aired. With the onset of cold weather, the seedlings are insulated with the help of a covering material, and in this state they winter. It is believed that during this time they have already taken root and will be able to overwinter. With the onset of spring, the plants should show themselves in the best way, over the summer they will get stronger, and by autumn they can be transferred to a permanent place.
But this method is more suitable for regions with mild winter temperatures and long warm autumn. Otherwise, the cuttings may die.
Green
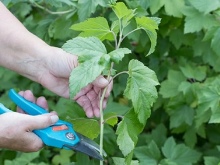
In the case of green shoots, proceed as follows:
- in June, a healthy two-year-old branch with a young green shoot is chosen;
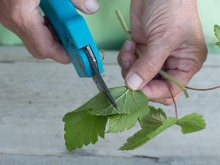
- the shoot is cut in such a way that a piece of bark from the mother's branch remains at the end;
- after that, a hole is prepared, a twig is placed there, sprinkled with earth, watered;
- cover with a transparent cap on top, most often this is an ordinary cut-off plastic bottle;
- every day the plant is ventilated;
- after the seedling takes root (about two weeks later), the transparent container can be removed;
- by the fall, the seedling can be transferred to a permanent place.
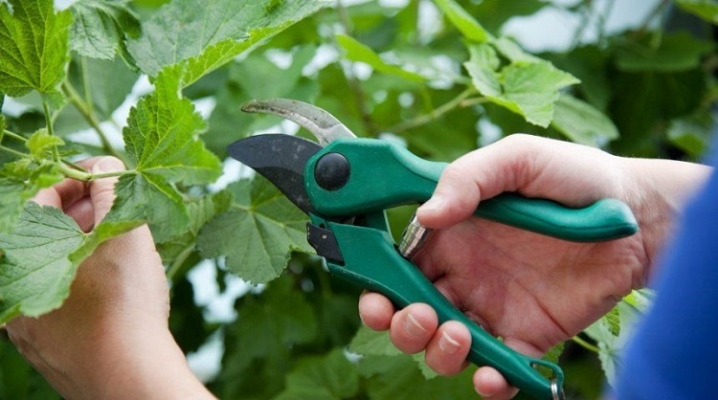
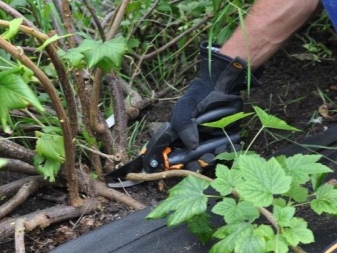
All work must be done with a sharp pruner, well disinfected, which will exclude the occurrence of various infections... Several of these branches can be cut from one bush. On the plant itself, from which the shoots were removed, the cut sites should be treated with fungicides, and after they dry out, the wounds should be sealed with garden varnish. This will prevent the occurrence of various infections.
How to spread with layering?
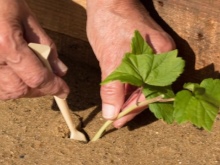
There is a certain part of summer residents who believe that vegetative propagation using layering is much easier and more effective. This is most often done in the spring, when the plants wake up and are actively growing. Many believe that in the first summer month, time has not yet been lost, and there are enough days ahead for the plant to take root and adapt to the environment, which means it can successfully overwinter.
You can choose any convenient form of such reproduction, the main thing is to do everything right.
Horizontal
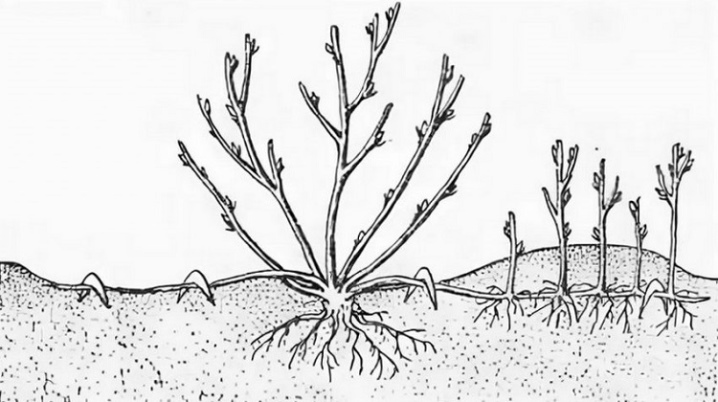
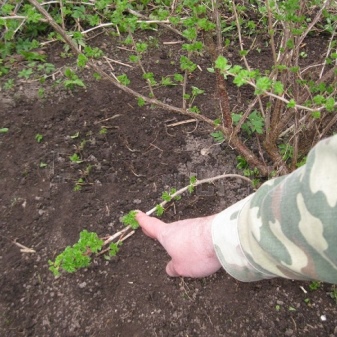
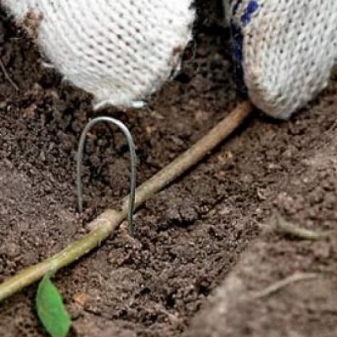
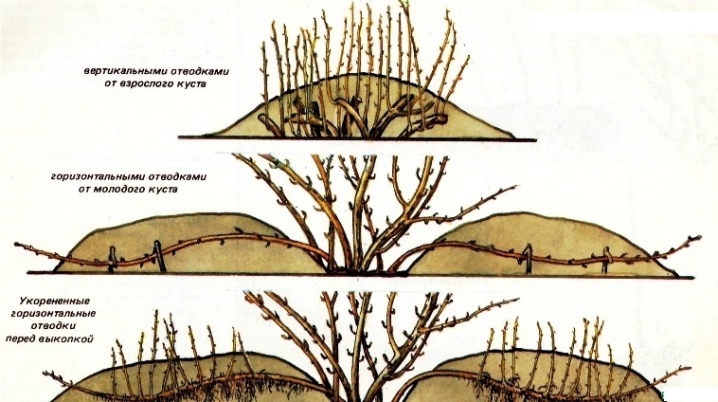
In this case, only the lowest branches can come in handy.... To do this, shallow trenches are dug under the bushes, fertilizers are placed there. The lower branches are bent to the ground and laid in trenches, secured for reliability with brackets or wire, then lightly sprinkled with earth on top. Then it is necessary to moisten the soil well, loosen it. When sprouts appear, they need to be spud. Thus, several bushes may turn out from one branch in the future. In autumn, with a sharp pruner, a branch with shoots is cut into fragments, new plants are placed in the area chosen for future bushes. It should be borne in mind that the branches that need to be pressed to the ground must be flexible enough, and therefore not old... You need to do everything carefully so as not to break the branch. In extreme cases, it is better to add more earth around the bush to make it easier to place the layers on the surface.
From a young bush of currants up to three years old, you can take only one branch to dig in. While from a 5-6-year-old plant, you can take two, or even three layers. But it should be borne in mind that the plant will spend more energy, which means that you need not forget about fertilizers and moisture.
In addition, you will have to remove some of the ovaries so that the plant does not waste energy, and sacrifice some of the harvest for new bushes. But in the future, if the reproduction of currants is successful, it will be possible to double, or even triple the harvest.
Vertical
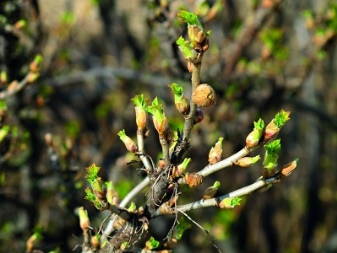
In early spring, you should choose a bush that will give new growth. For this, the branches are cut to the state of hemp. Then new shoots will go from them. Further, it remains only to huddle the bush so that the lateral shoots give roots. In this case, hilling should be done regularly, as well as watering and other agrotechnical procedures.
After the shoots have actively begun to grow, and the roots have appeared, they can be carefully separated from the main bush and transplanted to a new place. But you don't always need to rush. The plant is worth watching. Perhaps, first it is better to experiment, plant one shoot - and see how it will feel in a new place, and only then transplant others.
Arcuate
This method is similar to propagation by horizontal layers with the only difference that the lower branch is not completely buried in, but only its top... It should only be well anchored in the ground. Thus, the rest of the branch is an arc located above the ground. By the end of summer, an independent bush is formed, it can be safely separated from the mother tree and sent to a new place. You should not take many layers from one bush, so that this is not to the detriment of the plant.
How to propagate by dividing the bush?
It is rare for anyone to specially breed currants by dividing the bush. Too troublesome type of reproduction, and even meaningless when there is an opportunity to do it with the help of cuttings and layering. At the same time, the main bush will not suffer, and there is a chance that the layers and cuttings will take root... The division of the bush has its own nuances, and here you need to act extremely carefully and carefully, since there is a likely risk that the plant will be destroyed and the new bushes will not take root.
Most often, this method of reproduction is chosen when they plan to plant overgrown bushes, update an old planting, or there is a need for a small redevelopment of the garden when part of the plantings needs to be transferred to other places.
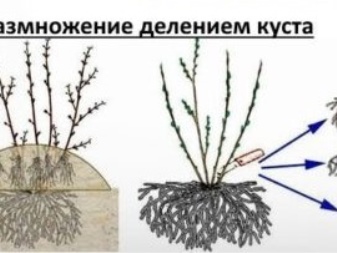
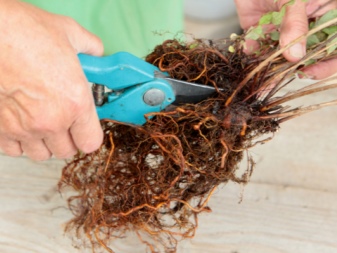
Consider the whole algorithm of actions that will allow you to plant the bushes correctly with further hope for successful development and a good harvest.
- First you need to very carefully dig out the currant bush. Look closely at the roots for disease. Rotten and dried ends should be immediately removed without regret. And you should also remove all old branches, leaving only young growth. But it must also be shortened by 20-30 centimeters. In the future, all these manipulations carried out will allow the new bushes obtained to develop faster.
- After the first stage, it is necessary to decide how many divisions are planned to be obtained from this bush. If the bush is rather large, then you can divide it into 4 parts. But for the first experience, you can try to divide into two, most often they do this.
- To do this, you need a sharp hatchet, which will have to chop the roots in the central part of the bush. You just need to pay attention to the fact that each part must have roots with developed buds.
- For a successful transplant, the delenki must be well prepared, which will increase their survival rate and subsequently get healthy fruiting currant bushes. First of all, the newly obtained seedlings are soaked in a weak solution of potassium permanganate for about an hour, which will disinfect the roots and prevent the occurrence of various diseases.
- Some summer residents also prefer to use fertilizers in this case.... For example, they are bred according to the instructions on the package, "Optim-Humus", and the roots are kept in it for 24 hours.
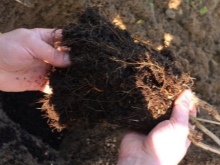
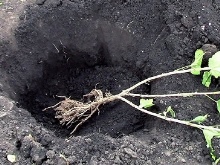
- After that, you can place the bushes in the soil. The pits should be about 50 cm deep. If you do not plan to then transplant the rooted seedlings to a new place, it is better to immediately foresee the optimal distance between the bushes - from 70 cm to 1 meter. At the bottom of the planting pit, drainage is placed in the form of small pebbles, humus. The hole itself is watered with diluted chicken droppings.
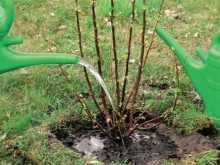
- After that, a seedling is placed in the hole, sprinkled with earth, well and carefully tamped. Then it is watered abundantly, the earth is poured again, and tamped, and watered again.
- After all the planting procedures, the soil around the seedling is mulched for optimal moisture retention and delaying the appearance of weeds. For mulch, straw or sawdust, as well as cut dried grass, are suitable. It is good if the whole row with new bushes can be mulched with a dense layer. This will keep the plantings attractive and will allow you to spend less time and energy on removing weeds and watering the plants.
- Further, the seedlings also need to be watered, fertilized and sprayed from pests, in addition, periodically loosen the soil and remove weeds. In a word, carry out all the usual manipulations as with other shrubs and trees growing in the garden.
Breeding nuances, taking into account the season
Currants can be propagated both in autumn and spring. Probably, every summer resident chooses the most convenient time for himself. You can do this throughout the summer. One has only to take into account the peculiarities of the region where the currant grows. For example, autumn breeding is not suitable for all areas.If in Siberia, for example, you decide to start rooting cuttings in early October in the open field, then most likely they will not take root, but simply freeze. But in the south, there is a good chance of getting healthy bushes by spring.
Cuttings can be prepared according to all the rules, and then planted in open ground, covered with a film or a transparent cap. Moreover, the procedure can be carried out in October, and by the end of November the cuttings have all the conditions to take root. Considering that the winter will be warm too, you don't even have to worry about a particularly thorough shelter. If frosts are planned, you can build a house for cuttings in advance using any covering material.
One has only to remember that the cuttings planted in the garden need appropriate care. They must be watered and make sure that the ground is moist, but not overly flooded. Periodically, you should open the shelter and ventilate the so-called greenhouse. As soon as it becomes clear that the cuttings have grown, the shelter can be removed. In regions with a harsher climate, it is better not to carry out such experiments in the fall, but to choose methods that are more suitable for spring, that is, to get new bushes using layering, choosing any convenient method - vertical, horizontal or arcuate.
In addition, when deciding to transplant part of the bushes, you can use the division method. During the spring and summer, with proper care, the bushes will take root and get stronger, which will provide them with a good wintering and a safe exit in the spring. But at the same time, in regions with severe frosts, all the bushes need to be covered for the winter. There is another option to prepare cuttings in the fall and store them in a cool place until the end of winter. Already at the end of February, you can place cuttings in banks, and wait for the formation of roots. As soon as they appear, you can transplant them into the ground.
But at the same time, you need to monitor the temperature. If it is still cool outside and there is a risk of recurrent frosts, it is worth placing the cuttings in the house, and only with the onset of real heat, send them into the open ground.


The comment was sent successfully.