How to make a workbench in a garage with your own hands?
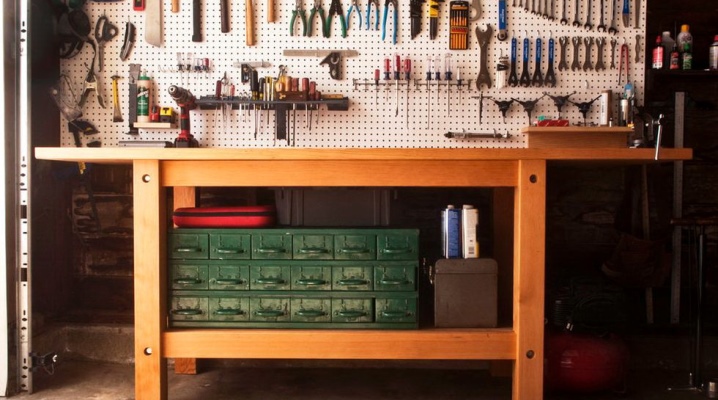
A workbench is an essential attribute in the garage of a professional auto repairman. It can even be installed in a repair ditch under a car driven into the garage, provided that the hole is wide enough and its depth exceeds the height of the owner of the house. But more often the garage workbench is installed near the parking lot, if the total square of the garage allows.
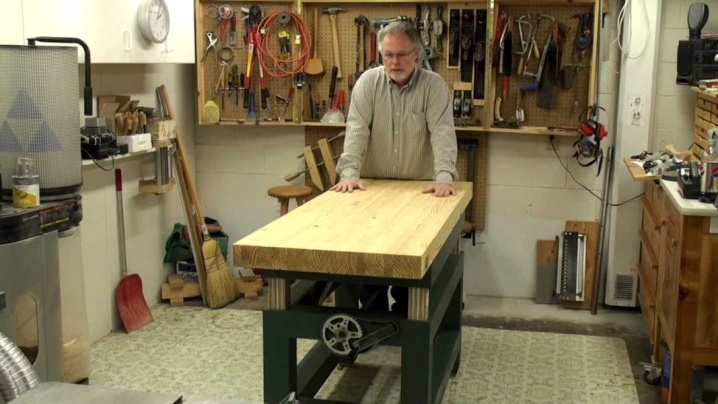
Preparation
Preparatory work begins with a revision of the available free space in the garage. It is necessary to ensure the passage of people to the car, opening the doors of the car itself, so that they do not bump into the workbench. When the garage is not wide enough in size and there is enough end-to-end space to start (or take out) the car and get into it (on one or both sides), then think, perhaps, you will need a workbench under the car (in a repair ditch). In the latter case, it should be:
- retractable and / or folding, to approach the place of repair, pushing it to either side;
- twice as narrow as the ditch itself.


Having decided on the location, select the layout of your universal repair table. There are dozens of ready-made blueprints for workbenches. If you are friends with drawing and sketching, and you know how to design in the slightest degree, calculating possible unfortunate moments and probable moves, then this is your way.

Drawings and dimensions
A high-quality garage workbench starts with dimensions - the floor space and the amount of space available for it. The workbench drawing is based on the following points:
- Worktop height - the distance from the floor to the bent elbows of the master working while standing.
- Length - most often no more than 2 m, but to collect long structures (related or not related to the car), all 3-4 m may be needed.
- Width - no more than 1 meter.
- Frame length and width a workbench (including the so-called pedestal, or a shelf for drawers or without them), taking into account the legs, is 5-10 cm less than the corresponding dimensions of the countertop lying on it. But you can equalize these dimensions - they do this when boards are laid in a metal base, and a steel sheet is attached on top.
- Legs are made taking into account the dimensions of the workbench frame. Ideally, if they fit into its length and width, without bulging out in the corners. The height of the legs is the distance to the bent elbows of the worker, working standing, minus the thickness of the tabletop (at least 3 cm).
- Hanging shelves (with or without drawers) are installed on secondary beams under the table top, the distance to them is not less than 60 cm from the floor. Most often, the boxes are located in one row.
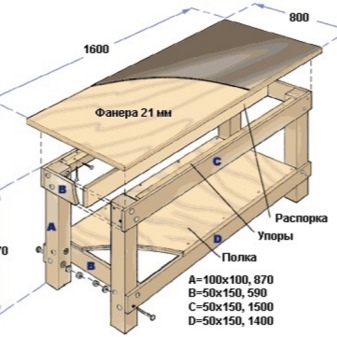

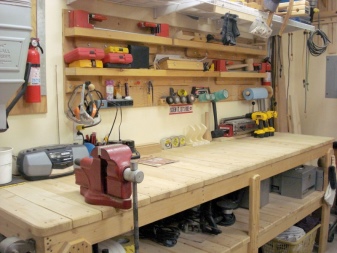
Joiner's workbenches are made mainly of wood - they contain metal pins, self-tapping screws, nails, furniture corners, as well as elements of a vice - a lead screw and its lock and lead nuts, possibly a bushing with a ball bearing.
But such a table is intended only for the manufacture of furniture and other wooden structures - it will not be possible to process and cook steel and non-ferrous metal parts on it.
A multipurpose workbench necessarily contains a steel table top, frame and legs - then it will withstand the weight of parts and structures in hundreds of kilograms, which cannot be said about the assembly of wooden products. It is easy to place locksmith's vice, sawing and drilling machines on it, equip a welding station. The table itself can be angular, hinged, folding, but hardly retractable.

Tools and materials
The necessary tools for a craftsman who urgently needs a workbench includes:
- a welding machine (an inverter one with an operating current of no more than 300 amperes is best suited), electrodes for 2.5, 3 and 4 mm, a protective helmet with tinted glass;
- building level;
- drill or hammer drill with an adapter for conventional drills, a set of drills for metal;
- grinder with cutting (for metal) and grinding discs;
- roulette-type ruler for 3 m;
- jigsaw with a set of saw blades for wood;
- screwdriver (in its absence - a universal screwdriver with a set of slotted, cross and hexagonal nozzles).


The following are suitable consumables:
- profile pipe 60 * 40 mm (wall thickness - at least 2 mm, total length - from 24 m);
- steel strip 4 * 4 mm, strip length - about 8 m;
- sheet steel with a sheet thickness of at least 2 mm;
- plywood with a thickness of at least 1.5 cm (it is undesirable to use a smaller one - the rigidity of its walls will be insufficient);
- self-tapping screws with a thickness of at least 5 mm;
- a hairpin with a size of at least M12, nuts and washers (grooving, ordinary enlarged) for it;
- corner profile 50 * 50 and 40 * 40 mm (steel thickness - at least 4 mm);
- natural wood boards with a thickness of at least 5 cm;
- primer-enamel for rust and paint for wood.
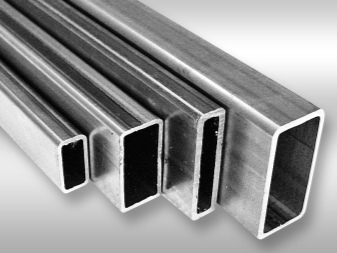

Not the entire profile is delivered perfectly clean - if the day before there was a rainstorm, and the consignment of iron was not sold out by the building market on time and lay in a warehouse that was not equipped with a shed, a thin layer of rust appears on ordinary steel, which is easily primed with the appropriate composition.

Manufacturing steps
A do-it-yourself workbench in a garage is a very real and feasible task even for a beginner.
Made of wood
For a wooden workbench, the sequence of work will be as follows:
- Plywood and timber sheets are sawn into segments according to the scheme.
- Assembling the workbench frame - all horizontal and vertical rungs. Additionally, triangular jibs are placed - the best and easiest way to strengthen the frame, protecting it from loosening and breaking.
- Burrs and sharp edges on parts are sanded with a grinder with an emery wheel... For coarse smoothing, a grinding and brushing disc can be used.
- Workbench base - completely screwed and knocked down frame - turns over and is installed in the place where it will stand fully assembled. The plywood of the countertop is screwed to the base.
- A low wall is attached to the back of the workbench, preventing parts and some tools from falling over the table, since small parts and consumables (for example, drills less than 3 mm) cannot be found immediately, even if the garage floor in this place is perfectly flat and does not have cracks and potholes.
- A hanging shield is assembled for hand tools. However, seats are also allocated for a small power tool. Such, for example, a home-made drill, or a mini-drill that allows you to drill mounting holes in printed circuit boards - it uses drills up to 1.5 mm.
- The drawer shelf is assembled immediately after the worktop is installed. A sheet of plywood of the same thickness is screwed onto the finished lower crossbeams. All sharp edges must be leveled and rounded.


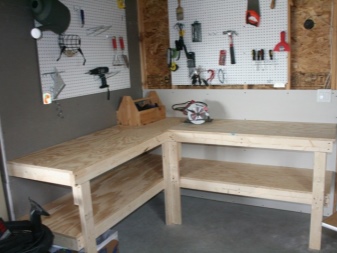
The assembled product is covered with anti-mold and antifungal impregnation, as well as a non-flammable compound. The entire table is painted over with paint or non-flammable and moisture-resistant varnish. After the staining layer is ready for further work of the table, the electrical wiring is mounted - a power cable, sockets and switches. They put a vice, machines and devices - depending on the types of work to be performed frequently. This list of works is typical for a typical project of a wooden workbench.
In the presence of additional elements and structures that are not quite typical for most garage workbenches, the assembly order may change.

Made of metal
It makes sense to weld a metal - most often steel - workbench if you are not only a home carpenter, but also an installer, locksmith, turner, milling machine operator and professional auto repairman. To create the base of a steel workbench, do the following:
- Mark and cut the profile, sheet steel and corners into parts, referring to the finished project. So, a professional pipe is needed to give the future frame rigidity, elasticity and strength, without which a multidisciplinary master cannot do. Corners are more often used when constructing edge edging - they allow the workbench to gain ultimate strength. The corner profile is cut into several components, ready for assembly of the supporting structure of the future table. The structure itself also carries the countertop, under the sheet during final assembly, you can place boards pre-impregnated from combustion and microflora, because the sheet itself bends. For the installation of the guides used when placing the side panels, a steel strip is used - it will be needed to fix the brackets connecting the frame and the plywood of the table top. Drawers are also assembled from pieces of plywood.
- If specific dimensions are specified, then pipe sections are required to connect the upper part, for example, 2 x 220 and 2 x 75 cm... After welding the upper frame, an angle profile is mounted on it. In it, in turn, support boards are placed to hold the metal sheet of the table top so that it does not bend under the weight of massive parts and structures that are subsequently processed by the master. Additional strengthening of the table top is performed by welding several pieces of the professional pipe - they are 0.4 m apart from each other. These segments will give the structure special resistance to deformation and distortion.
- Next, four legs are welded to the workbench from the sides.... It is recommended to maintain the length of each of them at least 0.9 m - for most people of average height or when the master works mainly sitting. To give even greater strength, additional horizontal crossbars are welded to the legs.
- To place the tool, you need a panel crate... It is made from steel corners. Two are located on the side, a couple more - closer to the center, these corners additionally strengthen the structure. The dashboard is welded to them.
- To strengthen the resulting base, bracket fragments are used, cut from the strip, - 24 pcs.... A stand for the boxes is fixed to them for the central holes with the help of bolts and nuts.
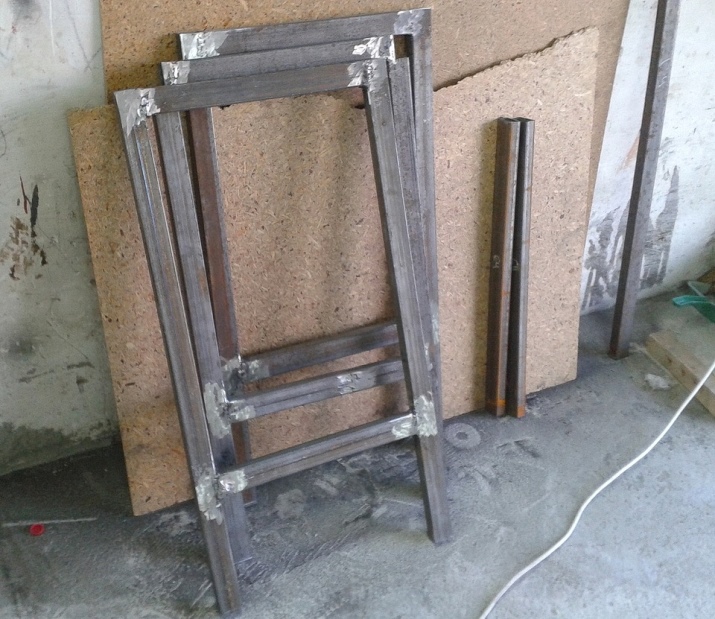


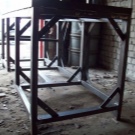

The base of the table is complete. To craft crates, do the following:
- Mark and cut a sheet of plywood pieces according to the drawing.
- Attach them to each other - this is how drawers are assembled. Their number for a start is 2 or 3. The remaining space is used for open shelves.
- Weld steel strips for boxes between the side sections of the compartments... Drill holes in them - they are needed for the internal installation of the guides along which the boxes move.
- Install the assembled crates and check their operation. They should slide without jamming and without much effort on the part of the master.


Final work on the steel workbench
Make sure that the structure does not contain poorly welded seams, excessive drops of steel. If defects are present, correct them before painting.
Prime the assembled table (if there is rust) and paint over with paint that adheres well to the metal.
Often they use car paint to cover car bodies.

Make sure all joints and welds are completely covered - poorly painted steel or missing spots, dots can lead to rust soon after the table is assembled.
After waiting for the structure to dry completely, lay the boards pre-sanded and soaked in the necessary compositions under the countertop.Arrange them somewhat loosely - the tree shrinks when it dries and expands when the humidity changes, picking up moisture. The approach here is the same as when installing siding panels on a house or a technological gap between the door leaf and the frame, a gap in the floors around the perimeter. This will prevent the tree from deforming and not bending in the heat - the temperature coefficient of expansion is also respected.
Welding is not recommended to secure the metal sheet as a countertop cover - nearby boards can become charred. Use self-tapping screws or countersunk screws.


Safety engineering
Be sure to ground the workbench. The fact is that electromechanics are mainly motors, and during operation, when current is applied to the windings, an alternating magnetic field is induced in the cores of the coils and circuits. This applies to all motors that do not operate on direct current - a voltage of up to several tens of volts arises between the case and the ground. To divert them, the workbench itself and all these devices are grounded. Grounding is possible both through the reinforcement of the building, and through a separate metal sheet with a reinforcing bar, buried in the ground next to the garage where the master works.
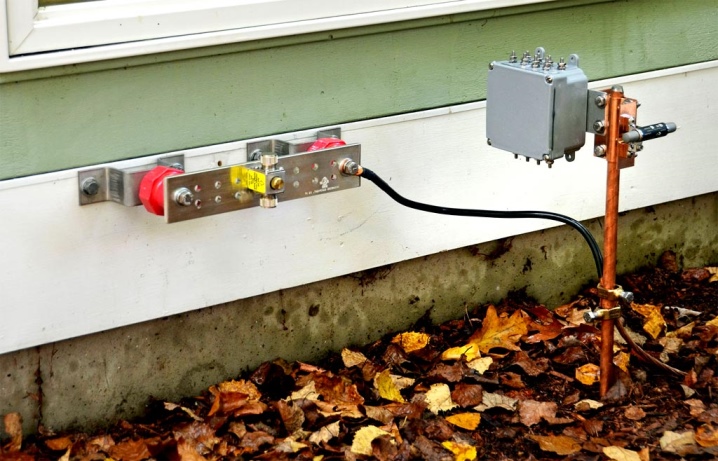
Fix a stationary (non-movable) workbench on the floor and walls - this will prevent the entire structure from suddenly falling down when the work requires swinging forces.
There have been cases when a workbench installed on an uneven floor and overloaded with tools and blanks, hanging several hundred kilograms during work, crushed a person or led to hand injuries and even amputation of limbs. The fallen structure simply broke the bones of working people who did not have time to step back in time.
The cross-section of the wires must be sufficient to withstand the power, for example, 5-10 kilowatts. The main consumers are a hammer drill, a grinder, a welding machine and a sawing machine.


Arrangement
It is possible to equip a workbench table only after its complete assembly and installation:
- Install the switchboard. Automatic fuses are required - mainly 16 amperes in operating current. The inverter welder may require a 25 amp automatic fuse.
- Some masters install an additional electricity meter - for auxiliary control of electricity consumption by the workbench and prevention of excessive consumption of electricity.
- Install multiple outlets... If some work requires a special mode, a "smart" socket is used, which will not turn on the electricity until the room cools (or heats up) to the desired temperature.
- For power tools, equip shelves with small edgespreventing, for example, a screwdriver and a drill from shifting from vibration to the edge and falling.
- For the welding station, you need an LED spotlight that clearly illuminates the welding site. When the master puts on a regular darkened helmet, due to the absorption of up to 98% of the light and ultraviolet radiation from the welding by the glass filter, a clear examination of the joint to be welded is required - before starting the electric arc. This will make it possible to cook metals even in the evening, when it is already dark. For the rest of the work, a table lamp is required.
Additional ideas and options depend on the list of types and types of work.


A detailed overview of how to create a workbench for a garage or workshop with your own hands is presented in the following video.


The comment was sent successfully.