Tool racks: overview of types, selection and assembly

Many men dream of a roomy tool rack. The presence of such shelves will allow you to store all the tools in a convenient way for the owner, and will also help to competently organize the workplace. Today there are a huge variety of wall-mounted, movable, metal or solid wood shelving-shelves with drawers, trays for hardware and many other additional structural elements. Read about all types, features of the choice of shelves and how to make them at home.


Tool rack: types
First of all, you need to understand what types of shelves for storing tools there are. There are several classifications of designs. First of all, tool storage racks are distinguished by their type of attachment.
- Wall mounted. They are made of any material and can be mounted in special places on the wall. The storage elements can be arranged in the most convenient way for you. The disadvantages include the time-consuming process of moving the shelf. For its implementation, it is necessary to drill new holes in the wall.
- Stationary. The classic version, which is distinguished by its versatility. As a rule, it is attached to the floor with special corners and anchors. If the dimensions of the structure are not too large, it can be moved. Otherwise, difficulties may arise.
- Mobile (on wheels). The main advantage is the design mobility, thanks to which you always have all the necessary tools at hand. It is important that the rack stands firmly on the surface.
- Ceiling. Convenient design that does not occupy the working space in the room where it is installed. Such equipment is more suitable for storing tools that are not used too often.
- Transformers. They are ready-made structures with several racks and shelf supports that can be placed in any place convenient for you. It is only important to fix the racks well, and you can place the shelves in any place convenient for you. Their position changes quickly and easily.
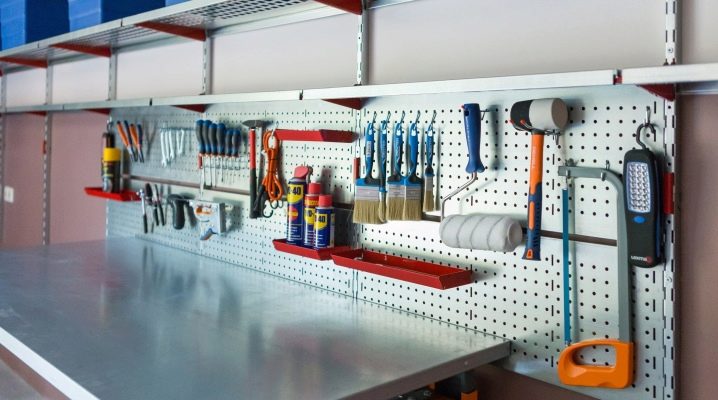
- Perforated. Such models imply a metal sheet with special holes or a mesh. They are installed on a flat surface, after which shelves, clamps and all the necessary tools can be placed on them.


The following classification is based on the materials from which the structure is made. Usually there are 2 main options.
- Wood. It is often used because of its flexibility in processing. There will be no problems with wood during installation of even the most complex structure. The low cost of the material makes many people opt for this option. A wide variety of sizes of bars and boards is characteristic, which allows you to build a rack of any shape and volume. The main disadvantage is the need for timely and high-quality processing of the material, since it does not tolerate sudden changes in temperature and moisture.
- Metal. Durable material. Compared to wood, metal processing is more time consuming. Self-creation of a rack is impossible without the skill of metalworking. For the construction of the structure, profile pipes are used, which are interconnected by corners.Most often, ready-made products are bought from this material, which simply need to be assembled.


How to choose?
There is a huge variety of shelves. Even if you have opted for a particular type of equipment, you should not neglect the advice of experienced craftsmen. There is no need to be intimidated by a wide range of products. The main thing is not to forget to pay attention to the following criteria.
- Material. If you decide to purchase a ready-made structure, then it is better to give your preference to metal models. For self-construction of shelves, a more practical solution would be to choose wooden elements.
- Dimensions. It is better not to choose and not build too large a structure, which in the end will not be very convenient to use. The most optimal shelf width is 50 centimeters. If they are larger, then the tools will be difficult to reach, and if they are smaller, they may not fit and fall.
- Configuration. You need to focus on your personal requirements. Pay attention to the presence of various kinds of shelves and drawers. During installation and the subsequent period of operation, the structure must fit well and be easy to use.
- Load. It is necessary to familiarize yourself with the parameters of the model you want to purchase. If electrical appliances are stored on the shelves, then the load on the shelves will be many times greater. If you miscalculate, the shelves will begin to sag and the rack will not last long for you.
- Possibility of regulation. If this criterion is important for you, then buy ready-made metal structures. Self-constructed structures cannot be moved, since they are attached to a rigid fixed frame.


How to make it yourself?
To have a rack with shelves in the garage or in your workshop is the dream of any craftsman, since all the necessary tools are always at hand. If, for one reason or another, you want to make a shelf for storing tools yourself, then you need to follow this sequence of actions.
- Materials. It is best to use wood as it is much easier to process at home. This material is also more affordable.
- Drawing. It is almost impossible to make a high-quality stable structure without a sketch. Thanks to the developed drawing, you will be able to understand what the final result should be and what parameters the elements of the product should have.
- Element markup. For a complete structure, vertical struts and crossbars are required. It is necessary to make markings on the bars in accordance with your drawing.
- Cutting bars. It is better to make individual elements in a certain order, so you will not get confused. You need uprights and jumpers for both wide and narrow portions of the rack. Their number and parameters will depend on the estimated number of shelves and the overall dimensions of the structure.
- Oriented strand board (OSB) cutting. A plate is used, the thickness of which is from 16 to 20 millimeters. This material is not afraid of an increased level of moisture, it is quite tough and durable. Do not forget to measure and mark before cutting.
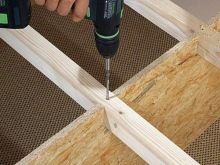
- Side support setting. It is necessary to place vertical posts on the floor and align them. Next, jumpers are placed on them. After that, holes are made for self-tapping screws. It is important that the drill is 1 millimeter smaller than the fixing diameter.
- Fastening the jumpers. They must be screwed in with self-tapping screws. Each connection must have more than two fasteners. On each post, the fasteners must be installed on different sides.
- Rack fixing. The uprights must be aligned exactly to the width of the drawing. To do this, you can use already made shelf elements.
- Fastening of jumpers. First, the upper and lower jumpers are attached using self-tapping screws. So the frame will immediately become resistant.After that, you need to fix all the other jumpers. A construction triangle can be used to make the fixation accurate. It is necessary to turn the structure over and insert the shelf frame into it. Then insert the block and secure with self-tapping screws.
- Installation of OSB shelves. You need to insert the blanks and align them. Fixation takes place at the expense of self-tapping screws. The step between the mounts should be about 30 centimeters.
- Installation of wheels. It is best to use wheels with brakes. Self-tapping screws with a diameter of 6 millimeters are suitable for fixing. The holes on the product should be 1 millimeter smaller in diameter. For the stability of the structure, it is best to place the wheels at the corners.


At the end of the manufacture of the shelf rack, once again make sure that the final version matches your idea and sketch.
Then check the strength and stability of the structure. If everything is in order, then you can start operating.


How to organize a storage system for tools in the garage, see the following video.


The comment was sent successfully.