Tool cabinets: types, materials and production
It's nice when a man knows how to do everything with his own hands. But even a virtuoso master needs tools. Over the years, they accumulate and take up a lot of free space in the garage or in the country, and sometimes in the apartment. Tools laid out in a chaotic manner get in the way when there is no need for them. They are annoying when you start to tinker with something and spend a lot of time looking. To put things in order and put everything on the shelves, you need a cabinet for tools. For a man with "golden hands" to build a wardrobe is not a problem, but a pleasure.
Views
A tool cabinet for storing repair electrical equipment, garden tools and thousands of useful little things is convenient and relevant, wherever it is, with a farmer in a village or in a city apartment. Such types of furniture can differ from each other in many ways: in shape, size, material, design, their purpose and location. These can be factory products or handmade.


Materials (edit)
Metal
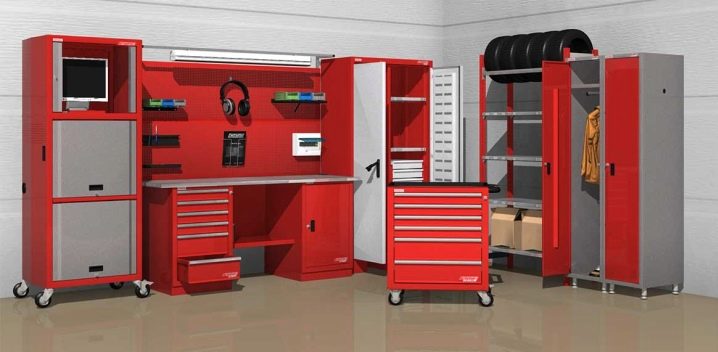
Iron products can be purchased ready-made. The industry produces them not only in the form of cabinets, but also as work furniture sets. Metal belongs to particularly strong materials and can take a large load, concentrating on one shelf a number of dimensional tools or organizers with hardware products. The base cabinet made of metal has wide drawers, several lower shelves are designed for storing large items.
A large area (back wall and doors) is occupied by perforated surfaces, on which tools can be easily fixed. On the doors there are small container shelves for small items. To help the workshops, a convenient metal sectional set is produced. Wall cabinets for spare parts are fixed permanently, and the floor part is made in the form of modules on wheels and is mobile. Any of the modules can be easily brought to the workplace.


Wood
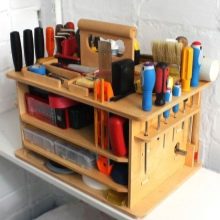
Wood is a pleasant, environmentally friendly and malleable material for processing. It is she who is chosen by home craftsmen to carry out their projects. You can make your own multifunctional tool cabinet out of wood, embodying all your ideas in it. Sometimes, with the help of sliding doors like a compartment, an entire workshop is hidden in an apartment. Here are 2 examples of wooden cabinets, one of which is made by hand, and the other is made in an industrial environment.
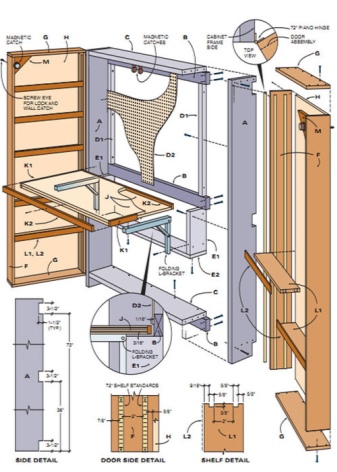
- The master made a convenient cabinet for his specific set of tools. When closed, it is a wall box and does not take up much space. If you open it, you get shallow furniture in which everything is at hand. The open doors double the storage space. The transforming desktop hidden in the closet expands the functionality of the structure.
- Thanks to the beautiful woodworking and carved facade, such furniture can even decorate a living room, as soon as it is closed. The closet contains large and small drawers, shelves of different diameters, pockets and fasteners for storing small items.


Plastic
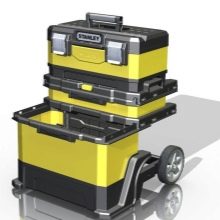
Cabinets are made in industrial conditions from extra strong reliable plastic. They are usually small, desktop or mobile.The tabletop type of plastic cabinets is designed for a lot of work little things. The mobile design in the form of a set of containers is convenient in that it is able to contain tools of different sizes and move in the desired direction.

Combined
Tool cabinets can be produced from several types of materials. For bulky items, a solid base is used, and little things can take light plastic shelves, boxes, containers. Sometimes furniture is equipped with pockets made of dense fabric.
- We offer two examples when metal cabinets are fully or partially filled with plastic in the form of convenient removable drawers.
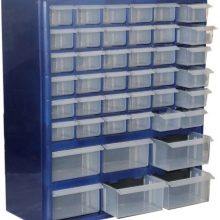
- The following example relates to a wood product containing a large number of identical plastic containers.


Make a wardrobe yourself, the easiest way is from a board. Its quantity is determined by a previously developed sketch and calculations. Since the board is chosen as the main working material, the load of the contents of the cabinet will fall on it. The tool has a lot of weight, therefore, and the thickness of the board should be considerable. During the selection, preference should be given to dry material, otherwise the product will subsequently deform during the drying process. A quality board should not have knots and cracks. For the cabinet, you can choose inexpensive hardwood or pine. Shelves and a frame are made from the board.
To create the back wall of the cabinet and partitions, you will need a sheet of thick plywood. The cabinet is filled with tools as much as possible, the walls and doors of the structure are used. It should be remembered that plywood cannot take the load of heavy tools, and the bottom of the product cannot be made from it. After examining the sketches made in advance, you can understand which parts of the wooden cabinet are filled with plywood.
A bar may be needed for the lower base, runners, legs. In addition, you should stock up on metal furniture corners, door hinges, screws, nuts, screws. Having collected all the material and prepared the tool, you can get to work.


Location differences
It is not always possible to find a full-fledged place for a cabinet with tools from ceiling to floor. Sometimes it is hung on a small free section of the wall, set on a table or transported in the form of a suitcase, mini-table to different parts of the room.
If the architecture of the room has a niche, it is also possible to arrange a cabinet for tools in it, hiding it behind any kind of door.
Here are examples of cabinets designed for different locations.
- Wall types of structures are widely used.
- Floor-standing cabinets can contain a large amount of work tools.
- Desktop cabinets are convenient because tools are always at hand. If desired, they can be transferred to the work site.
- Carrying products do not even need to be carried, they are easily moved on rollers to any place in the space.


Drawings and diagrams
Ready-made drawings and diagrams can be found on the Internet, but then you have to adapt your tool to someone else's cabinet. If you have the skill and desire, it is better to build furniture according to your sketches. A place is initially selected for the design, and your own drawing will fully meet its dimensions, that is, the cabinet can be entered into any free niche in the garage or apartment.
It is important to visually assess the number and composition of your tools before sketching.
Immediately think over the shelves for large equipment (punch, jigsaw, drill) and take into account that they are in the boxes. The lower 2-3 shelves are assigned to the oversized tools, they are made of a thick board, mounted on a solid frame.

Hammers, chisels, screwdrivers are placed on a perforated wall or fixed to a door. When designing furniture for tools, they try to use every free centimeter of the plane, and doors are no exception. Drawers with small items can be placed above the oversized shelves.For convenience, it is better to make them removable, this will allow you to transfer containers with screws, nails and other trifles to the workplace. For such purposes, they also use pockets located on the wall.
The cabinet is designed in such a way that any thing is easily accessible, which means that it should not be deep.
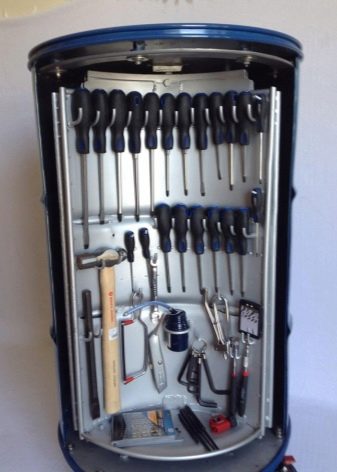
When making calculations, you should take into account the thickness of the shelf board. You can add lighting to the project over furniture or over each shelf. By the way, craftsmen make designs for tools not only from new materials. When it comes to country or garage options, they use old furniture, broken refrigerators. The semblance of a cabinet can even be built from an iron barrel.

How to do it yourself?
Before installing the cabinet, check the evenness of the floor and the quality of the board. It must be sufficiently dried and treated with antifungal agents. Next, the diagram is studied, you will often have to look into it. A frame made of thick beams is installed. As a rough version, it is fixed with self-tapping screws, checked with a level, whether the supports are evenly exposed. Then all connections are strengthened with furniture corners.
When the frame is ready, install the back wall, sides and bottom. Holes for screws are pre-drilled on shelves and other installation elements. The shelves themselves are joined to the sidewalls using metal corners. The legs for the cabinet should be made in advance or you can buy ready-made ones. Before screwing them in, the timber should be fixed at the bottom along the perimeter. The legs are mounted to the surface of the timber. To create boxes from a thin bar, frames are made and the walls and bottom are already mounted to them. The finished cabinet can be varnished or painted.


How do I arrange the tools?
If the cabinet was made with his own hands according to his own drawings and diagrams, by the end of the work the master already knows what and where he will have. To equip the purchased furniture, you should study its capabilities. Each owner of the cabinet fills it with his own tools, they differ significantly. For example, the filling of an electrician's shelves will be different from that of a carpenter. At the household level, tools are most often used for construction and plumbing work around the house, for creating simple furniture, car repairs or summer cottage inventory.
Dimensional devices are installed on large reinforced shelves, it can be an electric saw, a renovator, a grinder (grinder). A construction vacuum cleaner or a work table may well fit in massive cabinets. If the back wall is a perforated surface, anything is hung on it: hammers, scissors, pliers, screwdriver sets, paint brushes, tape measures.
Paints, aerosols, glue, polyurethane foam, and sealants are placed on small shelves. Building levels, hacksaws, wrenches, grinding discs are hung on the door. Small boxes, pockets, containers are designed for many small things: screws, nuts, nails, mini-corners. Sometimes little things are laid out in plastic organizers, and they are placed on shelves.

Successful examples
You can always look on the Internet, from what and how to build a tool cabinet. The most extraordinary ideas are found there. Finished industrial products are also offered. Let's consider the most successful examples.
- Such a wonderful cabinet can be made from an ordinary metal barrel.

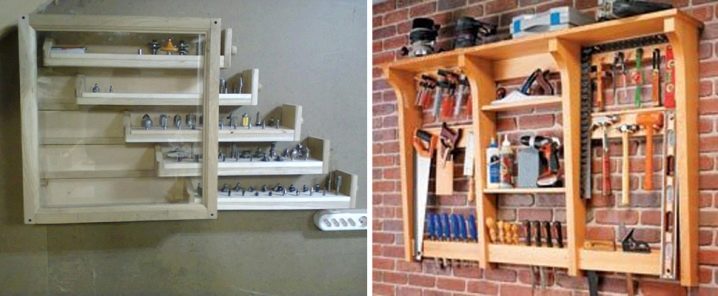
- Miniature hanging cabinets can beautify any workshop.
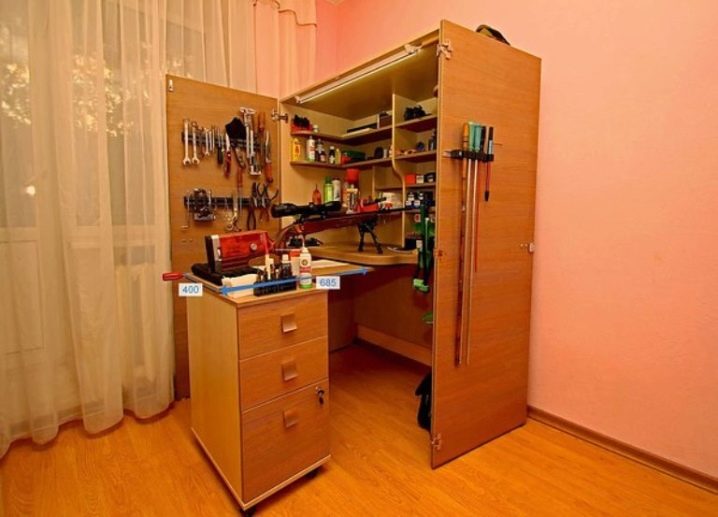
- Furniture with a pull-out chest of drawers.
- The beautiful closed design makes for a compact box.
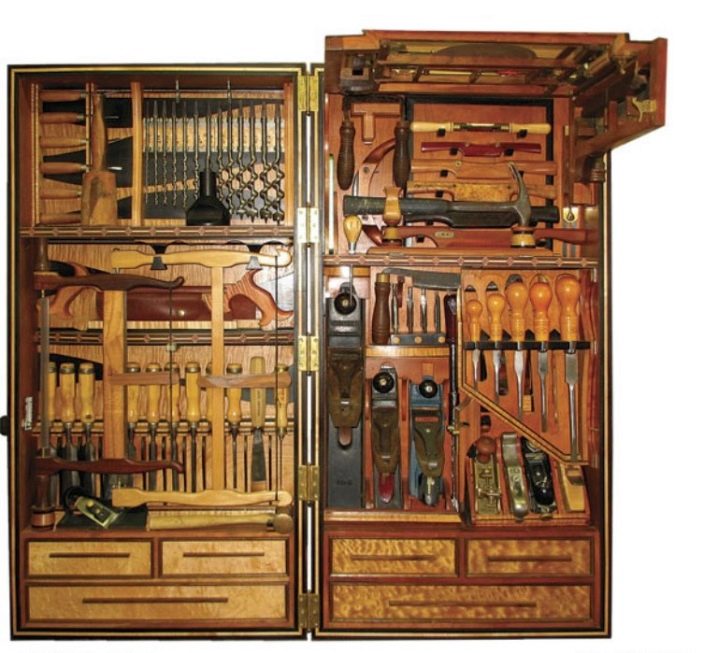
- Examples of tool storage on a door leaf.


The cabinet assembled for tools is not only useful and functional, but also pays tribute to the skill of the owner, who can rightfully be proud of his work.
See the next video for more details.


The comment was sent successfully.