How to make a toolbox?
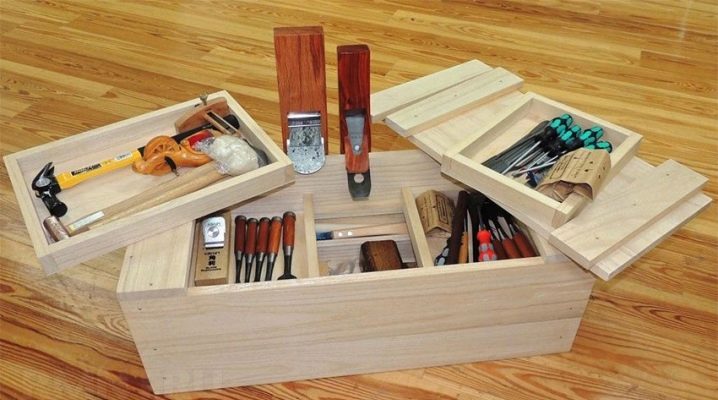
People of working specialties, and just lovers of tinkering at home, need a place where all the necessary equipment will be located. If the equipment is small and lightweight, belts are often used. But when you need to bring a lot of tools of different sizes and weights with you, you cannot do without a high-quality box for such products. You can buy such products in a store, or try to make a box with your own hands, making it convenient for use in specific conditions.
Peculiarities
The toolbox can have a different appearance, depending on the size and weight of its contents. In order to choose or make such a product for yourself, it is important to understand the differences between the options that exist at the moment.
There are design variations depending on what exactly will be placed inside.
- Non-professional - can be in the form of any container in which there are compartments or compartments for placing the instrument. Most often, bags and boxes of different sizes are used.
- For power tools - they have special compartments in which a screwdriver, a drill can be conveniently and compactly placed, there is also a place for a grinder. The peculiarity of such products is the presence of a main, large compartment for the tool, as well as several small ones for accompanying elements.
- Professional - suggest specific offices for a specific instrument. Convenience lies in the minimum size due to the clear placement of all content.
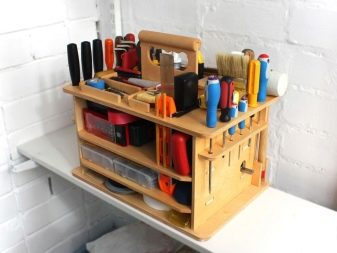
- Universal - may have a different appearance and material of manufacture. The essence of such boxes is that they contain a large number of various tools. Due to the presence of many boxes and the ability to place partitions in them at will, you can correctly and conveniently organize the workspace.


If you want to build a homemade box for carpentry or other tools, you should navigate the types of designs of such products.
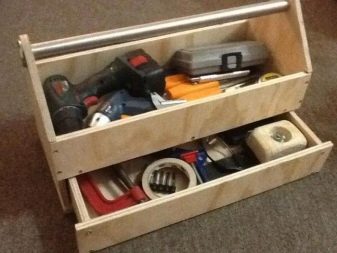
- Case - a container having a rectangular shape with a handle on top, for which it can be moved. There are often several compartments inside, the size of which can be varied using removable partitions. The convenience of the cases lies in the miniature size and lightness of the entire structure.
- Container - is a box consisting of separate containers that are folded into a single structure according to the principle of a nesting doll, and are laid out upward or to the sides. Usually this option is quite bulky and heavy, therefore it is often equipped with wheels for easy transportation.
- Multibox - looks like a small structure with drawers moving forward, like in a storage chest of drawers. The height of the boxes can be either the same or different, depending on the tools that are located there. More convenient will be those structures in which it is possible to fit almost all available tools.
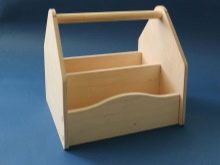
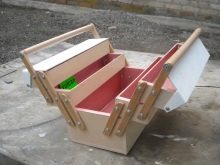

Having a complete knowledge of what tool boxes are, you can correctly determine what exactly needs to be done and what kind of product the product will have.
Required materials and tools
The tool box can be made from a variety of materials.
- Wood - the most affordable option in the price range, with which it is easy and convenient to work.To make a box with your own hands, you can take a board or a durable sheet of plywood with a thickness of 10 to 18 mm. It is possible to independently adjust the height and width of the structure, as well as its internal structure.
- Metal - often steel or metal sheets are used. The disadvantage of such products in weight, the boxes are heavy, but they are much more reliable and stronger than wooden ones, which is their advantage. If you want to make a durable container for storing tools, but lighter, you should use aluminum.
- Plastic - the lightest material for tool boxes, which are difficult to make yourself, but can be purchased at any hardware store. A variety of shapes, sizes, colors, and designs allows you to choose exactly the option that will be most convenient.
The process of creating any structure requires the availability of materials and tools to create it.
As already noted, among the main materials from which a box can be made, one can single out:
- plywood of the required thickness, at least 10 mm;
- a board, mainly made of pine;
- metal - steel, aluminum;
- plastic.


Depending on the material chosen, you need to have with you a set of certain tools to create the desired structure. Among the most popular are:
- cutting tool - saw, hacksaw, grinder, knife;
- drill with a set of drills;
- scissors for metal;
- hammer with nails;
- chisels of different sizes;
- manual frezer;
- a ruler with a pencil;
- roulette;
- screwdrivers or screwdriver with self-tapping screws;
- clamps;
- waterproof glue.
If the box has a simple design, then it is worth making a lock in it, which will prevent the container from suddenly opening. For this, a miniature snap-on metal clasp can be used, which snaps into two metal ears connecting the base of the structure and the cover. Plastic clips can be used - they are more convenient to use, but they must be correctly installed and used with care.

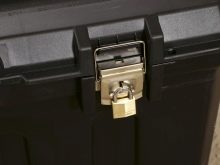

It is important to think over the design of the product itself. It can be made in the form of a spacious box, inside which the tool will be laid, or it can have a more complex structure with additional containers.
The guides will make it possible to use these roll-out containers with greater convenience, as well as save the useful space of the box.

Step-by-step instruction
To make a reliable and convenient toolbox with your own hands, you must have some knowledge of its design. The most important requirements are:
- the correct choice of material and its thickness for the bottom of the structure - it is it that accounts for the bulk of the weight during operation;
- when selecting material for a structure, it is worth assessing the weight of its contents after full loading, while it is very important that the walls of the product do not deform under the created load;
- if possible, it is better to choose the material for the box that is not flammable;
- The finished product must be such that there are no gaps or holes through which dust or dirt can enter the interior, which will adversely affect the tools.
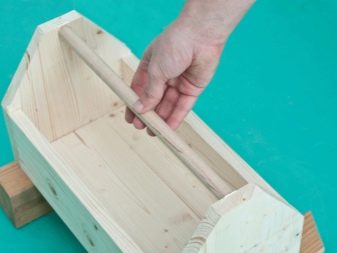
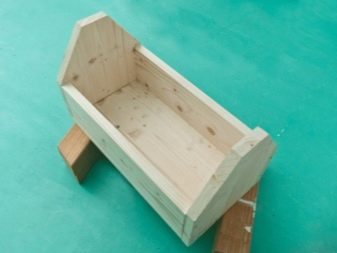
Making a toolbox can take a different amount of time and effort, everything will depend on the experience of the master and the complexity of the design. In order for the structure to have the required dimensions, it is worthwhile to initially make its drawing on paper, and then transfer the image to the material from which it is planned to create the object. It is the template that helps to see all the design flaws even before its creation. To avoid unnecessary mistakes, do not skip this step.
Having all the necessary tools for work is just as important, because the thickness and density of materials can vary significantly, and you may not be able to get by with one thing.You can cut out parts from plywood using a hacksaw, a saw is suitable for wood, and a grinder is needed for metal. The same applies to the assembly options for the entire structure.


If nails and screws are suitable for wood and plywood, then the metal only needs to be boiled.
By the time the box is created, you need to already accurately determine the design of the product, it can be:
- folding;
- sliding;
- portable;
- rolling;
- made from a barrel;
- installed on wheels.

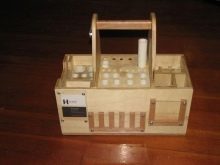
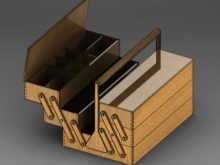
The procedure for creating a toolbox will differ depending on the selected material and design features, therefore it is worth considering each option separately.
Wooden
For the process of making a wooden box, you need to decide on its appearance, as well as the amount of inventory that will be in it. Most often, such structures are made of plywood or wood. The first option is appropriate for small products in which something too heavy will not be carried, the second - it can accommodate any inventory that will be needed in the work.
The simplest option for making a box will have the following sequence of work:
- draw a drawing on paper, check the correctness of all measurements;
- pick up moisture-resistant plywood with a thickness of 8-10 mm for the walls and 15-18 mm for the bottom, transfer the drawing from paper to material;
- cut out all the parts and sand the edges with sandpaper;
- glue the elements together, while it is best to initially choose a system of grooves so that the structure is more durable;
- after gluing, additionally knock down all joints with thin nails for reinforcement;
- for ease of transportation, you need to supplement the structure with a handle - it can be either metal or made of scrap materials that can withstand the weight assigned to it.


The construction of a wooden box will have a similar course of work, but in this case the fixing of the parts is not done with glue and grooves, but with screws and nails.
Products can have a lid and can be supplemented with fabric pockets for maximum filling of the box with tools.
Metallic
It is more difficult to make a metal box at home, but the product will turn out to be durable and reliable. The iron box is created according to the following principle:
- selection of the appropriate material, lightweight and reliable, easy to use;
- marking and drawing of the future structure;
- cut out the product with metal scissors;
- gently bend all parts, creating the necessary structure;
- the side parts should be higher so that they can be additionally bent, reinforcing the entire structure.
The size of such a box can be any, and if you wish, you can also make a lid for it, which will either be put on or closed by soldering the curtain to the box. For a closing product, it is important to make a lock, especially if the inventory inside is large and heavy.


Plastic
At home, a plastic toolbox can be made from a canister or large plastic water bottle. The process of creating such a product is quite simple.
- Find the right material for work.
- Determine the cutting line of the main part from the top, which will be used as a cover.
- In the upper part, make 2 holes on one side and one on the opposite. Ropes will be threaded into two holes, fixing the lid on the container, in one - a bolt is attached to the washer, which will act as a fastener.
- To connect both parts, holes are made in the canister in the same place as in the lid.
- Pull the rope through the holes, fasten, make a loop in front.


The convenience of this option is in its simplicity and accessibility, in addition, the container turns out to be light, and it is convenient to carry it thanks to the existing handle.
The choice of the option for self-creation of a toolbox depends entirely on the abilities and ideas of its creator, as well as the inventory that will be transferred there.
For information on how to make a budget toolbox with your own hands, see the video below.


The comment was sent successfully.