Features of screwdriver repair
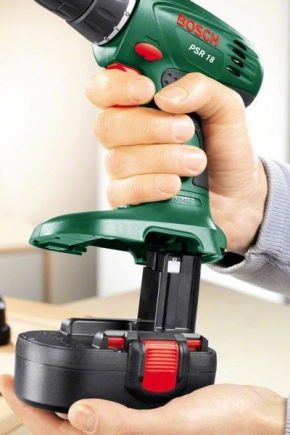
The screwdriver is a popular and irreplaceable tool. It is used both in domestic conditions and on various kinds of construction sites. In the process of many works, you simply cannot do without it. But as befits a complex and functional technique, the screwdriver is susceptible to breakage. Even the most expensive and high-quality instrument is not insured against this. Today we will take a closer look at how you can fix such a useful device, and also find out what problems happen with screwdrivers most often.

Device and principle of operation
Before proceeding to self-repair of such a tool as a shururpovert, you should understand in detail its structure and principle of operation. Only with this information, it will be possible to repair the device, and not harm it.

The basic components of any modern screwdriver are:
- Electrical engine;

- planetary gearbox;

- start button that can be adjusted;

- reverse type switch;
- part that regulates efforts;
- power unit.

The electric motor in the construction of the screwdriver is characterized by the fact that it operates from a direct current network. By its design, it has a special cylinder shape. In the inner part of the engine there is a special anchor with brushes and magnetic parts. A distinctive feature of such a scheme lies in the fact that the direction of the supply voltage flow always tends to the above-mentioned brushes located inside. If the polarity changes, then the reverse motion of the engine is carried out.

The planetary type gearbox is considered a very serious componentresponsible for converting high-frequency gross vibrations of the electric motor into low-frequency revolutions of the chuck shaft. Typically, these components are made of durable and wear-resistant plastic or metal. Often, models of modern screwdrivers are equipped with gearboxes designed for a couple of speeds. The transition to the first speed mode is required to work with self-tapping screws. As for the second speed, if you set it, you can drill wood, metal or plastic bases.

The function button "start" is necessary so that when it is pressed, the device starts up. With the help of this button, it becomes possible to keep the speed under control. In addition, it will be possible to choose the ideal rotational speed of the chuck shaft for a certain moment. Thus, a strong pressure on the "start" will provoke the engine to work at high speeds. If you press the button weaker, then the power indicator itself will weaken.

A reversing switch is required to carry out measures to change the direction of rotation of the device slider. This functional component is very convenient to use not only for the purpose of twisting, but also unscrewing the fasteners.

As for the force regulating element, it should be noted that it is responsible for determining the speed of tightening the screws. In modern demand copies of the screwdriver, there is often a variable gradation with 16 steps. It makes it possible to identify as accurately and seamlessly as possible which tightening speed will be ideal when working with a variety of materials.

The power source for such a device is a battery.Their voltage power ratings are capable of ranging from 9 to 18 V.
Frequent malfunctions
Having figured out how a modern cordless screwdriver is arranged, you can safely move on and consider what problems are typical for such a tool.
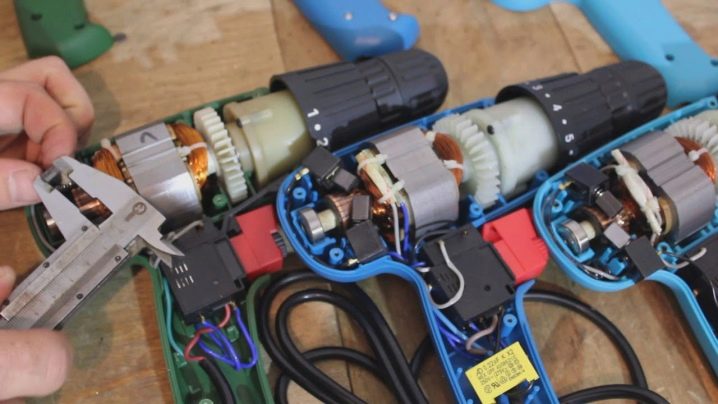
If at some point you notice that the tool simply does not start, then perhaps it was struck by a certain malfunction. In practice, the situation is that a non-working tool can be such for two main reasons:
- breakdowns, in which such devices stop working, in many cases are caused by problems associated with their electronic "stuffing";
- many breakdowns of modern screwdrivers occur due to mechanical damage.
If we understand directly the objective reasons for the breakdown of such tools, then we can distinguish a number of characteristic features:
- at some point, the technique stops turning on;
- the speed regulator stops functioning normally (it may stop working altogether);
- the reverse stops its work.

With regard to the mechanical problems of such devices, there is often significant wear on the parts located in the interior of the tool. For example, the characteristic crackling sounds of the mechanism can come from the screwdriver. In most situations, a broken screwdriver will make unusual noises where the bushing is seriously worn or the bearing has collapsed. Hammer tools often encounter these problems.

And also the following problems can be attributed to the most common problems with screwdrivers:
- malfunctioning of the battery (the charger may stop charging it, or the device stops charging);

- severe wear of the brushes located in the inner part of the engine;

- breakage of the starting button;

- beating of the cartridge;

- may not grip the bit;

- lack of response to turning the device on and off;

- "Uneven" work with noticeable failures.

You can cope with all of the above breakdowns on your own, if you have at least minimal skills in such matters. Here you need to have soldering and measuring instruments on hand - they will help solve many problems with screwdrivers. In some cases, it will not be possible to avoid the complete replacement of important components, since not all spare parts are sold separately in stores (such parts include gears located in the inside of the tool).

If the repair of the motor or gearbox of a screwdriver seems to you an overwhelming task, then it is permissible to subject these parts to a complete replacement or send them to a workshop, where these elements to be repaired will quickly bring them into working order.

How to disassemble?
Often it will be possible to identify this or that malfunction of the screwdriver, as well as to repair it, only after correct disassembly. Since almost all such tools are similar to each other and have the shape of a kind of angle pistol, when disassembling them, you should adhere to useful recommendations.
- The first step is to disconnect the battery pack from the device battery. To this end, it will be necessary to gently press the latch and unfasten the module equally carefully.

- You will need to unscrew the screws around the perimeter of the tool using a small Phillips screwdriver.
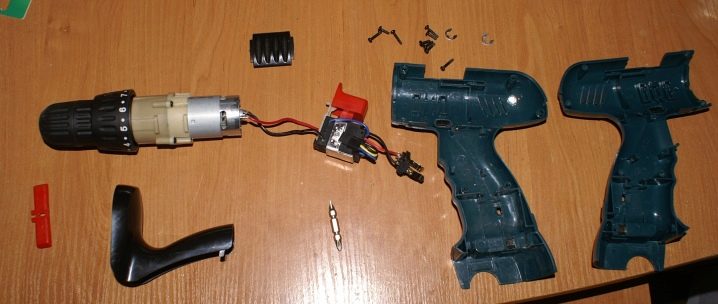
- By unscrewing all the fasteners, the two parts of the body base can be easily disconnected from each other. But at the same time it is extremely important to hold on to the remaining elements of the existing structure, which are fixed in the grooves.

- Very carefully it is necessary to remove the part responsible for gear shifting. Together with it, carefully remove the start button and the reverse mechanism.

- After that, you can further carefully disassemble the technique. Remove the reducer from the removed housing half. To remove it from its place, you will need to turn the gearbox at the landing site.

How to repair it yourself?
Knowing the internal structure of the screwdriver, as well as its principle of operation and the method of disassembly, you can safely proceed to acquaintance with the process of its direct repair. Any misfortune can happen with such a tool - most problems can be solved on their own, without resorting to the help of experienced craftsmen. Let us analyze in stages how to repair the various elements of this tool so that it works correctly and efficiently again.

Charger
In most cases, problems with chargers are arise for the following common reasons:
- if the fuse has blown;
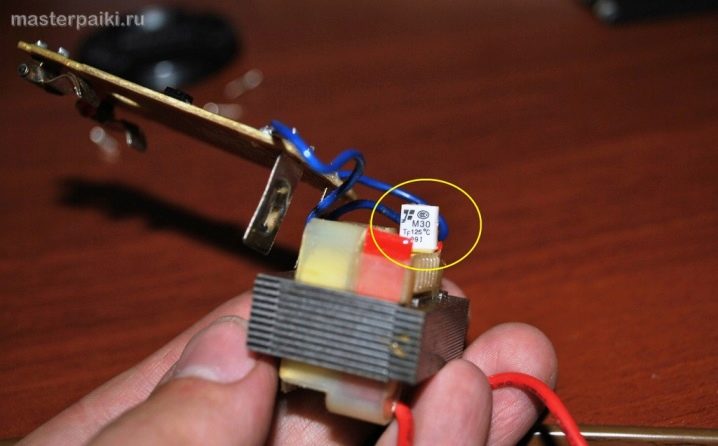
- the network cable is broken;

- the primary winding of the transformer has broken;

- the diode broke through.

It doesn't matter what brand the screwdriver you own is released under. If, when you turn it on, it simply does not start, then the first thing you need to do is make sure that its battery is charged. To find out, you need to put the battery on charge for a couple of hours. After the specified time, remove the battery and reinsert it into the device. Make sure the battery is working properly. If the screwdriver still does not work, then you will need to carry out a number of manipulations using a device such as a multimeter (you can use a special tester instead). Using this tool, you can diagnose the existing parts of the screwdriver.

If you have a multimeter in your arsenal, then most likely you know how to use it. If not, then you should read the instructions for its use. This tool is very useful and effective.

With the help of these devices, it will be necessary to determine what exactly is the problem of equipment refusal to launch. In this case, either the battery or the charger itself is to blame. To find out what the cause of the malfunction is, you will need to carry out the following procedures:
- first, fix the multimeter in the DC voltage measurement mode (set the rating to 20 V);
- if the battery in the screwdriver has a nominal value of 24 V, then the device will need to be set to a nominal value of 200 V;
- insert the plug of the charger into an outlet;
- Now measure the output voltage at the terminals of the charging unit.

The reading of this device should be approximately 2 V greater than the rating of the battery being diagnosed. If this indicator turned out to be much lower, or there are no values at all, then this means that the problem lies in the malfunction of the charger itself, and not the battery in the device. It will be possible to repair this part only if you can boast of certain knowledge and skills in electronics. If there are none, and you cannot repair the charging unit, then you will need to purchase a new part of the same brand.

Battery
If you find out that the screwdriver's charger is working fine, and it's not at all about it, this means that the problem lies in the battery of the equipment. However, take your time to disassemble the battery. Before that, you need to make sure that the screwdriver problems lie in this particular part. There are two methods for this.
- Connect the tester to the terminals of the storage battery. Determine the voltage level at the output. When carrying out these manipulations, you will need to pre-charge the battery, leaving it to charge for 3-4 hours. If the values on the tester turn out to be less than the nominal, then the root of the screwdriver's malfunction lies precisely in the breakdown of the battery.
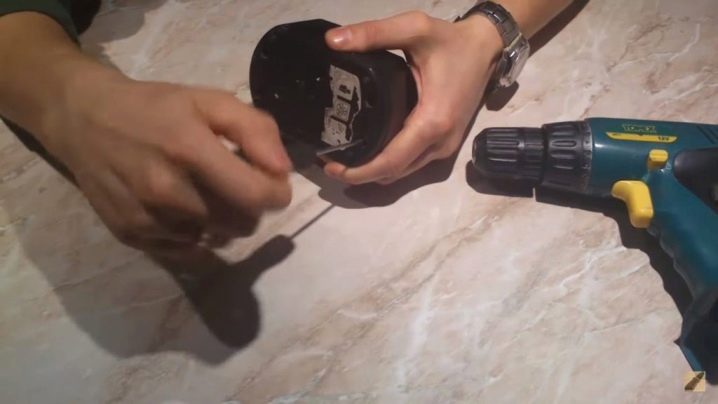
- Install another battery in the screwdriver. Make sure the device turns on with it. If this happens, it means that the first battery is faulty, and the equipment does not start because of it. Modern manufacturers strongly do not recommend resorting to self-repair of batteries. Disassembling them is also not advised. That is why if you moved on to disassembling the device, you need to keep in mind that your every action is completely unsafe.In practice, the situation is that it is still possible to restore the battery, and this is done quite simply. Consider how you can fix a screwdriver battery.

- Disassemble the battery (at your own peril and risk - do not forget about the recommendations of the manufacturers). Many manufacturers manufacture batteries from a pair of plastic bases that are connected with screws.
- Removing the top lid, you will see a certain number of small barrels (cans). Their number depends on the direct voltage of the battery. Banks issue 1 V each. To get a nominal value of 12 or 15 V (or other values), the jars will need to be connected in series.
- Now we need to make sure that the contacts are reliable. If there is a break in the connections between the banks, then we can conclude that the breakdown has been directly identified. But it should be borne in mind that these problems occur in rare cases. In most situations, one or a certain number of cans fail.
- Next, you should check if there is voltage in each of the cans. If they all have a voltage of 1 V, and one of 0.8 V, then this means that the problems with starting the screwdriver lie in this particular part. They cannot be repaired, but it is quite possible to replace them in order to fix the device's battery.

To replace the jars, it will be necessary to carry out such manipulations.
- Detach the damaged keg with a soldering iron.
- In its place, solder a brand new jar of the same size. When choosing a new part, you will need to take into account its face value and content.
- Collect the battery back, charge and test the correct functioning of the equipment.

Button problems
If you find out that both the battery and the charging unit are operating normally, then you will need to look for the source of the breakdown a little deeper. Disassemble the screwdriver. Next, you need to perform a series of actions to identify and eliminate breakdowns.
- Measure the voltage that comes from the battery to the terminals of the start button. If there is voltage, this means that the necessary power is supplied to the button. If the voltage was not detected, then this means that the wire was damaged in a certain area, or one of the important contacts was broken. Continue down the chain to troubleshoot.
- Check the operation of the button that turns on the device. Remove the battery in order to carry out the necessary checks. Short-circuit the contacts. The output elements of the button will require the connection of the multimeter probes. Set the device to resistance measurement mode. If the button works properly, the readings on the device will tend to zero. If the specified part is still faulty, then the parameters will tend to infinity.

A broken start button can be replaced with a new one or it can be repaired. If this component is collapsible, then it is permissible to disassemble it, clean the contacts. Often the buttons break if one of them burns out. It can be cleaned with sandpaper. The screwdriver will then work as before. If the button is not separable, then you will need to purchase a new one.

Reducer
The reducer is a set of gears that increase the chuck rotation torque and decrease the speed. If the gears are metal, it is better to fix the part rather than replace it with a new one. Carrying out the repair of this component, it will be necessary to disassemble it, find a malfunction. Clean the mechanism and all elements from old grease. Then you need to lubricate all components again. Replace defective gears. Then you need to assemble the gearbox. The assembly must be neat.

Replacing brushes
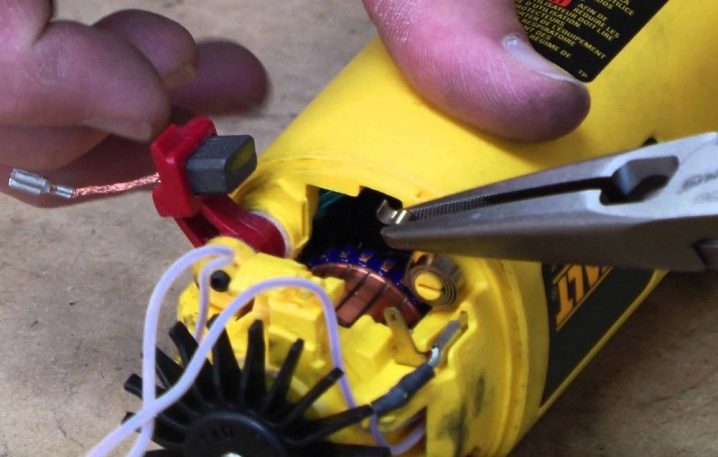
The graphite brushes are located at the end of the engine at the junction with the button. They can be located inside the case, or outside. If at least one brush is worn out, then both will have to be changed. To do this, you will need to disassemble the engine, carefully bend the flare with pliers. Then a part with brushes is taken out.Old elements are extracted from it and new ones are installed. After that, you need to put the base back together.
Engine
In modern screwdrivers, there is a DC motor in a cylindrical housing with magnetic elements. To check the condition of the engine, you need to disconnect the gearbox, as well as the wires going to the start button. Measure the resistance of the armature winding (part inside) using a multimeter. If you did not see any readings on the device, then this will indicate that there is an open circuit. Too small values will confirm that a short circuit has occurred in the device.

The collector resistance parameter must be measured on the shaft and on each of the plates. It should be zero. Breakdowns in the anchor can provoke a shutdown of the device during its operation. Power will be lost, sparks and smoke may appear. If the engine breaks down, the gears often remain intact. Because in the lion's share of engines it is pressed onto the shaft, it can be difficult to remove it. Purchase a specialized removable element or resort to using available tools. Do not do this with a nailer or pliers - ruin the gears. You should act differently.
- Stock up on a piece of profile or channel. Make a neat longitudinal notch using a grinder.
- Place the shaft in the groove in a direction perpendicular to the profile. Pry the gear.
- Lay the prepared profile on 2 rigid bases so that the slider hangs between them.
- Take the nail and hammer. Tap the edges of the shaft gently. After that, the gear will slide smoothly.
- Now you can put the gear on the new engine using a hammer and a hard-surfaced base.

Ratchet
If a ratchet breaks in such a tool, then it will need to be detached from the gearbox in order to find the causes of the breakdown. Often, special rods are fixed in the coupling, set aside for adjusting the forces. There are also devices where, instead of rods, a pair of balls are installed in each hole. They are pressed with a spring.

In many cases, the repair of this part consists of cleaning it and applying fresh lubricant.
Recommendations
If the speed controller does not work, then the transistor has burned out. It will have to be replaced without fail.

The plastic gears can be replaced, but the metal gears are better left - repaired and put back if they are broken.
If the problem is in the cartridges, it is easier to replace them with new ones. Finding spare parts for cartridges is a big problem. It's easier to get a brand new clamping part. It will be inexpensive (about 300 rubles).
Disassemble and assemble the screwdriver very carefully so as not to damage the parts located inside its body.

How to repair a screwdriver with your own hands, you will learn in the next video.


The comment was sent successfully.