Depth gauge: what is it? Device and principle of operation

In many sectors of construction and manufacturing, such as manufacturing and processing of parts, milling, turning, plumbing and jewelry, high-precision measuring instruments are used. One of them is a depth gauge.


What it is?
This device is structurally similar to the more well-known tool - a caliper. It has a narrower specialization than the latter, and is intended only for linear measurements of grooves, grooves and ledges in one direction - in depth. For this reason, the depth gauge does not have sponges.
Measurement is carried out by inserting the end of the measuring rod into the groove, the depth of which must be determined. After that, you should move the frame along the main scale on the rod. Then, when the frame is in the correct position, you need to determine the readings in one of three possible ways (see below).


There are 3 types of readings from the device, according to three corresponding modifications:
- by vernier (depth gauges of the SHG type);
- on a circular scale (SHGK);
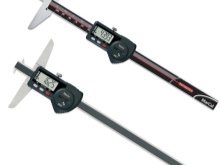
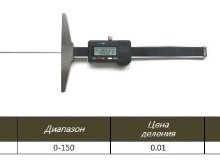
- on a digital display (SHGTs).
According to GOST 162-90, devices of the three listed types can have a measuring range of up to 1000 mm. The common ranges are 0-160 mm, 0-200 mm, 0-250 mm, 0-300 mm, 0-400 mm and 0-630 mm. When buying or ordering a depth gauge, you can find out its range by the corresponding conventional marking. For example, a model measuring a depth from 0 to 160 mm with a reading on a circular scale will have the designation SHGK-160.


Depending on the device device, important parameters, also regulated by GOST, are the following.
- Vernier reading values (for modifications of the ShG type). Can be equal to 0.05 or 0.10 mm.
- The division of the circular scale (for ShGK). The set values are 0.02 and 0.05 mm.
- The discreteness step of the digital reading device (for ShGTs). The generally accepted standard is 0.01 mm.
- Measuring frame length. Not less than 120 mm. For models with a measuring range of up to 630 mm or more, the required minimum is 175 mm.
In the technical conditions established by GOST, the accuracy standards of this device are determined. For devices with vernier, the margin of error is 0.05 mm to 0.15 mm, depending on the measuring range. Devices with a circular scale have a permissible error of 0.02 - 0.05 mm, and digital ones - no more than 0.04 mm.
At the same time, these standards do not apply to micrometric models, with which it is possible to carry out measurements with an accuracy of thousandths of a millimeter.

Device
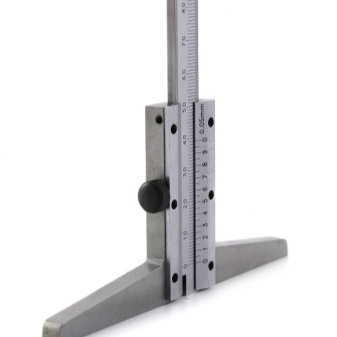
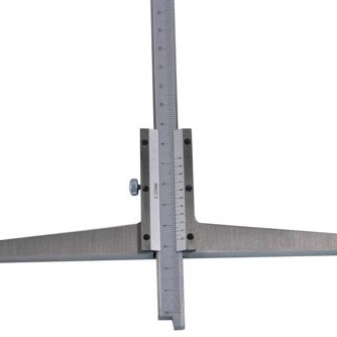
As mentioned above, the depth gauge has a measuring rod on which the divisions of the main scale are marked. Its end rests against the inner surface of the measured depression. The SHG models have a frame, in the slot of which there is a vernier - a fundamentally important unit, which is also available in the design of calipers, micrometers and other precision measuring instruments. Let's take a closer look at the description of this node.
If the purpose of the main barbell scale is easy to understand - it functions like a regular ruler, then the vernier makes the measurement process more complicated, but allows you to determine the linear dimensions much more accurately, up to hundredths of a millimeter.


The vernier is another auxiliary scale - it is applied to the edge of the frame slot, which can be moved along the bar, combining the risks on it with the risks on the vernier.The idea of combining these risks is based on the understanding of the fact that a person can easily notice the coincidence of two divisions, but it is quite difficult for him to visually determine the fraction of the distance between two adjacent divisions. Measuring anything with an ordinary ruler with a 1 mm graduation, he cannot determine the length, only rounded to the nearest whole (in millimeters).
In the case of the vernier, the integer part of the desired value is determined by the zero division of the vernier. If this zero division shows any value between 10 and 11 mm, the whole part is considered 10. The fractional part is calculated by multiplying the vernier division value by the number of that mark corresponding to one of the divisions on the bar.


The history of the invention of the vernier goes back to antiquity. This idea was first formulated in the 11th century. The device of the modern type was created in 1631. Later, a circular vernier appeared, which is structured in the same way as a linear one - its auxiliary scale is in the shape of an arc, and the main one is in the shape of a circle. A pointer reading device in combination with this mechanism makes it easier and more convenient to determine the readings, which is the reason for the use of vernier depth gauges with a circular scale (SHGK).
This is how the mechanical version of the depth gauge works. Recently, digital devices ShGTs have been widespread, a distinctive feature of which is an electronic reading device with a sensor and a screen for displaying readings. Power is supplied by the battery.


Types and models
Above, only the main varieties of depth gauges were named, with and without vernier. Now we will consider specialized modifications, each of which has its own characteristics depending on the scope of application. In addition to those listed, an indicator depth gauge (with a dial indicator) is used, indicated by the GI marking, as well as GM - a micrometric depth gauge and a universal version with replaceable measuring inserts.
The types of structures and the choice of a particular model depend on the following factors:
- in what range is the value of the depth of the groove (groove, borehole), which must be measured;
- what are the dimensions and shape of its cross-section.


For shallow depths, the measurement of which requires high accuracy (up to 0.05 mm), models of the ShG160-0-05 type are used. For medium grooves, options with a wider range are better, for example, ШГ-200 and ШГ-250. From specific models of this type: Norgau 0-200 mm - 0.01 mm error margin for electronic versions, there are cheaper vernier ones.
When carrying out locksmithing and turning work related to the processing of grooves and boreholes more than 25 cm, ShG-400 depth gauges are used, which still allow you to maintain accuracy to hundredths of a millimeter. For grooves of 950 mm and more, there are also standards for depth gauges with a wide measuring range, however, GOST in this case allows an error limit of up to a tenth of a millimeter.
If this is not enough, it is better to use micrometric instruments.


The particular features of depth gauge models that you should pay attention to when buying are the shape of the end of the rod. Depending on whether you want to measure both the depth and thickness of a groove or narrow holes, you might want to consider models with a hook end or with a measuring needle. IP 67 protection ensures the water resistance of the instrument, which is primarily important for models with electronics.
If you need a digital instrument that is more convenient than a vernier instrument, you have a choice among a number of foreign and domestic manufacturers. For example, the well-known company Carl Mahr (Germany), its Micromahr model range has proven itself well with modifications of MarCal 30 EWR with data output, MarCal 30 ER, MarCal 30 EWN with a hook. Another popular German brand Holex also supplies its products to Russia. Of the domestic brands, CHIZ (Chelyabinsk) and KRIN (Kirov) are well known.


What measurements are they used for?
As follows from the above, the purpose of the depth gauge is to measure the depth of the elements of the parts by inserting the end of the rod into the groove or groove. It is necessary that the end of the rod easily enter the area under study and fit snugly against the surface of the part. Therefore, the rods are made of an alloy of increased hardness, and for complex grooves and narrow wells, special inserts are used - measuring needles and hooks - from the same materials.
This tool is used in cases where it is required to obtain the exact size, and the use of a caliper or micrometer is impossible due to the specifics of the shape of the part. At the same time, it is important to understand how the device works and monitor the effectiveness of its use. There is a simple test of accuracy: take several measurements in a row and compare the results.

If the difference is several times greater than the permissible error limit, then an error was made during the measurements or the device was defective. For calibration, you need to follow the steps described in the verification methodology approved by GOST.
- Prepare the instrument for calibration by washing it to remove dust and debris with detergent.
- Make sure it externally meets the requirements of the standard, parts and scale are not damaged.
- Check if the frame moves freely.
- Determine if the metrological characteristics are consistent with the standard. First of all, this concerns the limit, error, measurement range, and the length of the boom overhang. All this is checked with the help of another known working device and a ruler.

Although for mechanical depth gauges according to GOST, an error limit of up to hundredths of a millimeter is declared, if you need guaranteed accuracy, it is recommended to use a depth gauge with a digital type reading device.
Using a cheap instrument, you can still run into inaccuracies when measuring - then it is best to apply the method described above, and the end result is to consider the arithmetic average of all the values obtained.

How to use?
The measuring principle includes several practical guidelines that should be applied to obtain accurate results. When measuring, fix the frame with a bolt, which is designed so that it does not accidentally move. Do not use tools with damaged rod or vernier (in the case of digital devices, there may be more complex malfunctions) or with a broken zero mark. Take into account the thermal expansion of parts (it is best to take measurements at a temperature close to 20 C).
When measuring with a mechanical depth gauge, remember the division value. For most models, it is 0.5 or 1 mm for the main scale and 0.1 or 0.5 mm for the vernier. The general principle is that the number of the division of the vernier, which coincides with the mark of the main scale, must be multiplied by its division price and then added to the whole part of the desired value.
It is much easier to work with digital devices SHGTs. You can simply read the result from the screen. Calibrating them is also not a complicated procedure, just press the button that sets the digital scale to zero.


There are several rules for the use and storage of devices to avoid their premature failure:
- the ingress of dust and solid particles between the frame and the rod can cause it to jam, so keep the instrument in the case;
- the service life of mechanical devices is longer than digital ones, and the latter require more careful handling;
- the reading computer and the display must not be subjected to shock and shock;
- for proper operation, these components must be powered from a battery with a normal charge level and / or from a working power supply.
In the next video you will find an overview of the ShGTs-150 depth gauge.


The comment was sent successfully.