How to use a caliper correctly?
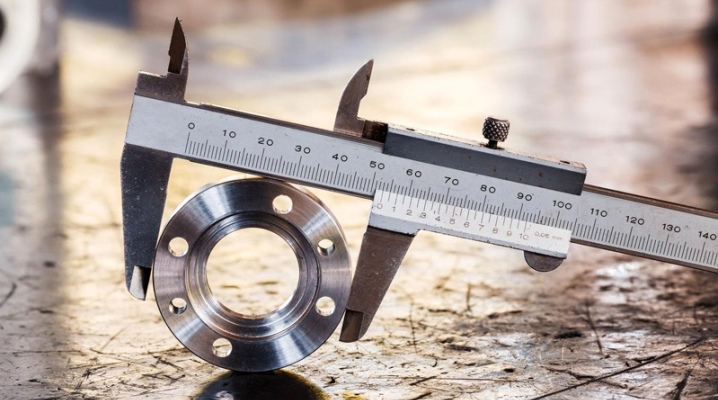
During repairs or turning and plumbing work, you need to take all kinds of measurements. They must be as accurate as possible in order for everything to work out according to the prepared plan. There are many tools for measurements: level, ruler, tape measure. But among them there is one of the most versatile and most useful - this is a caliper.
With it, you can find out the height, depth, width, diameter, radius and much more. It may seem like a complicated tool at first, but it is actually quite simple to use a caliper, despite its many functions.

Basic terms of use
In order for the device to always work properly and take accurate measurements, you need to comply with all the necessary storage conditions. Lubricate the movable part with machine oil so that the jaws move smoothly and without great effort. Observe safety precautions during work, as the edges of the sponges are sharp - an inexperienced person can get hurt by them. They are specially made to do the markup.
Store the caliper in a place free of excess dust, debris, shavings, and other elements that could clog into the mechanism. Recently, manufacturers have been selling these instruments along with cases. They protect devices from moisture, dirt and dust.
If dirt or moisture does get to the caliper, then it must be cleaned.
Since measurements can be carried out in different places with different conditions and some symbols or numbers may simply disappear under a layer of dust or dirt, wipe the front of the device before and after work, where you can see the numbers and where the measurement takes place with the help of sponges. During work, make sure that all sponges are tight and not loosened. The main advantage of a caliper is that it can give readings with an accuracy of a thousandth of a millimeter, so the skew of the jaws can affect the correctness of measurements.
If the jaws are loose due to the measuring method, and not because of the device itself, then they can be tightened using the locking screw. It sits on top of a caliper and is shaped like a small wheel. It must be unscrewed so that the jaws are in contact with the measured part or surface as tightly as possible.
How to work?
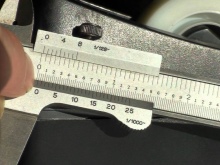
In order to work correctly with a caliper, you need to understand how to read the readings. Everything here is a little more complicated than with a simple ruler. The fact is that the instrument has two scales... The first (main) is millimeter. It gives the initial measurement data. The second (aka vernier) will help you measure parts with high accuracy. Even fractions of a millimeter can be recognized on it.
Vernier is 0.1 mm, so correct measurement can give a very accurate result. But each caliper model may have a different step (one division). As a rule, the stride length is indicated slightly to the left of the scale itself.


Also, the vernier scale can be different in length. In some models it reaches 2 cm (20 mm) from the main measuring scale, while in others it can be about 4 cm. The longer the length, the more accurately the secondary scale will give readings. Basically, modern calipers are measured with an accuracy of 5 hundredths of a millimeter (0.05 mm), older instruments have an accuracy of only one tenth of a millimeter (0.1 mm), which is half as much.
The caliper has two pairs of jaws: an upper and a lower one. Some have only one, but these are already highly specialized types of devices. The outer width and height are measured with the top pair of jaws. The lower one is measured for the diameter and internal width of the part. The inner grooves must be firmly pressed against the inside of the element so that there is no backlash and the diameter measurement is very accurate.

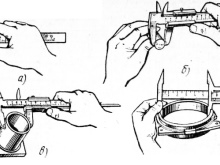

These jaws can move a fairly large distance, so they can be used to measure the diameter, length, width and height of a pipe, a large bearing, large parts and other types of spare parts. But the main advantage of the caliper is that it can determine the parameters of very small or thin objects. For example, they can measure the cross-section of the cable, determine the width of the wire, nail, nut, bolt thread pitch, and much more.
Always during a large amount of turning or plumbing work, they use a caliper because of its convenience and versatility. But this device can also be used at a construction site.
If you want to measure the diameter of reinforcement, brick, concrete block, then a vernier caliper will help here too.

Also, in addition to a pair of sponges, some models also have a depth gauge. It allows you to easily measure depth, even on small parts. This device slides out together with a measuring and vernier scale. The depth gauge line is very thin and fits comfortably at the back of the caliper. In order to measure the depth, simply lower this device all the way into the part (while placing it so that the part itself is supported) and secure from above with a clamping screw. After that, using the measuring scale, you can calculate the depth in the same way as measuring length, height and other quantities.

If you don't know which drill you used to make a specific hole, just measure the diameter. In general, a vernier caliper can answer many questions, and after some work with the part to be measured, you can study it completely. An instruction manual may be included with the caliper, so you can familiarize yourself with it before the first work.


If the vernier caliper is corroded, treat it with a special anti-rust agent. Just make sure that this tool does not corrode the metal, because this can lead to the fact that the divisions and steps on the measuring and vernier scales will not be visible.
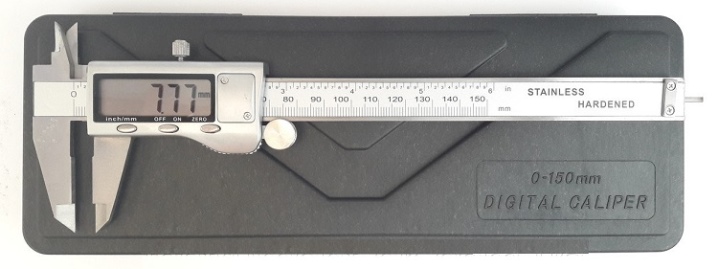
There are electronic types of calipers, but they need to be handled more carefully. Avoid contact with water or other liquids in the first place. A short circuit may occur in the electronic scoreboard, and you will not be able to find out the exact data.


It is also not worth measuring any things powered by electricity. This can knock the scoreboard off and the results after measurement will be incorrect. Before starting work, check the device and press the ON button to turn on the vernier caliper. After you have taken the readings and you need to re-measure, then press the zero position setting button. The principle of switching on is approximately the same as for a non-programmable calculator: after each operation, the value must be reset.
Also in the electronic version of the caliper, it is necessary to change the power... To do this, open the protective cover and replace the battery. Also don't forget about polarity. If the battery is functional, but the display still does not work, then check if the battery is inserted correctly.

How to read the readings?
Perform the initial measurement on the main scale. Select a whole number of millimeters. In order to find out more accurate readings, look for risks on the vernier (second scale). You will need to find where the risks of the second scale coincide with the first. If you can determine by eye on the main scale that the reading is closer to the end of a millimeter, then it is also better to look for notches from the end of the vernier scale. It is the risks that should show the most accurate readings.
In the case when you have several risks coinciding, then it is better not to work with such a caliper and not even try to adjust, since it is faulty. Only divisions of zeros can match, but they match due to the fact that they are the same numbers.

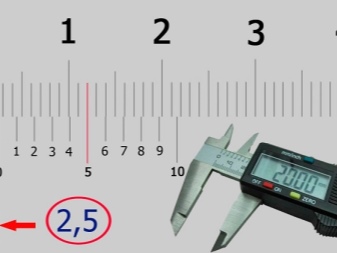
If you want to roughly find out the meaning, then it is not necessary to peer at the vernier scale. The basic value can also be determined by the measurement. It also happens that the values on the scales are erased or become invisible. For better preservation, degrease these surfaces and wipe with a rag, because this way you will see all the divisions.
There are other types of calipers on sale, for example: dial and electronic. The dial is made in the shape of a circle, where the arrow indicates a certain measure. This operation replaces the calculation of indicators on the vernier. Electronic options are much easier to work with, but more expensive. You just need to take a measurement (any, it can be depth, diameter, length), and a number will be displayed on the electronic board. This will be the desired value. It can also have an accuracy of 0.05, 0.02 or 0.01 mm.

Carrying out marking operations
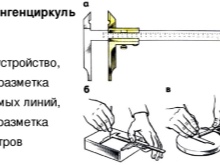
The caliper has many functions, so it can be used for marking as well. This process depends on the device type of device. The fact is that the lower jaws (with which they carry out the marking) can be not only rectangular with internal bends, but also round. In any case, the inner edge is specially cut so that marks can be made with the lower jaw.
To do this, take a measurement and press down a little with the lower sponge on the material where you will make the mark. Due to the fact that the edge is slightly sharpened, it will scratch and mark in a peculiar way. You can also skip the scratching method and just leave the caliper in place and mark with a marker, pencil, or other object.
If you do the markup according to the plan of the part, then do not forget about the scale, because it is not always 1 to 1.


Possible mistakes
Beginners begin to make many mistakes during the first measurements and subsequent work. Examples can be given when novice people begin to measure the inner diameter with the upper lips, which are designed to measure the surfaces of the part. Also, beginners do not always follow the locking screw: it moves freely with them. But it is this part of the device that reliably fixes the part in a vice, which gives the most accurate measurements.
Everything comes with experience, and there is no way to find out all the subtleties of a caliper without using it, so the most important prevention against mistakes is practice.

For information on how to use a caliper correctly, see the next video.


The comment was sent successfully.