Dolls-boxes: varieties and step-by-step instructions for making

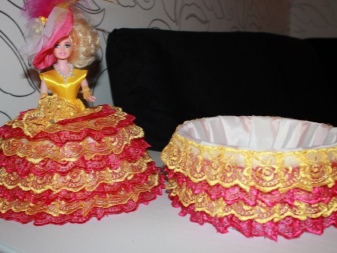
Among the huge list of functional items for decoration, doll-boxes are especially popular. Today they can be purchased or made independently, using simple materials and tools at hand, as well as a little imagination.


Peculiarities
There are many ways to breathe a second life into toys, from which children have grown up long ago, as well as to use with benefit things that in most cases must be recycled, in particular, various reusable food packaging. In this matter, the creation of a unique doll-box will become relevant. Such a thing is considered multifunctional, since it can serve as a useful storage capacity, act as an original presentation.


In light of this versatility, there are many ways to create an original piece. In this case, you can use improvised means or exclusive raw materials for the manufacture of an expensive box.
Today, even a novice craftsman can implement a similar idea to create a doll-box, since the design of a beautiful and functional thing is notable for its simplicity, as well as the ability to use your imagination in work, which will allow you to create a real masterpiece from a minimum amount of materials.

Required materials and tools
Among the list of raw materials used for making a doll-box, it is worth highlighting the basic components of the product, namely a store-made doll or one made by hand, as well as any container that will act as a compartment for storing small items. This role can be played by the lower compartments of the boxes, the lid of which, for one reason or another, has become unusable.Also, plastic containers, containers, bottles and so on are usually used for manufacturing. These two components will play the role of a frame and two main parts - the top and bottom of the doll-box.

As for the rest of the set of useful materials for creating a box, the master can select it based on his personal preferences, as well as the main idea and work skills. It can be:
- cuts of fabrics of any density, color and texture;
- ribbons and lace;
- synthetic winterizer or any other filler for the lower compartment;
- rhinestones and beads, beads;
- sequins, buttons;
- braid.


To make a box using the kanzashi technique, special sets are usually used.
However, all of these materials will require reliable fixation to each other, as well as to the base. Therefore, for work, they usually use:
- glue;
- threads, needles;
- stapler.
As important tools, without which it is unlikely to be able to implement such an idea, it is worth noting a clerical knife, scissors.


How to do it yourself?
There are many master classes on creating caskets using dolls, the most popular are described below.
From a plastic bottle
For work, you can use containers of any color, its dimensions must be selected taking into account the planned dimensions of the future box, as well as the functions that it will perform. To make a doll-box in which jewelry or sweets will be stored, you can use a container with a volume of 1.5-2 liters.

The step-by-step work algorithm is described below.
- First of all, you need to divide the container into three parts.The middle of the bottle will not be used in the work, so the depth of the lower section of the box can be adjusted at your discretion. However, the cut at the top and bottom must be straight in order to avoid injuries in the future. You can pre-draw future borders with a marker.
- After the main components are cut, the bottom of the bottle will need to be decorated with the selected material. If necessary, place a synthetic winterizer inside or put any other filler. You can fix the fabric with a glue gun or a stapler.
- To make the box as stable as possible, you can additionally glue a plastic cover, an unnecessary disc, to its bottom.
- Further work will concern the upper part, which acts as a cover. The doll is only partially used in this case. Usually, the entire torso is removed from the toy to the hips. Then the narrow part of the bottle is threaded inside the doll so that its edges extend beyond the belt by a couple of centimeters. For secure fixation, the toy is attached to the neck with glue.
- After that, a circle must be cut out of plastic or cardboard, which will be larger in diameter than the lower part of the box. It should be attached to the bottom of the doll to form the final lid. On one side, the doll lid can be attached to the bottom, or you can make a box with a completely removable lid.
- The final stage of the work will be the decoration of the doll, namely the creation of an outfit for her. For these purposes, you can use any fabric you like. Several circles are created from it, the first is tightened at the waist of the Barbie doll, the rest are sewn until the material covers the entire structure. For decoration, you can use satin ribbons, lace. To complement the look of the doll, you should also take care of the headdress or the corresponding hairstyle of the toy.


From a mayonnaise bucket
In addition to drinking plastic containers, you can use a container with a large diameter, for example, a bucket of mayonnaise or ice cream, to make a doll-box.
The work will be reduced to the following actions.
- First of all, you need to arrange the inside of the future box, for this the container should be covered with material, leather, additionally putting a synthetic winterizer or cotton pads inside. Next, the outer part is decorated, it can also be sheathed with material, crocheted, decorated with twine, wrapping it in a circle.
- The next stage of work will be the task of fixing the doll for further decoration of the lid of the future box. In this case, the toy will only be needed partially - up to the waist. This part is glued to the lid of the bucket with hot glue or any other bonding agent.
- Next, the task of the master will be to create a dress for the toy. It should be magnificent, since the diameter of such a box will be much larger than in the previous version with a bottle. You can use the idea of a dress for a doll using the example of ball gowns. To make the top of the dress, you can use plaster from the set for children's creativity, simply paint the torso or sew it from a small cut, making a bodice. The skirt is made from round cuts of material of any length, larger in diameter than the lid. The splendor of the dress will depend on the number of frills and tiers used.
- The final stage of work will be to fix the cover to the base. This can be done by sewing on the edge of the lid on one side, or you can leave the box with a completely detachable lid.


From newspaper tubes
An alternative to creating a box from fabric and plastic containers can be the option of making it from rolled paper tubes. A part of any plastic doll will act on top. In this case, the bottom is also woven from tubes like a basket. Its size and depth can be varied based on your individual needs.
Any container of the desired shape can act as a basis that helps to carry out weaving. The first priority will be to prepare the required number of tubules.
Plain printing paper is perfect for these purposes. You can use sheets from magazines, in this case, the box will look more colorful and attractive. To make the tubes more pliable in work, they can be slightly moistened with water before weaving. You can twist the consumable yourself or use a thin knitting needle as a base.

The manufacture of the box is as follows.
- The tubes are laid crosswise to form the main risers. As a result, each group will have several tubes arranged in the shape of a star.
- Further, weaving consists in going around each riser with tubes in a circle from the bottom up, starting from the very core of the future box. To build up the material, you need to insert one tube into another or fasten it together.
- When the paper bottom reaches the required diameter, the second task will be to form the walls. To do this, the main risers must be bent up, and then continue weaving according to the algorithm described above, building them in the same way as the main weaving tube. To make the shape neat and correct, you can temporarily insert any suitable container inside, which will give the product the correct contours.
- At the final stage of weaving the lower part, the remaining tubes are cut and glued to each other so that the edges do not create unsightly defects.
- Next, you need to start weaving an outfit for the doll. The racks need to be made around the waist, fixing them on the toy. To make the weaving even and proportional, you can also use a container of a suitable diameter inside, but with an extension to the bottom, so that the lid covers the lower part at the base. The colors of the tubes of the top and bottom of the box can be the same, or they can represent a contrasting composition.
- You can complement the decor of the box by creating a soft pillow for the bottom; it is also worth decorating the doll's head with a headdress or a beautiful hair accessory.


Beautiful examples
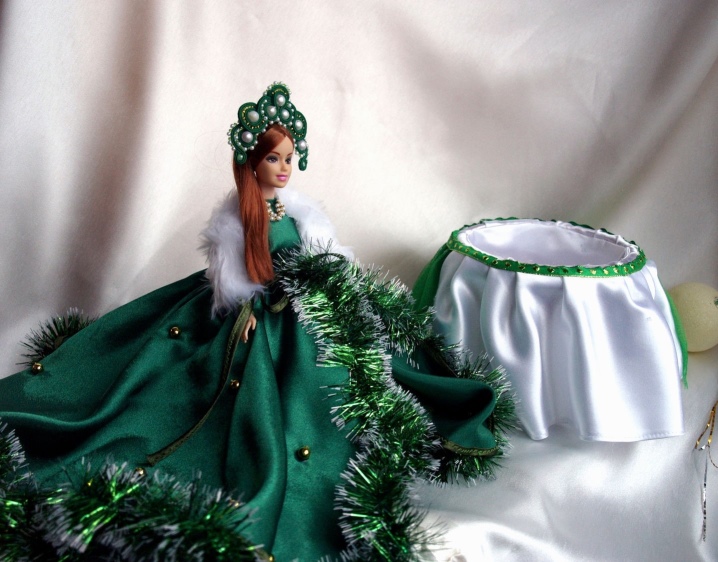
A decorative box in the shape of a Snow Maiden can become a thematic gift for the New Year holidays. Such a present is guaranteed to become a decoration for any interior., and to create it, you will need simple materials that are present in any home.

The doll-casket can be a themed wedding gift. The lid with the toy and the lower part, decorated in the style of the bride, will be a relevant and memorable present for the newlyweds.

A traditional folk theme box will be a wonderful decor item, appropriate in any home, it will also become a beautiful accent in rooms decorated in ethnic style, in country houses or dachas, in restaurants.

How to make a doll-box with your own hands, see below.


The comment was sent successfully.