Plywood box: how to do it yourself?

Each person has certain talents, and the more there are, the wider the opportunities for their realization. The ability to make something with your own hands is an advantage for both girls and guys, because it allows you to create something unique and inimitable for yourself, family and friends. The simplest and most successful solution for a gift or presentation is a box that can be used for a wide variety of purposes. Let's figure out how to make a plywood box with your own hands.

Tools and materials
Do-it-yourself creation of any thing requires knowledge of the product diagram, the main stages of work, as well as the availability of the necessary tools and materials.

To make a box using plywood as the main material, you must have the following things.
- A sheet of well-dried plywood, the optimum thickness should be at least 8 mm. Wet or poorly dried wood is poorly cut and sanded, which will cause a disappointing appearance of the finished box.
- High quality polymer glue for fixing parts.
- Jigsaw or jigsaw for sawing parts.
- Protective equipment for face and hands - glasses and gloves.
- Sandpaper of varying grain size.
- Putty.
- Small awnings.
- Short screws and screwdriver.
- Gas-burner.
- Acrylic varnish.
- Decor paint.
- Manual router or 45 degree cutter.
- Milling cutter for processing end faces.


How to do it?
After the preliminary preparation is completed, it is worth making sure that there is enough knowledge on how to create a box with your own hands.
You should not rely on your vision or an approximate theory of work, it is better to read the materials and watch a video on the topic.
This information will help you more clearly understand the process of creating drawings and assembly diagrams, as well as the sequence of actions, which will help avoid difficulties in the work.

A plywood box is created thanks to the correct algorithm of actions, which consists of such items.
- Think over how the future product will look like, and transfer the diagram to a paper sheet. If all the calculations were performed correctly, you can start marking the parts on plywood. To get straight sides and corners, it is best to use a square.

- Once all the drawings are made, each detail is cut out using a conventional or jigsaw. When using a power tool, you must wear protective goggles to prevent sawdust from getting into your eyes, and gloves are useful as additional protection.

- Finished pieces must be processed using a cutter set at 45 degrees. This manipulation will allow you to hide the ends from the outside and make the product neat and beautiful.

- Before starting the collection of the box, it is necessary to process all parts with sandpaper. To avoid plywood chips and creases, you need to start work with finer sandpaper, moving on to a larger one, with a grain size of 200 to 800.

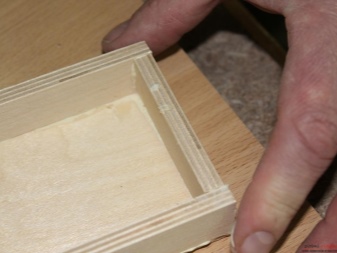
- Once all the parts are complete, the next step is to assemble the structure. For this product, it is necessary to use polymer glue, which is applied to the joints to glue the entire structure. To prevent the corners of the box from shifting, you need to glue them only on a flat surface.To make the assembly process more convenient, you can use clamps, under the legs of which it is better to put fabric, otherwise traces of pressure may remain.


- As soon as the base of the box is made, it is necessary to proceed to work on the lid. Each part must be sanded and prepared for gluing. Having connected all the parts of the lid, it is worth checking how it fits into the box, and, if necessary, adjust the location of the internal parts while the glue is still viscous.

- When all the parts are dry, it is necessary to putty the box to exclude any cracks and crevices.

- Once the putty is completely dry, the entire product is carefully sanded again.

- After completing the preparation of the future product, it is necessary to install curtains on it, for which it is worth marking places for them and using a cutter to make recesses on the box and lid. Before twisting the structure, you need to check if the holes match and, if necessary, correct them.

- The last step is to install screws, but you should not screw them into a solid layer of plywood, otherwise it may begin to crack. It is best to drill small holes into which the screws will be screwed.

It is this sequence that allows you to create a neat and easy-to-use box that you can keep for yourself or donate to someone. The final look of the product can be very diverse and depends on the preferences and purpose of the thing.

Internal and external finishing
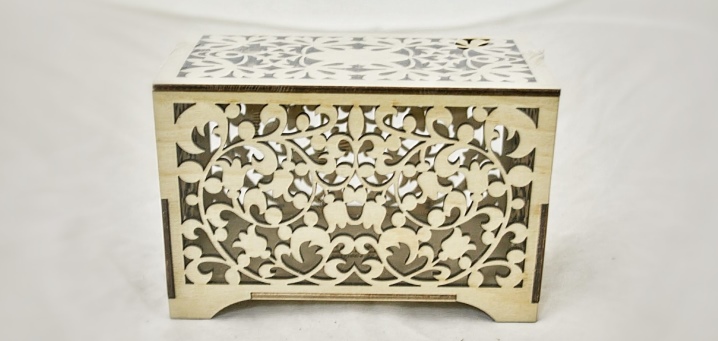
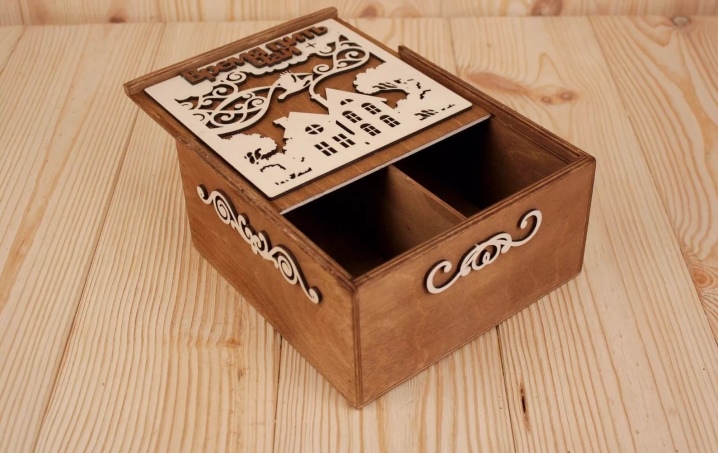
To preserve the appearance and performance of the plywood box, it should be covered with acrylic varnish. Once the surface is well dry, it is possible to complement the product to your liking, creating an individual design. The most presentable and beautiful will look like carved elements that are cut out with a jigsaw from thin plywood.
The pattern must be thought out in advance so that the finished product has a complete look. It is best to place the decor over the entire surface of the box. To create a more original look, you can use different colors.

Another option for decorating the box is to burn the pattern directly onto the item, which looks spectacular and interesting. If you have some experience in working with an electric burner, almost everyone can create a unique design of the box.

Many people prefer to tint the finished product in dark colors, artificially aging it, for which it is necessary to use a gas burner and burn the plywood with it. The result is fixed with a semi-gloss or matte varnish - the box is ready to use.

The inner side can remain intact if all sorts of little things are placed in the box, or it can be finished with fabric if jewelry or important items are stored in it. Velvet is best suited for upholstery, which has an attractive appearance and good wear resistance. Fastening is done with a stapler, which secures the inside of the upholstery, after which the main one is fixed.

Recommendations
To make the use of the box convenient for any purpose, there are a few additional steps worth taking.
- Install a latch that will fix the cover to the main structure, which will prevent the product from opening due to falling or turning over. This fact is important if there are children or animals at home.
- Glue felt legs to the bottom of the box to prevent scratches on other furniture. It is not always possible to make a perfectly flat surface and varnish it with high quality, therefore traces may remain from using the box on other surfaces. On the bottom, you can stick a single piece of felt, equal to the bottom of the product, or cut out pieces of any geometric shape and place them in the corners.

In order for the box to last long enough, it is worth choosing high-quality materials for its manufacture and covering them with a durable varnish that will withstand any atmospheric changes. One layer of coating is usually not enough for the desired result, so it is worth re-painting the box. The varnish can be used transparent, translucent and matte, the choice is made based on personal preference. You can use tint paint to give the box an interesting look.
The decorative elements must be quite strong and well fixed so that they are not damaged during use and do not break off from the box.

Plywood boxes can be created as a gift to someone you know or for personal use.
Appearance, dimensions, decor - all this is dictated by the purpose of the product. The presence of interior decoration will be desirable for a gift option, especially when it is created for a girl. The large dimensions of the box are suitable for household little things that often have nowhere to put, but it is important to have it always at hand.

Having correctly prioritized, defining the tasks and purpose of the future product, you can build a high-quality and useful box that will serve for many years, performing its task every day.

In the next video, you will learn how you can quickly make a plywood box with your own hands.


Bravo, master!
The comment was sent successfully.