How to cut the ceiling plinth correctly in the corners?

The correct design of the ceiling makes almost any renovation beautiful and neat. The corners of the skirting boards carry a great deal of stress in decorating any room and creating an overall impression of the interior.
Peculiarities
The first skirting boards that people came up with were made of plaster. To make them, gypsum was poured into special molds. Then they were attached to the ceiling. Such decorations were called fillets. Currently, they are not popular, they are not so easy to manufacture, they are not on a budget. Currently, this name hardly pops up.

How to cut?
To understand which tool to cut, you need to understand what the baseboard is made of.
- PVC ceiling skirting board. It is one of the cheapest. There are many disadvantages of such skirting boards, one of them is that these products are quite fragile, after damage they hardly recover. This is due to the lack of plasticity of this design. PVC products are electrostatic, which means they attract dirt and dust. You can cut such skirting boards with a hacksaw, a construction knife or a sharp kitchen knife.
- Skirting board made of expanded polystyrene. This option is also considered inexpensive. The downside is high fragility; if handled incorrectly, it begins to crumble. It is better to cut with a sharpened knife or a hacksaw for metal, and you should not put much effort.

- Extruded expanded polystyrene ceiling skirting board. It is more expensive than conventional styrofoam skirting boards. It has a more rigid structure, which allows less crumbling, on the one hand, but, on the other hand, they are cut more difficult. It is better to cut this material with a construction-type knife or a hacksaw for wood.
- Polyurethane ceiling skirting board. This type of skirting board is considered one of the most expensive at the present time, they have a large margin of safety, have elastic qualities and are resistant to moisture. The disadvantage of such skirting boards is that they are sensitive to temperature extremes. In places where the temperature often changes, it is better not to put them, otherwise deformation may occur.
- The skirting board is made of wood. Convenient to use due to its practicality and resistance to the external environment. Such skirting boards are quite expensive. You can cut them with a saw or a hacksaw, since wood is a heavy material.


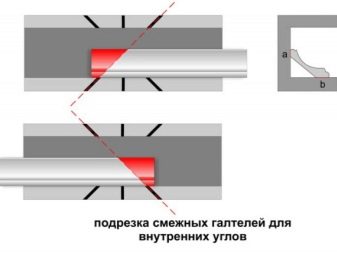
Inner corner
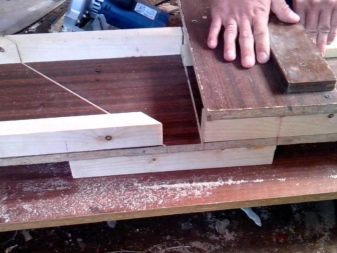
One of the easiest ways to get the inside corner right is to use a miter box.
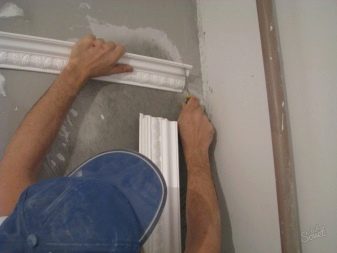
- The baseboard blank must be attached to the ceiling and the required length must be measured. Better to leave room with a margin.
- The plinth must be installed in the miter box in such a way that it stands in it in the same way as it will be further attached to the ceiling.
- The plinth itself must be carefully leaned against the opposite wall of the appliance.
- You need to hold the plinth with your left hand for easy cutting.
- To trim straight and with the correct angle, you need to choose an angle of 45 degrees. The tool holder should be as close to the left hand as possible.

- You need to cut the bar without extra effort so as not to damage it.
- Then you need to carry out the same manipulations with the other bar.
- The plank should be as close to the right hand as possible.
- The bar itself should be in contact with the far wall of the device.
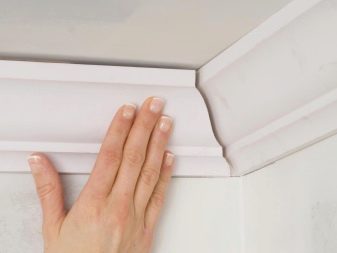
- The skirting board needs to be cut without too much pressure, after which the two parts need to be connected. If they do not fit perfectly, then it is easy to finish the flaws with a knife.
- The corner is tried on to the wall without glue and if everything looks good, then it is attached to the mortar.

If small errors remain, they can be easily repaired with a special solution.
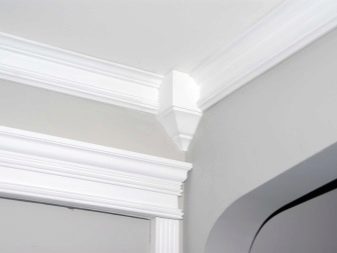
Outside corner
Often in rooms, in addition to the inner corner, there is also an outer corner, which is also subject to special processing.
In order not to miss the definition of the size, you first need to prepare the inner corner, and only then start working on the outer one.
- The ceiling strip is pressed against the ceiling, and the dimensions of the cut are outlined.
- The plank is placed in the device and pressed against the nearest wall.
- Without strong pressure, the workpiece is cut, the main thing is to leave extra space.

- The other strip is processed in exactly the same way.
- In this case, the bar should be placed closer to the right hand.
- It must be in contact with the wall of the device, which is located further away.
- The skirting board is cut without much pressure, after which the two parts must be joined. They must be docked perfectly, if this is not the case, you can adjust the strips with a knife.
- If everything is fine when trying on without glue, you can attach with glue or mortar,
- Small flaws are easily repaired with a special solution.


Cutting the plinth with a miter box is possible only in a situation where the angle has 90 degrees, but if it is more or less, then trimming must be done manually.
Circumcision methods
There are other options for cutting skirting boards without using a miter box.
If it is not possible to make a miter box manually, you can use the method of marking in place, and the corner plinth will look perfect.
- The first thing to do is cut the workpieces correctly.
- First you need to attach one plank to the wall with the opposite side, then make a mark on the surface. To do this, outline the entire baseboard.

- Where the lines will intersect, there will be a junction of the planks.
- In the future, you need to transfer the sign to the plinth.
- You need to draw a line from a point to the end of the baseboard.
- Cutting takes place strictly along the outlined lines. There is no need to apply a lot of pressure during this procedure. After that, without using glue, it is worth comparing the planks so that they fit perfectly with each other.


How to make a miter box with your own hands?
To make a miter box yourself, you need two boards. The workpieces must be connected to each other in the shape of the letter P. In the future, markings are made on it, along which slots will eventually be made, where the skirting boards will be inserted for cutting. The markings themselves are made at an angle at which the plinth will be cut. It is important to understand that the slots themselves should be small, because the main thing that is needed from the miter box is to fix the board.

Another way to make a miter box is to combine a miter box and a miter box template. In order to cut the skirting board conveniently, you need to make a workpiece that is easy to use and does not require weight work. You can make a corner out of two unnecessary boards. Take a piece of paper and draw a 45 degree angle on it. The skirting board must be applied to the corner, applying with the side that is to be cut. The markup that is made on paper must be moved to the cutting site, and a piece must be sawed off along it.

How do I crop with a template?
If it is not possible to make a full-fledged miter box, then you can use a template that is made on paper.


To do this, you need to draw and then cut small holes in cardboard or thick paper. First, the corners at which the plinth should be cut are drawn on paper. After that, the points are connected. Then holes are made in place of the points. Paper with slots is applied to the skirting board and the designations are transferred to it. The skirting board needs to be cut off according to the markings. In the case when cutting the perfect plinth did not work out, it is easy to adjust with a knife.
Tips & Tricks
There is a situation when you need to make repairs very quickly, but, unfortunately, there is not a lot of time.In such a situation, you can use the method of orientation on the terrain, but it must also be competent in order for the joint to be perfect.
Take a protractor and measure the angles in the room. A good situation if it turns out that the angle is 90 degrees or 45. Unfortunately, this is not always the case. If the angle is correct, then a miter box is used. If not, then the markup is in place. When marking in place, it often happens that even after cutting with a knife, the corner does not fit perfectly.

In such a situation, you need to cut off a piece from the first plinth that can close the gap formed, you need to cut it off so that the angle is ideal. This strip is inserted into the slot and neatly closes it. And also this method will help to round off the corner of the baseboard, which is often required during repairs.


Installation of skirting boards
The trimming of the skirting board is over, finally, the moment of installation has come. This process is just as important as trimming the skirting boards. In order to glue the skirting board to the ceiling, you should use glue or sealant.
For skirting boards that are made of polyester and similar materials, special glue is quite suitable. For wood and semi-synthetic materials, it is better to use a sealant.

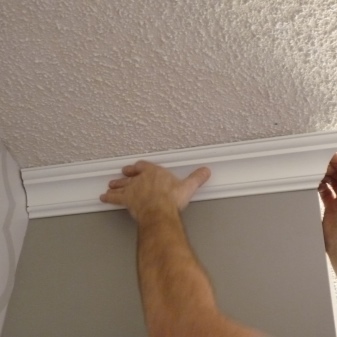
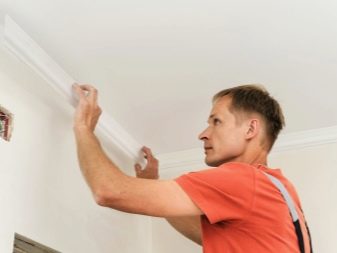
After passing the moment when the planks are put in place, their final adjustment begins. It is worth remembering that before you stick the skirting boards, you should first try them on at the place where the ceiling meets the walls.
Last but not least, cosmetic work. With the help of a special putty, cracks, minor damages and irregularities are filled up. Thanks to the putty, the angle can be leveled and finally adjusted.


It is better to use acrylic filler rather than plaster. Acrylic putty, unlike gypsum, easily withstands moisture. If you use plaster, then in the bathroom at some point you can notice that its pieces will begin to crumble right onto the floor. To apply the putty, you first need to grind everything, but such manipulations can damage the skirting board.

Another noticeable difference is that the gypsum putty needs to be diluted on its own, acrylic can be bought ready-made. Someone may say that it will not be a problem to dilute, but this is not entirely true, since in order for the puttying result to be of high quality, the putty must be made in the correct proportions. Otherwise, it will begin to crumble. Acrylic putty costs a little more, but has a number of advantages, so the price is justified. The disadvantage of acrylic putty is that it is in a situation. when the layer must be more than 10 mm, it will not work, but in a situation with skirting boards, such problems should not be.
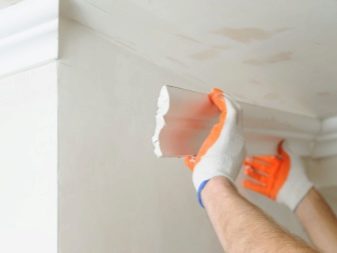

After the question of which putty is better to use has been decided, you can start working. The putty should be applied over the entire baseboard and adjacent walls in a thin, even layer. After the first layer has dried, a second is usually required to fix the result. It should be applied carefully so as not to stain the walls and ceiling.
Using ready-made corners
For people who do not want to engage in sawing, joining corners, there is an alternative solution to the problem. You can come to the store and buy ready-made corners. There are pros and cons to this solution.
There are, of course, more advantages:
- when buying ready-made corners, the skirting board can simply be measured and cut in the usual way, without thinking about whether or not it is suitable for a specific angle;
- options for corners in a large number, they are from almost any material, many are beautifully decorated, differ in great variety.

The main disadvantage in such a solution is that since they are not tailored specifically for a specific apartment, most likely, they will protrude noticeably, which will also not be a sufficient plus. Not all apartments are suitable for such repairs.
Another disadvantage may be that a corner with high humidity can simply fall off or break. But such phenomena are rare.
Non-standard angles, reasons for their occurrence
Ideally, the corners in the room should be straight, but this is not always the case. Most often this happens due to the fault of the builders who built the house in bad faith. Another reason could be that the house was built on land that is subject to subsidence.
Most often, irregular angles can be found in country houses and villages. After all, many houses were built according to individual projects, and not all proportions are made professionally.


Another option, and perhaps the most unpleasant one, may be that the house may begin to curve. It is imperative to check this aspect, since it is dangerous to live in such a room. If such a problem appears, you should not despair, the corner can be made using one of the methods of marking in place, as described above.
Summing up, we can say with complete confidence that making beautiful corners in the room is not a problem. There are several ways. The procedure itself does not require a large number of tools or special skills, the main thing is to clearly follow the instructions.
For information on how to properly cut the ceiling plinth in the corners, see the next video.


The comment was sent successfully.