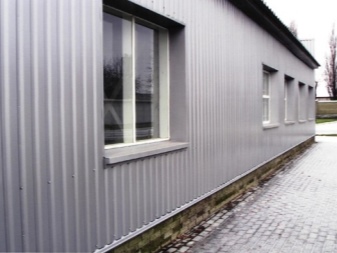
House cladding with profiled sheet
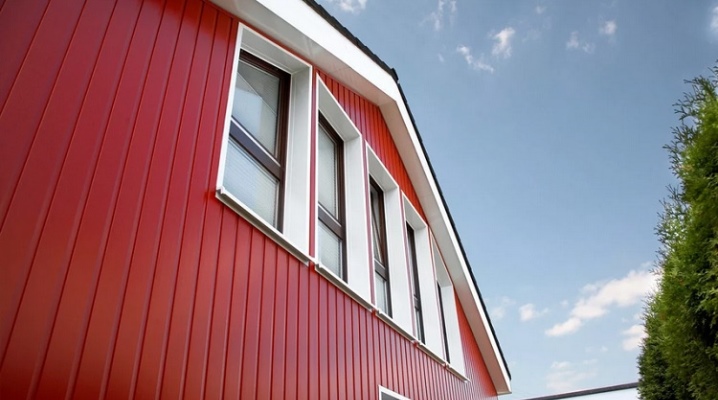
Sheathing a house with a professional sheet is very common, and therefore it is so important to figure out how to sheathe the walls with your own hands. Step-by-step instructions for cladding the facade with corrugated board will be the most valuable help for many people. A separate topical topic - how to sheathe a balcony from the outside with the same sheets - should also not be discounted.


Features of cladding
Before describing the actual nuances of finishing in general, you need to answer a question that torments, probably, every owner of a private building. This question - is siding or profiled sheet better? This topic causes heated discussions among both novice builders and experienced people. But still, it is quite possible to understand it. Siding is designed to protect walls from adverse external factors, while providing an attractive appearance.
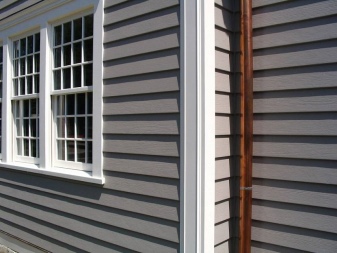
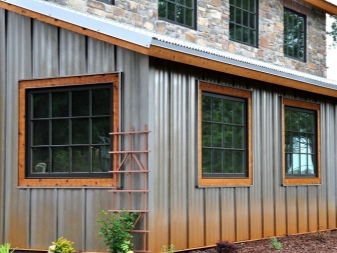
Both stuff:
- made of metal;
- strong enough;
- do not burn;
- serve for a long time;
- installed without unnecessary problems.


But sheathing the house with corrugated board from the outside turns out to be a much simpler matter. Unlike installing siding, there is no particular need to involve qualified installers. It is worth considering that buildings finished with profiled sheets still sometimes look somewhat rustic in comparison with decorated siding.
It is imperative to prepare the walls themselves. Since steel is characterized by increased thermal conductivity, you will have to take care of insulation (and arrangement of a number of layers of the wall "pie" that help the insulation to fulfill its function); in addition, we must not forget about the ventilation of the internal volume and the creation of the crate.


Choosing a professional sheet
This, of course, is also a very important question. Professional sheet for walls is available in a colossal number of options. And therefore, it should be selected as carefully as possible in order to exclude even a small error. One of the most important criteria is the protective coating. If you want to take the most profitable option for yourself, then you should definitely give preference to a simple galvanized sheet.
True, its service life will not be so long, such a saving option can hardly be considered the right choice. Therefore, it is still advisable to focus on various types of polymer coatings that enhance the protective properties. Of these, polyester is the simplest. It turns out to be the most affordable of all protections, but its limited thickness drastically reduces its effectiveness.


Other options are:
- matt polyester (its slightly different structure and slightly thicker guarantee durability and no glare);
- pural (polyurethane-polyamide mixture with a confirmed service life of up to 50 years);
- plastisol (a durable substance designed to withstand severe mechanical and thermal effects).
But the difference between the types of corrugated board is associated with its dimensions, more precisely, with the total sheet thickness. Structures up to and including 0.4 mm are suitable only for temporary buildings. Private housing construction, even with a minimum level of requirements, implies the use of a more durable and reliable material. The facade coating should have a thickness of 0.45 to 0.5 mm. But the thickest profiled sheets (from 0.6 mm) should also be avoided, as well as the thinnest ones - their severity is justified only where extreme loads are created.


And yet the overwhelming majority of consumers, even from the commercial sector, choose a professional sheet also by design. It is not difficult for industry to decorate the metal surface in different colors. But chasing originality does not make much sense, because the optimal combination for the roof must be created. Otherwise, the house will not be perceived as a single, stylistically integral space. Therefore, the main goal - creating a favorable impression - will not be achieved either.
At the same time, it is worth considering the specifics of different types of colored profiled sheet and decorated in one way or another in a special way. According to experienced designers and connoisseurs, houses painted in ivory look very beautiful.... This design is not too flashy, but at the same time it is quite expressive and looks dignified, respectable.
It seems that 95% of people will agree to produce such an effect with their home. Green colors are also in demand.


She:
- original;
- fresh;
- pleasing to the eye;
- creates associations with wildlife and spring;
- evokes positive emotions;
- goes well with various other colors.
A dwelling decorated with a stone looks beautiful and solid, outwardly indestructible. It is worth noting that a professional sheet with the same effect is produced for fences. That is, it is easy to ensure harmony on the site. The required visual effect is usually supported by photo offset printing. This technology is well established and has been used for many years.


The most advanced corrugated board, imitating stone, includes as many as 10 layers. This is a South Korean development that has been protected by a patent for a long time. The necessary safety is provided by polyester or PVDF. The choice between them is determined by the policy of a particular manufacturer. Decking under a tree is also important from an aesthetic point of view (including decorated under a log). Moreover, it is this version of it that is most recognizable in all countries of the world. And it is precisely such solutions, even according to the version of search engines, are most often shown in the first place. The perfection of industrial imitations is already such that it is difficult to immediately distinguish a surface from a natural wood.
It is worth considering that each specific modification imitates the appearance of a completely specific wood species or the type of its processing. The size range always depends solely on the manufacturer's policy; if you don't like the traditional woody look, you can always order white sheets with brown inclusions. Too pronounced relief is hardly justified. The fact is that such a covering will create, rather, associations with a hangar or warehouse, and not with an ordinary residential building.
If possible, you should order material already cut into the required pieces. Then the probability of error will be less, and the speed of work will increase dramatically.


Calculation of materials
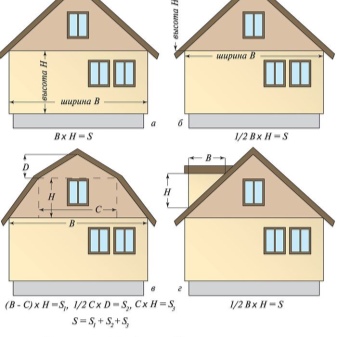
To determine the consumption per 1 m2 means to understand exactly how much material you need to order. And it is definitely not worth rushing to estimate the required amount, as well as overly trusting online calculators. Practice shows that they only give very approximate figures. The length of the profile sheet is of decisive importance in the calculations. For facades, a profiled sheet is ordered equal to the height of the wall - so there should not be any special surprises from this side.


The typical sheet width is always 125 cm, with rare exceptions for some manufacturers. In this case, the real working width can differ significantly depending on the parameters of the waves. Additionally, we must not forget about laying on a crate or other frame, about the necessary overlap between adjacent sheets... But the length of the slope can be ignored - this parameter is relevant only for roof assemblies.
If you have any doubts - for example, in the case of walls with a complex configuration - you can turn to professionals.

Required set of elements
The installation of wall corrugated board has a number of important features, and it is very problematic to carry out all the work without proper equipment. Corners superimposed inside and outside are in demand. Such products are mounted at any angle and protrusion of the surface to be equipped. They also cover the edges of the profiled metal. The wall strip is a product that is divided into a number of types. Known at least:
- initial;
- connecting;
- horizontal;
- the universal character of the plank.

The role of the slats is very high. They form connections vertically and horizontally. They are used to overlap the joints of the profiled sheets along the length. At the same time, the violation of the properties of the fasteners and the separation of the sheet are excluded, even with a relatively powerful wind. Slopes are used to trim openings for doors and windows; they are also used to trim places with sophisticated geometry. Also for the installation of corrugated board you may need:
- aquilons for windows and doors;
- platbands for various projections;
- slats connecting sheets;
- drainage systems, that is, structures that safely discharge sediments and melt water, dew from the wall in a safe way.
All such designs are both standard and made according to an individual list of characteristics. Stainless steel is released for their production. It is additionally coated with protective polymers, so the resistance to harmful meteorological factors will be quite high. You can easily select designs of one or another favorite color.


Preparation
There are usually no special difficulties at the preparatory stage. They start with the dismantling of platbands, gutters, ebbs and other interfering products. Then the surface needs to be repaired. It does not need to be leveled, but cracks, cracks and gouges are required to be repaired. You will also need to remove all mold and nests of other fungi.
Preparation for finishing the facade of a wooden house has its own subtleties. In general, wood is well suited for installing corrugated board. But in any case, you should start with antiseptic treatment, so that harmful fungi do not start. When the tree is dry, it is additionally treated with compounds that increase fire resistance.
A brick or stone surface must be examined, if necessary, knock out weakened and cracked areas, and then replace them with more durable masonry.

Step-by-step instruction
Installing the frame
It is at this stage that it is determined how beautiful the finished coating will look. Laying out the corrugated board with your own hands horizontally or fastening vertically - depends largely on the personal taste of the decorators. It is important that the lathing should be performed in an identical way.
- Get started by marking the walls for the installation of the mounting brackets... You need to move from the corner.
- Marks are placed according to the instructions of the plumb line... In some cases, it is more correct to use a laser level. The distance between the marks should be from 0.5 to 0.6 m. Having shifted vertically by 0.4 m, do the same operation. When the marking is finished, you need to make a recess with a puncher, into which plastic dowels are driven.
- Next, galvanized metal brackets are placed on the marks. Self-tapping screws are used to fix them. Experts believe that it is necessary to put a paronite gasket between the wall and the bracket.
- The next step is to install the guiding elements; carefully monitor that they are fastened in a strictly uniform plane. Even very modest deviations can dramatically degrade the quality of work.
- In some cases, it is necessary to strengthen the metal frame.... Then it is required to put crossbars in the intervals of the profiles. They are clippings of the same profile. Such a bunch of long frame elements allows you to create a monolithic structure from cells. We must not forget that the crate is always made with insulation.Most often these are slabs of mineral wool or expanded polystyrene. There is no point in looking for original solutions and abandoning these time-tested options. Plates are laid out in the intervals of frame parts. Attaching them to the wall is done using either dowel-nails, or glue mixtures of a special composition.
To maximize adhesion, both options must be used simultaneously, while also not forgetting to overlap the thermal barrier with a membrane that protects from the wind.


Installation of corrugated board
It is not so difficult to properly sheathe the outer wall of the house with a profiled sheet.
- Start by attaching the slope planks based on additional parts... They are fixed with self-tapping screws for metal in increments of 0.3 m.
- Next comes the turn of the installation of the basement ebb, which should stand exactly along the crate... If the length of a specific low tide is insufficient, you need to dock a pair of planks; the overlap with a shift should be equal to 0.02-0.03 cm.
- The next step in technology is the installation of an outer corner. It is just mounted in a designated place for the entire height of the wall. Fastening is done in 0.3 m increments.
- Then comes the time to install the sheets themselves. Vertical fastening is carried out from the corner to the middle, from the base to the side of the cornice; when filling horizontally, it is also better to move from the outside, collecting strips successively.
- Do not leave a transport protective film on the profiled sheet. There is no benefit from it, but the harm during operation is undoubted.
- The panels are mounted at the corners of the building and are not screwed in completely with a self-tapping screw in the corners of the sheets.... This allows the planes to be aligned. Only the next step can be the final fixation with self-tapping screws. They are screwed into every third wave. The second sheet is exposed in a plane corresponding to the previously mounted product. You need to fasten the profiled sheet with an overlap of 1 wave. This is enough to maintain tightness. The overlap points are connected with self-tapping screws with a distance of 0.5 m.
- It is unacceptable to screw in fasteners with a strong clamp. The point is the high coefficient of thermal expansion of the profiled sheet. A gap of 0.08-0.1 cm should remain from the head of the fasteners to the surface of the sheet.


When arranging walls from a profiled sheet, other subtleties may appear that deserve careful study. So, covering the balcony with a profile must be carried out before it is glazed, or you will first have to remove the already exposed glass, and then return them to their place. You can take an old parapet as a basis for fastening. But sometimes it is sheathed with other materials that will have to be dismantled. Some people prefer to shape the timber sheathing. It is very important to strengthen it properly. Fastening is traditionally carried out on self-tapping screws.
Often a different problem arises - sheathing with a profiled sheet of a bar or log house. If the condition of the old log cabins does not cause any complaints, you should simply saw off the ledges, leaving only 5 cm each. But first you need to make sure that nothing will fall off with this procedure. With an obvious risk of destruction, you will have to fasten the problematic fragments of wood with nails or self-tapping screws. Then you can already do the editing of the sheet according to the classical method; such work is also performed by professionals, although they rarely come across them.


But it is necessary to fix the profiled sheet not only on houses made of timber and other types of wood.... It is often attached to a brick wall. Direct connection can be achieved by means of dowels with anchors. To install them, you will have to drill holes in advance. The channels should be 0.05 cm larger than the insert.
Dowels with impact screws will allow you to speed up the installation. Their external difference is the shape of the thread. But the problem is that such fasteners can break the surface of the sheet. All protrusions and uneven areas must be removed in advance.
The joining of sheets in brick to each other is done with rivets - this is the most reliable way.

For information on how to make the outer cladding of a house with a profiled sheet yourself, see the next video.


The comment was sent successfully.