How do I set my default printer?
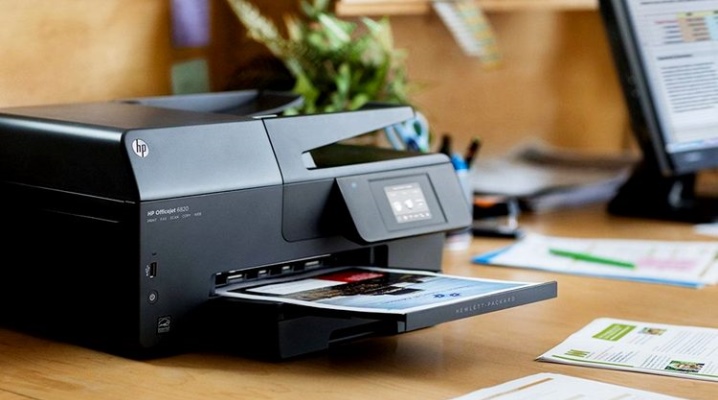
Very often in offices, several printers can be connected to one computer at the same time. The user, in order to print a certain one of them, has to go to the "file-print" menu each time. These steps are time-consuming and easy to work around - you just need to install the default printer on your computer.
How to install?
Most computers run on the Windows operating system, so the instructions are given for just such a technique. So, there are a number of specific steps you must take to make your printer the default.
- Click the "Start" button, go to the "Settings" menu and select there a tab called "Control Panel". Even for a novice PC user, there is nothing difficult in these actions.
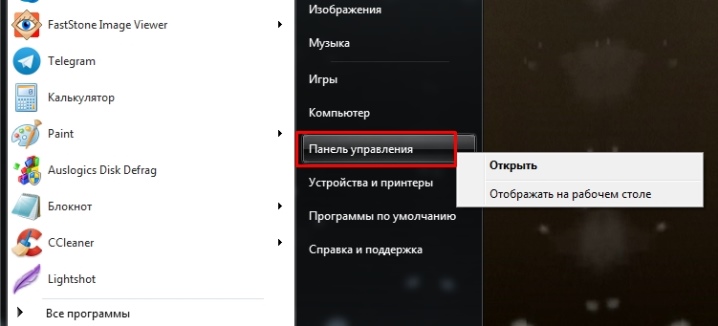
- In the "Control Panel", select the item called "Printers and Faxes".
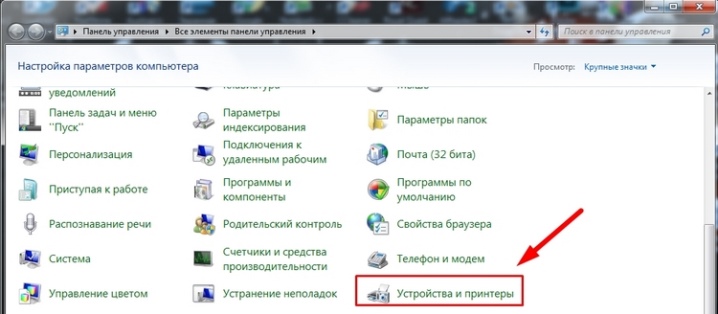
- There you need to select the desired printer, click on it with the mouse and check the box "Use as default".

After the performed actions, printing from this computer will be output exclusively to the selected printer.
If the computer is running Windows 7, then you will also need to do these steps. The only difference is that the names of the tabs here can be different. So, in the "Hardware and Sound" section, you need to find a tab called "View devices and printers".
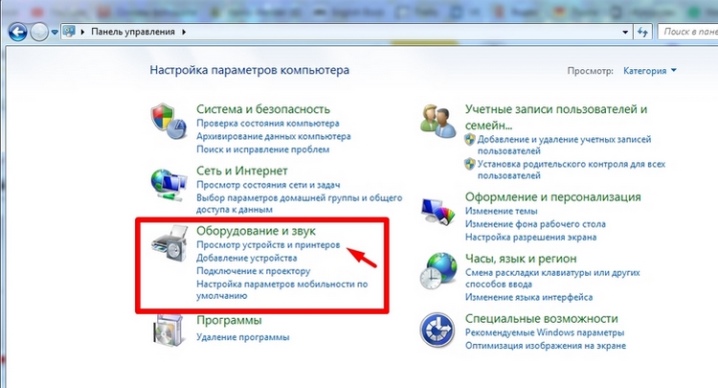
There you need to select the "Printer" tab and set the corresponding checkbox "Use as default" on it.
In the relatively new Windows 10 operating system, you can also set the printer as the main one.
- In the Options section, there is a Printers & Scanners tab. There you need to select the desired printer model, and then click "Manage".
- In the window that opens, you need to select "Use by default".
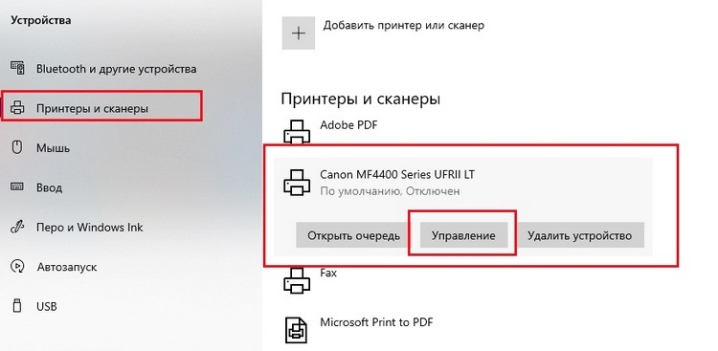
Nothing complicated either. It will take only 2-3 minutes to put the printer on.
How to change?
If a default printer is already installed on the personal computer, you can also change it if necessary. To do this, you need to go to the control menu using the above methods, uncheck the "Use as default" checkbox from the selected printer and install it on the desired device.
It is not difficult to change one printing device for another. The whole procedure will take no more than 5 minutes, even for a beginner. It should be remembered that only one printer can make the main one for one computer.
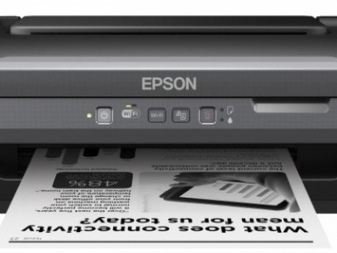
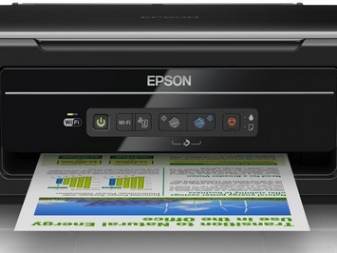
Changing the printing device is most often required when devices with black and white and color printing are connected to the computer. If changing printers is required constantly, then it is better to choose a printer each time than to set the default 2 devices several times a day.
Possible problems
Sometimes it is not possible to set the default printer on some computers. At the same time, the technique itself, when trying, gives an error 0x00000709 that is incomprehensible to the user.
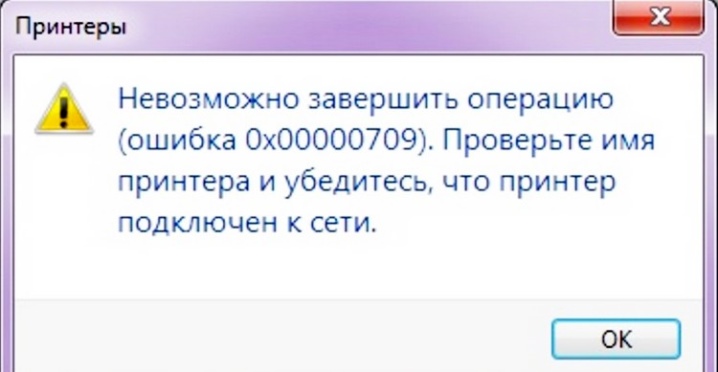
Accordingly, printing is not output to this printer either.
This problem can be solved in a few simple steps.
- Through the "Start" button, go to the "Run" tab.
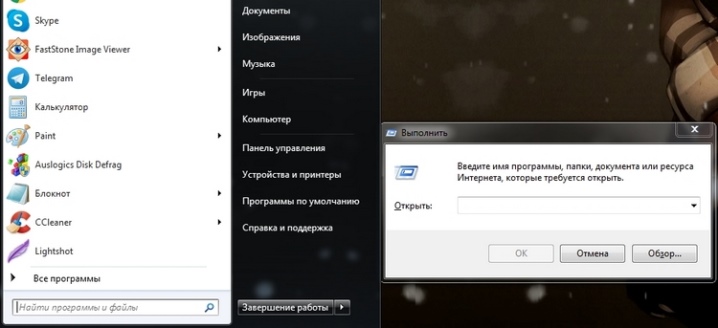
- Next, you need to enter the Regedit command. The Windows editor will be called.
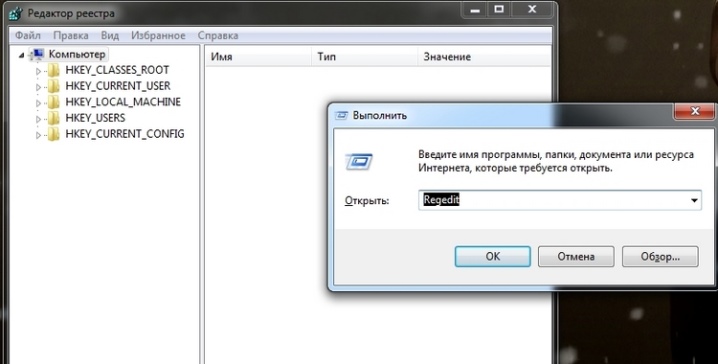
- In the window that opens, you will need to find the so-called Hkey current user branch, which is located in the panel on the left side.
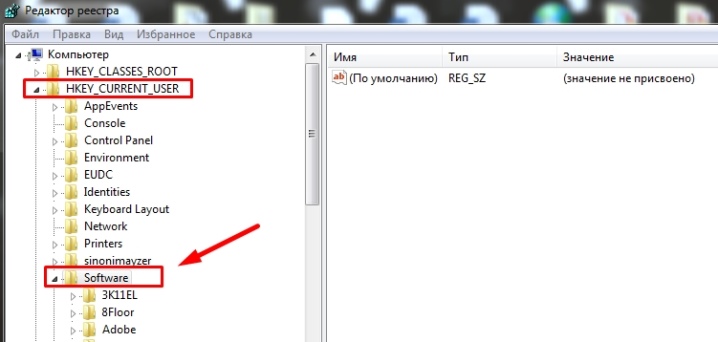
- After that, you need to click the tab called Software, then Microsoft and then Windows NT.
After the steps taken, you need to go to the CurrentVersion tab, and then find Windows there.
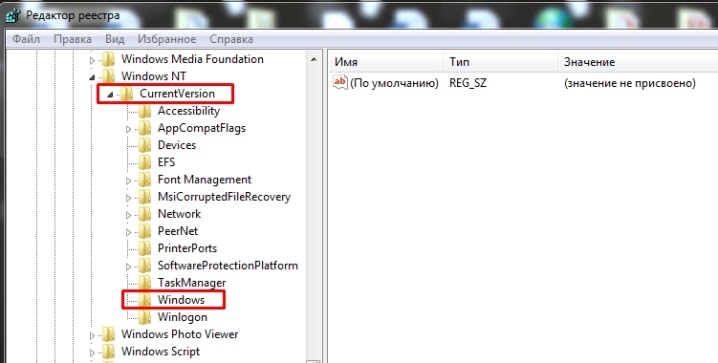
Now you need to turn your attention to the open windows on the right. There you need to find a parameter named Device.It should contain the name of the printer that is currently selected by default. This parameter must be deleted using the Delete key.
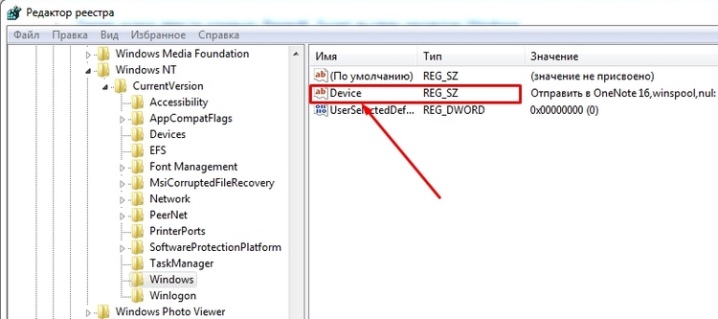
The computer will then need a standard reboot. It updates the registry settings. Next, the user needs to go to the "Devices and Printers" tab and by one of the known methods, select the default computer.
This is far from the only reason why a computer may refuse to set the selected device as the main one. So, problems can occur due to other features.
- No drivers are installed on the selected computer. In this case, the computer may simply not include the device in the list of available ones. The solution to the problem is simple: you need to install the driver. The device will be displayed in the list of available ones. All that remains on it is to select the "Default" checkbox.
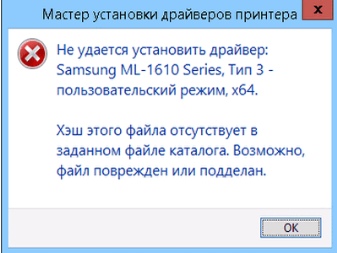
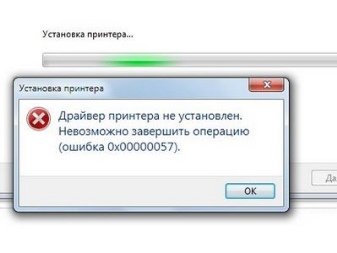
- The printing device is not connected to the network or is not working properly. Sometimes the reason for inaccessibility lies not in the computer, but in the device itself. To rectify the situation, you need to check the correct connection of the printing equipment, then try to make another attempt to set the printer as the main one.
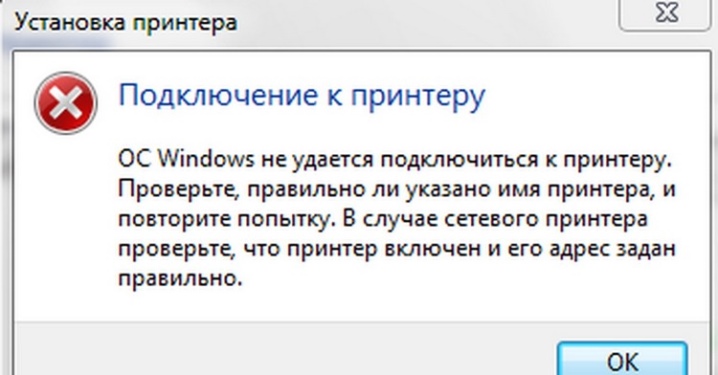
- The printer is connected correctly but is defective. It is possible that in this case the user will be able to set it by default, but it will still not be printed on it. Here you should already understand the reasons for the inoperability of the printing device.
If you cannot independently identify and eliminate the cause of the problem, it is recommended to contact a specialist in this field. Sometimes it happens that the technique is simply incompatible with each other.
By following these simple steps, you can get rid of the unnecessary steps of constantly choosing a printer when you need to print some information. This will significantly reduce the time spent on printing documents, and all information will be displayed on the same printing device.
For details on how to set the default printer, see the video below.


The comment was sent successfully.