How to connect a Canon printer to a laptop?

A printer is a device you need to work in any office. At home, such equipment is also useful. However, in order to print any documents without problems, you should correctly set up the technique. Let's figure out how to connect a Canon printer to a laptop.
Connection methods
Via USB
First, connect the device to a power source. You also need to make a connection with a laptop. The kit usually includes 2 cables to enable this. After using the USB port, you can turn on the equipment by pressing the button on the external panel. Usually Windows will immediately recognize the arrival of new hardware. The required software is installed automatically.
If this does not happen, you should act manually.

For Windows 10:
- in the "Start" menu, find the "Settings" item;
- click "Devices";
- select "Printers and scanners";
- click "Add printer or scanner";
- after completing the search, select the appropriate option from the list.
If the laptop does not find the device, click Update. Another option is to click on the button indicating that the device is not in the proposed list. Then follow the instructions that appear on the monitor.

For Windows 7 and 8:
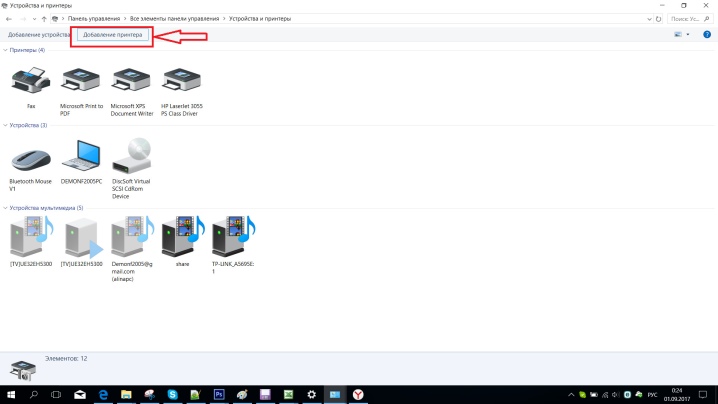
- in the "Start" menu, find "Devices and Printers";
- select "Add printer";
- click "Add a local printer";
- in the window that appears prompting you to select a port, click "Use existing and recommended".
Via Wi-Fi
Most modern printing machines allow wireless connection to a laptop. All you need is a Wi-Fi network and internet access. The main thing is to make sure whether the equipment has such a function (this will be indicated by the presence of a button with a corresponding symbol). On many models, when connected correctly, it will light up blue. The algorithm of actions for adding a printing device to the system may be different depending on the type of OS.

For Windows 10:
- in the "Start" menu open "Options";
- in the section "Devices" find "Printers and scanners";
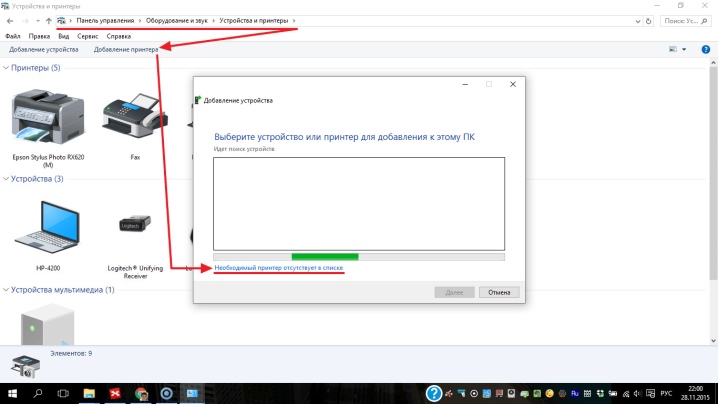
- click "Add";
- if the laptop does not see the printer, select "The required printer is not in the list" and go to manual configuration mode.
For Windows 7 and 8:
- In the "Start" menu open "Devices and Printers";
- select "Add printer";
- click "Add a network, wireless or Bluetooth printer";
- select a specific model of equipment in the list;
- click "Next";
- confirm the installation of drivers;
- follow the instructions of the installation wizard until the end of the process.

Installing Drivers
With disc
For the device to work correctly, certain drivers must be installed. As a rule, a disc with them is attached to the equipment upon purchase. In this case you just need to insert it into the laptop's floppy drive. It should start automatically.
If this does not happen, you can switch to manual control of the process. To do this, go to the "My Computer" section. There you need to double-click on the name of the disc.
Installation is performed using the Install files. exe, Setup. exe, Autorun. exe.

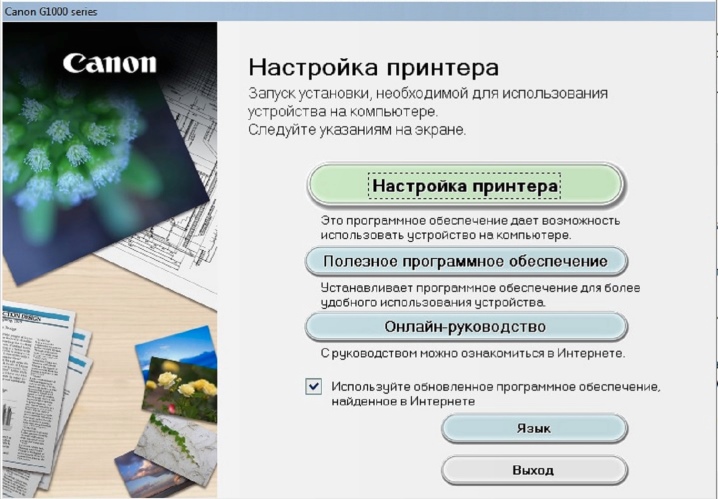
The interface can be anything, but the principle is the same in all cases. You just need to follow the instructions of the system, and the installation will be successful. The user is asked to agree to the terms of use of the drivers, to choose the method of connecting the device. You also need to specify the path to the folder where the files will be installed.

Without disc
If for some reason there is no driver disk, you can go the other way.You need to go to the Internet and find drivers suitable for a specific model of the device. Usually they are posted on the manufacturer's website. Then the files should be downloaded and installed according to the attached instructions. By the way, this method can be used even if the laptop does not have a floppy drive. (such models are not uncommon today).

Another option for finding and installing drivers is to use System Update. In this case, you need:
- in the "Control Panel" find "Device Manager";
- open the "Printers" section;
- find the name of a specific model in the list;
- right-click on the found device name and select "Update drivers";
- press "Automatic search";
- follow any instructions that appear on the screen.

Customization
To print any document, you need to set up the technique. The process is quite simple - the user must:
- in the "Control Panel" find the section "Devices and Printers";
- find your model in the list that appears and right-click on its name;
- select the item "Print settings";
- set the required parameters (size of sheets, their orientation, number of copies, etc.);
- click "Apply".

Possible problems
If you are going to print something, but the laptop does not see the printer, do not panic. You should calmly understand the cause of the problem. The name of the vehicle may be incorrect. If another printing device was previously connected to the laptop, data related to it may have remained in the settings. To print documents through a new device, you just need to specify its name in the operating system and make the appropriate settings.

If the printer refuses to work, check to see if there is paper in it, if there is enough ink and toner. However, the device itself should inform you in case of a shortage of some components. For example, it could be a notification on the display or a flashing light.
In the next video you can learn more about the Canon PIXMA MG2440 printer and learn about all the intricacies of connecting the printer to a laptop.


The comment was sent successfully.