Stretch ceiling lighting with LED strip: installation features

The lighting market has a wide selection. The leading position is occupied by the illumination of the stretch ceiling with LED strip. You can choose any shade, create an unusual pattern from LEDs. Before buying, you should study the features of the installation of such products.


Peculiarities
Stretch ceilings personify lightness and airiness, therefore, you should carefully approach the choice of lighting. With dynamic lighting, you can get crisp light in any room. At the same time, try not to overdo it, as there must be a balance between smooth and "cutting" light.
The LED strip has features that you should be familiar with before purchasing:
- optimal lighting. LEDs shine at an angle of up to 1400 degrees. This quality makes it possible to illuminate a large area;
- saving. Small-sized bulbs can replace conventional bulbs, consuming a small amount of energy;


- long-term operation. The manufacturer guarantees 10 years of work;
- LED strip pays off quickly. Despite the high cost, this type of lighting can pay for itself in just 1.5 years due to savings on electricity;
- using a dimmer, you can control the brightness of the backlight;
- uniform illumination. Silent luminaires can illuminate a room at full brightness with a single movement.


If you decide to use the option with an LED strip under a stretch ceiling, remember that lighting should be created for comfort. Many users choose LEDs as a decorative component. They will also be useful if you need to set accents on some objects in the room, visually enlarge the room or zone the space.
A wide range of colors expands the design possibilities.


Which one to choose?
The organization of the backlighting of the stretch fabric can be done using the following options:
- use of contour diffused illumination. This element forms a continuous strip of light. In it, the LEDs can be located on the shelves and shine upward. This method is considered the simplest, but with its help many creative ideas can be realized;
- directional lighting, where the lamps are located on the slopes that are located along the ceiling. This feature forms "rays" diverging on the main ceiling sheet;


- spot lighting. Another name is "starry sky". Such a diode backlight consists of LEDs, the luminous flux of which looks from the ceiling to the floor. Installation of the "starry sky" has some difficulties, so the installation work should be placed at the disposal of specialists;
- installation of curly elements. In it, the LEDs will be located in special shades on the ceiling. Items should be small.


To choose the right LED lighting, consider the following nuances:
- number of LEDs. LEDs in strips are arranged with a certain density, which affects energy costs and the degree of light brightness. Tapes are popular, in which there are 30, 60, 120, 240 elements. As a rule, small elements have a more frequent arrangement than large ones;


- power level. You should decide on this parameter in order to correctly select a power source.Calculating the power consumption is simple: if the consumption level of each LED is 0.04 watts, a strip of 60 elements requires 2.4 watts. When using a 10-meter circuit, the resulting number must be multiplied by 10. As a result, we get a value of 24 W;
- voltage level. Most power supplies operate on direct current, the value of which is 12 volts. Also on sale there are more powerful devices with a power of 24 volts. For such elements, a step-down transformer is required;


- color scheme... Many users opt for white backlighting, but manufacturers offer a variety of options. Modern ribbons have the ability to change the color scheme, which can be changed based on the user's mood;
- lighting control can be done using an IR remote control or an ordinary smartphone. These devices allow you to change the lighting parameters, control the level of brightness and color.


Mounting
You will be able to mount the LED strip with your own hands. There are several installation methods to help you create the right ambiance in your room.
Perimeter installation
If you want to create a calm atmosphere in your room, choose soft lighting that can be installed along the borders of the stretch fabric. In the evening, not only the body will need rest, but also the eyes, so this option is considered the most optimal.


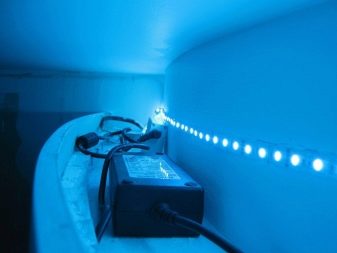
Installation consists in the location of the LED circuit along the wall slightly below the canvas itself. The skirting board helps to hide the structure. You can equip multi-tiered structures using this method, the boundaries of which should be made of plasterboard. The tape will hide under it. For multi-level structures, it is not recommended to choose glossy surfaces, since gypsum board and LEDs will reflect in gloss, which will ruin the whole picture.
Since LEDs are not capable of producing adequate lighting, you need a chandelier.


LED lighting along the edges of the ceiling is ideal for a hall or dining room. In the evening, you can turn off the main lighting, leaving only the LED lighting. Such light will be necessary when watching TV, since experts do not advise watching movies without light, and the main lighting will not allow you to fully relax.


Installing the tape inside the ceiling
Each person will be able to create a unique pattern on the ceiling from the LED strip. Installation of the ceiling is carried out only along the guides, so the rough surface remains intact, and LEDs can be attached to it, which in the future will be able to illuminate the ceiling from the inside.
To make the light pattern unique, you need to mark the location of the LEDs on the ceiling. Based on the planned pattern, LEDs should be chosen. They can be white or combine several shades.


Based on your personal drawing, measure the required footage, make an increase for random changes. To work you will need: the LED strip itself, connectors, connecting wires, a relay for working with light intensity.
How to attach the tape:
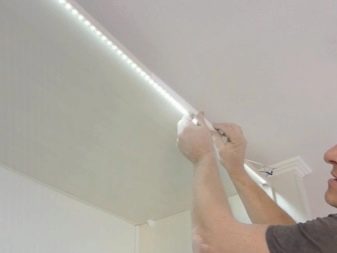
- fastening the tape is easy, since the elements have an adhesive base. Before work, you should prepare the surface of the ceiling: degrease, prime and putty the base;
- the glue adheres quickly, so you should work quickly and accurately;


- cut the tape only in the marked areas. The connection should be made using a connector. Keep in mind that strong kinks affect the life of the elements;
- after you have installed all the components on the ceiling, you will need to connect the tape to the network. To do this, you must use a special power supply unit;
- choose a power supply based on tape footage and power.The energy consumption is indicated per meter, therefore, during installation, the tape length should be multiplied by the parameters of one meter.


Helpful hints
Uneven lighting can help make the room feel more comfortable. To do this, you should choose an LED design that will not have the same brightness around the entire perimeter. For each area of the room, install a tape with LEDs of different densities or use a dimmer.
Pay attention to the labeling of the diodes. Although the SMD 5050 tape has a high price, it guarantees high quality white light due to the combination of three color components.
The SMD 3528 brand has an affordable cost, but it is made on the basis of blue LEDs that burn out during use.


The installed stretch ceiling is difficult to dismantle without damage. For this reason, experts recommend working with decorative lighting before the canvas is stretched. The exception is the harpoon mounting method, which can be removed and re-hung.


Beautiful examples in the interior
LED lighting paired with a stretch ceiling can create a unique atmosphere and make your interior unique. You can implement your own ideas and surprise your guests.
Such lighting looks beautiful in a room for children. The ribbon plays not only a decorative, but also a practical role. Since most babies are afraid to fall asleep in the dark, you can leave a "starry sky" on the ceiling, which will protect your child.


The lighting inside the ceiling is beautiful and unusual. Choose original combinations that will paint unusual patterns or even paintings above you. Such structures should be invisible in the main lighting and look spectacular in the evening.
Many people choose soaring ceilings. This solution creates the illusion that the ceiling is located in zero gravity and hovers above you. Rooms decorated in a similar style are airy and immersed in an atmosphere of mystery.


Installing lighting in a drywall niche is a common option that will never lower its position. Lighting creates a unique effect that will be appreciated by all your guests.
For multi-level structures, LED lighting is considered the best option.
With the help of the tape, you can emphasize the boundaries of each tier, designate the zoning of the room and create a unique atmosphere.


For information on how to properly mount the LED strip, see the next video.


The comment was sent successfully.