Features of the repair of induction cookers
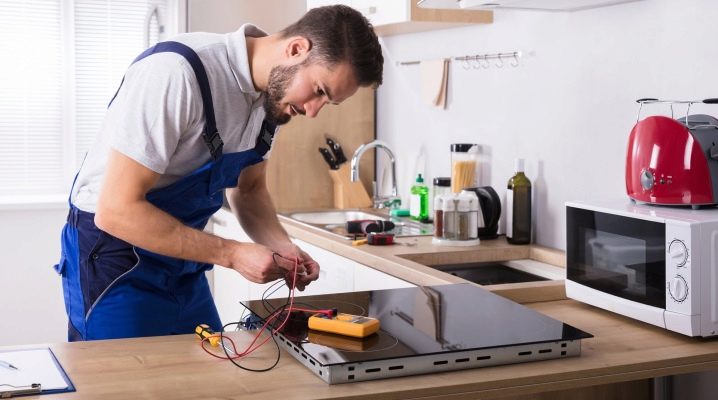
Recently, induction cookers are gaining the same popularity as other varieties of this type of kitchen appliances. However, like any device, sometimes they fail. Although the service center will help the owner to quickly solve this problem, a person who understands the device of the stoves will be able to fix the breakdown on their own. Moreover, in this case, significant savings will occur.
Induction cooker device
An induction hob functions much safer and more efficiently than a conventional hob equipped with cast iron hobs. Its work occurs due to electromagnetic induction - eddy currents heat up the metal. NSOn top of the induction panel there is a glass-ceramic sheet, and inside it there is a closed winding that conducts a current with a high frequency, the indicators of which range from 20 to 60 kilohertz.
In this way, the inductive current is applied to the bottom of the pot, which is the secondary winding. As a result, the cookware heats up very quickly and heats up the stove itself. In other words, a high-frequency magnetic field creates induction currents. Heating occurs due to the fact that the metal of the cookware used absorbs the energy of these fields.

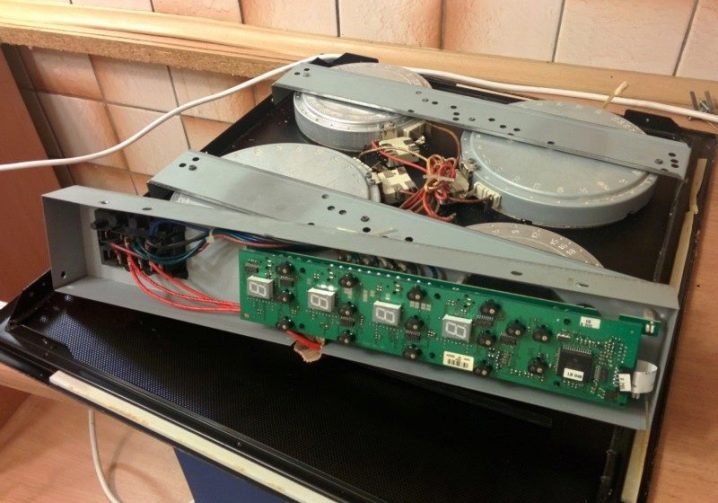
The functioning of an induction hob is impossible without a few basic parts.
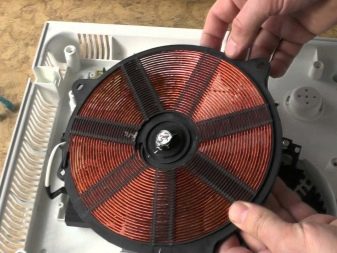
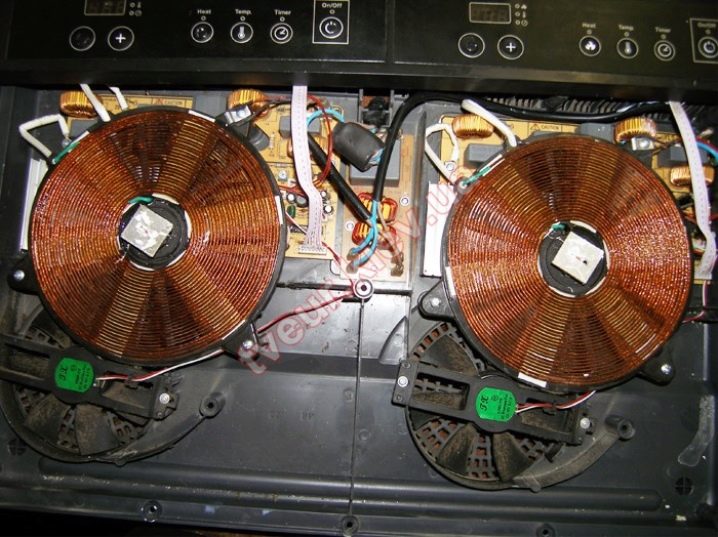
A temperature sensor monitors how hot the device is. If something gets out of control, then it is he who will turn off the power. The coil, which is the primary winding, looks like a copper conductor laid in a spiral. Together with the ferrites placed in the housing, it forms a ferromagnetic complex. The generator PCB has a fan heatsink. Finally, the blowing is carried out by the generator housing.

Frequent malfunctions
Most often, the consumer is faced with the fact that one or more burners do not turn on, the stove makes strange sounds, heats up poorly or stops working on its own. The essence of the most common situation is that the stove does not heat well. This cannot even be called a breakdown, because the problem arises if the bottom of the container used has shifted relative to the center, or if its diameter is much smaller than the hob.
If one or more burners have stopped working, then it is necessary to check whether their power is retained, since several parts may fail if overheated. Insufficient heating can also occur due to an incorrect switching sequence.


As a rule, to start an induction hob, you must first select the burner to be used using the sensors, and then set the required power on it.
If the order is out of order, then nothing will work. When the touch surface does not respond to touch, the problem can be trivial pollution. After cleaning, it is necessary to check again - if it does not help, then it is worth inspecting the connecting loops that combine the inductor circuit and the control panel.
When the temperature of the hob is no longer displayed, the difficulty may be in a broken thermal sensor. Sometimes breakdowns occur with a fan, the main task of which is cooling. The solution may be to fix the temperature sensor.If the ventilation system stopped working at all, then this could have happened either due to a burned out motor, or due to the fact that the control circuit was broken.
Sometimes the hob switches itself off. This can happen if the wrong cookware is used - made of material that is not marked "for induction cookers". It is worth mentioning that you should not use all containers made of non-magnetic materials, that is, aluminum, copper alloys, and stainless steel.
Heaters can turn off on their own for several reasons, indicated in the instructions. For example, by a timer signal or upon reaching a two-hour operating period. The burners will also stop working if no further action has taken place within 10 seconds after turning them on.
The induction hob makes a noise when the appliance has an excessively high heater power or is cooking in an unsuitable pan. For example, noise occurs when the bottom of a saucepan is too thick, too thin, or too small in diameter.
When the fuse blows out, the hob becomes impossible to activate at all. This happens either if it did not cope with the load, or the transistors are short-circuited. Overheating of the hob can be caused either by dirt or excess liquid that has entered. The winding overheats when the entire structure is not placed on a solid surface, and the equipment begins to sag under the weight of the dishes used.


If the induction cooker clicks during cooking, then first you should study the instructions - for some models this "accompanying effect" is considered the norm. You should also not worry if the device hums, pops or squeaks - these sounds are emitted by induction coils, interacting with the cookware. When the surface of the induction hob is very hot, as well as what is under it, it is worth checking if there are metal objects in the cabinets, for example, cutlery.
Finally, if the machine knocks out at startup, then first of all you should check its condition. Otherwise, the problem will be either in the connection or in the heating element.


Preparation for repair work
After all the possible causes of the malfunctions have been checked, you have to proceed to repair. Preparation necessarily begins with the fact that the stove is disconnected from the power supply, in this case electric. By the way, before that it is worth finding out if the outlet itself is working. This can be done with the help of another, unambiguously working device. Next, the surface is dismantled in order to be able to work with the induction system itself.
The first step is to visually assess whether everything is in order with the elements. For example, soot, a changed shade and other traces should immediately alert you. Further, a full check of all components begins.


Contacts, cable and fuses are assessed using a multimeter - if resistance is detected in the sections of the circuit, the broken elements are replaced. The spirals of the induction coils are checked for cracks and tangencies between the individual turns. Temperature sensors are again monitored with a multimeter. The next step is testing the wiring going from the induction coil to the generator. Further, with the help of an ordinary powerful light bulb and a magnifying glass, it is necessary to find out if cracks have appeared on the control board. The latter are capable of provoking a rupture of paths conducting current.
Upon completion, the base of the inoperative burner, if any, is examined separately.


How to repair?
In order to repair an induction cooker with your own hands, you must immediately prepare diagnostic tools, a soldering iron and soldering devices. As a rule, the reason is either improper operation, or a factory defect, or the ingress of liquid into the body.
If the stove does not turn on, the fault may be in the power cord or a problem with the plug. Repair in these situations is carried out as follows: the stove is disassembled, the wire is cut at the entrance to the household appliance, after which the copper conductors are stripped. After assessing the condition of the conductor with a multimeter, it is necessary to remove the part of the wiring that is still in the case. Finally, the power cord is installed and the pair of main conductors are correctly connected to the grounding conductor. The plug is also cut off and replaced with a collapsible three-pin product.


When the cause of the breakdown is a damaged fuse, it will be enough to disassemble the device, replace the failed part and return the induction system to its original state. To return the control module or the touch panel to service, you will also have to purchase a serviceable element and replace it. Loose pressure springs are even easier to repair - they just need to be tightened to the level required according to the instructions.
A break in the wires connecting the coil and the power grid can be eliminated if their ends are professionally soldered. It will be enough to replace the burned-out coil with a new one, but it is better to entrust this process to a specialist.
It is worth mentioning separately that if used improperly, cracks may appear on the glass-ceramic surface. In this case, self-repair is impossible, so the only solution is a glass replacement performed by professionals.
In general, basic equipment repairs are easier to carry out according to a specific algorithm. First, the electrical wire is inspected for kinks, breaks and abrasions. If they are available, the cable is simply changed to a new one. If the wire is in order, then the hob is dismantled. Having unscrewed the mounting strips, you will have to lift the panel and disconnect the wires, after which it can be completely removed. A multimeter evaluates the condition of the fuses and the transformer. If necessary, parts are replaced with new ones. Next, all the wires are checked - first visual, and then again with a multimeter. Torn or damaged parts are replaced with new ones.


Experts recommend contacting a workshop if serious malfunctions of the control unit are detected.
Alternatively, it can be faulty electronic components, microcracks on the printed circuit board, or problems with the fan. Not having sufficient skills, it is worth contacting a specialist who can cope with the task.
From the video below you will learn a lot of information about the device of the stove and its repair.


Thanks to the author for the video. In great detail, clearly and everything is correct. In the overwhelming majority of cases, it is the power elements that fail. This video will help even a novice electronics or electrician to correctly perform expensive repairs.
The comment was sent successfully.