How to germinate pepper seeds for seedlings?
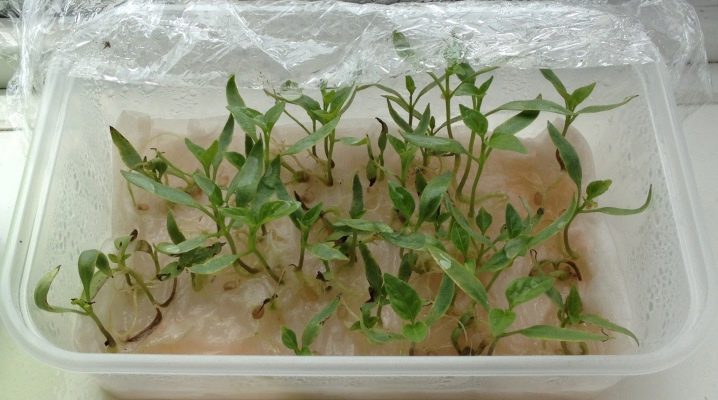
Gardeners often find it difficult to plant bell peppers. Some people find this species difficult to grow. The key to the success of the future harvest is high-quality seedlings. It is best to grow healthy plants in your home on a windowsill. How to properly prepare seeds before planting is described in this article.
The need for a procedure
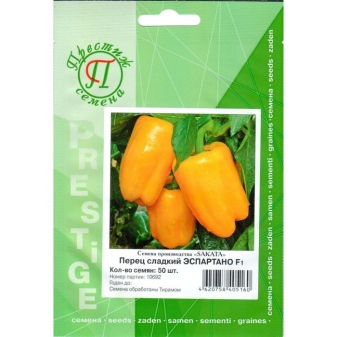
Pepper takes a little longer to germinate than cucumber or cabbage. In warm climates, some gardeners, with the onset of favorable weather, sow seeds in the ground and wait for seedlings to appear. This is done if the planting material was purchased from a trusted manufacturer. It has a high germination rate and is protected from pests and infections. Usually, the information on the package will tell you whether the seeds have been pre-treated or not.
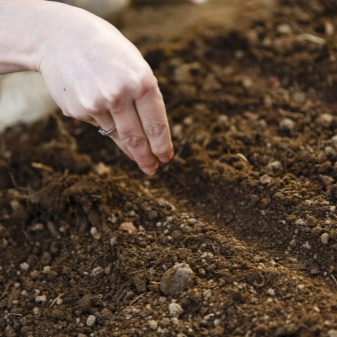
Peppers planted dry, when the weather conditions change, germinate a little longer, and the plants are not as strong as those grown in seedlings.
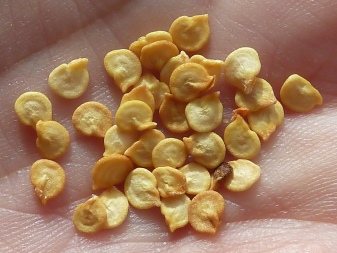
If there is any doubt about the quality of the seed, you can try to germinate it before planting.... This is done with old seeds purchased from a private owner or collected on their own. They are recommended to be pre-processed, but before that, you need to get rid of the non-similar seeds.
To do this, use the following methods.
- The seeds are poured onto a dry flat surface and the largest ones are selected without defects. It is believed that the larger the size, the stronger the seedlings will be.
- A few tablespoons of salt are dissolved in half a glass of water, the grains are placed in the solution for 30 minutes. The empty and the dead float, and with living embryos they sink to the bottom.
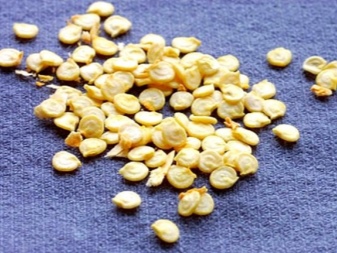

None of the above methods give a 100% guarantee of germination of pepper seeds. Sometimes all the seeds in a saline solution can float to the surface, and even the largest ones from the selected ones will give weak sprouts. How well certain species germinate can be found out only after germination.
In temperate climates, peppers are usually planted for seedlings in containers.
To improve the quality of young plants, seeds are preliminarily prepared for planting and favorable conditions are created for the emergence of sprouts.

Favorable conditions
To activate the embryos of future plants, you need to create a suitable environment, they need:
- humidity;
- warmly;
- Fresh air.
At a temperature of +15 degrees, the seeds begin to come to life, but they will germinate for a long time - up to 2 weeks. The optimum temperature at which sprouts will quickly appear is +25 degrees. In warmer conditions, above +30, plants may die.
Seeds should not be placed in water or very wet soil. During the day without oxygen, they will die. With a lack of moisture, the development of future plants will be delayed. As a rule, the seed is placed on a damp surface, but not on a wet one. A film is stretched on top or covered with glass to create a greenhouse effect - these are the most suitable conditions for sprouting.


The film or glass is periodically removed: 1-2 times a day for 30-40 minutes, since the seedlings will die without access to fresh air. The planting material must be ventilated, the moisture level must be checked and, if necessary, sprayed with a spray bottle.
Preparation
Before starting planting, the seeds must first be prepared: disinfect and place in a humid environment. Planting material purchased from a trusted supplier does not actually require special preparation: it is already sorted, processed with a special composition to protect against diseases and to stimulate growth. The grains do not germinate before planting, and the first shoots appear soon enough.

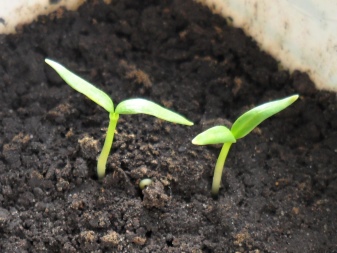
Sowing material collected with your own hands or purchased from other gardeners is best decontaminated. This will protect not only future seedlings from possible diseases, but also neighboring crops. Spores of fungi or mold may remain on the shell, and there are microorganisms in the soil, against which the sprouts will be defenseless.
For this procedure, the seeds are poured into cheesecloth and wrapped in a bag. Each is tied with a fabric ribbon, the name of the variety is written on it. Gauze bags are placed in warm water with a temperature of about + 40 degrees and soaked for 60 minutes.
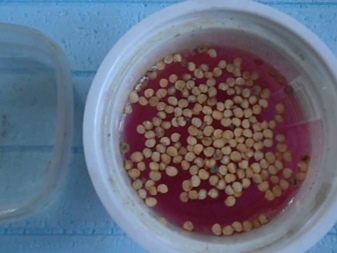
For disinfection, a solution of potassium permanganate is prepared: potassium permanganate is dissolved in water at room temperature: 1 g per 100 ml. A cloth with seeds is dipped into the resulting mixture and left for half an hour. Then washed.


What can you soak in?
After disinfection, the grain can be germinated, but it is a good idea to carry out additional processing to stimulate germination. They are placed in a special solution that nourishes and stimulates root formation. Growth stimulants are available in specialized stores: drugs Epin, Zircon, Ekogel, Baikal-M. The solution is prepared according to the instructions on the package and the seeds are soaked in it for several hours. Some gardeners do not trust synthetic products, using only settled melted snow for the grains. There are other compounds that fill the embryos with moisture and activate growth.


What nutritional mixtures can be prepared from available tools.
- Ash solution - 1st stage l. insist on 1 liter of water for a day, stirring from time to time. The resulting infusion is soaked for about 12 hours or used for germination.
- Honey solution - 1 tsp. per 1 liter, the composition is mixed. It improves germination and accelerates seed hatching. Suitable for germination.
- Aloe juice well disinfects and stimulates the emergence of seedlings. The sprouts become more resistant to negative factors, hatch and grow quickly. Aloe leaf is cut off, washed. A longitudinal incision is made in the pulp and opened like a book. The seeds are evenly placed in the recess, the edges of the sheet are connected and wrapped with a damp cloth, and then with a film. So leave for 24 hours.


Germination methods
Any kind of pepper has a long growing season, and it is better to sow it for seedlings a little earlier than tomatoes. The rules for preparing seeds for spicy and sweet species are the same. Both species begin to germinate in mid-February or postpone to the first week of March. The seeds of this culture can sprout for quite a long time - up to 2 full weeks.
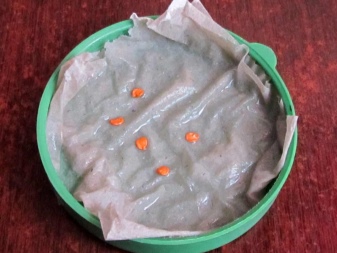
Everyone can sprout pepper at home. Traditionally, they do it this way: a piece of natural fabric is placed in a plate, and seeds are poured on top. Pour water 3-4 mm. They are placed in a warm place, moistened daily - the fabric should not dry out. Soaked seeds do not begin to hatch immediately, much depends on how well they were prepared, where and how the germination process took place.

There are several effective ways.
On cotton pads
To obtain seedlings according to this scheme, you will need cotton pads and small bags with zip fasteners. They are signed with a ballpoint pen, the name of the variety is pasted with adhesive tape or adhesive tape. Four to five holes are punctured in polyethylene for ventilation.
Cotton circles are immersed in warm water, removed and lightly wrung out. Seeds are spread on each disc, and covered with another cotton circle on top. The resulting layers are placed in a bag and removed to a warm place. For 2-3 days, each is checked for humidity and aired. Moisten if necessary. Sprouts at home can appear on the 4th day.
Suitable for large amounts of seed and in the absence of time. This easy method has one disadvantage - the roots of the seedlings can become entangled in cotton wool or grow into it. It will be difficult to remove them so as not to break off the tips. Can be cut and planted with a piece of cotton wool.

On toilet paper
Perforated paper is a safer material than cotton wool. Sprouted roots can be easily removed from wet cellulose without damage. This method requires a shallow cup or disposable dish.
At the bottom, paper napkins or toilet paper are laid in several layers, the seeds of bell pepper are moistened and distributed. A film is pulled from above or covered with a lid. It is recommended to ventilate twice a day, moisturize when dry.

Using foam rubber or a sponge
With this method of germination, you will need foam sponges, which are used for washing dishes or for taking a shower. It is better to choose a small multi-colored one: it is convenient to highlight each variety with the help of color... In the middle part of the sponge, two long cuts are made, the foam rubber is moistened and the seeds are placed in the cut. Wrapped in foil and put in a warm place. The structure must be checked, ventilated and humidified every day.

In the "snail"
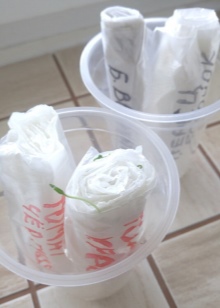
Germination requires a plastic bag and toilet paper. The package is folded in the middle and laid on the table, 2-3 paper layers are distributed on top of it. Moistened from a spray bottle. They retreat one centimeter from the edge and distribute the grains in rows. Polyethylene is rolled up with a tube and an elastic band from a stationery set is put on top. The name of the variety is attached to the roll. The "snail" is placed in a glass filled with 2-3 cm of water.
The sprouts will appear in about a week and should be placed in the soil immediately.


In sawdust
For this option, take ordinary sawdust, but wood filler for animals is also suitable.
The composition is poured with boiling water and left to swell, after about an hour the liquid can be squeezed out. The resulting mixture is poured into containers with a layer of 4-5 cm. Part of the sawdust is left. The grains are laid out evenly and covered with a thin layer of the remaining granules no more than 0.5 cm. Cover with foil or glass. Seedlings with two leaves are transplanted into separate cups.


In hydrogel
For seedlings, use a hydrogel in the form of granules or any other. Suitable even for small seeds, retains moisture perfectly. The granules are poured with water in the amount indicated on the package and soaked. The swollen gel is cut into plates or mixed to a jelly state, placed in wide shallow containers. Seeds are distributed on the surface of the hydrogel and covered with mica.
After the appearance of the leaves of the cotyledons, they are transferred to the ground with a fragment of the hydrogel. You can leave the seedlings until the dive stage, but so that the plants do not lag behind in development, they are fed with complex additives.

Which of the following methods is the best is hard to say. Each gardener chooses the most effective and convenient option for himself.
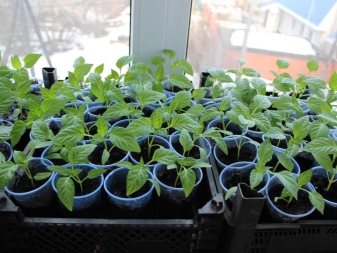
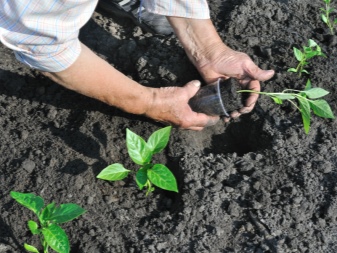
In spring, the days become longer and the sprouts already have enough light. Seedlings are placed on a light and heated windowsill. Young plants are transferred to the beds within 60-80 days. It is possible to plant in open ground or greenhouses when frost stops and warm weather is established.
How to speed up the process?
Novice gardeners often face failure when planting seeds for seedlings. There are reliable methods that guarantee 100% germination. Experienced vegetable growers share their secrets on how to make all the seeds germinate.
- Peppers are planted in the last week of March or the first two weeks of April.
- The sowing material is taken 3, and sometimes 5 times more than the seedlings are required for planting.
- The seeds must be fresh, otherwise all efforts will be in vain - the old ones give weak non-viable seedlings.
- Soak for 2 hours in such a mixture: growth stimulant "Zircon" - 4 drops per 1 liter and a weak pink solution of potassium permanganate.
- The solution is drained, and the grains are laid out in a moistened cloth (preferably non-woven) and in a container with a lid.
- The jar is placed on the battery. It takes time to look into it for ventilation and control.
- The roots should hatch quickly - after 3 days.
- After that, they are sown in separate containers, the soil is pre-spilled with hot water.
- 2-3 seedlings are sown in one cell, sprinkled with 5-10 mm soil, covered with foil and put in a warm place.

The sprouts should appear within 3 days.
Seedlings grown in this way are not dived, but kept in the same containers before transplanting to the garden bed.
In the absence of time to prepare pepper seeds before planting, this can be done quickly. The trick is to energize future plants in a short time. To do this, they are first left for 20 minutes in warm water with a temperature of up to 40 degrees. The main thing is that the temperature does not drop: the container is placed on a battery or heating pad. After the seeds are taken out and placed in a cold weak pink solution of potassium permanganate for a quarter of an hour. Take out, dry and sow.

Possible mistakes
Seeds awaken in a humid environment at a temperature of 26-30 degrees in terms of 3 to 7 days. In some cases, they germinate a little longer - up to 10-14 days. But there are situations when the seed swells when soaked and does not germinate for a long time or hatch, but it is very bad.
This can happen for the following reasons.
- Temperature too low or too high environment.
- Water for soaking contains chloride compounds: it is better to use filtered or settled for several days.
- Lack of air - closed containers are recommended to be ventilated more often.
- The main reason is the seed. This happens if it is old, weak or dry. Overdried grains sometimes sprout for more than 10-15 days. It is better not to use sowing material older than 5 years, the likelihood of sprouts appearing in them is minimal. Only the first two years are considered fresh seeds, in the 3rd year the germination rate decreases by 2 times, and in the 4th year only every tenth seed will hatch.
- It is now popular to steam the seeds before planting. or a very hot liquid, but this method is dangerous for future seedlings. After such a procedure, all embryos often die.
For even more information on how to germinate pepper seeds for seedlings, see the next video.


The comment was sent successfully.