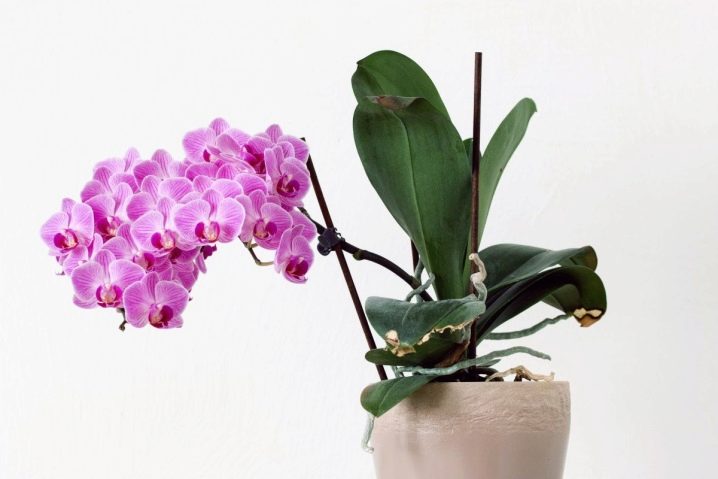
How to transplant an orchid?
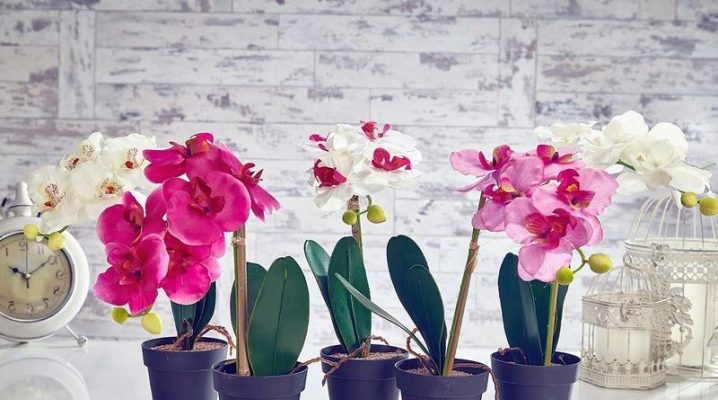
Home orchids are extraordinarily beautiful, showy, but at the same time capricious and sensitive plants. They perceive and endure any change in the habitual environment of existence extremely painfully. Naturally, a transplant for them is the strongest stress that can lead not only to a weakening of the immune system, but even death. What rules should be followed when transplanting these exotic beauties?
When should you transplant?
The most suitable periods for transplanting flower growers consider spring, when the plant wakes up and enters the stage of intensive development, as well as the resting phase after flowering. During these periods of time, orchids most steadfastly perceive the change in habitual conditions, enduring stress with the least losses and risks. It is very important to determine in a timely manner the moment when the flower should be transplanted.
Experienced florists recommend regularly examining it for signs such as:
- the formation of green plaque from moss and algae on the walls of the pot;
- filling the entire volume of the pot with roots;
- close interlacing of roots among themselves;
- visually noticeable root damage;
- the formation of mold, plaque, black spots on the roots;
- detection of pests in the substrate;
- wilting of plants;
- loss of plant resistance (the flower begins to move freely in the pot);
- no flowering for 3 months or more.
Green plaque formation
If a strange greenish coating begins to form on the transparent walls of the pot from the inside, this indicates that the moisture in the pot has begun to stagnate. The increased moisture content of the substrate, in turn, leads to the appearance of moss and algae on the walls of the pot. All this indicates that the air circulates poorly in the pot. This happens when the container becomes too small for the flower.
This sign is a sure signal for the immediate transfer of an orchid from a small pot to a large one.
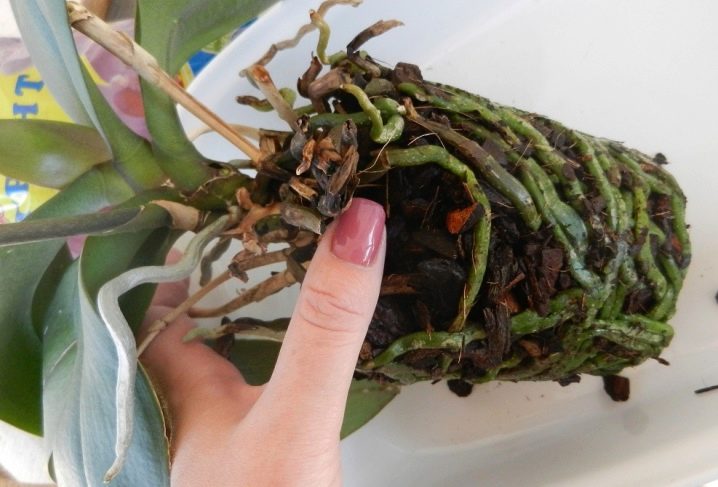
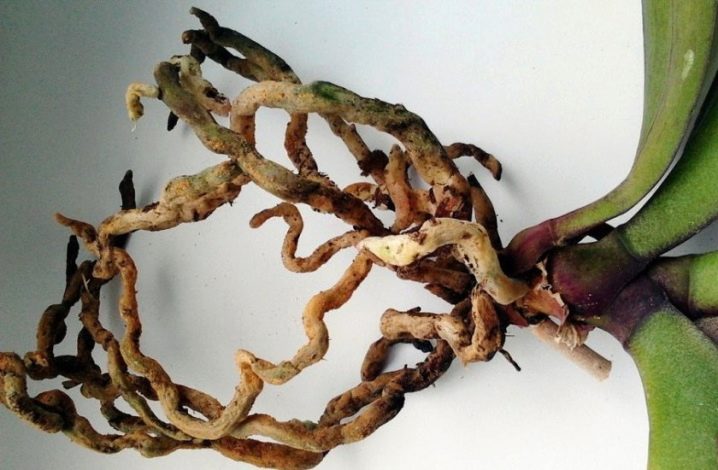
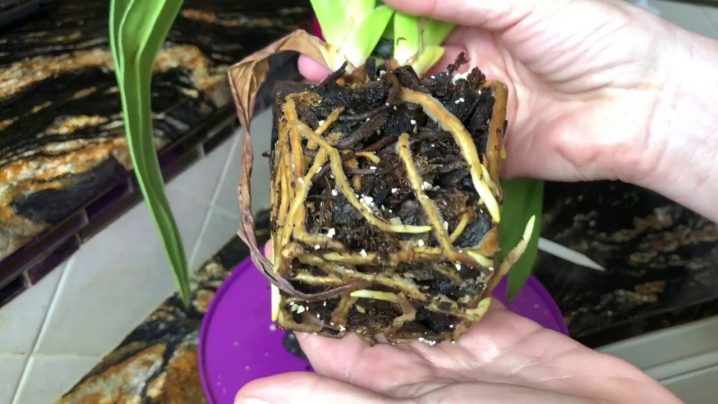
Filling the entire pot with roots
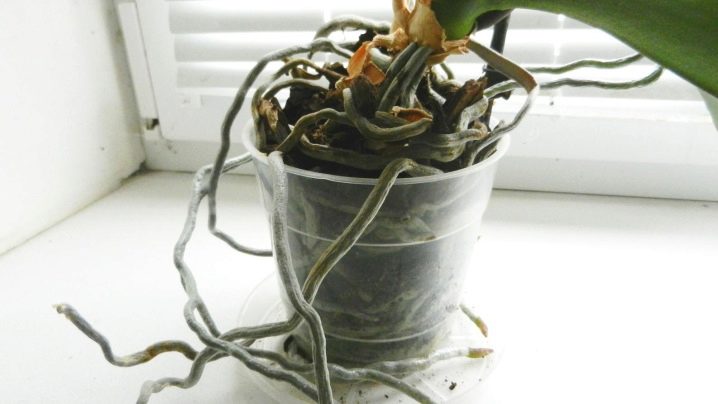
With age, the root system of the plant increases significantly in volume. If at the next examination it becomes noticeable that the roots literally rested against the transparent walls, it is worthwhile to immediately proceed with the transplant. However, here growers remind that a slight formation of orchid roots outside the pot is considered absolutely normal. A transplant is required only when the roots of the plant fill the entire volume of the container, intertwining into a ball. Orchids are also transplanted with intensive formation of aerial roots, which are actively formed if the pot is too small.
Interlacing of roots
When the roots of the orchid become cramped in their usual container, they begin to closely intertwine with each other in search of free space. In this case, it is better not to postpone the transplant, otherwise the tightly woven roots will begin to break.
Root damage
If, when examining the pot, mechanical damage to the roots (cracks, breaks) is found, it is worth immediately replanting the plant. Otherwise, the amount of damage will increase, which over time will lead to the death of the exotic beauty.
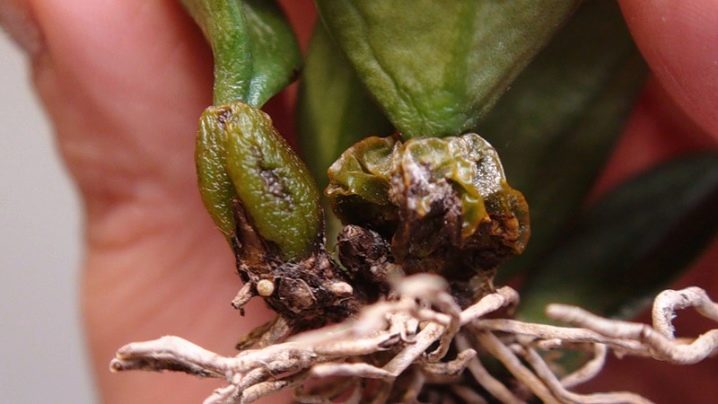
In addition, broken off roots often become an attractive target for pests, which also threatens the death of the plant.
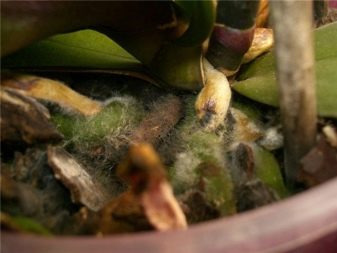
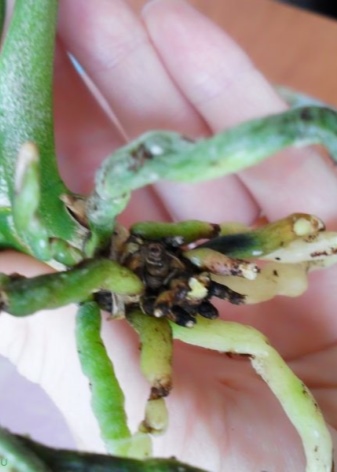
The formation of plaque and stains on the roots
When examining the roots of a plant, one should assess not only their condition, but also the color. In healthy orchids, the roots are gray-green and covered with a gray-silver bloom. The formation of mold, black spots, gray or whitish plaque on the roots indicates infection with fungal infections, bacteria and spores that cause decay. Any visual changes in this case indicate the activity of pathogens, which requires immediate flower transplantation and careful processing.

The appearance of pests in the substrate
If pests are found in the substrate, in no case should you hesitate to transplant the plant. It is necessary to change the pot and the infected substrate immediately, without waiting for the moment when the parasites have time to cause irreparable damage to the plant. It is not uncommon for pests to be found in the substrate of new orchids after purchase in the store. For this reason, experienced florists recommend temporarily isolating newly acquired orchids from healthy plants by quarantining them. During quarantine, it will be possible to check exotics for possible diseases and pests.
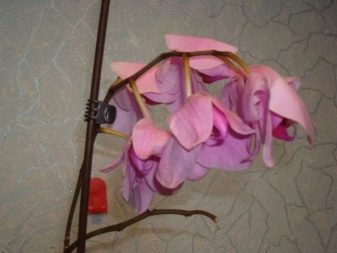
Withering of plants
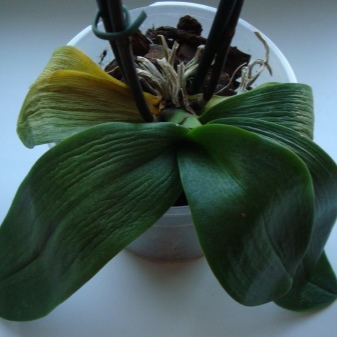
If the orchid begins to wither and dry out, and its leaves begin to wrinkle, losing turgor, the current care regimen should be revised. In the event that all the rules and requirements for caring for the plant are met, you should seriously think about a transplant. Usually, an orchid, without visible prerequisites, begins to fade when it lacks moisture and nutrients, and its roots do not have enough free space.
Loss of plant resistance
Loss of resistance is a very alarming signal indicating the need for an urgent plant transplant. If the orchid begins to move freely in the pot, this indicates that the roots that provide the flower with resistance have died. In this case, you can try to save the flower by taking a number of resuscitation measures. If the orchid still has healthy roots, it should be transplanted into a new spacious container with a clean and high-quality substrate. If the roots have died, you can try placing the plant in a small greenhouse from a plastic bottle, maintaining a constant temperature and high humidity in it. In some cases, new roots may form in the affected exotic.

Lack of flowering
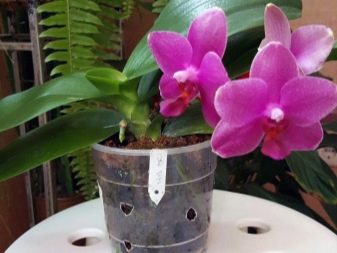
If an adult plant does not bloom for 3 or more months, but at the same time the season does not correspond to its resting phase, this may indicate that the orchid is very crowded in the pot. Due to the unsuitable pot size, the exotic in this case does not receive the nutrients and moisture it needs. Flowering can be stimulated here by transplanting the plant into a larger pot.
You should think about transplanting an orchid if a year has passed since the purchase of the plant and in the case when the substrate in the pot has exhausted its resource ahead of time. It is also necessary to change the orchid pot to a more spacious container if about 2 years have passed since the last transplant.
You should not rush to transplant a newly purchased plant. First, you should carefully examine the pot for damage. Dents and cracks on the walls are a strong argument in favor of a transplant.
Orchids purchased with an opaque pot or container should also be transplanted. These containers should be replaced with clear plastic pots.
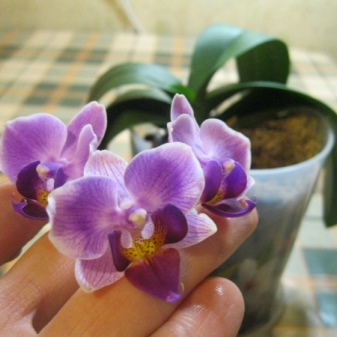
Can you transplant during flowering?
Inexperienced growers are often interested in the admissibility of transplanting exotic plants that are in the flowering phase. Knowledgeable plant breeders say that replanting a flowering orchid is highly undesirable. The fact is that flowering and the formation of new buds takes a lot of energy from a plant. If during this period it is transplanted into a new pot, the exotic will experience severe stress.A change in the usual conditions during the flowering period will lead to the fact that the orchid will begin to expend energy on adaptation, and it will no longer have enough resources for the formation of buds.
For this reason, transplanting during flowering is strongly discouraged. This procedure can be carried out only in extreme cases - for example, when pests are found in the substrate. In this case, the breeder must be prepared for the exot to stop blooming. According to some flower growers, in some cases, flowering orchids are able to neutrally transfer a transplant, accompanied by the replacement of an old cramped pot with a more spacious container. For a flowering plant, a cramped pot is a source of discomfort and nutritional deficiencies. By replacing a small pot with a larger container, a florist can provide optimal living conditions for a blooming exotic.
Preparing for transplant
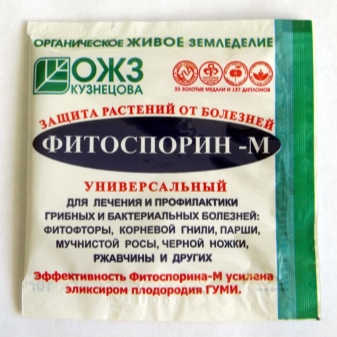
Before transplanting, the plant must be properly prepared for the upcoming procedure. Experienced growers say that even with the most accurate transplant, the roots of the plant will still be damaged, however, dry wounds will heal faster than wet ones. For this reason, the orchid to be transplanted must be removed from the pot, treated with Fitosporin roots and dried on a napkin for several hours.
If the exotic is firmly held in the pot, it is required to fill the substrate with water. When the water has intensively wetted the substrate, you should try again to remove the orchid from the pot. After that, the plant is placed on a clean napkin and dried.
It is important to note that it is required to dry exot in natural conditions, not bringing it closer to heating devices and not laying it out in the sun.
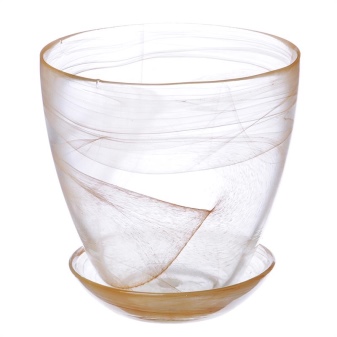
While the plant is drying, you need to prepare auxiliary tools and a new pot. The container for the flower should be selected in advance and carefully processed. When choosing a new pot, you should focus on the diameter of the root ball. The diameter of the new container should be 3-5 centimeters larger than the diameter of the ball of orchid roots. Such a pot size will allow the roots to straighten in the right direction and fully develop. Make sure that there are holes at the bottom of the container for water drainage.
Experienced flower growers recommend using translucent pots for planting orchids. The roots of these plants need not only moisture, but also sunlight, so the walls of the pot should not interfere with this. In addition, a transparent pot in the future will allow you to monitor the condition of the roots, timely identify signs of incipient diseases and traces of pest damage.
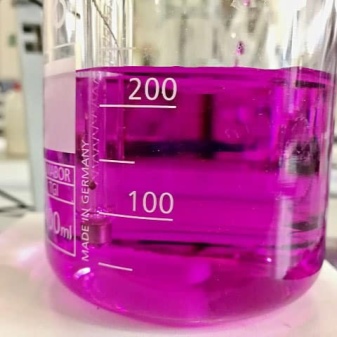
The new pot needs to be carefully processed. To do this, it can be washed with very hot soapy water and rinsed with boiling water (if the material allows it). Another reliable way to disinfect a container is to treat the pot with a solution of potassium permanganate or an alcohol-containing agent. After processing, the container is dried. In addition, it is necessary to prepare such tools and materials as:
- sharp scissors;
- sharpened pruning shears for indoor plants;
- coal;
- alcohol;
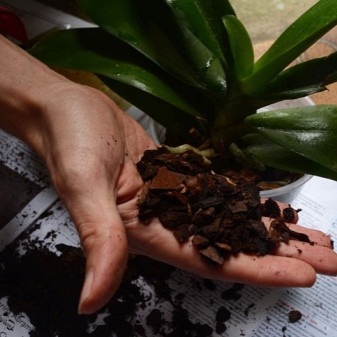
- new substrate;
- stick for distributing the substrate between the roots;
- holder for flower arrows.
Before planting, the orchid is carefully examined. All dry and dying leaves are cut off with scissors or pruning shears, the blades of which are pre-treated with alcohol. The same is done with the roots. All cut points are carefully processed with ground charcoal.
How to transplant correctly?
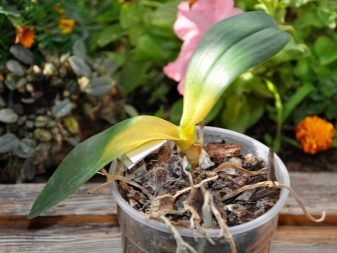
Before transplanting into a new substrate, add a little soil mixture from the old pot. Thanks to this, the nutrient medium familiar to the orchid will be present in the new soil. This, in turn, will allow her to quickly adapt and get comfortable after the transplant at home. It is important to take into account that the roots of orchids are very fragile and brittle, so you cannot rush and rush during the procedure.Rough and careless transplantation can severely injure the roots, after which the plant will take a long and difficult time to recover.
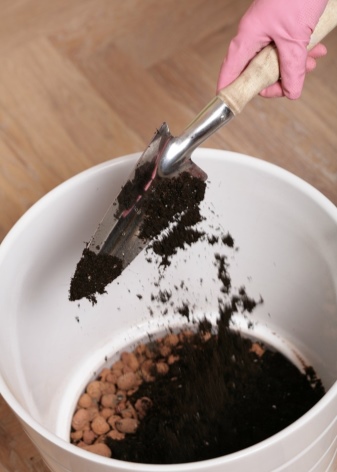
At the beginning of the procedure, it is required to correctly lay the substrate in a new pot. The substrate is preliminarily well moistened. At the bottom of the pot, crushed expanded clay or any other drainage is poured in a layer of 2 fingers. Then, the substrate is poured to the middle of the container - a mixture of crushed pine bark, sphagnum moss, vermiculite, peat or humus. Then the orchid is carefully placed on the substrate, making sure that its stem is in the center of the pot. If the orchid has previously released an arrow, you need to install a peduncle holder next to it.
After that, the pot is gradually filled with the substrate. In order for the mixture to be evenly distributed among the roots, its fragments are carefully leveled and pushed in the desired direction with a stick. You should act especially carefully when replanting an orchid with many roots. It is impossible to swat or compact the soil mixture, otherwise the fragile root system can be easily damaged. When the flower pot is completely filled, a layer of moistened sphagnum moss is laid on top of the substrate. Acting as a mulching material, moss will prevent moisture from drying out prematurely.
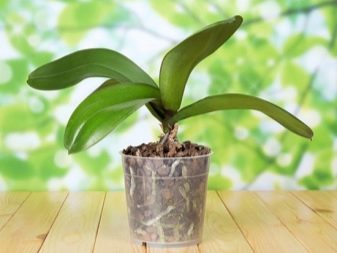
All of the above actions are also carried out in the case of transplanting a flowering plant or orchid with buds into a new pot. However, here, before transplanting, knowledgeable plant breeders recommend cutting the peduncles of the plant by a couple of centimeters in advance. This technique will stimulate the enhanced formation of new roots and the growth of lateral flowering shoots. Places of cuts must be treated with activated carbon powder. Orchid babies are the easiest to transplant. In this case, all the steps presented above are performed step by step, but the roots of young plants, unlike mature orchids, are not pruned.
It should be noted that all the steps that the above instructions for transplanting orchids describe at home can be carried out, like the procedure itself, at the most suitable time for this. It is highly undesirable to transplant exotic beauties in winter. During this period, they usually remain in a dormant phase, while some varieties enter the flowering phase in winter. In both cases, transplanting for orchids is highly undesirable. Exceptions to this rule are cases when a plant needs to be urgently transplanted in order to avoid its death.
This can be caused by a serious illness, pest attack, the need for resuscitation measures.

Follow-up care
In order for the transplanted plant to recover faster and adapt to new conditions, it must be provided with careful and competent care. After transplanting, the orchid pot is placed in a place where gentle conditions are maintained. Exotic plants affected by an unsuccessful transplant need special attention. Orchids, which were urgently transplanted due to illness or pest damage, require no less care. Gentle conditions after transplantation provide for the provision of such requirements as:
- lack of bright light (shading);
- stable room temperature;
- optimum air humidity.
If the leaves of the transplanted orchid wither, this may indicate that the plant is painfully undergoing stress. This is especially true for orchids, which have been damaged during transplantation. Also, wilting of leaves can be caused by plant disease or the consequences of pest activity, which was originally the reason for the transplant. In a shaded place with dim light, the transplanted plant is kept for about 10 days. During this time, the orchid should be looked after with the utmost care and care.

It is required to regularly inspect both the leaves and peduncles, and the roots of the exotic.
The temperature in the room where the transplanted plant is located must be stable at 22 ° C. In no case should temperature extremes be allowed, which can negatively affect the recovery of the orchid. It is also not recommended to move the pot from one place to another at this time. When planting a plant in a wet substrate, watering is postponed for 2-4 days. A layer of sphagnum laid on top of the substrate will retain the desired moisture.
As it dries, the moss can be moistened by spraying. It is important to ensure that moisture does not accumulate either in the sphagnum layer or in the substrate. Experienced flower growers say that after transplanting the orchid it is better not to water it again than to fill it with water. You can return to the usual watering regime 3-4 weeks after transplanting, when the plant is fully restored.
For information on how to transplant an orchid, see the next video.


The comment was sent successfully.