How to propagate an orchid at home through a peduncle?

Nowadays, in apartments and offices you can often find a miracle flower, which we usually call an orchid - this is a phalaenopsis from the Orchid family. In shape, the flowers are often similar to butterflies or moths, but they also come in the form of stars or a circle. In nature, they are distributed throughout the globe, except for northern latitudes. Numerous natural species and a large number of hybrid varieties of Phalaenopsis bear the English name Phalania Opsis, literally translated "similarity to the night butterfly." In India they carry the romantic name "moon flower", in European countries - the butterfly orchid.
Breeding features
Rarely can anyone remain indifferent to a blooming orchid. I want to enjoy its flowering endlessly. It seems that such a flower cannot be propagated like most other indoor plants. However, with a little effort, you can get an orchid baby at home, and in various ways: from seeds, dividing a bush, cutting a plant or peduncle, apical cuttings.
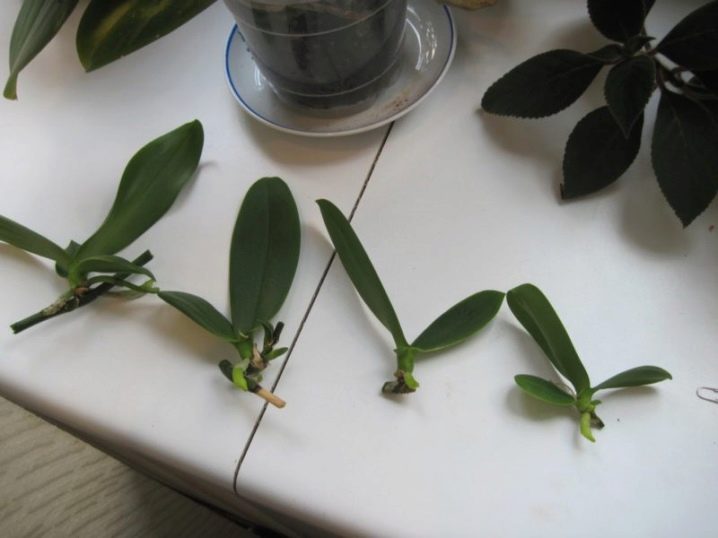
Regardless of the breeding method, the signal of a successful planting will be the appearance of an independent plant, its young tiny roots and leaves.
Reproduction of an orchid at home through a peduncle has several advantages over other methods.
- The mother plant is not affected... For example, when multiplying by dividing a bush, an orchid can die with inept actions.
- Available planting material... If you or someone you know has an orchid in bloom, you can always try to dilute it with minimal risk.
- The method is simple and easy enough even for a beginner.... You do not need to have special knowledge and skills to grow phalaenopsis. The whole process is clear and understandable, you just need to spend very little time.
- It does not take too long from planting to successful rooting., about three months. If successfully grown from seed, it will take more - about a year.
Phalaenopsis belong to monopodial orchids and represent a shoot with a growth point, which develops only upward during life and does not have bulbs. Their daughter rosettes are laid on peduncles. At normal temperature and humidity, the buds of the plant on the peduncle open up with beautiful flowers, similar to butterflies.
After the flowers delight us and fall off, the peduncle can still grow and bloom again, so do not rush and cut off the faded arrow.

There are several methods and techniques for propagating an orchid through a peduncle at home. The first and simplest method is to create such conditions for keeping an orchid, when instead of a flower, instead of a flower in place of a budding bud, not a flower appears on the peduncle, but a baby. This is possible when the temperature rises and the humidity is high. Favorable conditions can be created artificially by maintaining the temperature in the room at about 30 degrees and high humidity.
Sometimes, to facilitate the conditions of keeping and to obtain a new rosette, the orchid peduncle is wrapped in wet sphagnum and polyethylene.
You can provoke the awakening of a dormant kidney with a solution of heteroauxin, which is sold in flower shops. The mother plant is practically not watered these days, only sprayed.
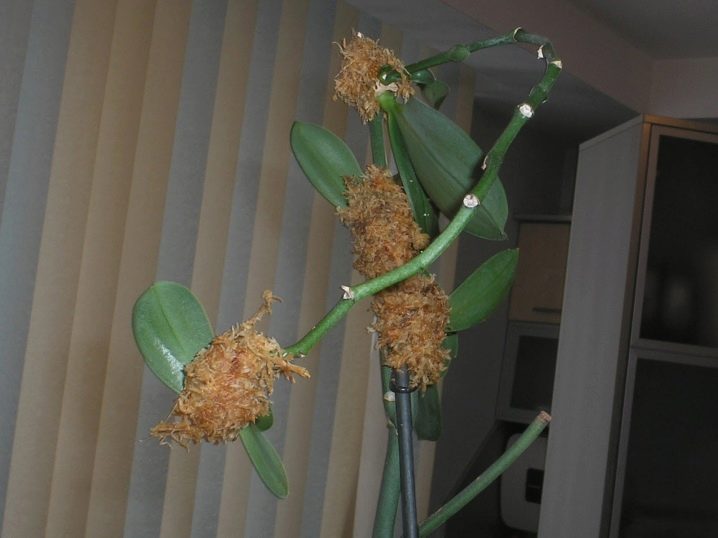
You can not water the orchid for about two weeks, without harming the plant itself.
The second method involves the separation of the peduncle from the original plant.With this artificial method of reproduction, you can use a faded peduncle, which pleased with its flowering no more than three months ago. Older or dry specimens should not be used. Or use a peduncle from a freshly purchased store plant, which may be infected or saturated with various chemical additives that interfere with natural survival.
For the reproduction of an orchid, the following is necessary.
- A fresh orchid flower cut from a healthy, strong plant. It is better if the mother plant is healthy and has at least 5-7 elastic leaves by the time the peduncle is cut.
- A sharp instrument such as a scalpel, razor blade, or sharp knife.
- Charcoal for processing fresh cut surfaces.
- Convenient, shallow container with a lid. The lid can be replaced with a plastic bag or film.
- Planting substrate, consisting of small pieces of pine bark with the addition of sphagnum moss, coconut fiber, charcoal. The breeding substrate is usually taken from the pot of an adult orchid.
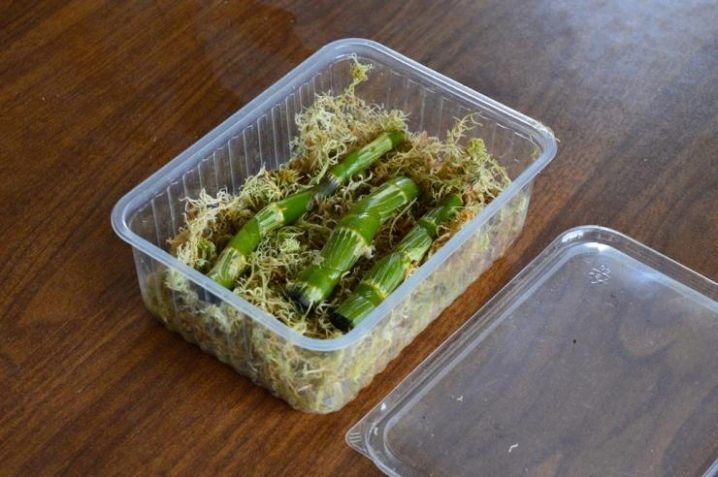
With the help of step-by-step instructions, the method of cutting an orchid will be simple and easy.
- Armed with a sharp, clean tool, cut off the selected peduncle from the mother plant. We act carefully so as not to cut ourselves and not cause more damage to the orchids. The cut is best done as low as possible., since this is where the most viable dormant buds are located.
- We carefully evaluate the peduncle and divide it with a tool into cuttings so that there is at least one bud on each piece. The kidney should not be in the middle, but closer to the lower cut.
- Do not forget process all cuts on cuttings and mother plant with crushed charcoal to prevent infection.
- We moisten the prepared substrate from a spray bottle or spill it with water. Drainage holes will help avoid stagnant water. Great if there is biostimulant solution, for example, "Epina", which we add to water.
- We lay the prepared cuttings horizontally on the surface of the substrate and press quite a bit. We do not fill the cuttings completely, do not place them vertically, this will lead to inevitable decay. Remember that Phalaenopsis is an epiphytic plant and feeds practically from the air.
- Now we create the necessary conditions for the awakening of the kidney. We achieve sufficient humidity by covering the container with foil or glass... Still need bright lighting lasting at least 12-14 hours and a temperature of at least 25 degrees... It is advisable to ventilate the greenhouse by removing the glass for a short time, moisten it as it dries. It is worth preventing drafts, sunburn, temperature changes, drying out, or, on the contrary, excess water.
- Now it remains to wait for the appearance of small plants, their leaves and roots. As a small orchid grows, the stalk dries up, giving up its nourishment for a new, nascent life.
- When two new leaves appear, we plant the young plant in a separate container with fresh substrate, carefully separating it from the cutting. Do not delay and wait for the appearance of grown roots.

Finally, the third option for multiplying an orchid at home is for lazy flower growers. This method is especially useful in spring, when the bright sun awakens all nature from hibernation.
You have a blooming orchid - great! When the peduncle has dropped its last flowers, you can cut it off and put it in a container of water.... It is better to take melted or filtered water and additionally disinfect it by adding activated carbon or a few crystals of potassium permanganate.
It is good to add half a tablet of succinic acid, which will saturate the water with all useful micro and macro elements.
Place the glass in a plastic bag and place it on a sunny windowsill. It is necessary to monitor the condition of the peduncle, ventilate the greenhouse, change the water 2 times a week.Gradually, under the influence of heat and sun, the buds will wake up, the first leaves will appear. After they grow up a little, carefully separate and plant in individual transparent pots.










The comment was sent successfully.