Reproduction of orchids by cuttings
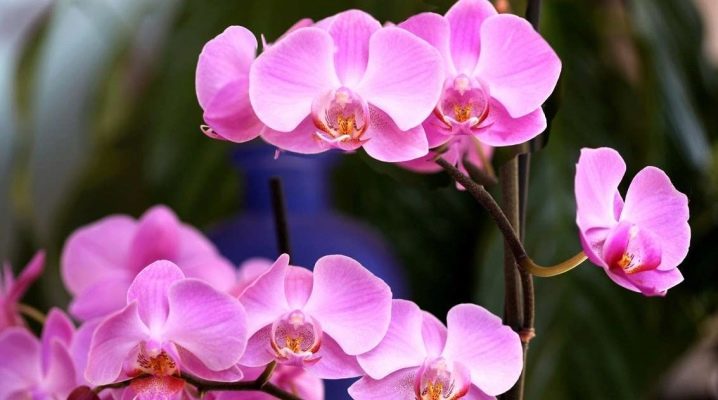
Many gardeners breed orchids using cuttings. This is easy to do, you can propagate the plant at home, you can even do it in a bottle. To breed an orchid, you need to know some of the nuances. This will determine whether your plant will grow or not. To plant sprouts, you need to know how to properly cut the cuttings. In an orchid, you need to cut off one of the tops or a peduncle, which is usually cut into several parts. If you are cutting off the tip for grafting, do it along with the aerial roots, thanks to which the cutting will settle and grow. Using a fungicide solution or activated carbon diluted in water, you need to treat the damaged areas of the cuttings. After the cutting can be planted and sent to the greenhouse.

How to propagate by cuttings?
This method is not easy, but more effective, it requires special attention and care. The advantage of this breeding is that the stalk will receive all the data from the mother flower. This method is indispensable for those who grow rare and unique orchid species. For the peduncle, not only the temperature regime is important, but also the level of humidity, which must be systematically maintained. The disadvantage of cuttings with peduncles is that not all of them take root, many of them simply rot and die. This type of cuttings is more demanding and requires longer maintenance than the usual cuttings taken from the top of the flower. For vegetative propagation of a plant, you will need:
- a sharp knife, you can use a scalpel, the main thing is that the tool is sharp and the peduncle is cut off without damaging the plant itself;
- antiseptic;
- activated carbon tablets;
- a plastic bottle in which you will plant a peduncle.
It is necessary to choose a peduncle only at the beginning of spring. During this period, orchids actively reproduce, they are full of strength and ready for vegetative propagation. You need to take the peduncle that has already faded.

The stem should be long with several dormant buds, intact. Do not take the flower that has been ill or underwent stress.
Cuttings in plastic bottles or containers
The plant can be propagated in two ways. Step-by-step reproduction of an orchid using a peduncle is as follows.
- Cut off the flower stalk gently with a sharp knife.
- Divide it with a knife into several parts. Each of the sticks should have a bud as close as possible near the bottom cut.
- Crush the activated carbon and sprinkle it over the damaged areas.
- Sprinkle charcoal over the cut that remains on the plant itself.
- Gently peel off the scales that protect the buds.
- Put sphagnum moss in a plastic bottle prepared for planting in advance and spray it with settled rainwater or purified water.
- Put your cuttings in a horizontal position in the bottle.
- Place glass on top of the bottle or wrap with cling film.
- Transfer the bottle to a warm place where the air temperature is +25 degrees.
- The bottle needs to be oxygenated every day, so remove the cover (glass or film) for 10 minutes.
- At the time of airing, be sure to spray from a spray bottle with water on peat.

Cutting with water
Method two consists in such actions.
- Cut the cutting, which has faded, put in water, the water should be at room temperature and soft. You can do this yourself, add a tablet of succinic acid, several crystals of potassium permanganate to the water so that the water acquires a pale pink hue, several tablets of activated carbon and a few drops of a biological stimulant. Calculate this amount for half a liter of water.
- Place a bottle or jar of water and sprout in a warm place with direct sunlight.
- Cover with foil or a special cap, creating a greenhouse effect.
- Be sure to enrich the water with oxygen, change it every 4 days.
- You can grow buds in a few weeks, they can be cut off and transplanted into the ground.

Orchids can be propagated by branches of arrows
On the plant, children are constantly formed, arrows, which are released by the stem. It can also be used to cut an orchid. Such shoots must be properly cut and prepared, with the help of them it is easiest to grow a plant. The disadvantage of this breeding is that the plant will not have all the maternal qualities of an orchid. This method is not suitable for those gardeners who breed rare and pure varieties.
An important point when choosing a cutting is the ability to distinguish vegetative from generative. Skilled gardeners do this very professionally, they can always tell one species from another. Inexperienced gardeners always get only about 15% of the result, since for this reason only a certain number of cuttings take root. You can do vegetative propagation using the arrows in this way.
- Cut the arrow off as close to the mother stem as possible.
- Treat all damaged sections of the cuttings on the handle and on the orchid itself with activated charcoal.
- Fill a plastic bottle or pot with a special mixture: sphagnum moss, pine bark, fern roots in a ratio of 1: 3: 1. There must be a drainage hole in the container.
- Sprinkle the area of the substrate with sprinkling and plant arrows there.
- Maintain the air temperature in the room from +23 to +25 degrees.
- Moisturize periodically to keep it dry.
- Pick off dry leaves that will gradually wither.
- Wait until the sprout reaches a size of 5 cm, and then you can transplant it into the ground.

Moving into the ground
After the cuttings have grown stronger, they will need to be transplanted into the ground. The land can be purchased ready-made or made on your own. To do this, mix pine bark, wood charcoal and sphagnum moss. Drainage from pebbles or expanded clay. Before mixing all the ingredients, be sure to boil the pine bark, then dry and grind (the pieces should be no more than 10 mm in size). After that, soak sphagnum in a solution of potassium permanganate, and treat expanded clay with boiling water.
Landing in the ground
To prevent the cuttings from festering, everything must be processed, including the plastic pot.
- Make drainage holes in the potso that excess moisture comes out and air enters the ground. The pot should be transparent in order to notice the rotting of the roots in time.
- Lay out the drainage (after processing it).
- Place the branch in the center and sprinkle with the prepared mixture, cover with moss.
- Sprinkle with water from a spray bottle, water every few days.
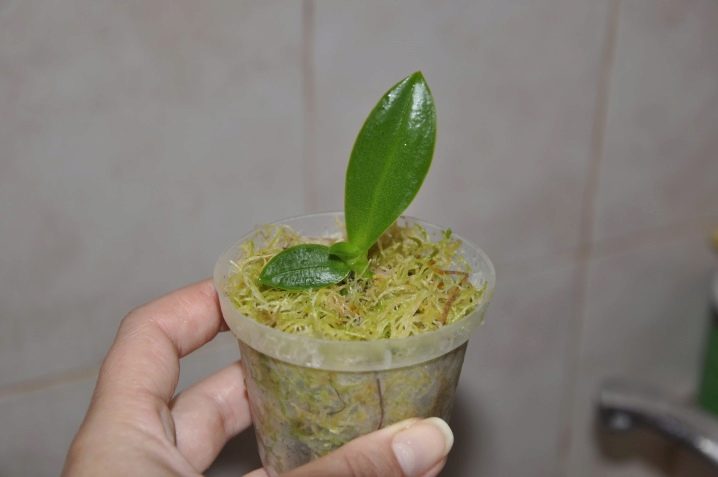
Remember, if the sprouts have been damaged, and you have poorly disinfected the instrument and brought in an infection, the sprout can be saved. To do this, dip it in a potassium permanganate solution.
Further care of cuttings
A young plant needs warmth and sunlight. If there is not enough sunlight for the sprout, you can use special lamps or place it on the sunny and east side of the window. Maintain the room temperature not less than + 18 ° C, but not more than + 25 ° C. In winter, the permissible temperature regime is from +12 to +15 degrees Celsius.
Moisten the soil systematically. If there is a slight excess of water, this is not scary, overdried soil is undesirable for orchids.Always use warm and soft water, you can just boiled or distilled. The plant must be fed within 14 days after transplanting into the ground. To do this, you can use special solutions that are sold in a flower shop.
Choose sparing solutions, choose the minimum dosage, it is better to reduce it by 4 times the manufacturer's recommended dose. Maintain a high humidity in the room where the sprouts are located, around 70%. You can carry out constant spraying from a spray bottle, water will not damage the flower.

Processing rotten scions
The plant begins to rot from heavy watering and from bacteria that were brought in with an untreated tool. It is possible to determine that the plant has rotted visually: the plant is covered with black spots, the bottom - with mold, there is a smell of rot. In this case, the plant cannot be saved. If it has just begun to rot, a brown speck appears on the rhizome. In this case, it is necessary to perform such actions.
- Pull the sprout out of the soil, fill it in advance so that the soil becomes soft and the plant can be easily pulled out.
- Disinfect the knife and clean the rhizome from rot and infected roots, cut off any leaves on which you see the fungus.
- Pour the fungicide solution into the container and leave the plant in it for half an hour. Treat the leaves with crushed activated carbon.
- After that, plant the sprout in new soil, completely treat the pot with an antibacterial agent, and drainage must also be treated. To do this, you can simply boil it.
- Water the sprout with potassium permanganate solution for about three months. The color of the solution should be pale pink.










Thanks for posting, very informative and helpful, exactly what I was looking for.
The comment was sent successfully.