How to choose a leveling rod?

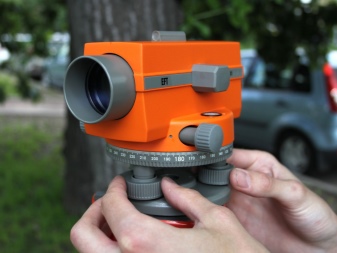
Levels are very useful tools. But in order for them to measure the difference between the levels, leveling rods are required. It is worth figuring out what these devices are, how they are chosen and applied in practice.

Peculiarities
A leveling rod is a special kind of rod with precise graduation. Without gradation, it would be impossible to use it to determine the difference between the levels of the surveyed points. It is worth noting that sometimes such a device is also used for other geodetic equipment. Traditionally, wood or aluminum alloys are used for their manufacture. In some cases, when accuracy is especially critical, invar reiki is used. The numbers on modern models are applied in their normal form. In older models, inverted images were more often used. Leveling rods are used:
- in construction;
- when drawing up geodetic plans and schemes;
- in topographic works;
- in geological research.

Varieties
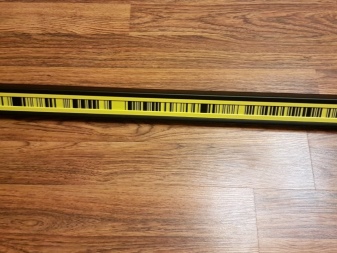
A leveling rod is always a rectangular device. A scale is placed on the plane. The scale divisions are established by the official standards for each device and type of measurement. Modern slats can be designed for analog or digital level... The second option implies reading a barcode of the BAR standard.

The foldable leveling rod is most often made of wood. Center fold is a typical solution. The length of the individual sections is approximately 1.5 m. The folding mechanism in wooden models is very reliable and has no backlash.
In addition, the dielectric properties of wood are appreciated, allowing you to work more quietly near wiring, transformers and high-voltage power lines.


Quite widespread telescopic slats... They are made mainly from light substances (aluminum alloys or even plastic). The advantages of such a solution are obvious for surveyors and other people who need to take more than one measurement and walk more than one kilometer in a day. The telescopic design is equipped with a circular level, thanks to which it is placed strictly vertically. Some models reach a length of 3 to 5 m, while after folding the length decreases to 1.5 m.
The disadvantage of the telescopic rail is that such fixtures last less than classic wooden products. It's all about the lack of reliability of the transformation mechanism.
The scale is applied on both sides. One edge is marked in millimeters, and the other, intended for relatively long measurements, is covered with checkers.

Together with digital levels, they usually try to use fiberglass slats. Of course, they are also marked on both sides. One side is marked in metric units. Fiberglass has excellent dielectric properties. It, like a tree, can be safely used to take readings near electrical infrastructure.


Invar reiki are needed in the case, as already mentioned, if particularly precise work is required. The measurement error (if carried out correctly) can be only about 1 mm. The bodies of Invar slats, strictly speaking, are also made of wood. On the basis of a special alloy, only a tape is made that wraps around the outer case. This solution is very popular, because it turns out to be a very lightweight design, and it is not difficult to apply it.
A typical leveling rod consists of:
- bars 0.1 m wide and 0.02 m thick;
- heels (that is, metal plates) at the ends;
- screws holding these parts together.


The rails are painted with a white dye composition. Black divisions are applied on one side, and red divisions on the other. You need to count the divisions from the lowest heel. From the “black” edge, the zero mark should coincide with it, and from the “red” edge - the reference point of 4787 mm. The gradation of the leveling rails is also prescribed in GOST 11158-76. According to this standard, for geometric leveling, you can use:
- RN-05 (this index is assigned to one-sided line products for measurements of categories 1 and 2; permissible error is 0.5 mm per 1000 m);
- RN-3 (the index is assigned to double-sided checker-type battens intended for leveling categories 3 and 4; an error of measurements at the level of 3 mm per 1000 m is allowed);
- RN-10 (double-sided technical grade leveling rails with a maximum permissible error of 10 mm per 1000 m).
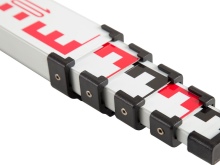

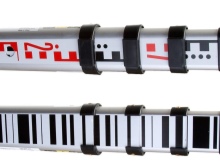
The length of the rails on these three models, respectively, is:
- 3 and 1.2;
- 1.5, 3 and 4 m;
- 4 m.

A 4 m long rail is always made of a composite design... Individual versions of the RN-3 can be stacked. On RN-3 rails, the graduation is 0.01 m. Every 10 cm, a mark with straight or inverted numbers is provided. Each specific model is marked with a special alphanumeric index. The symbol RN-3P 3000S is disclosed as follows:
- NS - leveling rod;
- 3 — model for taking particularly accurate measurements;
- NS - leveling the direct image;
- 3000 — number of millimeters;
- WITH - a complex structure.

The GEOBOX TS-6 is a good example of a 6 meter long leveling rod. This is a decent telescopic device for surveying. It is complemented by a two-sided measuring scale. The weight of the structure is 2.8 kg. The reverse side is marked in millimeters.
Any staff is suitable for both optical and laser levels. The only difference is in the accuracy of the measurements themselves, in the usability and other subtleties (price, options). It is good if the level comes with a rail and a tripod.
However, one must understand that many manufacturers save on standard equipment. It usually adds budget-class components.

Method of work
First you need, of course, understand the units of measurementto immediately clearly understand the meter readings. You should also carefully read the instructions for the level and accompanying documents for accessories. Next, you will need to put the slats on the stakes of wood firmly embedded in the ground. These stakes will reliably hold the structure if they protrude approximately 0.02 m above the surface. When fastening the mounting points of the rails is not necessary, they are mounted using mobile shoes or crutches.
In the required places, it is worth removing the sod and hammering the shoe or crutch firmly. At the same time, they diligently control that these supports themselves remain unshakable. After graduating with observations at a certain position, the shoe or crutch is removed, and then rearranged at the end of the next segment. The front fasteners are not rearranged, because this will result in a violation of the sequence in the transmission of heights. Then no processing of the leveling results can be adequate and you will have to re-measure everything from scratch from a firmly fixed reference point.


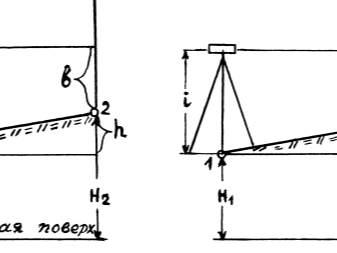
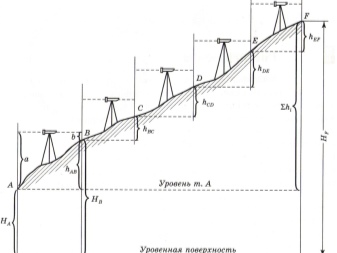
Sometimes practiced leveling "from the middle". This technique involves installing battens at the leveling points. Next, with the main device, placed horizontally, the segments on both sides of the rail are counted back and forth. Based on the data obtained, the black side elevation can be calculated. The calculation along the red line is done without fail, but purely for self-control. Normally, the difference in results is no more than 5 mm.
Sometimes you have to level with one-sided slats. Then, initially, the readings are carried out back and forth at the same instrument height. The next step is to repeat these counts after changing the height of the tripod legs by 0.1 - 0.2 m (2 times).This is how the excess can be estimated. Normally, its value is also a maximum of 5 mm.
The slats of the RN-0.5 and RN-3 models are equipped with round-shaped levels attached to the side. These levels have screws for adjustment and shields for protection. With the help of the levels, it will be possible to put the rail strictly vertically at the required point. Before starting work, the rails are always inspected and their quality checked. During visual control, they look at how well the checkers levels and numbers are colored.
You will also have to check the fastening of individual elements. First, find out if the round level is set correctly. For this purpose, either vertical threads of levels are used, or plumb lines, hooks and pins attached to the rails.
A plumb line is hooked onto the hook, and then the rail is tilted as it should. Ensure that the sharp ends of the plumb lines and pins exactly match.

When this is achieved, the bubble is brought out to the center zero point with the adjusting screws. After that, you will need to determine the average length of the meter. For this purpose, use a control ruler. The next step is to establish the errors of decimeter divisions. Final manipulations:
- deflection arrow setting;
- assessment of the perpendicularity of the rail heel and axis;
- estimation of the difference between the zero heights of the rails.


Telescopic leveling staff 4m and 5m from Laserliner are presented below.


The comment was sent successfully.