How to choose a hitch for a walk-behind tractor?

At present, agricultural mini-equipment is becoming more and more widespread among farmers and summer residents: walk-behind tractors, mini-tractors, motor-cultivators, etc. Often, for a more complete use of such units, you need to connect additional attachments: plows, harrows, etc. But for this you need a special coupling device, which is rarely included in the equipment package. In the article we will tell you how to choose the right hitch for a walk-behind tractor.
Purpose and features
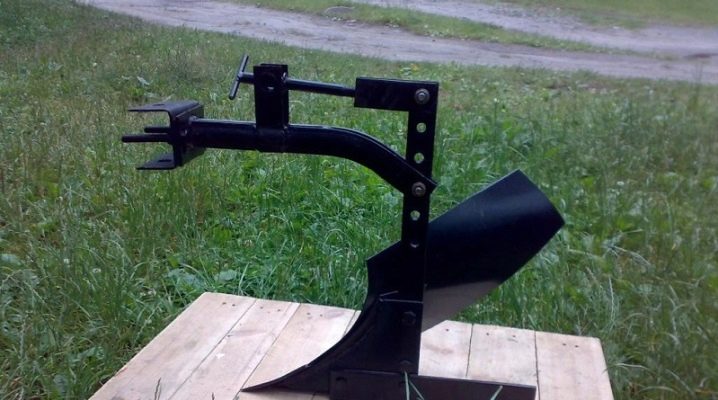
The hitch to the walk-behind tractor is designed for hanging (connecting) additional tools and mechanisms to the walk-behind tractor - hillers, cutters, trailer, carts, and so on. The hitch must ensure a secure connection and not limit the maneuverability of the machine. There are several types of coupling mechanisms.
- Hitch for the APM adapter. Purpose - attachment of plows, hillers and potato diggers to the body of the walk-behind tractor. It is fastened with just three fixing screws. It is mainly used on Neva walk-behind tractors.
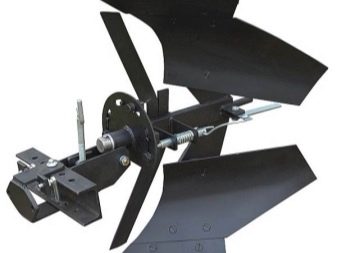
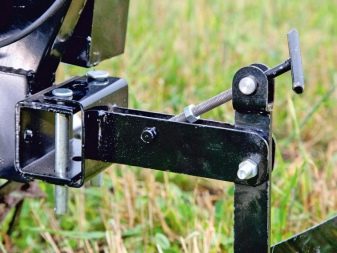
- Universal. It is possible to adjust the angle of inclination of the hinged elements by means of a special bolted mechanism. Also, the design allows you to attach two or more couplings - to fix several working mechanisms.
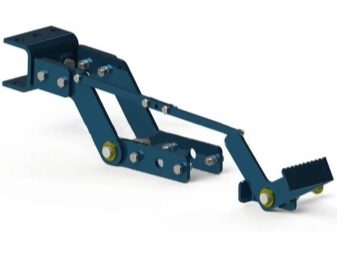
- Universal N. An improved version of the previous hitch. Added the ability to adjust the angle of inclination not only in the horizontal, but also in the vertical planes, as well as the depth of immersion of working elements into the ground.
- MK hitch - Produced by the Mobil K plant specifically for their OH-2 hiller and the Krot plow.


It should be borne in mind that the dimensions of the couplings largely depend on the models of the walk-behind tractor for which they are intended. Universal connecting units are perfect for motoblocks "Neva", "MTZ", "Salyut", "Farmer", "Champion", etc.... For example, the universal coupling device "Russia" has dimensions of 320x120 mm, weight 4.17 kg, suitable for motoblock units "Salyut", "Agat", "Celina MB-501", "Ugra". The connecting unit for Agros walk-behind tractors of the new model has dimensions of 430x120x130 mm with a weight of 3.8 kg. The hitch for the Favorit, ZID models has dimensions - 490x135x250 mm with a weight of about 7 kg.


For motoblock devices of Chinese and European production, it is necessary to carefully select coupling devices or make it yourself, since their dimensional standards are slightly different from Russian and Belarusian units. True, if you buy a walk-behind tractor from an authorized dealer, couplings often come with a walk-behind tractor. For Shtenli walk-behind tractors made in Germany, the hitch is almost always included with the machine itself., so there is no need to select or manufacture it additionally.

How to do it yourself?
The hitch is not such a complicated knot, it can be easily made by yourself. But keep in mind that during operation it will experience heavy loads. Therefore, when designing and assembling this connecting unit, it is necessary to follow the recommendations of specialists on the dimensions and material of manufacture of parts. When choosing a model, check the dimensions of the towbar of the motoblock unit and the equipment intended for connection.After you have selected the model of the hitch, draw a detailed drawing of the knot with the exact dimensions.
The basis of the hitch is a U-shaped bracket, the front side of which is attached to the rear bracket of the motoblock unit, and the rack of the necessary equipment is attached to the second.


You will need the following materials and tools:
- angle grinder;
- electric drill;
- measuring and marking tools;
- welding machine;
- keys;
- fasteners;
- a sheet of durable alloy or a square channel;
- adjusting lever.


The best option would be to manufacture a coupling hitch with an adjusting mechanism. This will allow you to attach to the walk-behind tractor and use as efficiently as possible various types of additional mechanisms, regardless of the country of manufacture and the class of the device. To drill holes for fasteners, carefully select the drills - their diameter should ideally match the dimensions of the fasteners. This will avoid backlash and, as a result, accelerated wear.

First, provide yourself with a flat work surface - a workbench or table of the right size. Then mark up according to the prepared drawing. Drill all required holes, carefully observing the diameters of the fasteners. Check the dimensions with a caliper or a bolt by inserting it into the finished hole. Backlash and jamming of the element are unacceptable. After that, weld all the parts of the connecting unit.
The use of electric welding would be ideal - the heating of the metal will go only at the junction and will not affect the strength of the entire structural element.

Bolt the bracket to the pin. The adjustment mechanism, if provided in the model, also fix to the structure. In the manufacture of couplings, you can use spare parts for cars, for example, a good connecting unit for a walk-behind tractor can come out of the cardan. If you decide to make a coupling device from a driveshaft, take a new part - the previously used shaft is already worn out and will not have the required strength characteristics.
A special adapter is required to use couplings with a non-standard configuration. You can buy it in stores or make it yourself.

Recommendations for use
To increase the service life, do not forget about preventive maintenance - daily clean the joint assembly and thoroughly lubricate the fasteners with good quality machine oil. Paint the hitch with paint designed for metal products, or cover it with an anti-corrosion compound - this will also significantly extend the life of this unit. Follow the recommendations on the loads on the hitch - if the unit is designed to connect small tools - plows, hillers, etc., do not hang a trailer or cart with a large load on it: the fastening or the part itself may not withstand.

The hitch is installed as follows - first, the connecting unit is attached to the bracket of the walk-behind tractor, and only then the attachments should be installed. The setting of attachments largely depends on the model of the walk-behind tractor and the type of soil in the area to be cultivated. Turn on the walk-behind tractor and test it for about 3-5 m of the allotment. Then, if necessary, adjust the angle of inclination of the working elements and the depth of penetration into the soil layer. This can be done by turning the handle and loosening the fasteners, adjust the grip angle and tighten them again until they stop.

A self-made coupler has several advantages:
- the possibility of perfect fit exactly to your unit;
- the ability to adjust the settings of the attached equipment - the angle of engagement of the soil, the depth of tillage, etc .;
- the ability to design a ruggedized connector for use with high loads - for example, for a snow blower blade.

An overview of the universal hitch for the walk-behind tractor can be seen in the video below.


The comment was sent successfully.