All about micrometers

The need to make the most accurate measurements these days has to be faced almost every day by representatives of a wide variety of industries. It is for this reason that many are trying to learn everything about such modern devices as micrometers. To determine the choice of a specific model, it is necessary to have an idea of the technical characteristics, the principle of operation and the existing varieties of these samples of measuring equipment.

What is it and what is it for?
First of all, you need to understand the purpose of these widespread devices. At its core, each micrometer is a universal device that is designed for the most accurate determination of linear dimensions. Regardless of what kind of measurement principle - absolute or relative - is applied, all measurements are carried out by the contact method. It is important to take into account that the scope of application of micrometers provides for high-precision measurements - from 2 to 50 microns - when determining mainly small sizes.

Many users are interested in how exactly a micrometer differs from a caliper. On the one hand, both instruments are widely used for outdoor and indoor measurements. However, in production, and sometimes in domestic conditions, the accuracy of a caliper may not be enough. It is in such situations that the micrometer will become indispensable. Measuring film thickness is one of many examples.


The maximum accuracy of measurements carried out by the mentioned contact method is ensured through the use of a simple, but at the same time more than effective conversion mechanism. Its basis is a screw pair. It is worth noting that people who have no idea about the principles of operation of the device, it is with this element of it that problems arise during operation. In other words, if almost everyone can use a caliper freely enough, then with micrometers the situation is different.

The described devices are relevant for determining the dimensions of various parts, both made of metal and any other materials. The functioning of the measuring mechanism is based on the axial movement of the screw in the nut. Its working stroke, as a rule, does not exceed 25 mm. In practice, it is quite difficult to make a screw with the same pitch in long sections.
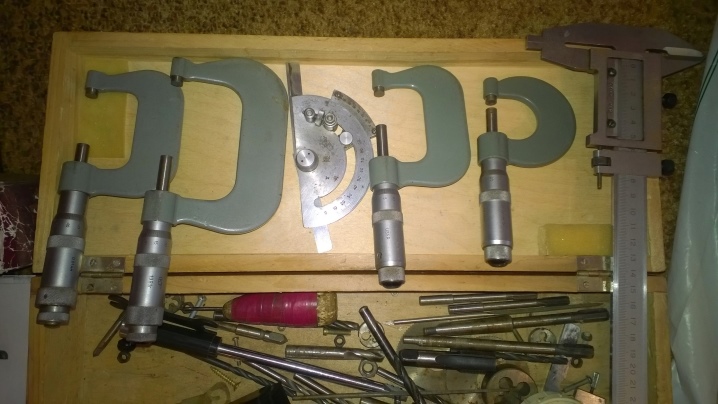
The considered category of measuring equipment is more than widely used in various industries. It has long been an indispensable tool for measuring the inside diameter of parts, adjusting valves and many other operations. Micrometers are professionally operated:
- turners and milling machines (including thread measurement);
- foundry workers;

- employees of laboratories of various specializations;

- modelers;

- jewelers.

With all the advantages of micrometers, it must be taken into account that in terms of versatility, they are slightly inferior to calipers. However, for the performance of certain tasks, this type of measuring instruments is simply irreplaceable. From this point of view, micrometers have a whole list of undeniable competitive advantages over other types of hand-held measuring devices.

It should be recalled that in the period from 1879 to 1967, the term "micron" was used, and the unit had the designation "micron". According to the decision of the 13th General Conference on Weights and Measures, this name was canceled. Today the unit of measurement in the Russian version is designated as "microns", that is, a micrometer. This value is a fractional SI unit and is equivalent to one millionth of a meter or a thousandth of a millimeter (1 μm = 0.000001 m = 0.001 mm).

Device and structure
A fairly wide range of micrometer types is available today. Moreover, they are all, to one degree or another, modified versions of the basic structure with inserts, tailored to the performance of certain tasks. If we consider the most simplified version of the described measuring device, then the following main components can be distinguished:
- bracket;
- heel;
- micro screw;
- heat-insulating pad;
- horizontal scale;
- drum;
- ratchet;
- clamping device.

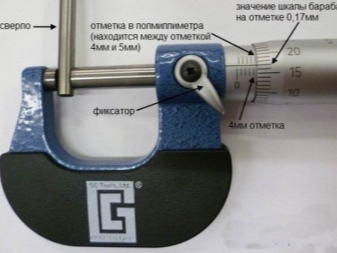
The basis of the entire structure, regardless of what it consists of and what dimensions it has, is a metal bracket. The functionality of the device directly depends on its parameters. One end of the bracket has a so-called heel, and the other is equipped with a screw. This mechanism is adjusted so that the distance between the indicated two elements (the tip of the screw and the heel) is displayed on the digital scale. The principle of operation of the micrometer is based on the fact that in the process of pressing the workpiece with a screw, you can get its exact linear dimensions.

It is important to remember that the samples of measuring equipment under consideration belong to the category of contact. This means that with their help it will not be possible to find the dimensions of blanks or products made of soft materials. Despite the design differences, all micrometers function according to the same principle. After obtaining the results, a clamping device is used to save the data. This retainer prevents accidental loosening of the screw and displacement of the pointer on the scale of the device.
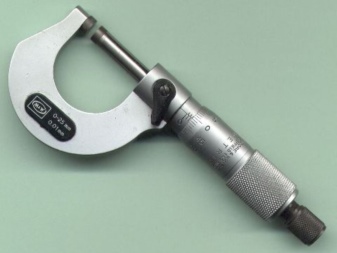
An important point is the degree of tightening of the screw. Excessive force can damage the threads of the micrometer. There is also a risk of damaging the measured object. A signal of sufficient fixation will be a characteristic drum click.
Views
The scope of this type of measuring equipment is more than extensive. Based on this, there is a very wide range of varieties on the market that are focused on performing specific tasks. To date, more than two dozen types of micrometers have been developed, differing from each other in technical characteristics and design features. Some of them are rare, narrowly focused modifications that are not used in everyday life.

Analyzing the range of mechanical and electronic models, first of all, you should pay attention to the following micrometer modifications.
- Smooth - the most widespread and most easy-to-use device used to remove linear dimensions from various parts. These models are successfully used by specialists representing a wide variety of fields. Exceptions are situations in which it is necessary to determine the internal dimensions.
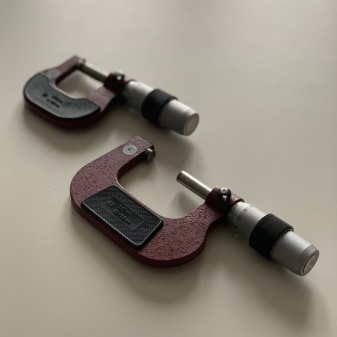
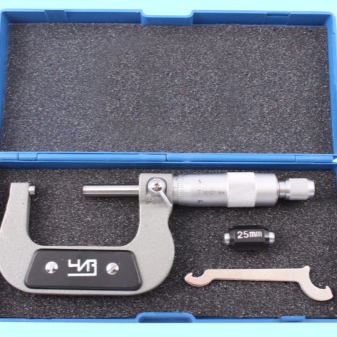
- Sheet - a micrometer with peculiar round plates on the screw and heel, which increase the contact area. Thanks to these elements, preliminary deformation and leveling of the surface of the measured objects is carried out.

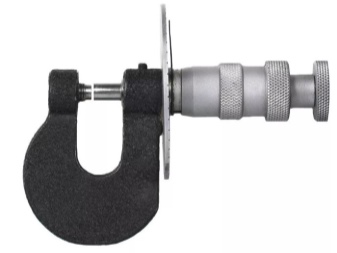
- Micrometers for taking measurements from hot rolled metal. This type of measuring equipment is used when specialists work with red-hot workpieces. Such micrometers provide the ability to determine the required dimensions directly in the production process, which, in turn, allows you to determine the optimal moment of completion of the rental when specific parameters are reached.


- Deep Measuring Instrumentshaving an elongated bracket and allowing you to check the thickness of the workpiece or part at the maximum distance from the edge. Such devices are most effective with blind holes and after countersinking.

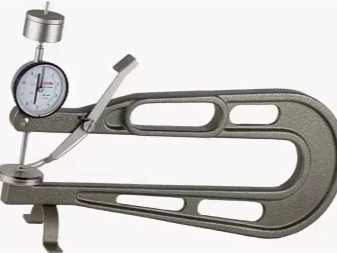
- Tube micrometers. In this case, we are talking about a highly specialized variety of measuring instruments used exclusively for determining the thickness of the pipe walls. They differ from other models, first of all, in their design. The main feature is the presence of a cut-off staple, the missing part of which is replaced by the heel. The latter is placed inside the measured pipe, after which the screw is tightened to determine the desired parameters with maximum accuracy.

- Prismatic micrometersdesigned for measuring the outer diameters of multi-edge samples of the tool. The main features of this type are the presence of a setting gauge in the kit, as well as hard alloy on the working surfaces.


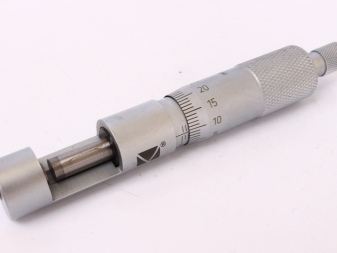
- Wire models, which are the most compact devices that do not have a pronounced bracket. Visually, such a micrometer can be mistaken for an ordinary rod. Based on the name, it is clear that such devices are used to determine the diameter of the wire. Moreover, they have a relatively small working stroke. Due to their maximum compactness, wire micrometers fit into small cases and take up no more space than conventional pliers.

- Devices equipped with small spongesused for taking linear dimensions from metal workpieces after completing drilling and grooving. The main design feature of such micrometers is the minimum thickness of the screw and heel, so that they can be placed in holes of small diameter. Otherwise, the design of the measuring device belonging to the described category can be called standard.

- Groove micrometers for taking measurements in hard-to-reach places. An important point is the absence of a bracket for these devices and their external resemblance to wire models. In this case, it should be noted the presence of sponges in the form of plates, with the help of which the gripping of the measured object is carried out. These fixing elements are quite fragile and therefore require the most careful handling to prevent the risk of deformation.

- Screw, they are also eyepiece, micrometers - devices having an eyepiece (10x and 15x) equipped with a horizontal scale and a vertically movable line. The main task of such micrometers is linear measurements of workpieces and parts along the horizontal axis.

- Universal devices with removable tips. The choice in favor of this variety is made if during the production process it is required to carry out various types of measurements. The ability to quickly replace working elements allows you to adapt the device with minimal time loss, taking into account the operating conditions in each specific situation. It should be borne in mind that cheap universal micrometers are often not able to provide sufficient accuracy.

- Laser or optical micrometers, representing a versatile, modern measuring device. Unlike conventional mechanical models, for the operation of such equipment samples, power supplies are required (most often we are talking about autonomous power supplies). The main characteristics and competitive advantages of such equipment samples are the maximum measurement accuracy (the error, as a rule, does not exceed 2 microns), ease of use, minimum weight and small dimensions.


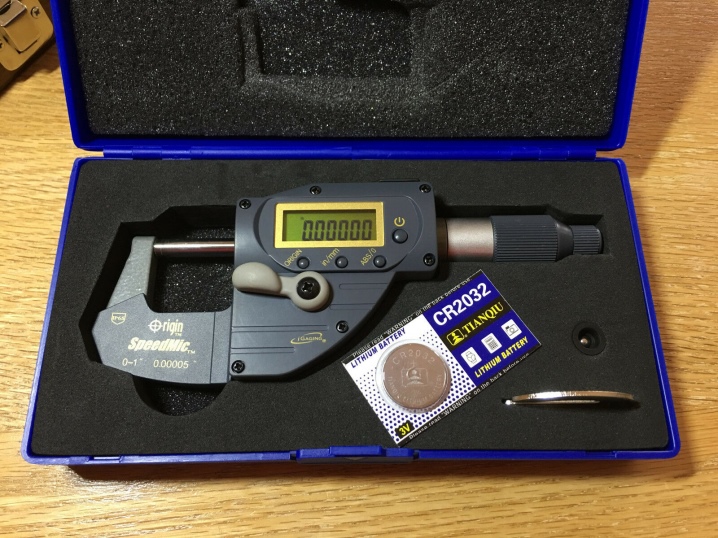
- Digital instruments, which today are one of the most convenient in operation due to the presence of an electronic display. Such indicator devices are superior to their "counterparts" in many respects.The power source for them is a small-sized battery, similar to those that are installed in a wristwatch.


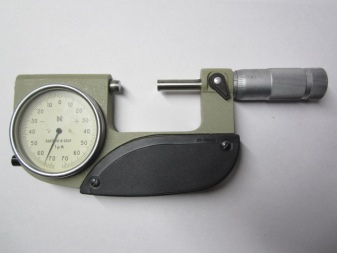
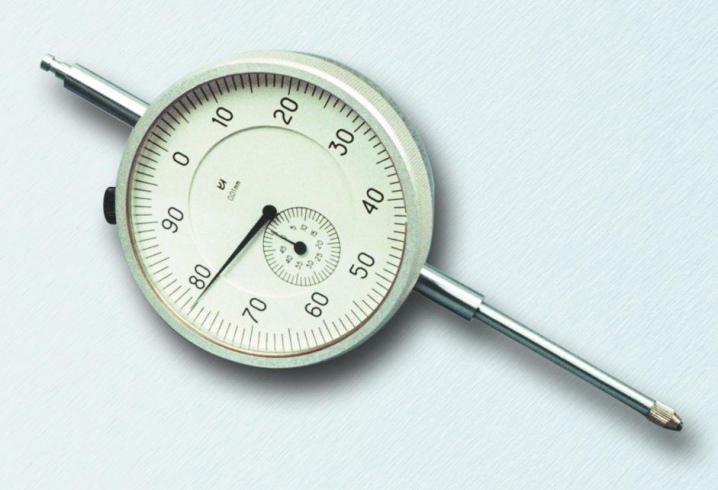
In addition to all of the above, it is worth paying attention to watch-type dial micrometers. They are equipped with the appropriate type of instruments with arrows showing the measurement results. At the same time, more expensive electronic models have an integrated memory, which, in turn, allows you to record the received data, including indicating the date and exact time of the measurements. This function is most relevant for the industrial use of micrometers, which requires a large number of measurements in short time intervals.
It should be noted that the models listed above are far from a complete list of measuring instruments existing today. So, they include threaded, point and a number of other micrometers. As a rule, we are talking about highly specialized models. However, in the overwhelming majority of cases, they can be replaced with universal modifications.
Verification method
Since the main parameter of all micrometers is the maximum accuracy of the measurements carried out, special attention is paid to the verification and calibration of instruments. The first is carried out in accordance with specific standards, namely, methodological instructions "MI 782-85". It should be borne in mind that not only specialists who carry out verification and adjustment, but also those who directly operate micrometers, should have an idea of this technique.


As practice shows, even when using a micrometer in a domestic environment, it will be useful to have an idea of its calibration and correct adjustment. First of all, you need to pay the following points:
- deviation from the measured flatness;
- deviation from parallelism;
- misalignment of the measuring plane of the screw.

The appearance of at least one of the listed symptoms should be a warning sign for the user. In such situations, it will inevitably require at least a check of the error limits, taking into account the measurement range, and often the repair of the device. The availability of appropriate knowledge and practical skills will maximize the life of the measuring device and ensure the maximum accuracy of its readings.

Technical operating conditions
All modern micrometers are manufactured in full compliance with the current requirements of applicable norms and standards. The latter are fixed in the approved design documentation. It is worth paying special attention to the following provisions of GOST 6507-90, directly related to the operation of the considered category of measuring instruments.
- The measuring force in the situation with devices MZ, MT and ML should vary in the range of 3-7 N, for other types of micrometers this parameter is from 5 to 10 N. At the same time, regardless of the type of device, the fluctuations of this indicator should not exceed 2 N.
- The limits of permissible error at each point of the measuring range provided by the design are indicated in the corresponding tables. It is important to take into account that the data are given for operating conditions with rated temperature and measuring force.
- The error of devices of the class MP, MK, MT and ML is determined by special measures with flat surfaces. In situations with micrometers of the MZ type, this indicator is determined by cylindrical measures set 2-3 mm from the edge of the surfaces of the device itself.
- In accordance with the current standards, the operation of micrometers is allowed at temperatures in the range of + 10-30 degrees. It is also important to consider that the relative humidity should not exceed 80 percent at +25 degrees.


At its core, any measuring procedure with a micrometer is reduced to rotating the drum until the heel and screw touch the surfaces of the object being measured.This determines the features of the operation of devices. It is best to consider the nuances of the algorithm using the example of mechanical models with a classical design.
The first step in the process is to check the readings of the measuring device. Experienced experts recommend using this procedure not only when buying new equipment, but also before each use. During verification, it is necessary to rotate the drum until the heel and the micrometer screw touch. If the end of the drum stops at the zero mark of the scale, then the device is in good working order. Parallel longitudinal stroke must necessarily indicate "0".

The second step is the correct and reliable fixation of the workpiece or workpiece to be measured by the working surfaces of the micrometer. In order to minimize the risk of damage to the instrument and at the same time increase the accuracy of the measurement results, it is necessary to pay attention to the following important points:
- after the object is firmly pressed against the heel, it is required to bring the micrometric screw to the edge without effort;
- the final approach of the surface of the screw with the object is carried out exclusively with the help of a ratchet;
- clicks are a signal of contact of the working surfaces of the device with the dimensions of the part or workpiece.

At the final stage, readings are taken, which begin with the maximum discharge, gradually moving to lower ones. First of all, the data of the scale are recorded, which is located on the stem of the micrometer. It is important to remember that the required indicator determines, first of all, the previous open division. After that, the readings of the drum scale are taken. The final result is the sum of the two indicated readings.

Model overview
As already noted, today more than a wide range of modern samples of measuring devices is available, including micrometers. At the same time, some of the models have design features and differ significantly from the basic modifications and all their other "brothers". On the one hand, the availability of such a choice allows you to purchase the most suitable device in each specific case, taking into account the operating conditions and other factors. At the same time, some find it difficult to navigate the existing variety. In such situations, you can use the ratings of the most popular and common models published on many specialized resources.
The most popular micrometers include the following samples.
- Smooth (MKTs and MK), which are universal devices with a measuring range of 25 mm with an upper limit of 300 mm (models MK-25, MK-50 and up to MK-300) and more than 25 mm for models with an upper threshold of 100 mm (MK-400, MK-500 and etc).

- Lever (MRI and MR), the main structural elements of which are a lever that removes the heel of the device and a pointer-type indicator. Most often, such models are used in batch production, and their list includes MP-25-0.001, MP-50-0.002 and others (report accuracy 0.001 and 0.002 mm). Micrometers with an accuracy of 0.01 mm are presented on the market by such models as, for example, MRI-25-0.01 and MRI-50-0.01.

- Leafy (ML) for determining the thickness of tape and sheet materials from metal, plastic, glass and other materials, including PVC film. In the model lines of manufacturers there are devices ML-5, -10, -25 and -50.

- Pipe (MT). To determine the thickness of the pipe walls, the MT-15, -25 and -50 models are used, which have a special design and measurement accuracy up to "hundredths" of a millimeter.

- Tooth micrometers (MZ), the main task of which is to determine the parameters of the gear wheels. Models from МЗ-25 to МЗ-300 have an accuracy of 0.01 mm and are equipped with wide working surfaces with a diameter of at least 24 mm. In this way, the centering of the device along the chords of the teeth is simplified as much as possible.

- Measuring instruments with special inserts (MVM)used for dimensioning threaded elements. The heels and screws of such micrometers have holes in which inserts of the appropriate shape are placed before use. Models from MVM-25 to MVM-350 in the standard version are equipped with replaceable elements for working with metric threads. Inserts for pipe and inch threads can be optionally included in the scope of delivery.

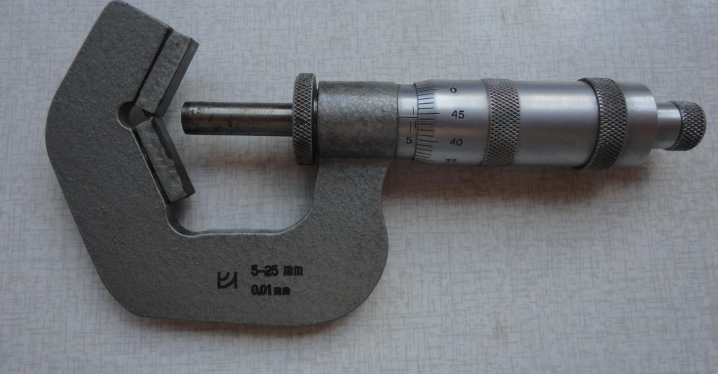
- Prismatic micrometersused to measure the outer diameter of a multi-edge tool. The role of a fixed heel in such devices is performed by an angle brace. Models from MTI-20 to MTI-80 (prism angle is 60 °) are produced for three-blade equipment samples, and micrometers from MPI-25 to MPI-105 (angle 108 °) for five-blade modifications. The parameters of the seven-edged tool are determined using the models MSI-25 - MSI-105 with a prism angle of 128º34´.
- Micrometers MK-MPhaving small working surfaces. Measuring elements of such models are in the form of rods, the diameter of which is 2 mm. Now on the market there are both mechanical and electronic modifications with the MKTs-MP marking. Both are used to measure undercuts on small parts.

- Point micrometers MK-TP, which are distinguished by a relatively small contact area (0.3 mm) and the shape of the measuring surfaces in the form of a pointed cone. Models, including digital MKTs-TP, have measuring ranges from 0 to 25, 25 to 50, 50 to 75 and 75 to 100 mm.

In addition to the list and features of the currently available types of equipment, its brand is an important point. Today, the following manufacturers are among the domestic leaders in the industry.
- Chelyabinsk Tool Plant.
- "Red Toolmaker" (KRIN, Kirov).
- Guilin Measuring & Cutting Tool Co. Ltd ", representing the PRC market. Measuring devices in the Russian Federation are supplied under the SHAN and GRIFF brands. The company specializes in the production of models of smooth (MK and MKTs) point, lever, sheet, gear and tube micrometers, as well as their modifications for internal measurements.
- Izmeron plant (St. Petersburg), which previously produced micrometers of the MP class. Unfortunately, today production has been stopped and the devices are being sold from storage.

Representatives of the model lines of these manufacturers are included in the State Register of Measuring Instruments of the Russian Federation. Naturally, all these products are certified. It should be noted that micrometers produced by the Kirov Instrument Plant are sold with initial verification.
The products of the Mitutoyo company deserve special attention., which today is one of the leaders in the development and production of high-precision measuring equipment. A striking example of the optimal ratio of price and quality can be called, for example, the Mitutoyo 0–25 model. At the moment, the brand's representative offices operate in more than 40 countries around the world and offer customers a very wide range, including micrometers.

Selection Tips
Given the variety of micrometer models, potential buyers often have problems with the choice of a specific measuring device. Naturally, everyone is trying to find the best balance between the cost of the tool and its quality. It should be noted that the cost of a micrometer directly depends on the manufacturer. It's no secret that high-quality products produced by well-known brands will cost much more than devices offered by little-known companies.

Another of the key and most significant factors is the quality of the materials from which the device is made. It is also recommended to pay special attention to the following points:
- the quality of the applied markings;
- the performance of the ratchet;
- accuracy of measurements (for verification, you can use a part with known linear dimensions).
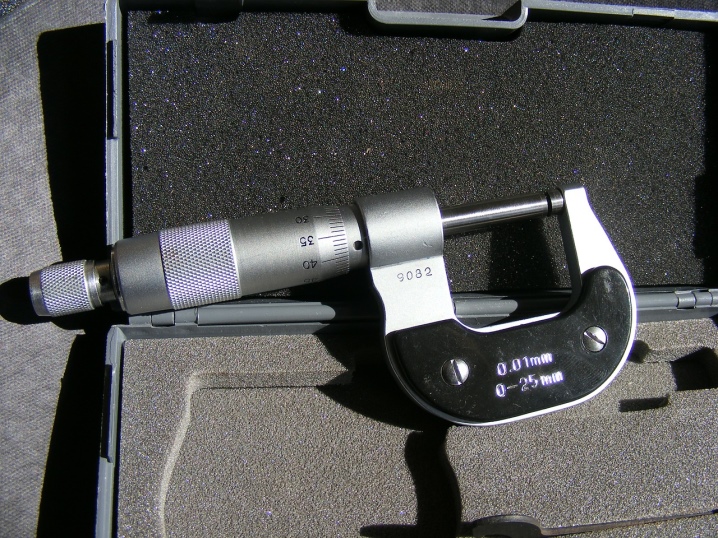
Among other things, when choosing a specific micrometer model, taking into account the peculiarities of the operating conditions, it is worth focusing on the presence of a tripod, stand and a special holder in the delivery set. In some situations, such structural elements can be indispensable. However, the most significant parameters when choosing measuring equipment will be the following.
- The measurement range, on which the minimum and maximum dimensions of the measurement objects depend.
- The accuracy of the measurements performed is determined by the thread pitch of the micrometer screw. It can be calculated by dividing the thread pitch by the number of scale divisions. It should be remembered that the indicator depends on the temperature regime.
- Error indicators, which are determined by the manufacturer and are displayed in the product passport included in the delivery set. The error of different micrometer models can vary in the range of 0.002-0.03 mm. In case of deviation from the norm, the device must be calibrated.

Naturally, this is not a complete list of selection criteria. One of the important points is the scope of the micrometer. It is about what kind of measurements and with what frequency will be carried out using the device. It must be remembered that there are universal and highly specialized models that are focused on performing specific tasks. The latter have certain design features.

For information on how to use the micrometer correctly, see the next video.


The best article on micrometers!
The comment was sent successfully.