Lever micrometers: characteristics, models, operating instructions

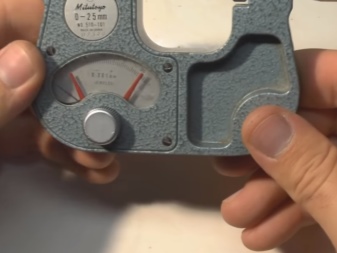
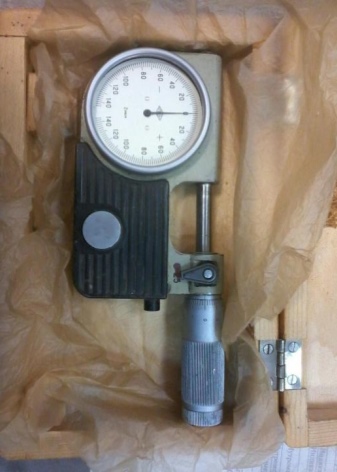
Lever micrometer is a measuring device designed to measure lengths and distances with the highest accuracy and minimum error. The inaccuracy of the micrometer readings depends on the ranges you want to measure and on the type of instrument itself.
Peculiarities
The lever micrometer, at first glance, may seem outdated, inconvenient and large. Based on this, some may wonder: why not use more modern products such as calipers and electronic bore gauges? To some extent, indeed, the above devices will be more useful, but, for example, in the industrial field, where the result often depends on a matter of seconds, it will be easier and faster to measure the length of an object with a lever micrometer. It takes less time to set up, its level of error is minimal, and its low price will be a bonus upon purchase. The device is indispensable for quality control of the products made. Lever micrometer is capable of making a sufficient number of measurements in short periods of time.
All these advantages appeared thanks to the Soviet GOST 4381-87, according to which the micrometer is produced.


disadvantages
Although this device has a lot of advantages, it has a significant drawback - fragility. The devices are for the most part made of steel, but any drop or even shaking of the sensitive elements of the mechanism can be disturbed. This leads to a malfunction in the micrometer readings or to its complete breakdown, while the repair of such devices often costs more than the device itself. Lever micrometers are also narrow-beam micrometers, which means that you can only get significant benefits in a specific area.

Verification method MI 2051-90
During external examination MI 2051-90 pay attention to the following parameters.
- The measuring surfaces must be covered with solid heat-conducting materials.
- All moving parts of the device are made of high quality stainless steel.
- The measuring head should have clear cut lines per millimeter and half a millimeter.
- There are 50 equal-sized divisions on the reel at equal intervals.
- The parts that are part of the micrometer must be specified in the list of completeness and coincide with those indicated in the passport of the measuring device. The indicated marking should be checked for compliance with GOST 4381-87.


To check, the arrows look at how much the arrow overlaps the line division. It should be at least 0.2 and no more than 0.9 lines. The location of the arrow, or rather, the landing height, is performed as follows. The device is positioned directly perpendicular to the scale in front of the observer. Then the apparatus is tilted 45 degrees to the left and 45 degrees to the right, while making marks on the scale. As a result, the arrow should occupy exactly 0.5 line art.
For to check the drum, set it to 0, the reference point of the measuring head, while the first stroke of the stele remains visible... The correct placement of the drum is indicated by the distance from its edge to the first stroke.
This distance should not be strictly 0.1 mm. A stationary balance is used to accurately determine the pressure and oscillation of the micrometer during measurement. In a static position, they are fixed in the base using a bracket.


The measuring heel with the ball is fixed on the surface of the balance.Next, the micrometer is turned until the arrow points to the extreme stroke of the minus scale, then the micrometer is turned in the opposite direction to the extreme stroke of the positive scale. The largest number of two is an indication of pressure, and the difference between the two is the force of vibration. The results obtained should be within certain limits.

How to use?
Before you start using the device, carefully study the instructions for use, the completeness of the device and be sure to check its external condition. There should be no defects in the case, measuring elements, all numbers and signs should be well readable. Also, don't forget to put the neutral position (zero). Then fix the micro-valve in a static position. After that, place the moving indicators in special latches, which are responsible for the designation of the permissible limits of the dial.
After setup, the device is ready for use. Select the part you are interested in. Place it in the space between the measuring foot and the micro-valve. Then, with rotary movements, it is necessary to connect the counting arrow with the zero scale indicator. Further, the vertical line marking, which is located on the measuring drum, is connected to the horizontal marker located on the stele. In the end, it remains only to record the readings from all available scales.
If a lever micrometer is used for tolerance control, then it is also necessary to use a special orienting device for a more accurate determination of errors.


Specifications
This ranking contains the most common types of micrometers.
MR 0-25:
- accuracy class - 1;
- device measuring range - 0mm-25mm
- dimensions - 655x732x50mm;
- graduation price - 0.0001mm / 0.0002mm;
- counting - according to scales on the stele and drum, according to the external dial indicator.
All elements of the device are reinforced with heat-resistant material, which allows it to be used at very high temperatures. The device is made of stainless steel, and the mechanical parts are made of an extra strong alloy of several metals.


MR-50 (25-50):
- accuracy class - 1;
- measuring range of the device - 25mm-50mm;
- dimensions - 855x652x43mm;
- graduation price - 0.0001mm / 0.0002mm;
- counting - according to scales on the stele and drum, according to the external dial indicator.

The brackets of the device are covered with external thermal insulation and shockproof pads, which provide increased rigidity. The device can withstand pressures up to 500 kg / cu. see There is a hard metal alloy on the moving parts of the micrometer.
MRI-600:
- accuracy class –2;
- measuring range of the device - 500mm-600mm;
- dimensions - 887x678x45mm;
- graduation price - 0.0001mm / 0.0002mm;
- counting - according to scales on the stele and drum, according to the external dial indicator.


Suitable for measuring large parts. A mechanical indicator of the scale indicators is installed. The body is composed of an alloy of cast iron and aluminum. Microvalve, arrow, fasteners are made of stainless steel.
MRI-1400:
- accuracy class –1;
- measuring range of the device - 1000mm-1400mm;
- dimensions - 965x878x70mm;
- graduation price - 0.0001mm / 0.0002mm;
- counting - according to scales on the stele and drum, according to the external dial indicator.

The device is used mainly in large industrial enterprises. It is reliable and not afraid of knocks or falls. It consists almost entirely of metal, but this only prolongs its service life.
For how to use the micrometer, see the next video.


The comment was sent successfully.