How to use a micrometer?

There are situations when you need to know the exact size of a part, down to hundredths or even thousandths of a millimeter. Such are, for example, instruments of precision mechanics, in which almost every micrometer is important. For this, the device with the same name is used, in which the stress falls on another syllable.

Rules for the use of different types
In its simplest form, a micrometer is a measuring device with at least three rulers. One, the main one, counts whole millimeters. The second, offset by half a millimeter relative to the first, allows you to measure the width (thickness, height) of the part with an accuracy of 500 microns. The third, threaded, has a reference point (zero), relative to which the drum rotates. It rotates around the main axis of the device - and has 50 divisions, similar to millimeter ones. In this case, the measurement accuracy is 10 μm (0.5 mm / 50 = 0.01 mm). The simplest analog (mechanical) micrometer operates on a screw pair, which is a micro-vise, in which the workpiece, wire or piece of steel sheet to be measured is clamped.

Device
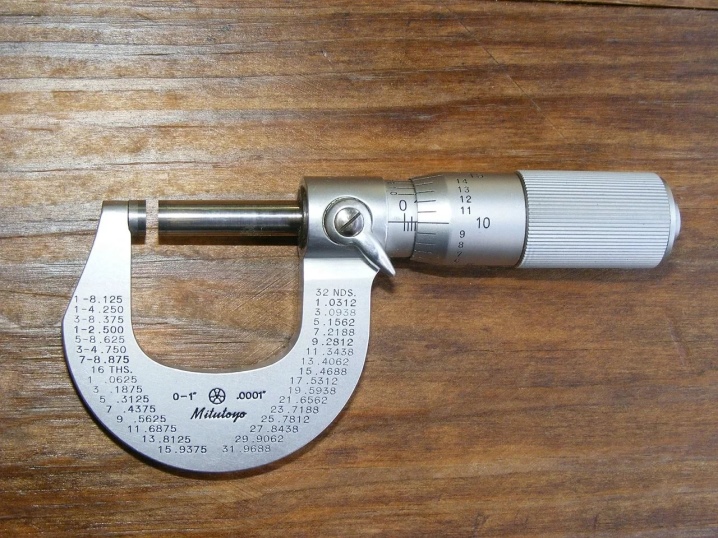
Application-specific micrometers have their own characteristics. So, a smooth micrometer measuring 0–25 mm with a mechanical or digital gauge consists of the following parts.
- bracket - a bearing element for a fixed part;
- stop - fixed at the end of the bracket and strictly perpendicular to the surface of the clamped part;
- screw - up to tens of times longer than the bracket, rotates on a fixed screw base and is also perpendicular to the clamped part; it moves within the measuring area equal to 2.5–7.5 cm for mechanical micrometers;
- stopper - prevents the screw from dangling;
- measuring base (stem) - contains two coarse measurement scales (accurate to half a millimeter); it looks like a hollow cylinder in which a screw pair rotates, held by special fasteners;
- drum - the basis for accurate measurement, which rotates with the screw and contains a scale for accurate measurement (up to 0.01 mm);
- ratchet - limits the force applied to the measured part;
- reference part for verification - used to adjust a misaligned micrometer; supplied with the device.

Accuracy class
In everyday life, accuracy greater than 0.01 mm is hardly useful. But in production - especially in precision mechanics factories - and among narrow-profile craftsmen, the division price of 1 micron (0.001 mm) or 100 nm (0.0001 mm) is considered the norm, which is achieved mainly on micrometers with a digital scale. An even higher class of accuracy used in the production of nanomaterials used, for example, in microcircuits - the lot is not micrometers, but completely different mechanisms and devices.


How are other types of micrometers arranged?
All types of micrometers function on the same principle. The most famous area of application is the identification of defective parts that can cause breakdowns in the mechanisms where they are used. But the measurement accuracy - up to 10 microns - is achieved in different ways.
- In a lever micrometer, the rotating drum is replaced by a pointer. The advantage of a dial gauge is an increase in speed, throughput at the stage of checking parts with a micrometer: there is no need to peer into the divisions.

- Counting micrometer (watch or dial type) - similar to those used in electromechanical meters and cassette (or reel-to-reel) tape recorders - calibrated and used in the same way as the classical one. Rotation of numbers in the counter is carried out step by step. Changing one digit to another is divided into 10 additional divisions (positions) - thanks to the counter gears, which increases the measurement accuracy from ten to one micron.

- A particularly accurate sensor is installed on digital models, giving a graduation in units of microns. Advantage - measurement accuracy is 1 micron, errors are practically excluded. Such a product is not inferior to the previous type - the readings of the device are read out almost instantly. There is no need to add readings - sensors and a microprocessor successfully perform this work "on the fly".

- Laser micrometers are higher than digital ones in terms of accuracy. The laser beam is obscured by the part, it is captured by a high-precision photo matrix, which sends the resulting beam deflection to the ADC and then to the processor and display. Measurement takes less than 1 second.
But the laser micrometer does not tolerate shocks and vibrations and requires regular adjustment. It is critical even to the slightest dust, and they will not be able to measure the internal dimensions of parts.

For specific tasks
Highly specialized micrometers have their own characteristics.
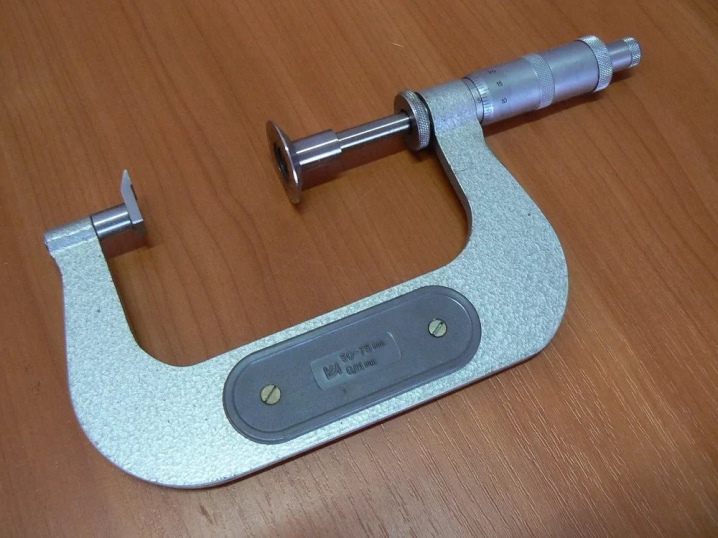
- The tooth meter has truncated-conical nozzles, allowing you to determine the gap in the grooves, the dimensions of the tooth of a gear or gear. Theoretically, it is possible to convert an ordinary (smooth) micrometer into a codometer by installing special caps of a certain length on the screw and the heel. In shape, they resemble countersunk screw heads - in the simplest case, they can be made from just such screws, then welded to the heel and screw. When measuring, the length of the nozzles is subtracted from that measured by the device converted in this way. This will add an extra calculation action to the measurements. In addition, the original micrometer should have a propeller power reserve not by 2.5 cm, but more, for example, by 5–7.5 cm.
Do not engage in amateur performances - it is better to immediately buy a ready-made micrometer-tooth meter, on which the manufacturer himself has already adjusted the scales and zero.

- The "pipe" micrometer is in demand among employees of management offices. They measure the thickness of the pipe walls to determine their wear. It has adapters that allow you to measure the diameter and thickness of the pipe wall, covered with rust. These attachments also allow detailed sizing of butted pipe with variable wall thickness. It is easy to reject pipes and tubes that have received deviations from the standard wall thickness with a "pipe" device at the casting and rolling stages. The pipe micrometer differs from the usual (smooth) micrometer by a special stop (heel), which is located not perpendicularly, but parallel to the clamped pipe. This probe touches the inner surface of the pipe pointwise, which ensures accurate measurement. Measuring actions are no different from actions with a smooth micrometer: the same screw and ratchet drum, when triggered, you get the desired diameter or pipe wall thickness.

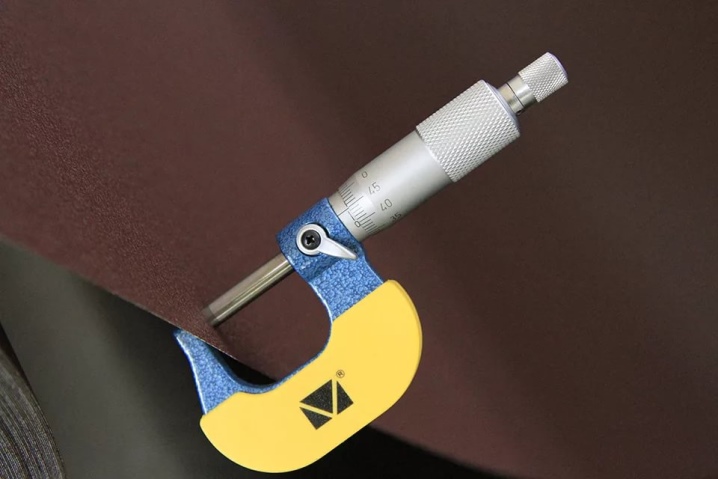
- A sheet thickness gauge has a shallower heel than a conventional micrometer, but the screw is approximately the same diameter as the screw of a conventional device. The graduation here is much more accurate than that of a conventional product. The staple of the "listometer" is stretched far out to the side, like a long U-shaped tube. Nozzles for such a device are supplied in two versions: narrow (for the corresponding parts and sheets) and elongated (measure the thickness of wide and elongated workpieces).
It is not recommended to measure sheets with an ordinary micrometer - it will push them through with its narrow screw. Here, the contact area is needed several times larger than when taking measurements from bearings and drills.

- The universal micrometer comes with attachments for different types of parts. It measures both the diameter of the bearing ball and the diameter of the sheet with equal accuracy. It has a large propeller travel reserve - up to 10 cm, which makes it "omnivorous": it can measure a ball, sheet, transverse dimensions of profile posts and structures - and even measure the head of a railroad rail from all sides.

- Wire - suitable for wire, drills, balls and other small parts with a circular cross-section, which can be easily broken by the clamp of an ordinary micrometer.

- Prismatic - makes it possible to measure the thickness of the descent of the knife blade. The nozzle for it is made in the form of a contour that repeats the tip with a 30-degree slope. Simply put, it is a double heel with slopes. At the same time, the screw is pointed, but its point is a little dulled. The set includes attachments for a different angle of descent, including for "single-pitch" sharpening of blades, for example, like lawn mower knives.

- A groove micrometer measures the depth and diameter of holes drilled in walls and supports. The measurement is carried out using a special retractable probe with a small cap at the end. This allows the master, without over-drilling or drilling the hole again, to choose a suitable self-tapping screw for him.

- The thread gauge measures the depth of the thread. It includes screw-in (and screw-on) nozzles with tapered ends or with two-tooth heads.

- The multiscale micrometer has an additional scale. From a distance, it resembles a caliper gauge, but it has one significant difference. It is like two (three, more) micrometers in one - identical, classic micrometric mechanisms on a common bracket extended far to the side. With a power reserve of up to 10 cm, you can measure a workpiece of an angle, T-bar or rail profile in one step.
Any profile structures with a complex cross-sectional shape, reminiscent of a letter or a simple hieroglyph, are also amenable to accelerated measurement.

- Hot rolling is an attribute of a metallurgical plant. It allows you to measure the thickness of a newly hardened product in the shape given to it. Instead of a screw, such a device includes a marking wheel. The heel is spring-loaded, has a transversely elongated (and not round, as in a simple product) shape. Principle of operation - the micrometer is rolled over a sheet or profile, allowing you to detect defects (chips, curvature) on a newly cast billet.

- Inside gauge - works in conjunction with the machine when the part is machined on the inner surface. Its probes, which have a smooth curvature and a landing size decreasing towards the end, are inserted into the processed piece of pipe or tube, or any other part that rotates in the fixing mechanism of the machine. This speeds up the work of the turner - there is no need to remove the part from the grinder dozens of times to make sure that the part has taken the desired shape.

Whatever the micrometer - when buying a product, ask the seller to check it. It will be a significant advantage to check the diameter or thickness of the same part using another, the same or similar device.
Accurate control during the purchase is the key to successful and long-term use of the product.
How to set up and check for accuracy?
This measuring device is one of those that are calibrated without fail before taking measurements, since we are talking about microns, not millimeters. Carrying it without a case or case, an accidental drop can affect accuracy. The verification technique, despite the seeming complexity of a beginner, is very simple. Follow a few steps to zero a conventional 0-25mm mechanical micrometer.
- Make sure the device is clean - especially check the gripping surfaces on the heel and screw. To remove debris and grease, a clean sheet of paper is best suited - place it between the clamps of the device and twist the drum until it stops.
- Spin the drum back.Repeat this step several times as necessary, moving the paper until the surfaces to be closed are clear. Adjustment without cleaning these surfaces is impossible - solid particles will not allow you to set the accuracy.
- Check that the brace and heel are securely attached. They shouldn't dangle. If this is not the case, the instrument must be repaired, in which the bracket is again securely fixed, and the parallelism of the clamping surface of the screw and the heel are re-set.
- Screw in the drum all the way without the part - until the 3rd, 4th or 5th clicks of the ratchet. Make sure all scales are aligned exactly with the zero marks.
- If, for example, the mark on the drum does not coincide with zero, adjust the base (stem) by twisting it using the special key supplied in the kit. The wrench is used on an instrument in which the screw is retained with an additional nut or a secondary (support) screw with a special recess.
- Check the accuracy of measurements by holding the reference part with a micrometer - on average, also up to the 4th click of the ratchet. It is by this that you can calibrate the device itself. The micrometer is successfully configured and ready for use.
Important! If you drop the device, it will not cause much damage. Having calibrated its zero marks, you can use it again. These devices are made of high quality tool and stainless steel.

How to measure correctly?
A ratchet is built into the drum of the device. When measuring the thickness or diameter of a part, as soon as it is slightly squeezed by the clamps, the first click is heard. This is the "moment of truth" - stop spinning the drum and count the resulting size in divisions. The instruction is extremely simple and looks like this:
- place the part between the screw and the stop;
- spin the drum until the ratchet clicks.
Further screwing the drum with force after clicking the ratchet can loosen the helical grooves of the drum. If this incorrect step is repeated many times, the micrometer will begin to play with time - the drum thread will deteriorate. None of the most accurate zeroing will make the reliability of measurements on it pristine, established by the manufacturer. It will become impossible to measure with a damaged device.


For thin wires made of soft metals and alloys - for example, copper, aluminum, tin, lead or solder wire - the micrometer pads will flatten the wire by 0.01–0.15 mm, and the measurement result will be inaccurate. Hardened steel and pobedite alloy are much more resistant to ratcheting. Such a wire will withstand repeated measurements without any problems, without flattening in diameter by a micron - provided that you did not continue to compress it after the control click of the drum.
Features of the determination of indications
It is also extremely easy to take readings of the device. For example, you measured the diameter of a hardened steel wire, on which, after a click during the rotation of the drum, the following marks were established:
- 3 mm on the first ruler;
- between 0.5 and 1 mm for the second;
- The "spinner" has stopped at around 5 divisions.
Accordingly, the diameter of your wire rod is 3 + 0.5 + 0.05 = 3 mm 550 microns (microns). In millimeters - 3.55 mm. The full turn made by the precision drum is 0.5 mm.
You will learn how to use the micrometer correctly in the video below.


The comment was sent successfully.