Shallots and features of its cultivation

Shallot is a unique herb that combines the benefits of onion and onion. Its fruits are used for preparing various dishes and are suitable for long-term storage. Therefore, many gardeners want to plant it on their site.
general description
This plant is popularly known as family, nesting and Old Believer onions, as well as kuschevka or kvochka. Shallot is a type of onion. Initially, it was distributed only in the Middle East. In Europe, they learned about this plant in the middle of the XIII century, but then it did not receive wide distribution.
Only over time, they began to use it to prepare various dishes.
Shallots are a biennial plant. Its main characteristics are a short ripening period, high yield and good frost resistance. It is possible to grow shallots both in warm regions and in cold ones.
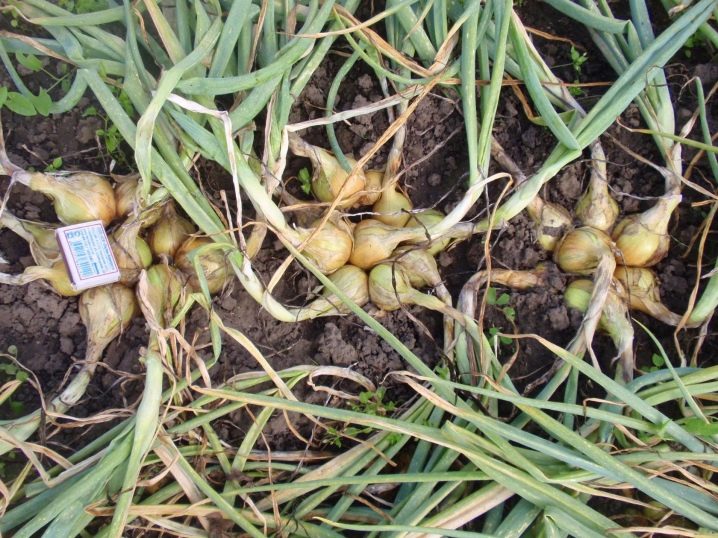
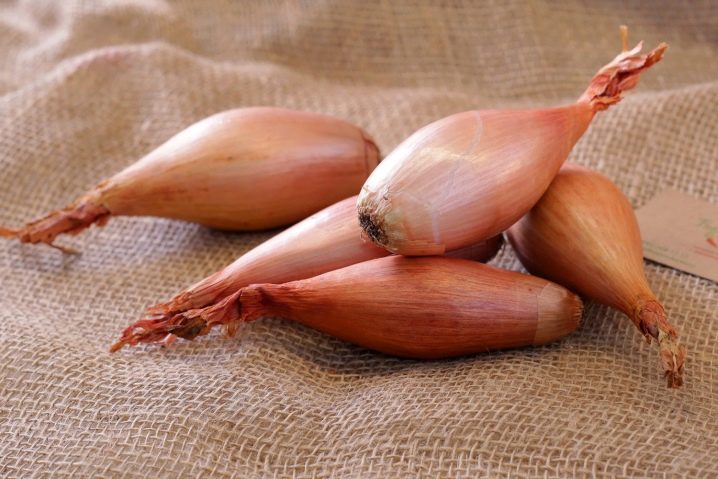
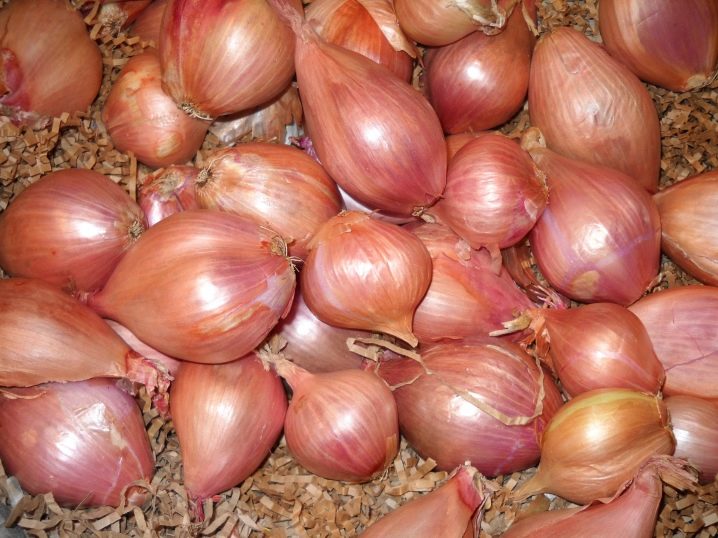
The root system of this plant is weakly branched. It lies shallow. The foliage of the onion is thin and light green. In length, it can grow up to 25 centimeters. Green onions look very beautiful. The bulbs that form underground resemble garlic heads. A whole nest of 5-20 daughter specimens forms around one mother bulb. The shape and color of the bulbs depend on the varietal characteristics of the plant.
Differences from onions
Having decided to plant shallots on your site, you need to understand how it differs from ordinary onions.
-
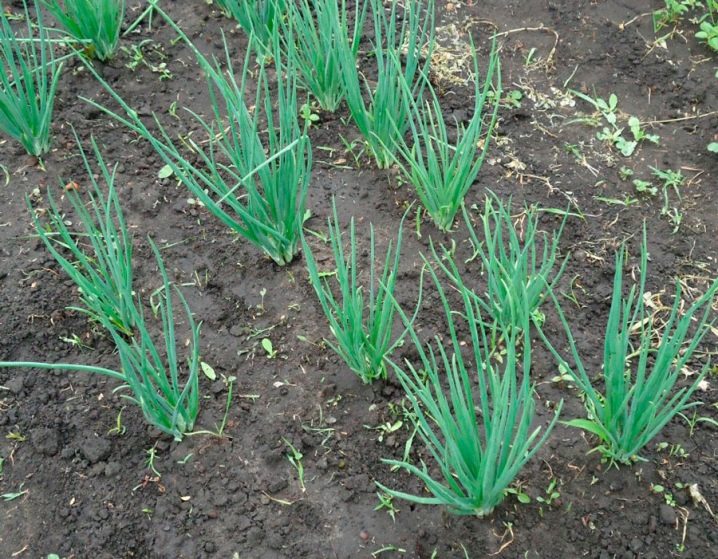
Foliage. The green feathers of the shallot are spreading. Greens begin to form after the formation of the head. Very often, such onions are grown in a greenhouse for feathers. With proper care, you can get juicy greens as early as February.
- Bulb shape. The shape of the turnip in shallots is more elongated. The bulbs are quite small. The color depends on the characteristics of the variety and the place where the onion grows. So, in the northern regions, turnips have a yellowish color, in the southern ones they are light purple.

- Taste. Most people value shallots precisely for their taste. Its delicious juicy greens are widely used for fresh salads and soups. Bulbs are used to prepare main dishes and side dishes.
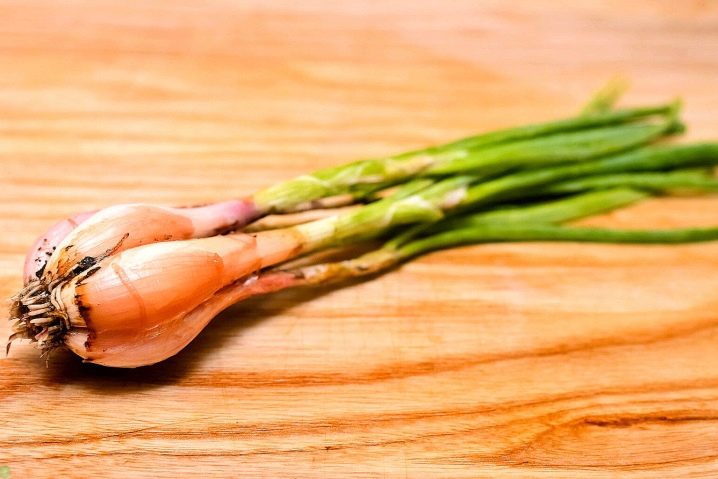
- Smell. Shallots do not have a strong, unpleasant odor. Its aroma is sweetish and slightly piquant. That is why shallots are eaten even by those who do not eat regular onions because of the smell.
Knowing these features of the plant, many gardeners are happy to plant shallots instead of onions or next to them.
Landing
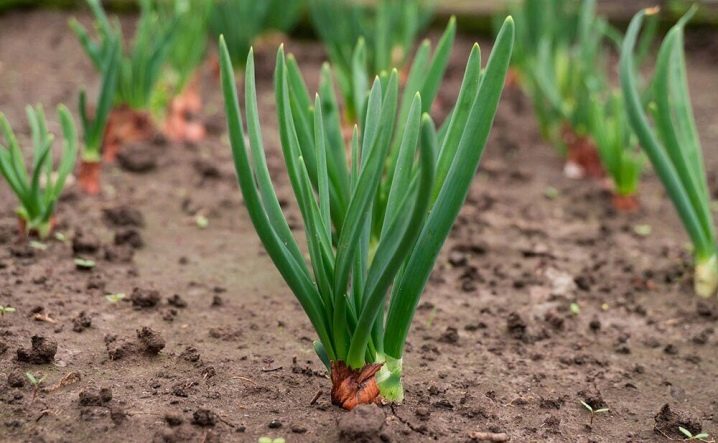
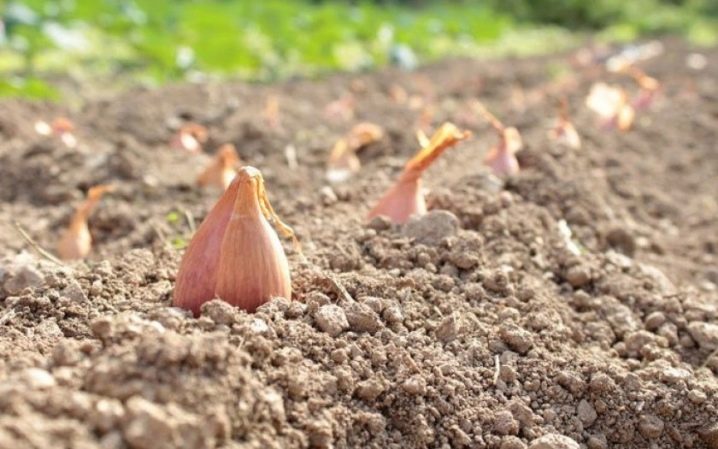
Planting shallots is recommended after the snow melts. In the southern regions, it is planted at the end of winter, in the middle lane - in the middle of spring.
When choosing a place for onion beds, you should pay attention to the following points.
- Soil quality. Shallots grow best in areas with fertile and well-loosened soil. Its acidity should not be increased. It is recommended to choose areas with deep groundwater. Otherwise, the roots of the plant will rot.
-
Illumination. In order for the plant to develop well, and its foliage always remain juicy and green, onions should be planted in well-lit areas. Shallot grows much worse in the shade.
-
Crop rotation. If you follow the rules of crop rotation, the plants will get sick less often. At the same time, it will also be possible to get a better harvest. It is recommended to plant shallots after legumes.It is in this case that the gardener will have the least problems with growing onions. Representatives of the nightshade or pumpkin are also considered good predecessors for him. But after carrots, beets and garlic, it is strongly not recommended to plant shallots.
-
Neighbors. Choosing the right shallot neighbors is just as important. This plant is usually planted next to carrots, radishes or strawberries. Rows of onions can be alternated with rows of green salad.
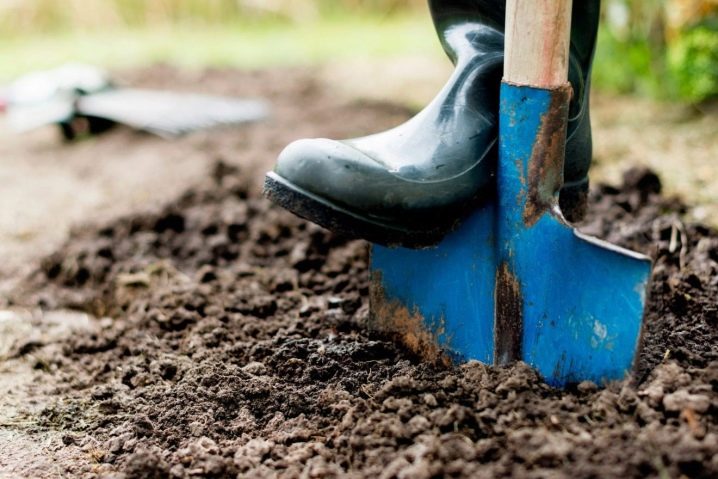
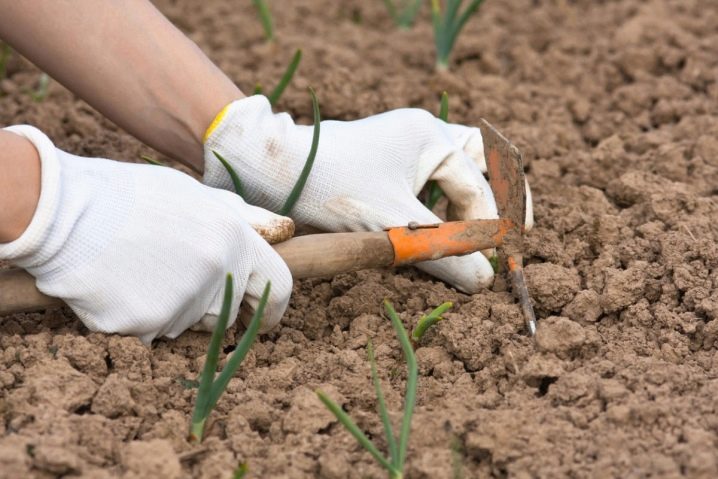
Before sowing shallots, the site must be dug up. This allows you to get rid of the remains of weeds and pest eggs. In addition, this procedure saturates the earth with oxygen. In the process of digging up the site, manure, compost or wood ash are placed in the soil.
If the onions are planted in the fall, the soil is prepared in this way in August. They begin to prepare for the spring planting of shallots in mid-autumn.
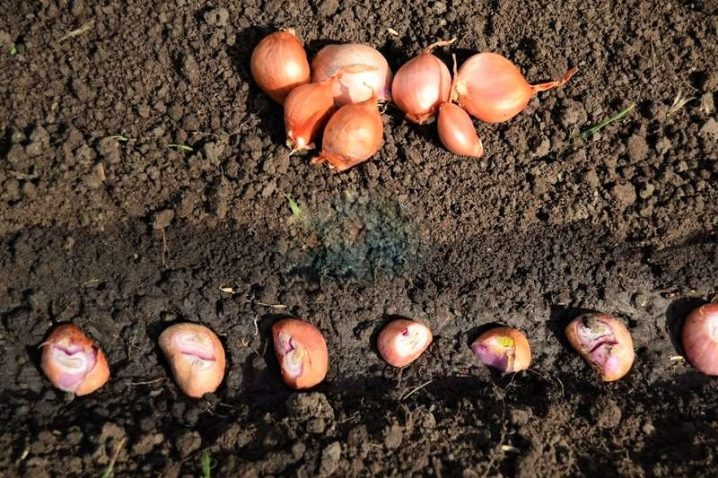
For planting shallots, you can use both seeds and sets.
Seed planting
For planting shallots, it is worth using quality seeds. They must be fresh and not damaged by mold or rot. Before planting, the planting material is wrapped in a piece of damp cloth. In this form, it is left for two days. From time to time, the fabric should be irrigated with a spray bottle. It shouldn't dry out.
The seeds prepared in this way are sown in the warmed-up soil. The depth of the onion grooves should be within three centimeters. After sowing the seeds, the rows are sprinkled with a thin layer of loose soil.

Using sevka
It is also recommended to sort out the sevok before planting. For planting on the site, only healthy and well-dried bulbs are used. They should not be too large, but not too small.
Sevok must be dried before planting. To do this, it is laid out next to the heating devices or directly on the radiator. In this form, the onion is left for several days. This allows the plant to “awaken” and speed up the process of green shoots emergence. Instead, the bulbs can also be placed in a container and covered with heated water for a couple of minutes.

The heated sevok is carefully planted in the prepared grooves. It is not worthwhile to deeply bury the bulbs in the ground.
Care
Growing shallots outdoors is not as difficult as it might seem at first glance. Plant agrotechnology consists of the following activities.
Watering
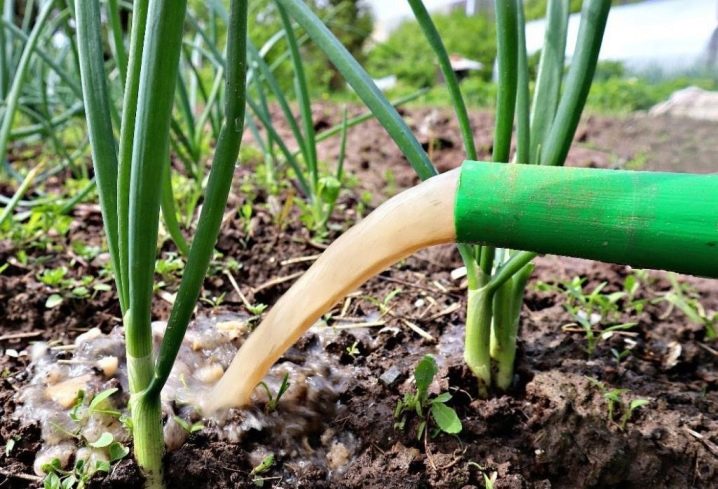
Water the plants carefully. Waterlogging of the soil must not be allowed. This can lead to rotting of the bulbs and the development of many fungal diseases. If the weather is rainy, there is no need to water the beds. In a drought, the site is irrigated every few days. Water for irrigation is used soft and settled.

If shallots are grown for feathers, watering should be guided by the state of the greenery. It should not turn yellow or dry out.
Weeding
Loosening of the area is usually carried out immediately after watering. Thus, the gardener prevents the formation of a crust. In addition, he needs to remove all weeds on the site. After all, they are able to drown out the bow. Because of this, both the greens and the heads will be very weak and tasteless.
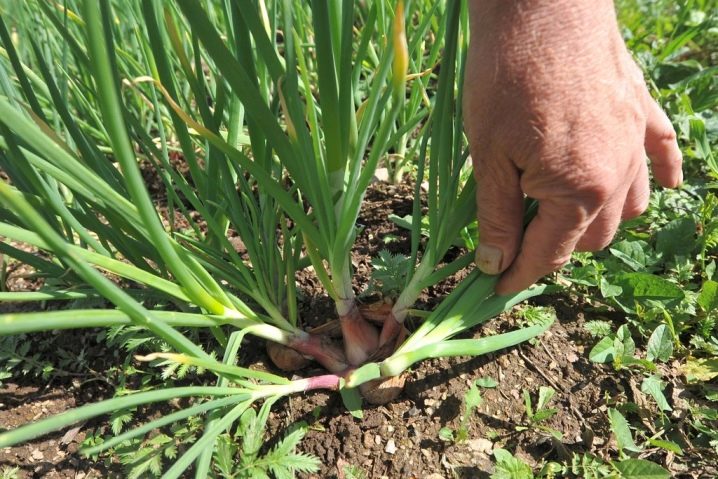
Thinning
When growing shallots for a large onion, it is important to thin it out in a timely manner. Excess greens are removed around mid-summer. Plucked plants do not need to be thrown away. They are usually used to prepare various dishes.
Top dressing
Shallots are usually fed twice a season. For the first time, this is done one and a half weeks after the appearance of the first shoots. At this time, organic fertilizers with a high nitrogen content are usually used. This can be a weak solution of chicken or herbal infusion.
During the formation of the heads, the plants are fed with potash fertilizers. Such feeding has a positive effect on the taste characteristics of the onion.
The shallots planted before winter are fed in the spring, after the snow melts.
Reproduction
Shallots are most often propagated vegetatively. The bulbs collected after harvesting are carefully dried and stored until next year. Using them, you can multiply the onion without losing its varietal characteristics.
Seeds are used much less frequently for breeding such plants. Collecting them yourself is quite difficult. The fact is that shallots rarely shoot and bloom. In addition, the planting material does not germinate well.
Diseases and pests
When planting shallots on your site, you need to know in advance about the pests that pose a danger to this culture.
-
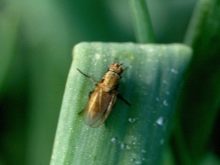
Onion fly. These insects appear on the site in the spring. At this time, the foliage of the onion begins to turn white and wither. Noticing this, the gardener should treat the bushes themselves and the soil around them with wood ash.
-
Nematode. This is another pest that poses a threat to most varieties of onions. The activity of this insect causes a rapid curvature of the bottom of the main bulb. In order not to lose the harvest, the gardener needs to dig up all the affected plants and destroy them.
-
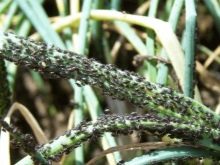
Aphid. Small insects settle on green foliage and begin to suck the juices out of it. Getting rid of aphids can be difficult. But to fight insects, it is quite possible to use folk remedies. As a rule, plants are sprayed with solanaceous infusion or pepper decoction. If there are too many pests on the site, shallots are treated with "Verticillin". Apply it according to the instructions.

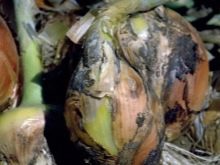
Fungal diseases are also dangerous for young plants.
-
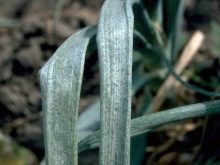
Powdery mildew. This is one of the most common diseases. It affects not only onions, but also plants in the neighborhood. At the same time, the greens are covered with a dense powdery white bloom. Diseased plants look like they have been doused with lime mortar. To combat powdery mildew, you can use folk remedies. Usually gardeners spray the bushes with a solution of wood ash.
-
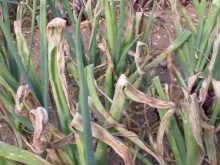
Peronosporosis. This disease can kill the whole onion very quickly. It is very easy to notice it. Yellow or brown spots appear on green foliage. Over time, they merge together. It is recommended to spray diseased plants with a solution of Bordeaux mixture. To achieve complete destruction of the disease, it is necessary to spray not only the foliage, but also the soil next to the plants.
-
Fusarium wilting. The cause of the development of this disease is usually high humidity. The bow slows down in development. Its feathers turn yellow and wither. They show bright red fungal spores. It is very difficult to fight fusarium. Affected plants must be removed and destroyed. The site is then sprayed with "Fitosporin".
In order not to miss the moment when the plants can still be saved, the beds should be regularly inspected.
Collection and storage
It is worth starting harvesting the shallots immediately after the leaves have lodged. If the right moment is missed, the bulbs will not store well. The collection of early ripe onions is usually done in July. Mid-late varieties are harvested in August.
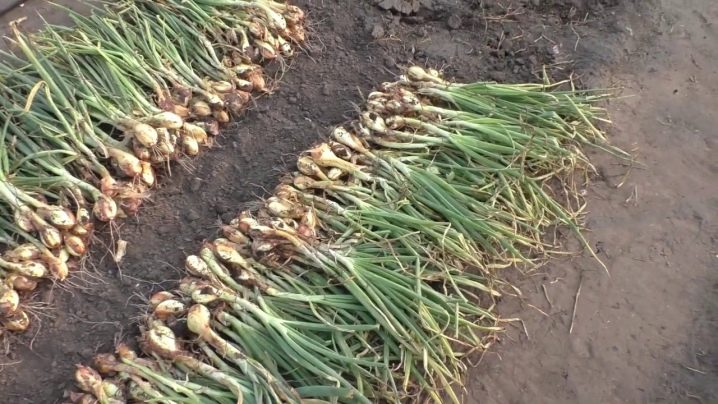
After collecting, the bulbs are cleaned of dirt and laid out in the beds for several days. There they ripen and dry up. After a couple of days, dry foliage is separated from the heads. Shallots can be stored in a variety of ways.
-
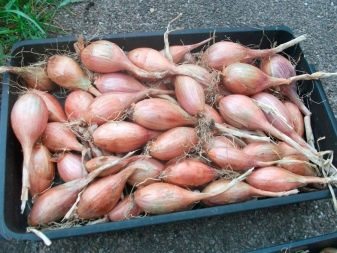
In boxes. Dried and peeled onions can be placed in crates. In this form, the crop will be well stored both in the cellar or basement, and on an ordinary balcony.
-
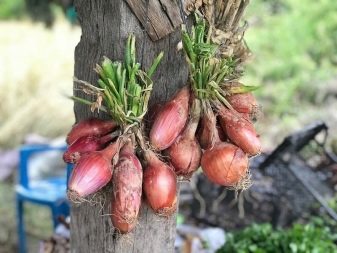
In braids. Dry foliage does not need to be trimmed after harvesting the onions. Leaves can be woven into braids. They are compact in size and can be stored well on shelves or racks.
-
In fridge. A small portion of the crop can be placed in the vegetable compartment. Onions are usually stored there, which will be consumed in the near future.
-
In the freezer. Peeled onions can also be stored in the freezer. In this case, it is pre-cut and moistened. After that, the onions are placed in plastic containers and sent to freezers. Green feathers can be frozen in the same way. Frozen onions do not lose their beneficial properties.
Knowing all the necessary information about shallots, anyone can grow it on their site.


The comment was sent successfully.