How to make a spray gun with your own hands?

Often we need to paint something. And I want to make sure that the paintwork is applied well at home. You can get such a result only with the help of a spray gun. You can make a similar device for paint yourself. It is thanks to him that it is very possible to get an even distribution of paint over the surface of the object. Given the high cost of such a device, creating a simple spray gun with your own hands is the right decision. Let's try to figure out how to make such a device and what you need to know.


Making from a ballpoint pen
The simplest and at the same time primitive option for creating a painting device can be a solution based on the simplest ballpoint pen. Naturally, such a tool will not replace a factory spray gun for painting large areas, but for home use it will not be the worst solution.

The advantage of such a spray gun is that it is very easy to make, and construction will take no more than 30 minutes. And it's easy to use - you just need to blow into the body of the pen so that the paint starts to come out through the rod.
This spray gun model consists of the following components:
- simple ballpoint pen;
- a vessel that has an expanded neck;
- a piece of dense foam that is used to protect drywall floors from the effects of low temperatures (alternatively, you can take a piece of plastic or use rubber).


First, you need to make a small blank, which will differ in that its lower part should be well and firmly inserted into the paint container. The width of the neck is also important, because the quality of the tool that should turn out will depend on this criterion.
After that, you will need to make a couple of holes in the upper part. It is better to do this not with an awl, because the holes will be uneven, and this will create inconvenience during use. Therefore, it would be better to use a screwdriver for this purpose. The first hole should only be vertical. You can use the vessel lid as a stop. After that, you will need to make a hole horizontally so that it intersects with the previous one.


Now you need to immerse the edge of the rod into the vertical channel. And in the second one should install the handle body. Then you need to fill in the paint, and screw the bottle neck with a lid.
If it is required to carry out whitewashing work, then in order to use other paints, in addition to the water-dispersion type, you can carry out a small modernization of the tool.

Using such a paint sprayer based on a regular ballpoint pen will require some skill.
In addition, you should understand the intricacies of the paintwork. Therefore, for a start, it will not be superfluous to practice on some unnecessary sheets of paper.


Homemade spray gun from a vacuum cleaner with a hose
If you need to paint some larger surfaces, then a hand sprayer will be ineffective here, because it will take a long time. Here it would be better to make a device equipped with an auto air supply mechanism. For such purposes, a vacuum cleaner or compressor is used, which is equipped with almost every refrigerator. Such solutions are suitable for creating a homemade autocompressor, which will perfectly cope with water-based paint. But such a device is not suitable for a powder powder.

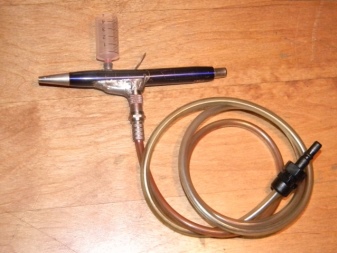
If you use a vacuum cleaner, then it would be best to take some kind of Soviet model. The reason is that the design of modern models does not provide for a pair of hoses, one of which works for "blowing", and the other for "blowing".

If the old vacuum cleaner is no longer needed, then sometimes to change the direction of air movement, you simply need to change the direction of the terminals that connect the rotor and starter. After that, you need to perform some actions, after which the vacuum cleaner can be used for painting.
- First you need to prepare a glass or plastic bottle. The material is not that important. The main thing is that the volume of the container is no more than one and a half liters, and the size of the neck is at least 20-25 millimeters.
- Now you need to take a 20 cm aluminum or copper bottle of 4 mm diameter. It must be bent and attached to the bottom of the nozzle on the hose from the vacuum cleaner. A good power aerosol can can be used instead of a compressor. Such, for example, are used in hairdressing salons. A brass nozzle should be mounted on the upper end of the tube. You will also need to grind the end so that it gets the shape of a cone. After that, it remains to install the upper edge of the tube into a plug-in connector.
- After that, you need to equip the resulting device with a holder so that it is convenient to hold it in your hands. To do this, first make a groove in the rod, then screw the handle into it using bolts or screws.
- Now you need to make a steel bracket with a hole that will correspond to the dimensions of the nest in terms of dimensions and especially in width. Assemble the workpiece keeping in mind that the end of the suction tube must be at the same level as the nozzle.
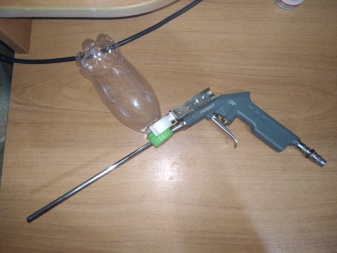

Before starting work, be sure to check the performance of the resulting paint spray gun based on a hose from a vacuum cleaner on some surface.
It is possible to reduce or increase the pressure by adjusting the tightening of the tube. When a suitable pressure level is set, it will be necessary to fix the suction tube using polyurethane foam in the groove that is glued to the lid of the paint container.
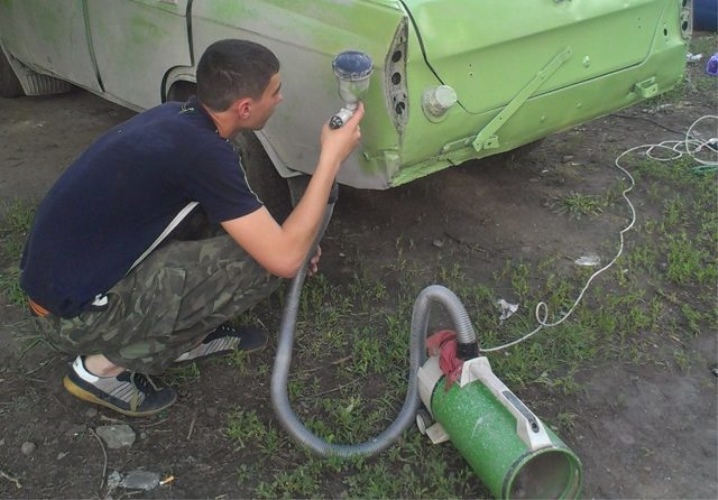
Sprayer with compressor from the refrigerator
Probably the most technologically advanced home-made spray gun will be a model based on a compressor from a refrigerator. It will not only be durable, but also as functional as possible. True, it will take a lot of time and effort to create such a device. But the result is worth it. Let's try to figure out what we need for this and consider the process of assembling a device of this type.


Tools and materials
To begin with, you need to have the following items and tools on hand:
- steel wire;
- car filter;
- a large container where paints and varnishes will be poured;
- 20 mm clamp (it is better if there are several of them available);
- board;
- self-tapping screws;
- 3 hoses, one of which will have a length of 400 mm, and a pair of others - 100 mm each.
In addition, you will need to have a drawing of such a device. You can do it yourself by calculating all the necessary parameters. Or you can download it on specialized forums where people share various homemade products.
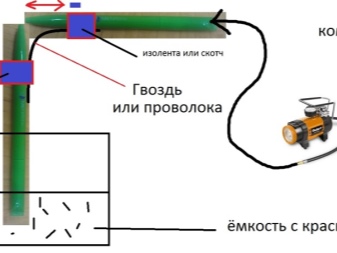

Besides, before starting assembly work, you need to find some thing that can be used as a receiver. You can use a fire extinguisher for this, some kind of unclaimed canister or metal container that can be tightly and tightly closed.
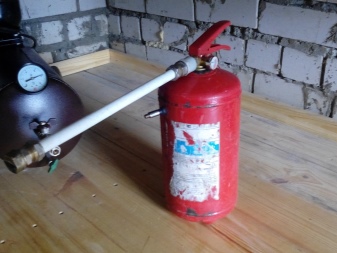
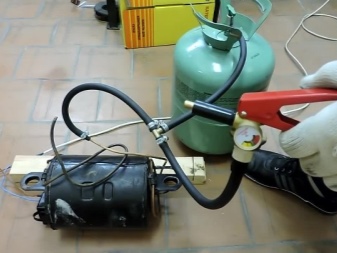
Assembly
The process of creating the structure in question will look like this.
- First, we fix the compressor from the refrigerator on the basis of wood.
- Now you need to determine where the air is coming from at the compressor. To do this, you can connect the device to the network and understand from which of the 3 pipes the pressure is being generated. When this is done, the outlet can be identified. This means that the second open nipple will be the inlet hole, and the third nipple is usually always sealed. It should be said that the sealed tube has its own important role - the lubrication of the compressor. So if the engine is running well, then it should not be touched.
- Further, hoses with the appropriate diameter must be connected to both open nozzles, and the joints must be tightened using clamps.
- Then, in the body of the thing that will act as a receiver, you should make a couple of holes where you need to connect the hoses. We attach a larger diameter hose to the inlet compressor tube, and a smaller one to the outlet.
- You will also need to install a pressure gauge for the system. It is needed to be able to control the level of injected pressure.
- The receiver must be connected to the main structure of the load-bearing blower. After that, both parts should be connected to each other using the first hose, and the second pipe should be fixed to the filter, which will catch small particles of debris and dirt in the air flow.
- At the last stage, you just need to connect the spray gun.

It should be added that if you want to make the resulting device mobile, then small wheels can be attached to its base.
How to make from a spray can?
Another option for creating a good and powerful spray gun is the simplest aerosol can. This solution is cheap and easy to implement. To implement such an idea, you will need to have:
- a nipple or a camera from a bicycle wheel;
- a plastic bottle that will have the required volume (there should be no defects in it);
- aerosol-type canister - special attention should be paid to the quality of the sprayer so that it works for a long time;
- bicycle hand pump;
- hacksaw for metal.

Many components can be found in your garage, which makes it cheaper to create such a device.
The build process will look like this.
- From the selected bicycle tire, a nipple will be needed, which can only let air through in one direction.
- You will need to make a hole in the bottle that fits under the nipple. It will be a container for paint.
- We fix the nipple there on the inner wall. It should be taken into account that the connection must be airtight. The nipple will be responsible for the paint supply.
- The upper area of the can should be sawed off with a metal hacksaw. This must be done so that the resulting result perfectly matches the size of the cork.
- You will need to connect the spray can and the bottle using cold welding. This solution will provide the best possible fastening. This is due to the fact that a fairly high pressure will be exerted on the structure.
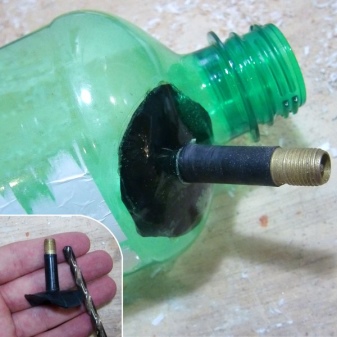

It should be added that this type of spray gun is designed for a pressure of no more than 3 atmospheres. Air injection is carried out by a bicycle pump, for the connection of which a nipple was installed. This version of the spray gun will perfectly cope with painting different surfaces with water-based paint or a lime-type solution.
How to make a spray gun with your own hands, see the video below.


The comment was sent successfully.