All about setting up a spray gun
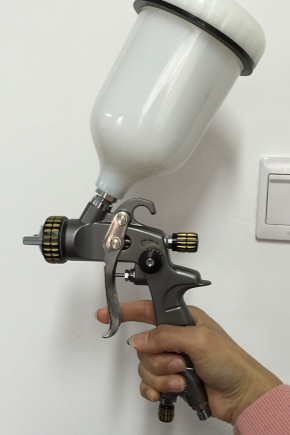
Painting various objects and surfaces with a device such as a spray gun implies the creation of a high-quality and uniform layer of good density, without the formation of any irregularities or smudges. In principle, this tool can do this without difficulty, especially if connected to a good compressor. But a simple connection may not be enough to get a good result. In order for the power of the spray gun to be fully disclosed, it must be properly adjusted by setting the best pressure, as well as some other indicators. Let's try to figure out what the scheme of this process is and what actions should be taken for this.

Torch adjustment
Setting up the spray gun begins with adjusting the torch. This element will be responsible for the area on which the paint will be sprayed. If you want to paint a large surface area, then you should set the maximum value or close to it. If you need to combine several colors or apply to a small area, it would be better to reduce this parameter. The change is made using a special regulator, which should be turned either in the direction of increase or in the opposite direction.
When the lever is set to maximum, the spray will be very thin and the paint will be dry around the edges. Moreover, this will cause too high paint consumption and will entail unnecessary financial expenses, besides, additional time will be required for mixing. It is better to set it up like this: unscrew the regulator all the way to the maximum, then turn it a little in the direction of decreasing.
We add that to apply paint, the torch is held in an upright position, but to paint narrow places, its angle should be changed almost to horizontal.
But you should not set the mode of weak spraying, because a high concentration will cause streaks and leaks.


Setting the inlet pressure
Another point regarding the setting of the painting tool is the adjustment of the inlet type pressure. After all, it should be understood that the pressure of the paint ejection is determined by the air pressure, which is regulated by a special valve. If the indicator is too high, then instead of an oval shape, a weight-like one will be obtained. This means that the boundaries will blur, splashes will simply fall outside the boundaries of the contour. With low pressure, the paint will form dense clumps that will lay down in a thick layer on the surface.
The simplest method for selecting the required pressure level for beginners will be the following algorithm:
- open the valve completely;
- test spraying at a distance of 250-300 millimeters;
- turn the regulator downward until the stain has the required shape and the applied layer of paint becomes uniform.
If, for some reason, the spray cannot be removed, and the spray gun continues to "spit" and does not spray paint, this indicates that a blockage has formed in the device and needs to be cleaned.
Naturally, it is worth noting that if the spray gun is new, then such a problem cannot arise.
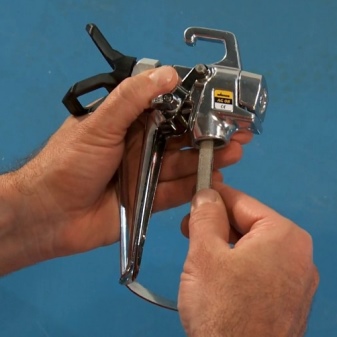
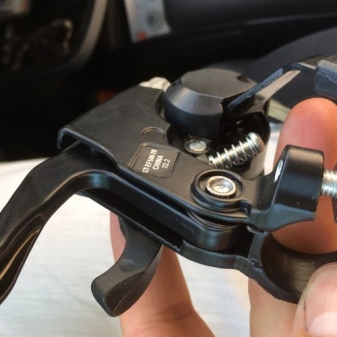
In addition, the device can be adjusted using a regulator with a pressure gauge, which is located at the handle. As the air moves, some of the pressure disappears. But the regulator makes it possible to correctly select the pressure value.
If the device is equipped with a built-in type pressure gauge, then there will be no problems. The setup will be done like this:
- the flare width adjustment screw opens completely;
- you need to pull the trigger of the spray;
- the required pressure level is set thanks to the air mass volume regulator.
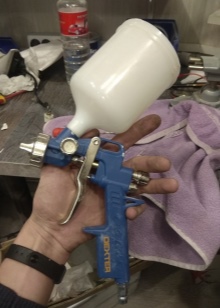


If the spray gun has a separate device, the inlet pressure setting will be done as follows.
- The screws responsible for the air flow rate and changes in the dimensions of the cloud should be set to maximum. Paint spray speed will not matter.
- The lever of the spray gun must be pressed in such a way that the compressed-type gas supply starts. When turning the adjusting screw on the pressure gauge, the required inlet pressure must be selected. If the spray gun is conventional, then we are talking about values of 3-4 bar. If the model is with a low inlet pressure - 1.5-2 bar.
- Now set the paint regulator to the maximum position. When the operator is satisfied that all the screws are in the correct position, and the viscosity of the paint is correct according to the standard, testing of the device can begin.


If the gun does not have measuring elements at all, then you can try to establish an approximate pressure level using the pressure gauge of the filtering mechanism or compressor reducer. There are two aspects to consider here.
- The pressure in an uncontaminated filter should be about 0.3-0.5 atmospheres. If it is clogged, then the recommended value is increased fivefold.
- Some of the pressure disappears as the air masses move along the hose. We are talking about a value of about 0.6 atmospheres.
To prepare the device for use, unscrew the gas supply screw to the maximum. Then open the cloud size adjuster and pull the trigger.
It remains to set the pressure on the reducer, taking into account the loss.


Subsequent stages
Now let's talk a little about the next steps in setting up a spray gun, which can be useful for painting wood or applying a coloring agent to other types of surfaces. Let's start from the moment the paint is applied.

Paint supply
When the torch size that suits the user has been set and the best pressure level has been set, you can start adjusting the spray. For such purposes, the spray gun is equipped with a special screw, which is responsible for regulating the paint supply. At the start of testing, it should be screwed in to the end, and then gradually twisted in the other direction as you apply test prints. Professionals advise not to set a high level of paint supply from the very beginning, because in this way you can accidentally use up the entire stock of the composition and spoil the surface being treated.
If the flow rate is too high, there is a risk that the spray booth will be dirty. With this type of work per unit of time, the material consumption will be too high, and small delays in use and a small distance of the device from the surface cause the formation of smudges that can hardly be called aesthetic.
For this reason, a reduced level of material supply will look more preferable, because if desired, it is much easier to raise the level of supply during operation than to lower it.

In order to understand exactly how best to set up a spray gun for painting all kinds of surfaces, you should have at least a small knowledge base about how paint and varnish materials are supplied to such a device.
There is nothing difficult here, because the feed mechanism consists of a steel needle covering the inlet, the stroke of which is limited by the aforementioned adjustment screw.
The simplicity of this design allows the operator to make prompt and the most insignificant changes in the operating mode of the device, depending on the needs and the current situation.

Distance to surface
If we talk about such an aspect as the distance to the surface, then there is no consensus among specialists and experts. Some say that for metal or any other surface, the distance between it and the spray gun should be about 10 centimeters, while others - up to 30 centimeters. Such a big difference can be explained very simply - different models are used everywhere, which have different characteristics, including power. It would be better to follow the following recommendations:
- for HVLP - 100-150 millimeters;
- for LVLP - 150-200 millimeters;
- for conventional nozzles such as HP - 200-250 millimeters.
How to set up a gun with a different reservoir position?
It should be said that on the market you can find models with an upper and a lower location of the paint reservoir. The second option will be simpler. Both types of models have certain features.
- The top tank model is an excellent solution for high viscosity material. It is also convenient to use under varnish. But it is not very convenient to use such a device due to the fact that it is always required to keep it at the same angle, which is not so easy if long-term work is expected. Changing the material in this case will also not be the easiest process, which is why it will be better to consume the paint and varnish material in the container in full.
- A device with a bottom capacity can be called more practical. Its only feature is that it is completely unsuitable for working with paint with high viscosity.
It is required to say that the location of the reservoir over the handle is somewhat inconvenient in terms of hand fatigue. For example, if the bottom of the tank can be easily supported with the other hand, then when it is located on top, this is much more difficult to accomplish.
That is, the only advantage of the top tank model is that it is better only when using paint with a different viscosity.

The configuration of the device should also be carried out taking into account the following aspects.
- Keep the gun at the same distance from the surface at all times. We are talking about values of 20-30 centimeters.
- The deflection of the spray gun to the side is unacceptable. If your hand is tired, then it is better to take a break. It is clear that it will be difficult to do without minimal fluctuations, but if they are too strong, then the paint on the surface will be unevenly distributed.
- When spraying on the ends, there is no need to save paint and varnish material by deviating the device from a strictly vertical position. It is better to spend a little more substance than to face the poor quality of the resulting coating.
- The first coat should be applied horizontally and the second vertically. The displacement of the stripes should be carried out by 30-60 millimeters, there should be good drying between the layers and there should be no adhesion at all.
- The staining speed in normal mode is 30-40 millimeters per second, and you should not deviate from these values. Keep the device level and move as smoothly as possible.
Setting up a paint application tool for beginners can seem daunting if you don't adhere to the aforementioned points.
But if they are observed, even an inexperienced person can carry out the correct adjustment of the spray gun.

You can learn how to set up a spray gun for painting a car from the video below.


The comment was sent successfully.