How to paint with a spray gun?

High-quality painting of large areas requires the use of a special apparatus called a spray gun. There are many models and variations of this device, but whatever device is chosen, its capabilities must be used wisely, according to the technology. That is, you still need to be able to paint correctly with a spray gun.


How to prepare paint?
Before changing the look of the walls with a new coating, you need to prepare the paint. There are several factors that matter.
-
If the paint is very viscous and very thick, it will not spread evenly. It will take more time for drying, material overruns will occur. And when painting inclined planes or verticals, the quality of work will significantly worsen smudges. And to fix this, a new stain is required. And also with the viscosity of the paint, one cannot count on irregularities, roughness, microcracks filled with the coloring composition.
-
If the paint is, on the contrary, too liquid, you will have to lay additional layers, because the desired effect cannot be achieved from the first or even the second time. The durability of such a coating will also be questionable, and it will take more time to paint the facades.
Using a spray gun, you can use alkyd, water-based, oil, acrylic paints, as well as nitro-enamels. What kind of paint will be depends on the material of the walls. For a wooden surface, an oil or acrylic composition is suitable, and if it is a more modern material, acrylic paint, alkyd or water emulsion is better on it.
As for the choice of a solvent, it is better to take the one recommended by the paint manufacturer.


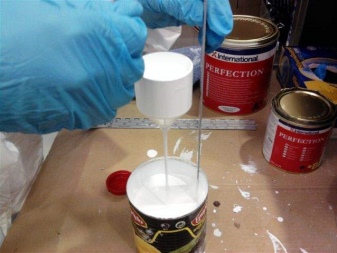
Not every paint and varnish mixture is a finished product that can be used immediately after opening. Most formulations are concentrates that require dilution with something more fluid. It can be either a solvent or water for a water emulsion. What proportions should be, is usually indicated on the container in the instructions.
You can control the viscosity of the mixture using a viscometer, or simply by taking a strong stick and stirring, trying to feel the density and evaluate it. The optimum consistency is determined by the spray test method. If an even film is not observed as a result of stretching the droplets, but the shape of the tubercles is preserved, then the mixture is not sufficiently diluted. The mixture that is ready to spray usually has a consistency comparable to liquid kefir.

Distance and trajectory
The optimal distance from the device to the surface is 15-20 cm. For example, the width of the palm of an adult with clenched fingers is approximately 12 cm, and if the fingers are spread apart, it is 20 cm. Here is the landmark. The distance may differ slightly with respect to the type and viscosity of the dye composition, from the settings of the spray gun, from the device itself.
Here are some important tips from the experts.
-
If you keep the spray gun very close to the object to be painted, then the excessive concentration of the composition will lead to the surface acquiring a pebbled appearance (something that resembles a citrus peel). Leaks are not excluded.
-
If the spray is held further than necessary, the paint drops will begin to dry before reaching the surface. This will cause increased dusting, and you will get a "dry" coating with a high, irrational paint consumption.


Staining should be carried out in horizontal movements, moving from left to right. The device is held evenly, confidently, maintaining the same speed, making as much parallel passes as possible. Each next passage must overlap the previous one by at least half. You can also overlap by 2/3. The main thing is not less than 50%. If you do not comply with this requirement, you can face the main mistake of painting the surface with a spray gun - insufficient overlapping of the torch. Stripes will remain on the wall, especially on metal surfaces.
It is necessary to start the movement a little to the side of the upper left edge, pressing without delay the release of the apparatus. On the right edge, the descent can be released, but the movement continues until we have passed to a new passage. When exactly to pull the trigger is practically the most important point in the staining procedure. Basically, this understanding comes with experience, practice in this matter is everything.
While the sprayer moves from left to right, the dyeing agent monitors the confident overlap of the torch. It is not allowed to describe a large arc with the device.


Pressure
The pressure at the inlet to the apparatus is a standardized parameter, which is usually regulated by the manufacturer of the spray gun. And this indicator is always indicated in the technical support for the device. It is important to adjust it to the inlet pressure using a regulator with a pressure gauge that connects to the handle of the spray gun. On the way of compressed air going from the compressor to the atomizer, losses of up to 1 bar (sometimes even more) are not excluded. The regulator, which is connected to the handle of the apparatus, contributes to a more accurate pressure setting.
Let's take a look at how to adjust the pressure.
-
Open the screws to the maximum level (this refers to the screws that regulate the air flow and the size of the flame).
-
Press the trigger so that the air supply starts. The adjustment screw rotates on the pressure gauge, the prescribed inlet pressure is set.
-
After the inlet pressure is set, the spray gun is fully opened by three to four turns of the regulator. Having made sure that all the adjustment screws are open as much as possible, and the viscosity of the composition is normal, you can test the operation of the apparatus.


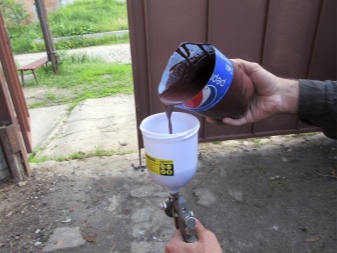
Well, if the device has a built-in pressure gauge, it is even easier, the automation works. There are also cases when the device is simple, inexpensively bought on the market, and there are simply no indications regarding the inlet pressure. Then the inlet pressure is determined empirically. It is necessary to pour the dye composition into the tank, focusing on the usual viscosity, fully open the regulators and, by turning the adjusting screw on the manometer, achieve an extremely even print of the torch to the test part - 15 cm.And the pressure that will be determined will thus become the working pressure on entrance.
True, it is worth noting that already at this stage one can, alas, be disappointed in penny paint sprayers. h
While the sprayer moves from left to right, the dyeing agent monitors the confident overlap of the torch. It is not allowed to describe a large arc with the device.

Surface preparation
The plane to be painted must be aligned initially. It should be treated with fine-grained sandpaper and then dedusted. The fact is that after painting, all the irregularities on the wall or other surface will become more noticeable.
A good, prepared surface is a grease-free, dry, dust-free surface. If grease and dirt remain on it, the density of adhesion with the applied composition will be far from optimal. The material will wear off easily and bubbles may form on it. But it is necessary to grind the surface so that light roughness promotes penetration into the pores of the paint, which already increases the strength of the gluing.
Before you start painting, you can practice on thick cardboard. This is how the hand is “stuffed”, and it will be clear how to paint, what the flow will be. The facade (or another plane / surface to be painted) must be visually divided into zones. Those that have priority in coloring are highlighted.In order to be more free to navigate in this, you can drive in pegs, use slats or other landmarks - in the case of a facade, this will work. Wall painting usually starts with less significant areas.


Dyeing technology
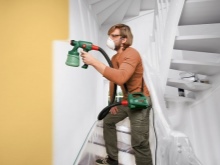
In order for the staining to be uniform, homogeneous, and of high quality, it is necessary to learn to “understand” the material, its features and the acceptance of the paint.
Metal
The absorbency of the metal is initially not particularly high, therefore people with experience in painting metal structures use the spray gun. In any case, you will have to practice. Spray hammer paint on metal without stopping, with slow and smooth first movements. The layer should lie parallel. After the first steps are taken, the pace of coverage is accelerated, one place is processed in different directions.
It is very important to maintain the same distance when painting.

Wood and plywood
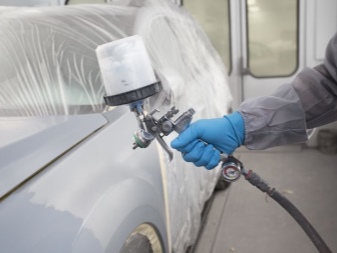
Lining, boards, wooden furniture - that's what actively changes color with a spray gun. And if small objects are successfully painted with a roller or brush, large volumes, facades still require a different approach. Usually acrylic paints and alkyd oil paints are used for this business. It is necessary to paint MDF or wood at an air temperature of at least +18 degrees, the moisture content of the tree should not exceed 14%.
The working pressure of the spray gun will be from 2 to 4 atmospheres. But the dosage size is selected within the range of 2.4 mm. It is necessary to paint the tree in one layer; re-application is not required, ideally. After painting, the surface is dried; artificial streams of hot air can be used.
Spray speed approx. 1 m in 2 seconds. If you delay a little, there is immediately a risk of dripping, and if the speed changes, fluctuates, then the uniformity of the coating will be questionable.


Concrete
The paint is spread not by smears, but by droplets released under pressure. The solution exits the nozzle, a jet is formed, flat or round.
The process is as follows:
-
the compressor and the atomizer are connected, the pressure is set (3 bar);
-
the filtered composition is charged into the container in the amount required for continuous coating;
-
the sample is made on a piece of cardboard;
-
the spray gun remains at the same distance (about 15 cm), does not deviate;
-
coloring is done in a straight line;
-
the entire surface is filled with paint, consistently, evenly;
-
the equipment is cleaned after work with a solvent.
If the base is initially slippery, it must be mechanically roughened.


Plaster
First, you can prepare a container with a volume of 10 liters, where pigment and white paint are added. The composition is stirred until the consistency is smooth. If the mixture turns out to be thick, water is added to it, the contents are thoroughly mixed. The spray head attaches to the spray gun. Several samples are made on the test board. If the coating is homogeneous, you can switch to plaster.
During the entire working time, the sprayer is held at a right angle. The hand should move smoothly, from bottom to top. You should not stay in one area for a long time. You need to be especially careful in the corner areas. There should be no unpainted areas.


Applications
The spray gun is used very actively, and for completely different purposes - someone wanted to paint the gate on their own, someone decided to change the color of the wall in the house or even the facade, someone swung at painting a car. The main function of a spray gun, whether piston or otherwise, is precisely to apply decorative as well as protective coatings. The tool is designed primarily for working with paints, varnishes, stains, primers, impregnations and even adhesives.
But the device also has less expected areas of use. For example, it can be used to spray plants on the site, you can carry out spring whitewashing of tree trunks, you can even disinfect the premises with special means.The spray gun works perfectly with any solution in liquid form, and since their fractions can pass through the nozzle orifice, the device becomes multifunctional. The main thing is to remember about its timely cleaning and careful use. Naturally, any work is carried out in protective clothing, glasses, gloves, respirator.


How to paint with a spray gun, see the video.


The comment was sent successfully.