How to decorate a flower pots with your own hands?

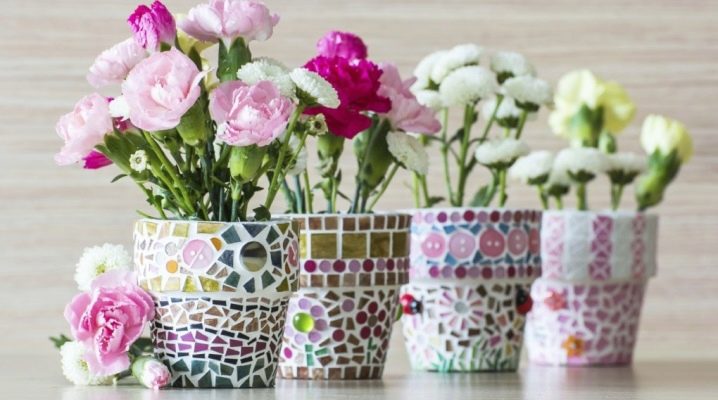
Any housewife dreams of a cozy "nest" decorated with fresh flowers. But houseplants will not look spectacular and original in simple, monochromatic and unremarkable containers. An exquisite do-it-yourself planter will allow you to decorate a flower pot. The main thing is to get creative with the process.

What it is?
The classic pots (translated from French as "hide the pot") is a decorative vessel for a flower pot. It has no drainage for excess moisture and is completely sealed. Its main function is to decorate the appearance of an ordinary pot and give the interior of a room or house as a whole originality and brightness.
The options for such dishes are different: from expensive porcelain vases to homemade wooden boxes or plastic containers. Decorating a pots is a rather painstaking process, but at the same time very interesting.


Decoration options
Of course, you can easily purchase ready-made beautiful and original vessels for flower pots in specialized stores. But this is quite costly. In addition, handmade decorations will add "harmony" to the interior of your home. Today there are various options for decorating pots: from painting under the "Greek amphora" to imitation of precious stones.
It is worth noting that indoor and outdoor vessels for flower pots can be "transformed".


Decor features
Materials for decorating pots can be very diverse. For example, small and large plastic elements are easy to glue and paint. They are durable and affordable. And also decor items such as flowers, figures of insects or animals can be cut out of a regular plastic bottle and fixed on the planter with glue.


Decoupage
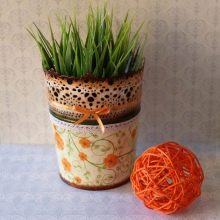
One of the fashionable and stylish types of decoration is decoupage. By the way, it is suitable for wooden, metal and clay planters. Thanks to this method, the design of your apartment will "sparkle" with bright colors. The decorating process is divided into several stages. We need the following materials:
- pots;
- varnish;
- brushes;
- PVA glue;
- napkins with a pattern.


The container can be pre-painted in light colors with acrylic paint and allowed to dry. Next, we proceed directly to the decoupage technique by performing the following steps:
- we cut out the motif we like from the napkin, put it on the planter and smooth it;
- using a brush, gently cover with glue, remove the remnants with a cotton pad;
- then let it dry and cover the pots with colorless varnish and dry again.
Important! For decoupage, you can use not only napkins, but also lace, printing products.


Marine theme
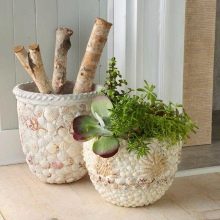
Another decorating technique has nautical motives and is very popular in any apartment. Shells or small pebbles from the depths of the sea will be excellent decoration elements. It is worth adhering to the following algorithm of actions:
- before gluing shells or pebbles, the planter should be cleaned and degreased;
- then, using construction glue, attach the shells to the surface of the vessel and “press down” with your hand for a few seconds;
- after the glue has dried, the “dishes” are ready for use.


"Face in varnish"
It will be possible to luxuriously decorate the pots by applying the technique “Face in varnish” (“implantation” of varnish printout). The process is quite painstaking and costly, but the result is worth it.
So, you need to prepare the following materials:
- pots poured (glazed);
- acrylic paint;
- printer printout;
- varnish (acrylic and finishing);
- universal soil;
- rice paper with ornaments;
- three-layer napkin;
- glue.


The decorating process is as follows:
- degrease the surface of the container with alcohol or acetone and apply a primer with a sponge;
- when the planter is dry, paint it with acrylic paint;
- cut out the necessary elements from paper and glue them on the sides of the dishes;
- further, let it dry and varnish;
- take a printout (four different drawings for each side), put it on the file and apply varnish;
- further, we varnish all sides of the pots and turn over the file with the pattern, applying the pots to the surface - "we print the pattern"; carefully smooth out and carefully remove the file;
- by analogy, we decorate all sides of the vessel for the pot; leave to dry for up to 8-10 hours;
- after the indicated time, we take a synthetic napkin, dip it in water and begin to remove the remnants of paper from the drawings;
- leave to dry;
- at the bequest stage, we cover it with a finishing coat of varnish.
Thanks to this technique, the vessels for the pots look very rich and sophisticated. In addition, you can decorate them in an oriental and Greek style, painting with gouache, and you can also decorate them with burlap or plaster.


New year design
The festive New Year's design of the pots will delight not only adults, but also the smallest household members. As a decor, you can use tinsel, paper snowflakes and even live spruce cones. For the New Year's decoration of the container for pots, we need the following materials:
- pots made of clay or ceramics;
- glue;
- ate cones and needles;
- green acrylic paint;
- brush.


To decorate the pots, it is worth following steps such as:
- we clean and degrease the vessel;
- paint with green paint and dry for 1 hour;
- we put notes on it with a pencil where the elements of the New Year's decoration will be located;
- glue cones and needles in the form of a beautiful composition, pressing with your hand;
- let it dry.
This decor will look great on outdoor pots on the eve of the main winter holiday.


For information on how to decorate flower pots with lace, see the video below.


The comment was sent successfully.