Growing potatoes from seeds
Growing potatoes from seeds is an agricultural technique that restores the yield and quality of planting material. In the article, we will consider the main nuances of the technique, from harvesting seedlings to planting in the ground. In addition, consider the common mistakes that prevent you from achieving a good result.
General description of seeds
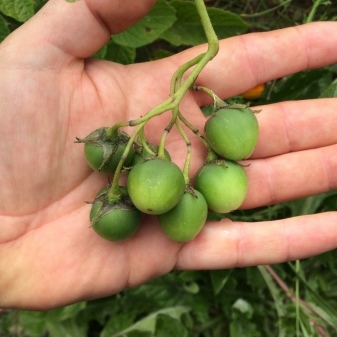
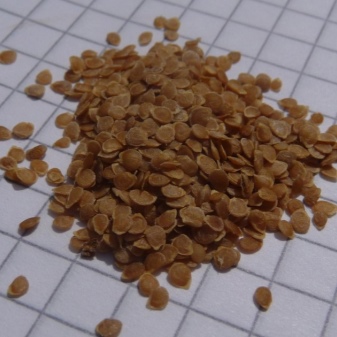
Potato seeds are formed as a result of the propagation of botanical seedlings under special conditions. This is a reproduction selected to preserve the varietal characteristics of the plant.
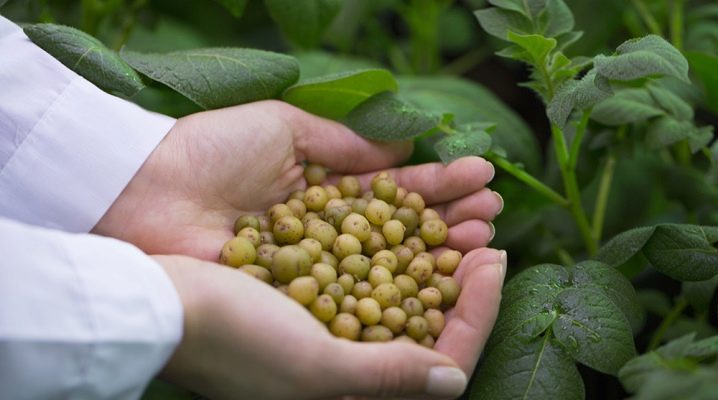
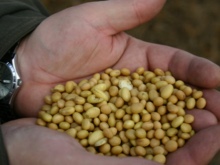
Seed material is tiny flattened potato grains. They have a light yellow or other color, which is determined by the varietal characteristics of a particular type of potato.
The seeds look like tiny root vegetables. The weight of 1000 seeds, based on the grade and care conditions, is 0.4-0.5 grams. They are not edible because solanine is formed during their formation.
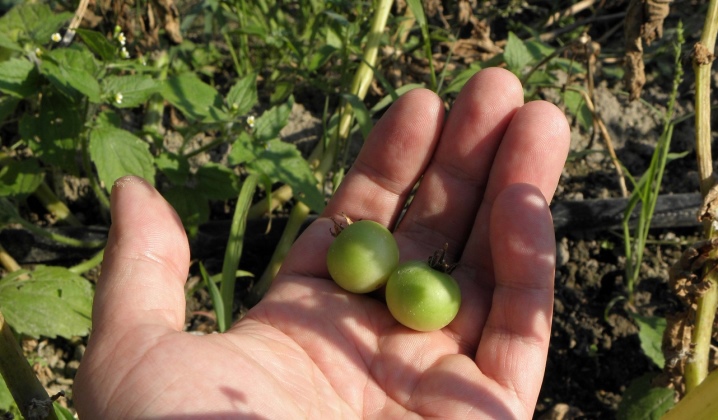
They are the prevention of the degeneration of the variety, do not have diseases and viruses. Formed inside multi-seeded berries. They allow you to get potatoes weighing 10-15 g.
Advantages and disadvantages
The technique is in demand among vegetable growers and allows you to periodically update the planting material. Seeds are the initial branch of reproduction. Therefore, they are cheaper than elite potatoes purchased for planting.
They are undemanding in storage, retain their germination capacity for about 6-10 years. They are resistant to negative external factors. They are inert to diseases, allow you to get a high yield.
They do not have late blight spores, this seedling is climatically resistant to weather conditions. It is acquired for the characteristic conditions of the region, therefore it does not get sick after planting.
It gives a guaranteed result, but has fragile roots in comparison with other vegetable crops. Dries quickly with improper care and temperature fluctuations.
In addition, the plant is demanding on the type of soil. It must be constantly loosened, saturating with air, acting as delicately as possible. Seedlings are demanding on light, soil nutrition.
From time to time they get sick with rot and black leg. The resulting harvest of the first year is not used for food. It is used as seed for the next season.
You need to select varieties with good taste characteristics, size, color. The very same agricultural technology of such cultivation is considered laborious and time-consuming. It will take 2 seasons to grow potatoes for food.
Seed material is available and varied. The buyer can test the cultivation of crops of different varieties, choosing the best in taste and color.
In this case, the seeds do not need to be stored in a cold place at all, like ordinary tubers. They take up a minimum of space, do not deteriorate before landing.
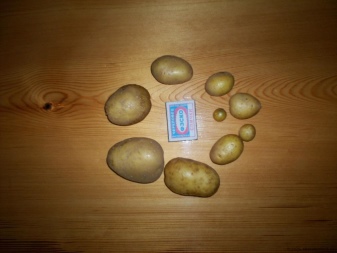
However, the nodules grown in the first season are quite different in shape and size. Often they differ in shade and quantity in a bush in one variety. Because of this, they have to be calibrated.
Procurement of material
You can use seeds of different varieties for growing. To get a high yield of the elite, it is necessary to properly prepare the seedlings.
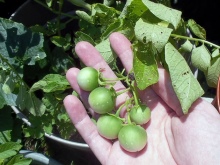
They must be harvested from the best, healthy, pest-free bushes. It is best to pick fruits when the color has become a bright saturated green, evenly colored, selecting the largest berries. They can be folded into cheesecloth and removed to dry.
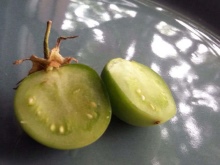
Usually, berries with maximum germination after harvesting ripen for about two weeks. Most often they are placed on the windowsill in an even layer in a ventilated room with good lighting.
During this time, the berries become softer. Their color changes to brownish yellow. As soon as this happens, the berries are cut into 2 parts with a knife. The pulp can be squeezed onto a clean sheet, after which it is rubbed and left to dry. After a while, the pulp evaporates, leaving tiny seeds on the surface.
The seeds are stored in a dark, warm place. They are planted in the last days of March or at the beginning of April, after preliminary processing.
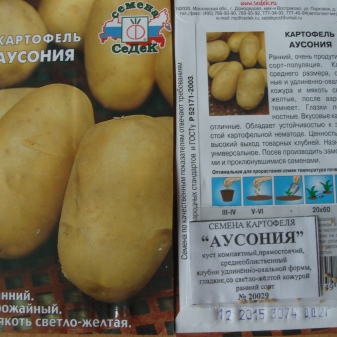
If home seeds are not available, you can buy them at a specialty store. When buying, they choose a variety that is suitable for a particular region. You need to take more seedlings, since not all varieties have good germination.
You need to plant well-dried seedlings. Wet does not store well and grows moldy.
Preparation
The preparatory stage involves stratification and germination. This is necessary to increase the percentage of germination. In addition to soaking and sprouting, hardening is needed.
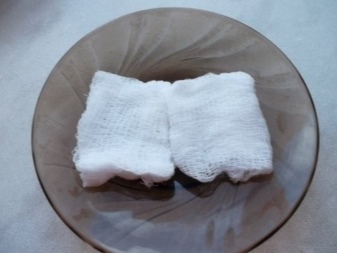
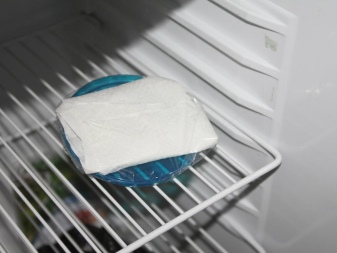
This must be done correctly. A few days before sowing, the seeds are soaked in water. You can use damp gauze or paper. Seeds wrapped in cloth or paper are placed in a plastic container. They are hardened in the room during the day and in the refrigerator at night. Monitor hydration by airing daily.
The basic rule of hardening is temperature holding. For potato seeds during the day, a value of +20 degrees is sufficient. The temperature in the refrigerator at night should not be lower than –1 ... 2 degrees.
The approximate hardening period is on average 10 days. With its help, weak seeds are sifted out, and viable ones become resistant to temperature extremes.
Instead of paper and dense matter, you can germinate seedlings on damp cotton pads, which are capable of perfectly retaining moisture. To avoid quick drying of the wrapper, cover it with cellophane.
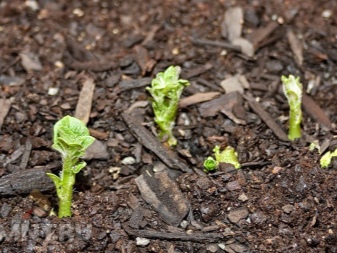
When the first shoots appear, sowing is started. As a rule, this takes no more than 2 weeks. Sometimes they appear within a few days. However, they can be planted no earlier than in a couple of weeks.
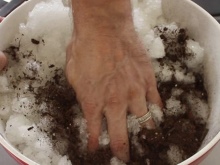
In addition to the planting material, the soil is prepared. For planting, you need soil enriched with humus and nutrients. It should be optimally loose, air and moisture permeable. This can be achieved by mixing turf, peat, garden soil and sand in a ratio of 6: 4: 2: 1.
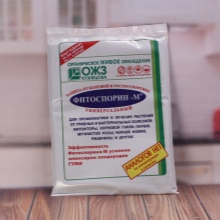
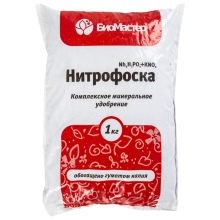
After thorough mixing, spilling "Fitosporin" in every 10 kg include nitrophosphate. Treatment is the prevention of diseases, improves the microflora. The soil mixture is mixed and dried under natural conditions.
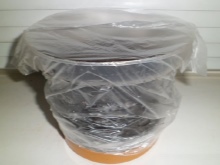
It is placed in plastic containers with resealable lids. To avoid root decay, holes are made at the bottom of the containers. Pallets are placed under the containers to drain excess moisture.
Then you can start sowing.
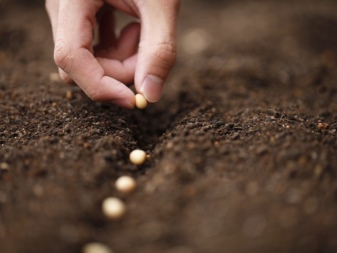
Sowing
To grow seedlings at home in the country with their own hands, they prepare seeds, soil, containers. The seeding technique may vary.
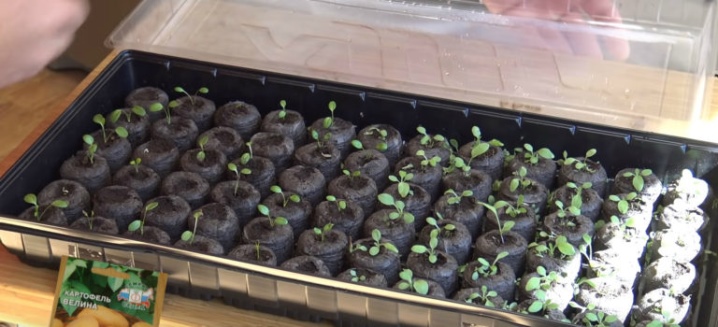
In peat tablets
They are trying to buy large-diameter tablets for this technology. The planting is carried out from the side of the peat pellet excavation. The central part is moistened, avoiding abundant watering.
These conditions are optimal for proper germination of the sprout. Prepared tablets with seeds are removed into plastic containers and covered with polyethylene. This will speed up germination.
No more than 1 time a day, the film is removed and the tablets are aired. Do not forget about cooling, as well as light spraying. This technique is one of the most effective in growing vegetables.
At the same time, the cost of the tablets is small. They are excellent at retaining moisture and are sold in almost any appropriate store. Peat soil is especially useful for potatoes.
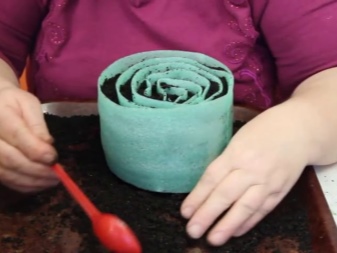
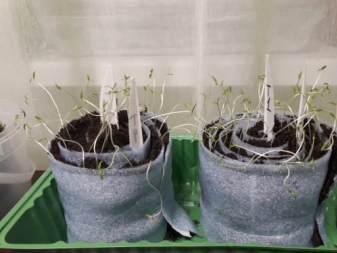
In the "snail"
"Snail" agricultural technology involves the germination of seeds in the material for substrates for linoleum. This is done by cutting raw materials into a tape, ready-made soil mixture, toilet paper and a wooden toothpick.
To quickly and correctly germinate seed material, they follow a certain pattern. Prepare the substrate by tucking one of its sides outward for future soil bedding, retreating from the edge of 30 mm.
Take toilet paper, fold it several times so that its width and length correspond to the tape (backing). The paper is moistened with a spray gun.
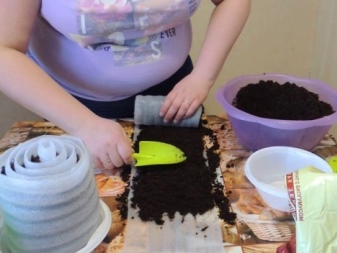
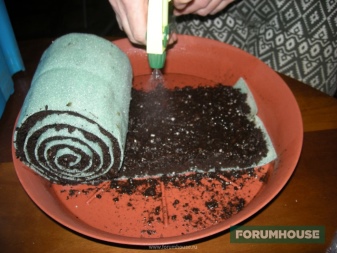
Take a toothpick and use it to place seeds on the paper with an equal pitch (20-30 mm). The paper, laid on the substrate, is rolled up, secured with a clerical rubber band, and removed into a plastic container.
The bottom of the container is moistened, the structure is closed, and removed to a warm place for germination. As soon as sprouts appear, the structure is deployed, soil is poured. Plants dive with the first true leaves.
The width of the tape and paper should be uniform along its entire length. This will make it easier to add soil when the time is right and will help the bale roll evenly.
Seeds also need to be placed at the same distance from the edge in order to sprinkle with a layer of the same height.
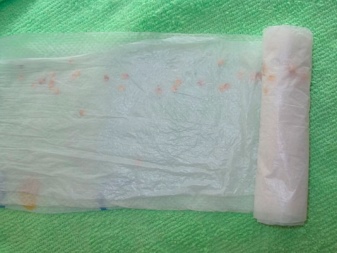
In a diaper
This agricultural technique is similar to the "snail" one, but polyethylene is used instead of a substrate. A roll is made of it, folded several times, overlaid with toilet paper folded in several rows.
The paper is moistened with settled water, after which seed potatoes are placed on it. Until it is dry, roll it up along with plastic tape.
Unlike the previous design, this one turns out to be softer, which is why you have to put it in a higher container. For the rest, the principle is the same: you need to add soil on time, and after the appearance of real leaves, engage in picking.
For this, the seedlings are transplanted into separate containers. You need to grow seeds in a well-lit place, otherwise the sprouts will stretch in length and will be weak.

Non-standard growing techniques accelerate the emergence process thanks to the greenhouse effect. At the same time, there is no pathogenic flora in the ground, which contributes to the growth of healthy microtubers.
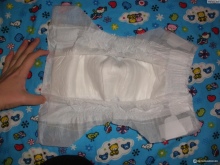
In diaper
This technique is considered one of the controversial solutions and involves the use of baby diapers, using the contents of their moisture-absorbing material.
Due to it, it is possible to grow seedlings with strong roots. This is done according to a special scheme.
Water is poured into the diaper. After it is completely absorbed, and he himself swells, it is cut into 2 parts. Swollen granules with water are mixed with the soil.
The soil mixture is placed in prepared plastic containers (ordinary disposable glasses are suitable), filling the container by one third. Lightly tamp, put the prepared substrate.
Sprinkle with earth on top, moisten, cover with plastic wrap. If necessary, add the granular-earth substrate, closing the sprouts to the top.
Seeds planted in this way form roots very quickly.
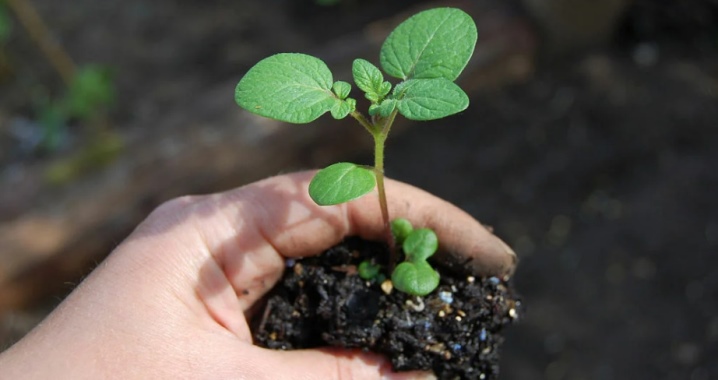
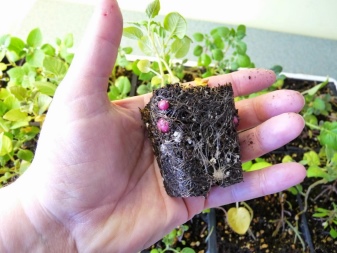
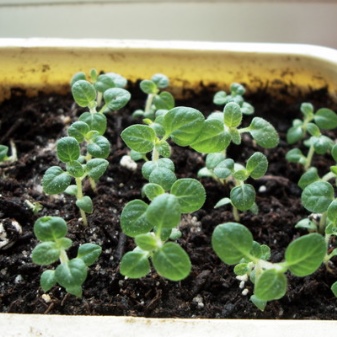
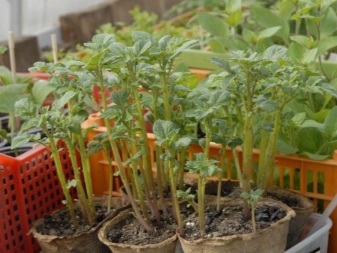
Seedling transplant and care
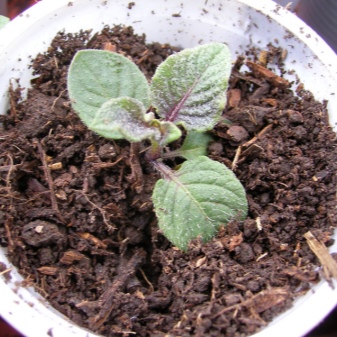
Potato seedlings are capricious and demanding of light. After 2-2.5 weeks from the moment of planting, she needs a pick. This should be done in a larger container.
It is better to plant grown seedlings in peat pots. In this case, there will be no need for a transplant in the future. The peat will disperse in the soil, so the potatoes will be able to further develop their root system.
Since the roots of the culture are very fragile, they must be dived as carefully as possible. One bush needs one container. Otherwise, good tubers will not be able to form.
During the picking, they do not forget about fertilizing the soil with ammonium nitrate. Due to this, the seedlings will be able to quickly adapt to a new place. Preferably warm water is used.
During the pick, make sure that it does not fall on the sprouts themselves. You can resort to picking 2 times in one season. Initially, this can be done using fine-mesh plastic cassettes. The second time it is done in a larger container.
During germination and before planting in open ground, care must be taken to ensure that the soil does not dry out. The optimum temperature for plants is no more than +25 degrees. The need for watering is monitored by the absence of condensation on the lid of the container with the seedling.
It is also important to keep an eye on the humidity in the room. The balance can be maintained by using a humidifier or spaced containers of water.
With improper care, the stems of the seedlings will stretch out, with a lack of moisture, they will dry out. When the shoots rise 3-4 cm in length, they begin to transplant. In crowded conditions, plants wither and compete with each other.
The duration of daylight hours should be at least 10 hours. It is important to monitor the condition of the soil, and do not forget about fertilizing, as well as loosening, which saturates the earth with oxygen.
If all of the above methods are not suitable, the seeds are planted in sawdust with preliminary moistening of the wood chips. Agricultural technology allows you to grow seedlings to a pair of true leaves.
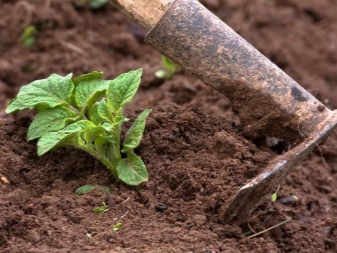
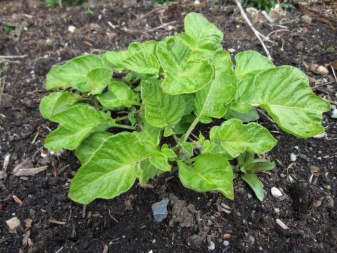
Landing in the ground
This technique is used in regions with short winters. It involves traditional soil preparation in order to achieve high yields.
It is possible to grow seedlings in the open field no earlier than May. So that they do not die from temperature fluctuations, make sure that the topsoil warms up to +14 degrees.
In each hole, deepened to 5 cm, put 2-3 seeds. Fertilizer is applied to each groove. The first shoots should appear in 20-28 days.
Possible growing errors
The seeds do not always grow strong and strong. The reason for this is the mistakes of vegetable growers.
Often this happens when the landing dates are not met. Novice summer residents do not think that temperature fluctuations are detrimental to seedlings. You can start disembarking only after the warm weather has stabilized.
It happens that the reason lies in poor germination associated with insufficient drying and lack of manganese treatment. This causes the seedlings to grow moldy and die.
Fresh manure must not be added to the soil. He is a factor provoking fungal diseases.
Some growers apply top dressing to dry soil. Extreme care must be taken with nitrogenous and minerals.
Bushes need to be formed correctly. The density between plantings should not be less than 50x20 cm.If planting seedlings is denser, their oppression cannot be avoided. In this case, the size of the root crops will suffer.
Someone neglects the preparation of seeds and their hardening. As a result, the seed material does not withstand planting and dies from unusual conditions.
It is important to choose the right seeds. It is impossible to grow an elite out of them if the ripening dates are not met, there is no resistance to frost and drought.
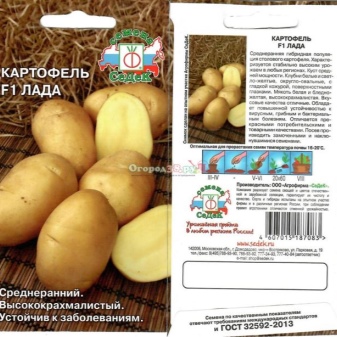
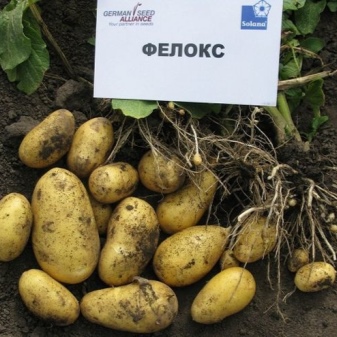
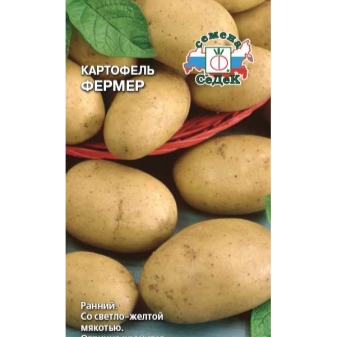
The manufacturers Solana, Adelaide, and Sedek have proven themselves well. Such seeds have an increased germination capacity.
It is not worth sowing all the seeds available. Before planting, their quality should be assessed by removing all diseased and damaged samples.
At home, this is determined in salt water. Samples placed there will either float or rise upward. Those that have climbed are unsuitable for planting, as they are empty.
Disinfection should not be neglected, which increases the immunity of reproduction. Thanks to her, the likelihood of illness is reduced. In addition to "Maxim" and "Fitosporin", you can use 3-5% hydrogen peroxide.
Do not ignore germination, believing that the sprouts will sprout perfectly without it. Practice shows that it increases germination.
As for the best material, at home it is worth giving preference to the apical berries. It is advisable to select the largest seeds for planting.


The comment was sent successfully.