How to plant potatoes under a shovel?

Many gardeners in their small backyard or summer cottages use the method of planting potatoes under a shovel. This method is simple at first glance, but it has a number of features. In this article, we will take a closer look at how to properly plant potatoes under a shovel, what methods and schemes are possible, how to plant evenly.
Where to begin?
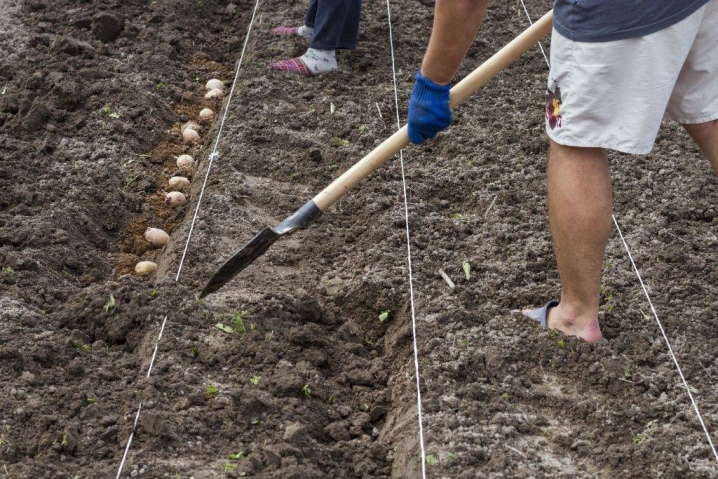
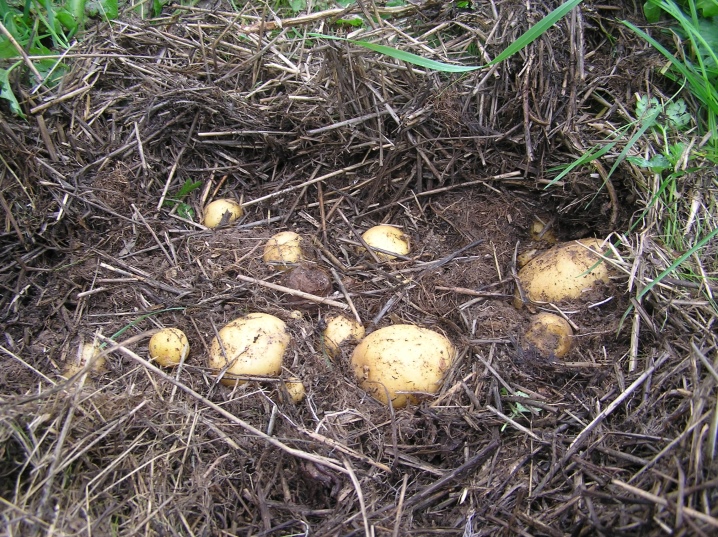
It is usually customary to plant potatoes under a shovel in small areas where it is impossible for equipment to enter. This method involves planting potatoes to the depth of a garden shovel bayonet. This option is possible on loose and light soil, while the groundwater must pass deep. When the potatoes sprout, an earthen mound is created around the stalks, and there is no need to row a lot of soil. It is very important to choose the right place, land and potatoes for planting, then you will get a rich harvest.
Tuber preparation
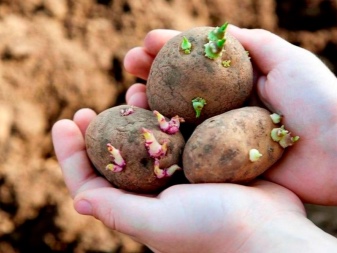
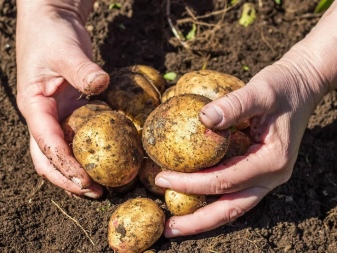
The yield of potatoes largely depends on the choice of tubers. Initially, you need to choose good varieties for planting, and then you can proceed to their processing. Several steps are recommended.
- In the autumn. All potatoes that will be used for planting should be sorted out, while all small tubers, as well as damaged ones, are recommended to be removed immediately. Then the tubers need to be poured out, forming one layer, and left for 2-3 weeks, excluding direct sunlight. This will allow the tubers to turn green, thereby gaining resistance to various diseases. To plant one hundred square meters, you will need from 500 to 700 tubers.
- In the spring. About 1 month before planting the potatoes, you need to sort out all the tubers again in order to remove possible signs of rotting. Further, the planting material should be placed in a damp and cool place, which receives the rays of the sun. If the moisture level is low, then the tubers should be additionally sprayed with water. If the temperature exceeds +10 degrees, then the tubers can be kept outside.
- Before boarding. If desired, potatoes can be dipped in a special solution of boric acid or potassium permanganate for half an hour. This action will make the planting material more resistant to various pests. If the potato is large, then it can be cut into several parts, but each of them should be with strong, but short sprouts.
Site preparation
An important role is played by the preparation of the territory for planting potatoes. There are several factors to consider.
- The nature of the soil. The ideal solution is black soil, since it is full of nutrients. Such land is characterized by excellent air and water permeability. Both sandy and clay soils are suitable for planting. To improve the quality of clay soil, you need to add sand, and for sandy - peat.
- Reaction of the earth. You should take a closer look at what is growing in this area. If plantain or buttercup predominates among the weeds, the soil is acidic. A birch or sow thistle grows in neutral soil. To make the acidic soil neutral, it is recommended to add 1-2 kg of lime, chalk or ash per 1 square meter.
- Preliminary landings. Potatoes can be safely planted in areas where cucumbers, beets, corn, sunflowers or pumpkins previously grew.And after the potatoes, it will be necessary to take a break for as much as 5 years, and only then will it be planted again in this place. If you ignore this recommendation, then the potatoes will hurt.
The area for planting potatoes under a shovel should be small, since this method is laborious. It is worth providing convenient watering and access to sunlight. In addition, groundwater should not pass nearby.
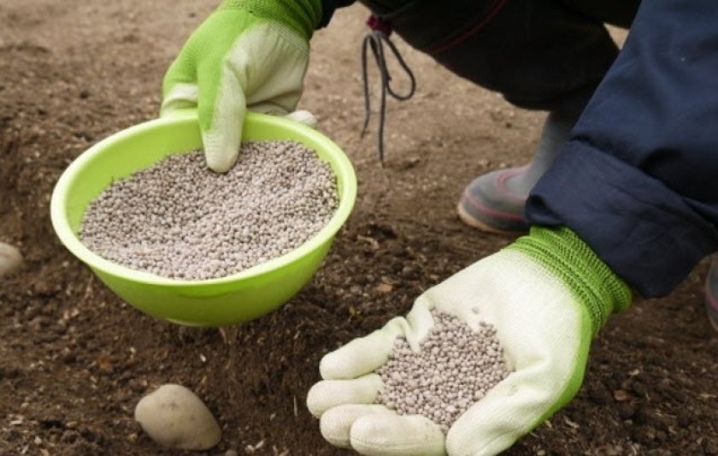
It is necessary to start preparing the soil in the fall, since potatoes will already be planted in the spring. You can consider two options for fertilization.
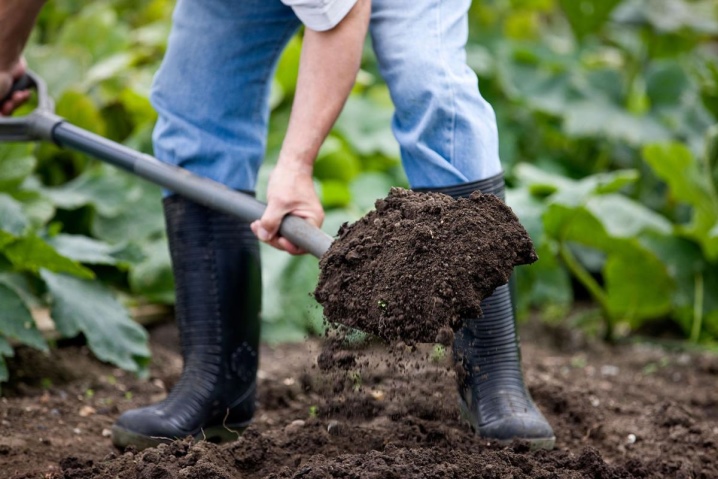
- Solid. You need to scatter compost, manure or bird droppings over the beds, then the earth will have to be dug up and loosened with a rake. In the process, it is recommended to exterminate the roots of the weeds.
- In rows. This option is suitable if you need to apply fertilizer and dig up the ground at the same time. Initially, you need to dig up the area for planting with a bayonet shovel, fertilizer is introduced into the dug row and carefully distributed. Then the next row is dug up, from which the earth closes the first row with fertilizer. Thus, all the nutrients will go to the potatoes. And in the spring, it is advisable to mix the fertilizer with the ground again when digging.
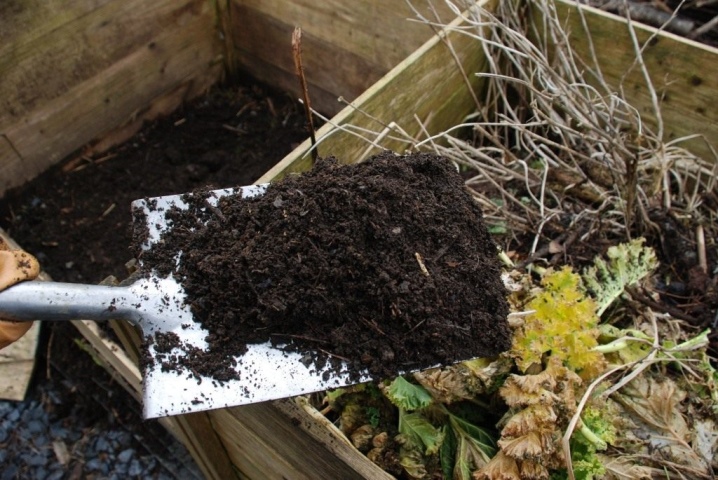
If you wish, you can make your own fertilizers for the active growth of potatoes, adhering to the following steps:
- collect the remains of vegetation from the site in the fall;
- put the collected mass in a compost pit or heap, where it will be re-heated;
- as a result, there will be excellent fertilization in the spring.
Some gardeners make fertilization in a different way - green manure crops are planted on the site in the fall, with the arrival of spring it is necessary to mow the vegetation and dig up the soil. Plants will start to rot, thereby fertilizing the soil. After two weeks, you can proceed to planting potatoes.
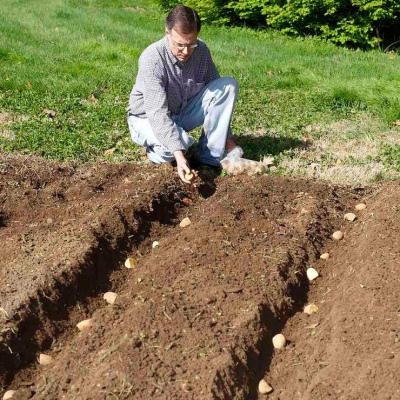
Standard technology for planting by hole method
Planting potatoes in holes is the most common method. The technology includes the following simple steps:
- the soil must be dug up and fertilized;
- using pegs, they mark the future beds in the garden, marking the beginning and end;
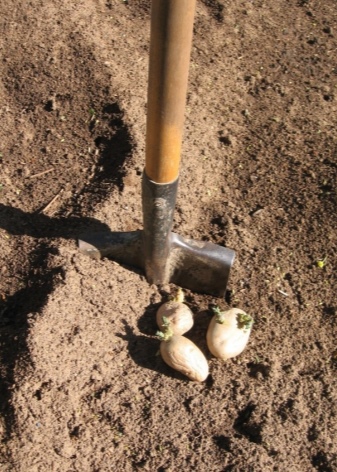
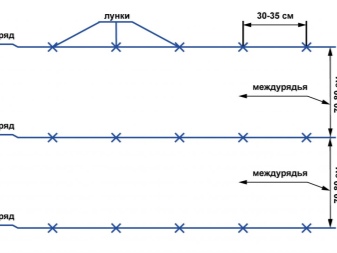
- using a shovel, make holes, keeping a distance of about 30 cm between them, it is important to take into account the variety of potatoes, for example, for late varieties it is better to make a gap between holes of 35 cm, and for early varieties - 25 cm;
- the depth of the hole should depend on the soil; for loamy soils, a hole 5–6 cm deep is enough, and for sandy loam - 8–10 cm;
- it is better to do the work together: one person digs holes, and the second puts potatoes and fertilizers (if shoots or eyes of potatoes are planted, then 0.5 liters of water are added to the holes);
- when they move to the second row, then automatically the earth from the second row is used to bury the first;
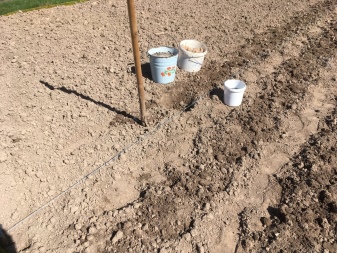
- it is advisable to make a distance of 70 cm between the rows, since during the growth you will have to huddle the bushes twice, and this will require land, which is taken between the rows.

Important! The main disadvantage is that in case of heavy rains, the harvest will be poor, since the potatoes will simply suffocate.
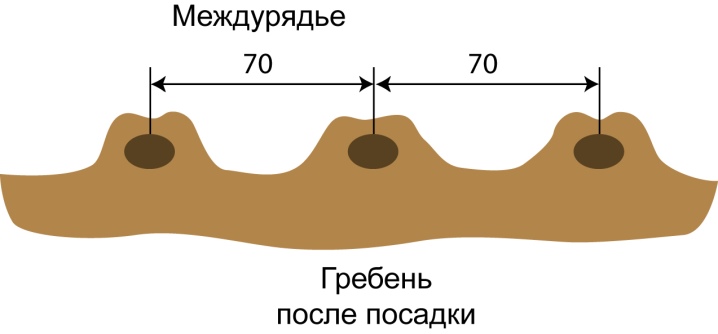
Ridge method
Ridge planting is often used in areas where soil moisture is increased, as well as groundwater passes nearby. As a result, the tubers will be located above the soil level, excess water will drain into the aisle. The soil is plowed up and potatoes are immediately planted. If the ridges are arranged from north to south, then the plants will receive a lot of sunlight, which will have a positive effect on yields. The work algorithm includes the following stages:
- a comb is formed with the help of a hoe;
- further holes are made on it to a depth of 6–8 cm;
- potatoes are laid out in the holes and covered with soil.

Between the holes, a distance of 25-30 cm is enough, but between the rows it is better to leave at least 1 meter. Usually the height of the comb is from 10 cm.It should have a trapezoidal shape, while the minimum width is from 35 cm, then the growing tops will not go to the side.
Important! After about two weeks, the ridge will need to be increased to 17 cm high and 75 cm wide, then the yield will be good.
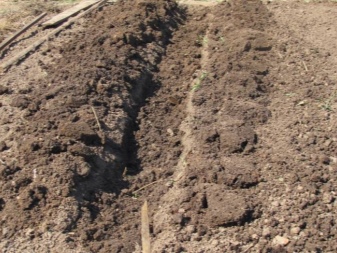
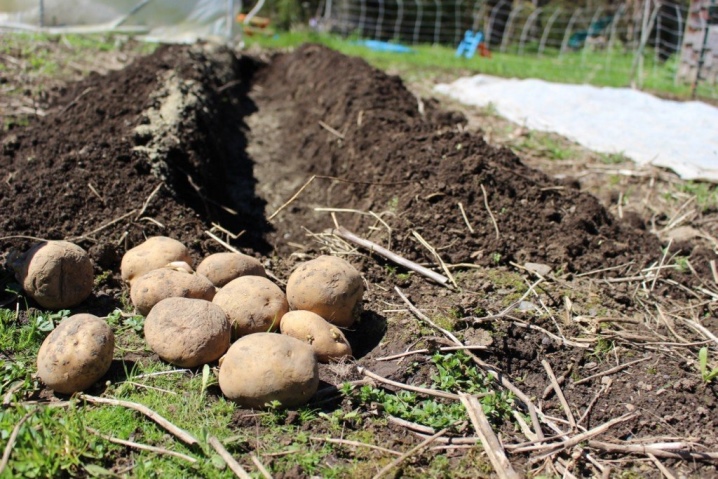
Trench way
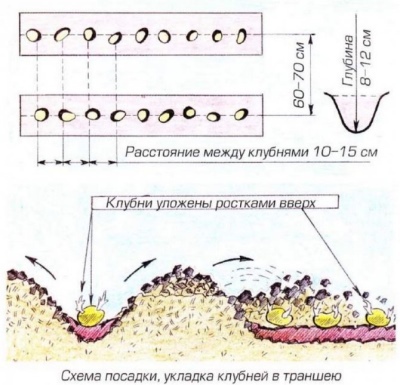
If there is usually little rainfall in the region, the trench method will be the best solution. Its essence lies in the fact that the tubers are planted in trenches. In autumn, trenches should be formed, the depth of which should be in the range of 20-30 cm. Then they are fertilized with various organic matter. But between the trenches should be kept from 70 cm.Already in the spring, after the fertilizer settles, the depth will be only 5 cm. It is recommended to lay the tubers at a distance of 30 cm and sprinkle with soil.
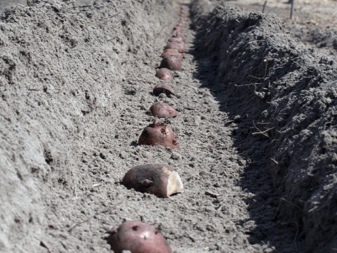
The advantage of this method is that in the spring there is no need to apply fertilizers, since the nutrient layer has already been formed. But the disadvantage lies in the fact that with heavy precipitation, the fruits will quickly rot. The situation can be changed by cutting grooves along the edge of each bed. Their depth should be 10-15 cm. Water will flow through them.
Planting in straw
Some gardeners prefer to plant potatoes in straw. This method is quite effective. The following algorithm of actions should be adhered to:
- you need to moisten and loosen the soil to a depth of 5 cm;
- at a distance of 35 cm, we make holes 12-15 cm deep;
- potatoes should be placed in the holes and sprinkled with straw on top, its layer should be no more than 25 cm, but gaps should be avoided;
- then the tubers should be sprinkled with soil in tandem with ash and humus;
- when the first shoots appear, sprinkle with a layer of straw again.
Important! A thin layer of straw will not protect potatoes from weeds and sun. A thick layer will complicate the process of germination of sprouts, and also will not allow the earth to warm up quickly.
Schemes
When planting potatoes in different ways, they use different schemes. On average, it is recommended to adhere to the following parameters:
- distance between tubers - 30 cm;
- the gap between the rows is from 70 cm to 1 meter;
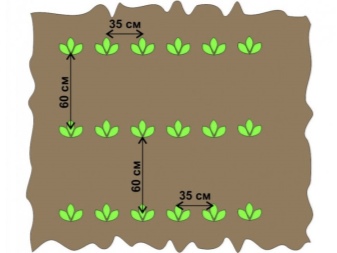
- in a checkerboard pattern, each subsequent row begins with a shift of half the distance between the bushes;
- according to the Mittlider, the tubers are laid out in double rows, while some should be 1 meter apart, the holes in the rows are staggered.
Optimal depth
It is quite difficult to find the optimal planting depth, since it mainly depends on the selected variety and the type of soil on which the potatoes will be planted. On average, the depth of the hole varies from 5 to 10 cm. If we consider heavy soil, then the depth of the hole is no more than 5 cm.And for light chernozem it can reach 15 cm.
The size of the planting tuber also plays a role. So, it must be sprinkled with soil about 5 cm.If the potatoes are small, then you can make depressions of 5 cm, but for a large one you will need a hole up to 10 cm deep.
How to plant exactly?
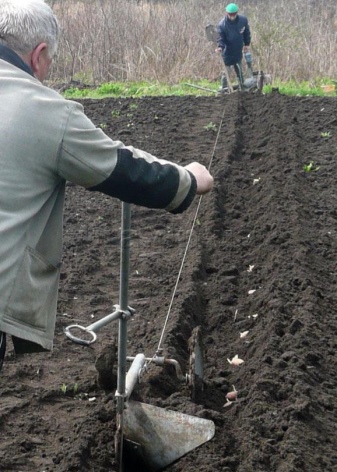
If the potatoes are planted evenly, then it looks beautiful, and also greatly facilitates further care for them, like the harvest itself. If the landing is carried out under a shovel, then the marking of even rows must be carried out manually. It is enough to mark the beginning and end of the row. In order for the next row to be even in relation to the first, it should be drawn along the rope. Thus, it will be possible to immediately mark the entire area for planting potatoes.
Features of planting in the fall
Planting potatoes in the fall is meaningless for many, but the region plays a role here. This option is practiced in the southern regions, where the weather conditions in winter are quite favorable for growing potatoes. The advantages of autumn planting are as follows:
- allows you to save time on planting in the spring;
- high immunity, especially resistance to late blight;
- if you properly fertilize and prepare the soil, then the yield of potatoes planted in autumn will not be inferior to similar potatoes planted in spring;
- no need to weed mulched beds in spring.
Important! The holes must be made from 15 cm, since in this way the tubers will not freeze in winter.
But there are also some disadvantages, namely:
- more time and effort should be involved;
- there is a risk of losing the entire crop if the weather conditions are severe.


The comment was sent successfully.