Do-it-yourself potato planter
The potato planter is easy to make in a garage, which does not require rare materials, special tools. The drawing options are presented in dozens of modifications - they can be repeated by any beginner who has an idea of how to work with power tools.
Tools and materials
In addition to a grinder, a welding machine, a hammer drill and a screwdriver, you may also need a square ruler, a construction "tape", a construction marker and, possibly, clamps. As materials - sheet and profiled steel (square pipes), ordinary pipe, angle and fittings (you can take non-ribbed ones), as well as hardware (bolts with nuts and / or self-tapping screws). As an electric motor - a motor from a washing machine, which has served its life, and parts for a reduction gear.


Assembly
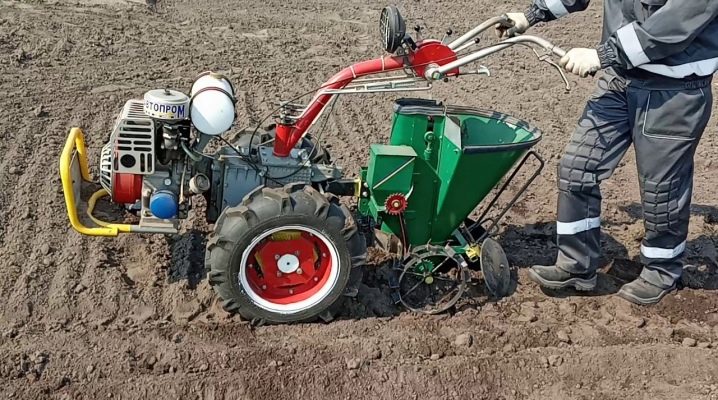
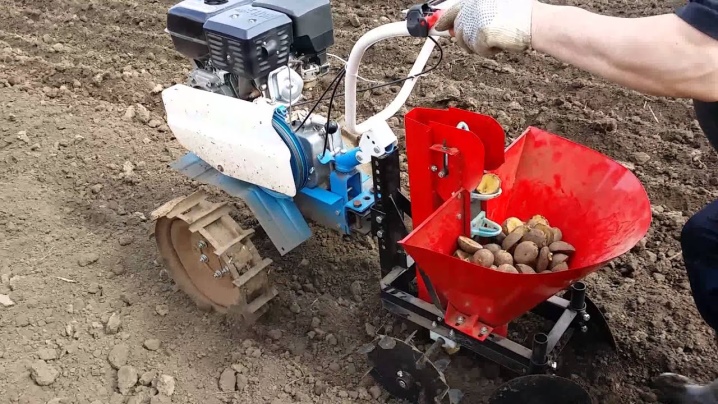
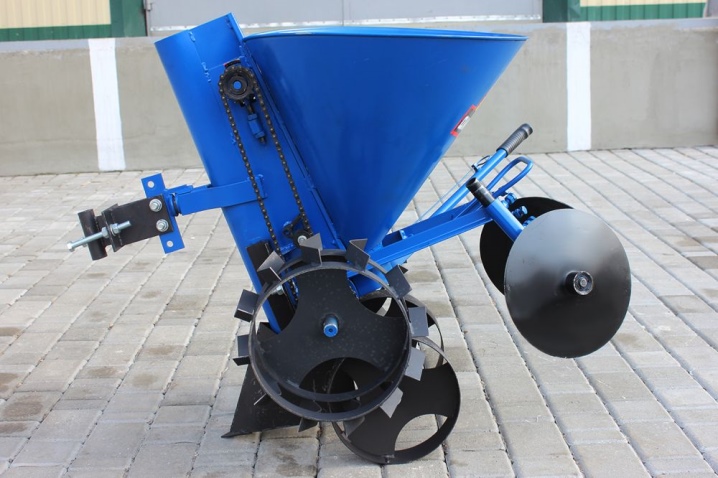
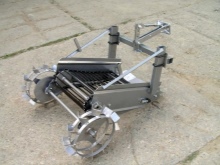
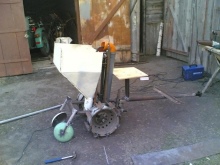
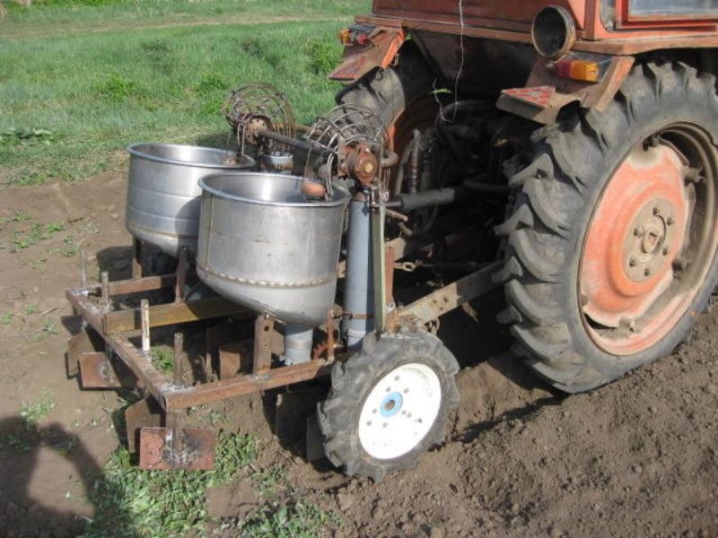
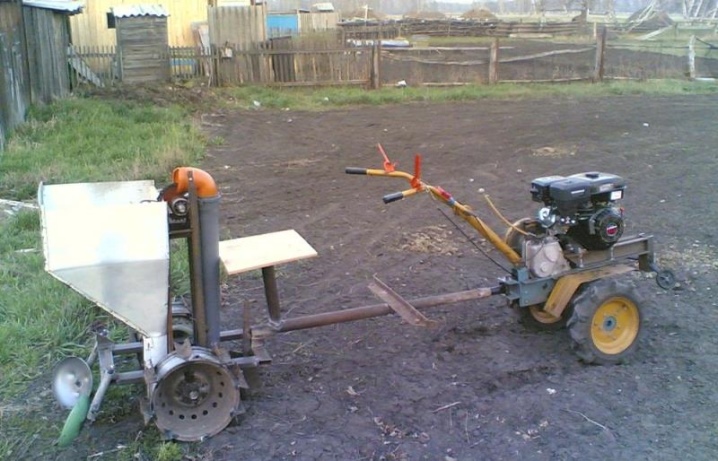
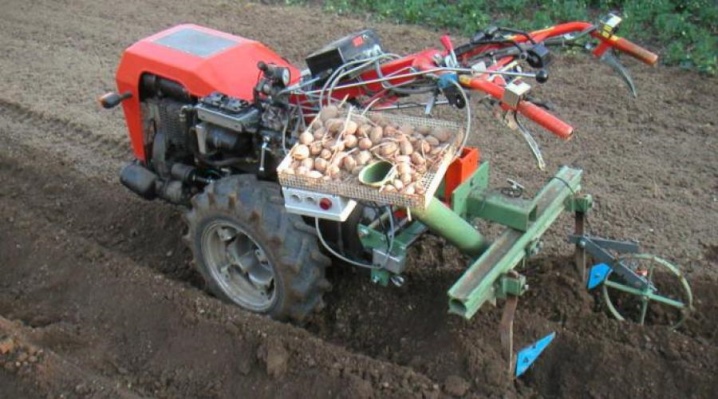
A self-made potato planter can be used, for example, in tandem with a conventional tractor or mini-tractor. The user himself can assemble a simple single-row copy based on a wheelbase - such devices cannot do without wheels.
The components of the device are:
-
frame - made of steel pipes and corners for fixing other components on it;
-
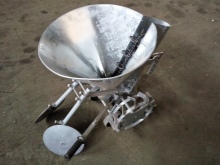
a bunker that serves as a temporary compartment for potatoes;
-
gearbox - a transmission mechanism in which the gears are located, the entire unit works on them;
-
steel components that create holes for potatoes to pass through;
-
burying components, thanks to which the potato tubers are covered with earth;
-
a wheel base on which the entire structure moves.
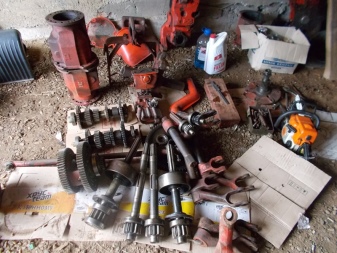
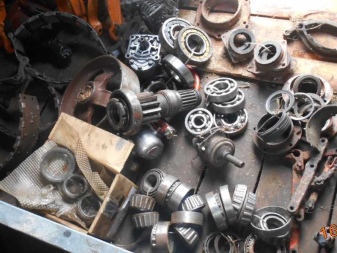
Some of these parts come from old agricultural equipment that has served its purpose and no longer withstands the nominal load indicated in its description.
An equally important component is the feeder for the introduction of fertilizers in the form of free-flowing powder. This will make it possible to get an additional crop from one virgin land or garden bed. As folk remedies, ash and bird droppings, cow or horse manure are used with the addition of a small amount of phosphorus-containing compounds, which spur the growth of garden and horticultural crops.
Detailed instructions for making a device for "in-line" planting of potatoes are described below.
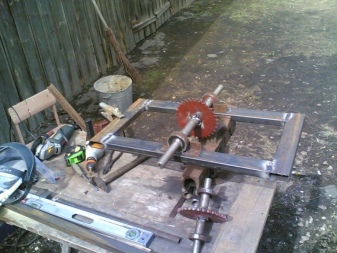
-
Make a frame structure. It will require channels of "8" size - longitudinal sides, on which the transverse beams are welded. An arch with fastening forks communicating with the main link is welded in front. The frame is reinforced with inclined steel beams fixed with the other side to the middle of the arched structure.
-
Having made the frame component, fasten the support of the seat element welded from a corner of 50 * 50 * 5 mm. It is fixed to the base.
-
A bracket component is welded to the inclined beams. With its help, the bunker is connected to the beams. To make the tank, the craftsman uses ordinary 12 mm plywood. You can also use the housing from the washing machine. Making a compartment "from scratch" consists in fastening the walls with corners, but the finished case from the washing machine no longer requires these actions. The hopper is treated with a primer and waterproof varnishes - so it will be protected from moisture. The inner side of the compartment walls is lined with rubber - the filled potatoes will not be damaged, which would otherwise affect its germination.Also tubers will remain intact when moving the unit over uneven ground. The compartment is fixed to the bracket with bolted connections. A wheel axle and a mechanical digger are attached to the bottom of the base.
-
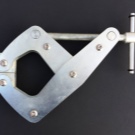
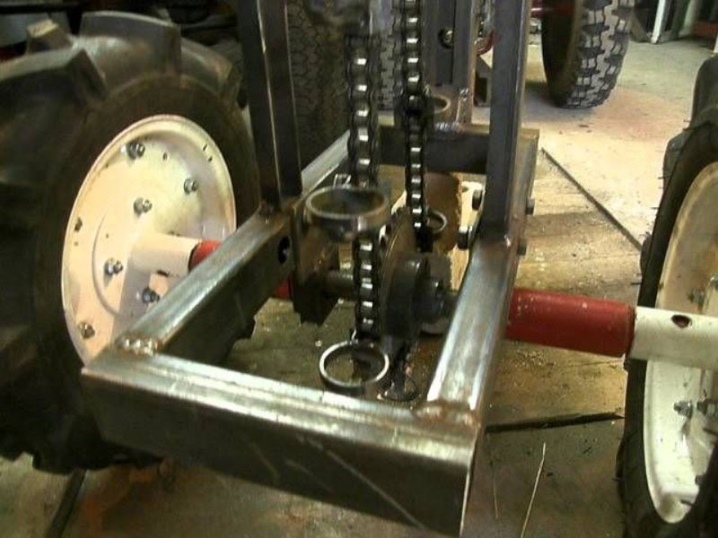
Wheelbase - component made of steel tube, at the ends of which mechanical adapters are installed. The dimensions of the latter depend on the diameter and wall thickness of the pipe - these components are cut to the values of its characteristics using a lathe. The steel pipe is cut with holes for the studded pins. They are welded, and the wheel hub is fixed using clamping steel parts, using "16" bolts (4 such bolts will be needed).
-
Wheels are mainly used from old agricultural machinery or a motorcycle. However, bicycle wheels will not withstand such a load - they will have a weight of one hundred or more kilograms, as well as shaking when moving, albeit at low speed, but on bumpy soil. The hubs are welded onto the wheelbase. On those, in turn, ball bearing kits are put on. The bearings are mounted on spikes and equipped with felt dust boots to prevent dusting.
-
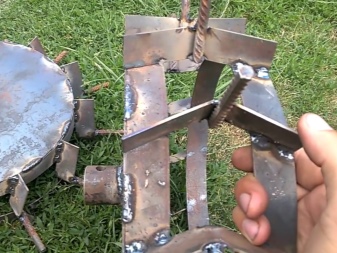
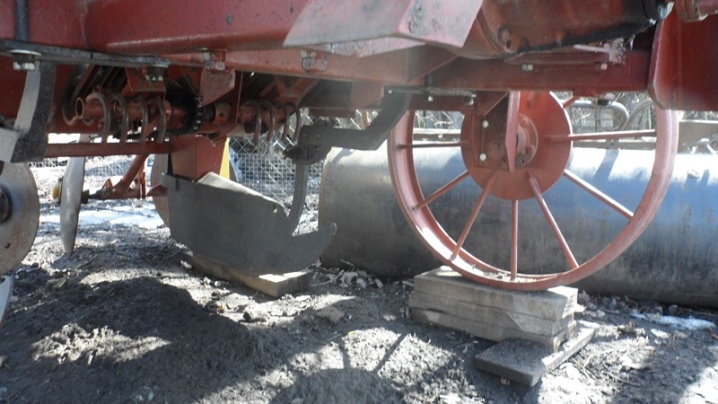
The component holding the digger is a square structure made of steel beams, joined by welding. At the tops of the square, holders of sheet steel are welded, the thickness of which is at least 6 mm. The base of the cultivator is located in them.
-
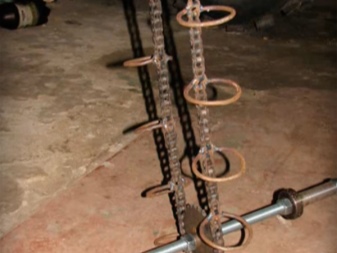
"Sazhalka" is made of a thick-walled pipe - like the one used for the chimney, for example, with a diameter of 13 cm. This is enough for even large-sized potato tubers to pass through it. Pipe wall thickness - at least 3 mm. In the lower part of the pipe section, a digging gate made of 6 mm sheet steel is welded.
-
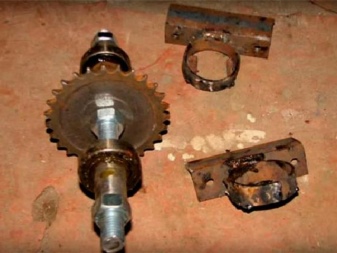
Gearboxes are predominantly chain driven. To change the chain in a timely manner - and without too much trouble, install a chain tensioner. It is recommended to use a chain with a lock-type link, which makes it possible not to rivet it in a new place every time. A two-row device will require two chain drives - one with a tensioner for each.
-
A worker's seat and footrest are welded to the frame. The seat cover is made of a board with a thickness of about 3 cm, after which it is upholstered with the desired fabric.
This device can be tested on a walk-behind tractor or under the control of a mini-tractor.
Self-made model test
If you are working on a tractor, make sure that it is in good working order. The same applies to the walk-behind tractor. The equipment must be filled with fuel, lubricated and ready to work.
Drive the equipment to the planting area, pour the potatoes into the bunker. The site must be prepared in advance - all weeds are mowed down in advance (if they were there). When the area sown with potatoes is quite large, up to several bags of potatoes are stacked on top of the bunker - this will prevent the loss of working time. For smooth operation, two people will be required: one drives the tractor, the other makes sure that the bunker works without stopping, if necessary, he pours potatoes into the bunker as it is consumed.
The planting depth of potatoes is adjusted by means of stirrup components that press the support against the racks. They are weakened, and the angle of pressing of the discs is also set, with which the holes are buried after laying the tubers. These discs turn in the desired direction.
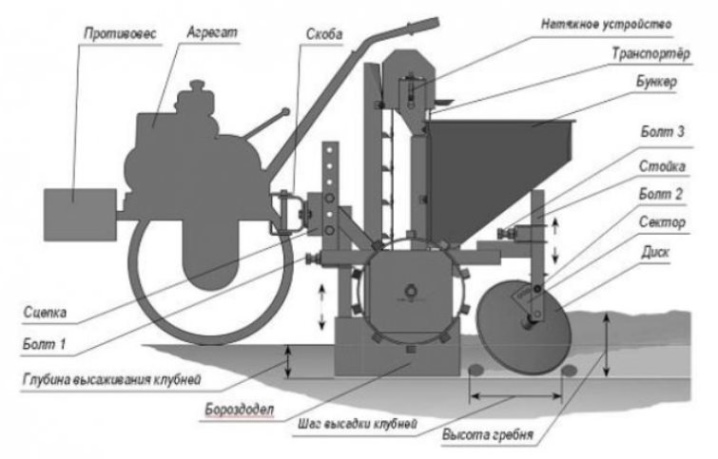
Having planted potatoes, it is necessary to eliminate traces of the work done. The cultivation areas, located on the racks, are regulated by the depth of immersion in the ground - this is necessary so that the newly planted tubers are not cut.
The point of making a homemade unit is to save tens of thousands of rubles: as a rule, specialized stores sell at a higher price, and the reliability and durability of the structure is not important for them, they just want to earn more, saving on quality and materials.It is possible to avoid capital expenditures by using parts and components from decommissioned devices.
Useful Tips
Do not run the assembled machine dry, using it only as a land digger. For this, there are cultivators and walk-behind tractors, whose task is to loosen the area, and not sow anything.
Do not try to use the device without a walk-behind tractor. It requires traction that a person 10 or more horses could provide - do not abandon motor vehicles, otherwise the costs of planting potatoes will be disproportionate to the expected revenue (and profit).
Do not use a potato planter, for example, for sowing wheat and other cereals: the grain consumption will be too high, and due to overcrowding, your crop will grow no more than 10%.
Use only steel components. The aluminum base, due to which the frame and other supporting components would be lightened, will quickly break from shaking and shock - only steel dampens excess vibration. Aluminum alloys simply burst from strong shaking, their purpose is aircraft and bicycles, and not heavy agricultural machinery. In addition, the aluminum profile is easy to bend: under the weight of many buckets of potatoes, which add up to more than one centner of mass, the beams and cross-members bend after the first hour of operation, which cannot be said about much more elastic steel.
It is useful to cushion the structure: use powerful springs, for example, from old motorcycles that have served their life.
Do not work on rocky ground such as mountainous areas. For the cultivation of any crops, the slopes of the mountains are terraced in advance, fixing the plumb lines. Without these measures, you will not only disable agricultural equipment, but you can also roll down the slope when suddenly the fuel runs out.
Do not work when it rains. Prolonged downpours will cause the soil to turn into mud, which will be much more difficult to dig up. Wait until the land of the site dries up and becomes looser.
For information on how to make a potato planter with your own hands, see the next video.


The comment was sent successfully.