How to make a router from a grinder with your own hands?
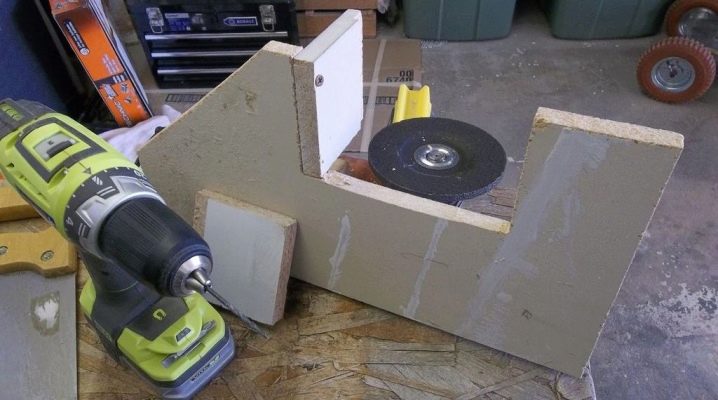
The angle grinder is an indispensable tool for carrying out construction work with various materials. It is also good in that you can attach additional devices (nozzles, discs) to it and / or convert it with little effort into another highly specialized tool - for example, a milling cutter. Of course, an original industrially manufactured instrument will in many ways surpass such a homemade product, but it will be quite enough for domestic needs.


Materials and tools
In order to make a milling cutter on the basis of a grinder, you will need the following tools and materials:
- LBM in working order, the absence of any defects or malfunctions is required;
- welding machine (if you are going to use metal);
- fasteners;
- screwdriver / screwdriver;
- electric drill;
- building level;
- ruler (tape measure) and pencil;
- square;
- a sheet of plywood or chipboard 1 cm thick or a sheet of metal about 3 mm thick;
- spanners;
- jigsaw or saws for working with wood / metal;
- metal corners or bars of dense wood (5x5cm);
- punch;
- set of hex keys;
- file, coarse and fine-grained sandpaper.

Procedure
First, decide which milling tool you need - stationary or manual. Both the one and the other option have their own characteristics during assembly and operation.
Stationary
If you need a stationary milling machine, consider when designing it that its capabilities will depend on the power and rotation speed (number of revolutions) of the grinder's motor, as well as the area of the table for work (workbench). For processing parts made of small-sized fragile wood, a small grinder is enough, the motor power of which is 500 watts. If the milling cutter is to work with metal blanks, the power of the angle grinder engine must be at least 1100 watts.
The design of the router consists of such elements as:
- stable base;
- movable / fixed tabletop with lined rail;
- drive unit.

Lamellar milling machines are distinguished not by vertical, but by horizontal arrangement of the working cutter. There are 2 options for designing a homemade milling machine:
- fixed table - movable tool;
- movable worktop - fixed tool.
In the first case, for horizontal machining of a part, the procedure is as follows:
- fix the angle grinder to the plate vertically (the cutter attachment is horizontal);
- guides are installed around the table for moving the plate with the tool;
- the workpiece is fixed to the work surface.


Thus, the processing of the fixed part is carried out with a movable tool. In the second case, you need to ensure the immobility of the grinder and the mobility of the working surface. To move the table top, a structure of guides is constructed under it with the possibility of fixing the position of the working surface. The angle grinder, in turn, is fixed on the vertical bed on the side of the workbench. When a machine with a vertical working attachment is required, the procedure is as follows:
- assemble the frame from blocks of wood or corners, ensuring that they are rigidly fastened to each other (using welding or fasteners);
- attach a sheet of chipboard or plywood to the frame;
- make a hole for the angle grinder shaft - the diameter of the recess must exceed the corresponding indicator of the shaft cross-section;
- fix the tool inside the frame - using clamps or bolted punched tape;
- on the working surface of the table, build guides (from rails, strips, etc.) to move the part;
- sand and paint all surfaces;
- The toggle switch for turning on the tool for comfortable use can be fixed.



All caps of self-tapping screws (bolts, screws) must be recessed and not protrude above the surface of the working area. Please note that the guide rails must be removable; different workpieces require different positions. The most convenient way to fix them is to use self-tapping screws. The tool should be conveniently located and accessible for quick replacement of the working attachment (cutter, disc, etc.).
For the full use of any home-made milling machine, you need to purchase cutters - additional attachments for the grinder in the form of cutting discs or key attachments. If the first ones replace the grinder's grinding disc without any problems and are calmly fixed on the shaft with a clamping nut, then for the second type of attachments you will need an adapter.


Manual
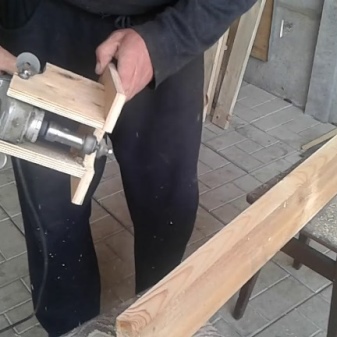
The easiest option is to convert the grinder into a manual milling machine. Please note that in this case, a reliable fixation of the workpiece is necessary - with the help of a vice or clamps, in order to exclude the possibility of vibration or shift of the workpiece. There are several ways to convert a grinder into a manual router. Here is one of them.
First, make the base base of the tool according to the drawings. The ideal option would be a base made of a metal sheet of sufficient thickness and weight, because the mass of the base directly affects the stability of the device. Then make a fixing plate - a bracket to hold the angle grinder. The material is the same as at the base. You need to make a hole for the back of the tool, the one where the handle is. Cut out the blanks in the shape you want.
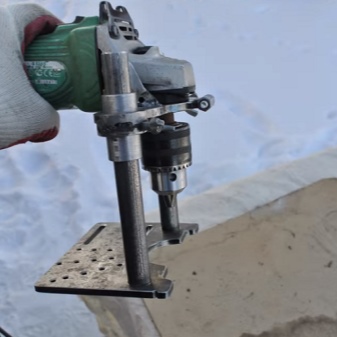
Weld sections of square pipes to the ends of the product - to move along vertically located guides. Longer sections of square pipes, but with a smaller diameter, will serve as guides. They need to be welded to the base. To improve the reliability of fixing the tool, you can make and weld a kind of "ears" from a metal sheet. To fix the tool at the desired height, you need to make a mount. You can weld 2 nuts, screw the threaded rods into them, onto which the wing nuts are welded. With the help of such a device, you can easily and quickly change and fix the required position of the tool.
Now you need to install the drill chuck as an adapter for the working cutter attachment. Pre-cut a thread inside it corresponding to the shaft of the angle grinder. Then screw it onto the shaft and fix the required cutter in it. Assemble the car. Fix it in the bracket.
Test its work. If there is no excess vibration or uncontrolled shifts during operation, everything is in order. Otherwise, you need to check where the inaccuracy came from and fix it.


Operating rules
When performing milling woodwork do not forget to follow some simple rules:
- correspondence of the nozzle on the angle grinder to the material being processed;
- it is not allowed to remove the protective case;
- set the speed of the angle grinder to minimum;
- really assess your strength - a large grinder can easily be snatched from your hands;
- work in protective gloves or firmly fasten the tool;
- first check the homogeneity of the workpiece - there are no foreign metal parts;
- work should be done in one plane, distortions are unacceptable;
- do not block the button during operation;
- be sure to turn off the power to the power tool before replacing an accessory / disc.
How to make a router from a grinder, see below.


The comment was sent successfully.