What can you do from a grinder with your own hands?
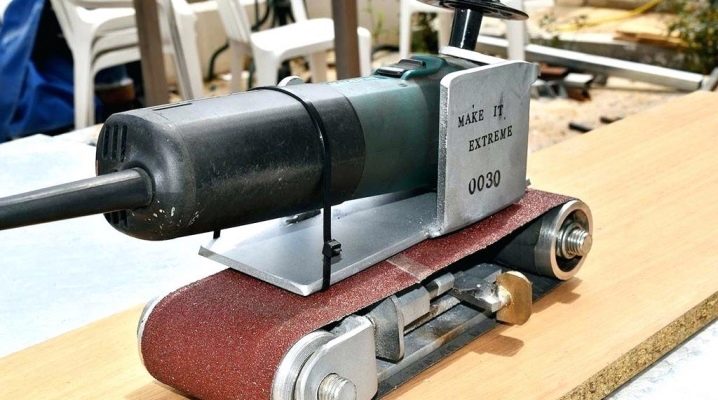
Angle grinder - grinder - works at the expense of a collector electric motor that transmits rotational mechanical force to the working shaft by means of a gear unit. The main purpose of this power tool is cutting and grinding various materials. At the same time, it can be used for other purposes by changing and improving the design characteristics. Thus, the functionality of the grinder is expanded, and it becomes possible to perform previously inaccessible types of work.

Basic tools and materials
Modification of angle grinders does not imply changes in the design of the grinder itself. In most cases, the alteration is the assembly of the hinged frame, which is installed on the grinder. The set of tools and materials used to assemble such a structure is determined by its purpose and the degree of complexity of the design process. The main parts of the grinder's attachment are a variety of bolts, nuts, clamps and other fasteners. The base is a supporting frame made of durable metal - an iron square tube, corners, rods and other elements.


Additional tools are used to convert angle grinders into a device for other purposes. Among them are:
- electric drill or screwdriver;
- welding machine;
- spanners;
- another grinder;
- vice.



How to make a grinder from a grinder?
Grinder is a belt sander. This tool is produced by manufacturers in a self-modification. Alteration of the grinder will help to get access to the grinder functions without buying an additional tool. There are many modifications of the homemade grinder. The main difference between them from each other is the degree of complexity of the assembly. Below is a description of converting a grinder into a grinder in one of the easiest ways.

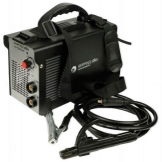
You will need the following materials for assembly:
- 70 cm of metal tape 20x3 mm;
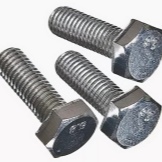
- three bolts with a thread corresponding to the thread of the fixing holes of the grinder's gear housing;
- several washers and nuts of the same size;
- three bearings;
- a small pulley with a hole diameter equal to the diameter of the working shaft of the angle grinder.


Assembling the frame structure. The main frame of the grinder has the simplest modification: it consists of a horizontal part made of a prepared metal strip, and a fastening part attached to it, which has the shape of the letter "C". The fastening part is designed to secure the entire grinder frame to the grinder's gear housing. To do this, holes are drilled in it, which must match the holes in the gearbox. They are designed to screw in the grinder handle. The oval shape of the holes will make it easier to attach the frame to the angle grinder.

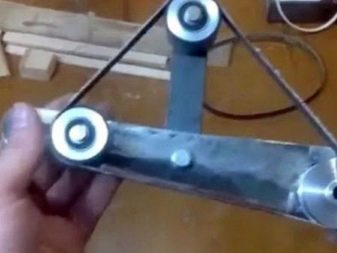
The horizontal part of the grinder is welded to the fastening part so that the edge of the former is in the middle of the latter. When cooking, the correct position of the edge of the horizontal element must be observed. It should have the best resistance to lateral loads that occur during the operation of the grinder. Installation of a belt drive. The polishing machine works on the principle of a belt transmission of rotational force. An emery tape acts as a belt.To carry out the transfer, it is necessary to fasten the pulley to the grinder shaft using a nut of the appropriate size.

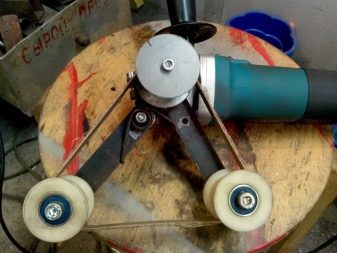
At the end of the grinder frame, which is opposite to the angle grinder shaft, a hole with a diameter of 6 to 10 mm is drilled. A bolt is installed in it. Its direction must match the direction of the gear shaft. Several bearings with an inner hole diameter exceeding the bolt section diameter by a maximum of 1 mm are put on the bolt - this will give the bearings the opportunity to sit tightly and not give vibration during the operation of the future belt sander. The bearings are secured to the bolt with a washer and nut.
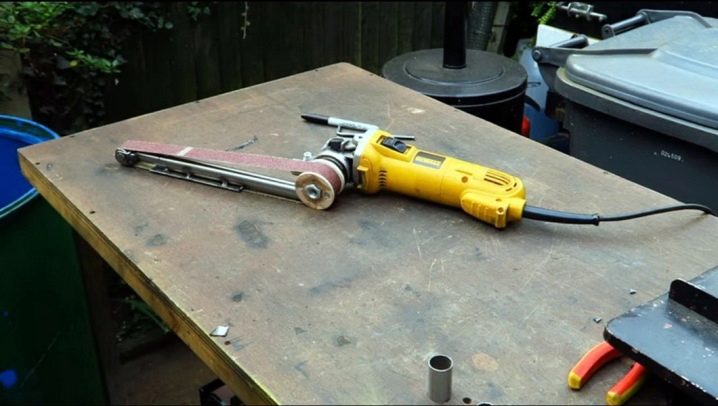
The final stage in the assembly of the hand grinder is the preparation of the emery cloth. A common abrasive belt used in factory-made grinders is cut longitudinally. The width of the cut must match the width of the pulley and the bearings on the opposite side of the grinder frame. Additional Information. When assembling this grinder model, it is worth considering the correspondence of the length of its frame to the length of the emery belt. The grinder attachment can be of a fixed size for a belt of a certain brand or with the ability to adjust the tension.

To introduce the adjusting properties into the design of the product, it is necessary to pierce the existing holes in the frame. These are the holes used to fasten the structure to the gear housing, as well as the one used to hold the bearings. In the process of grooving, the holes should acquire an oval shape - this will allow the frame to be shifted to the side, thereby adjusting the tension of the belt drive. To improve the properties of fixing the tension and prevent it from loosening during the operation of the tool, it is necessary to put ribbed profile washers under all the nuts.

A finished variation of the design of a homemade grinder is shown in the following photo.

Homemade miter saw
LBM of any model and size can be modified into a miter saw. A miter (pendulum) circular saw is an electric tool (rarely battery), used only in a stationary form for cutting workpieces from various materials at an acute and right angle. The difference between such a saw and others lies in the high accuracy of cutting at a given angle and maintaining the integrity of the cut edge.

With your own hands, you can make an installable structure that will allow you to use the grinder as a miter saw. To assemble the simplest modification, you will need to prepare:
- wooden blanks - a sheet of fiberboard, corresponding to the size of the future working surface, various bars (it is possible from the same fiberboard);
- wood screws;
- bolts and nuts;
- a conventional piano-type door hinge.

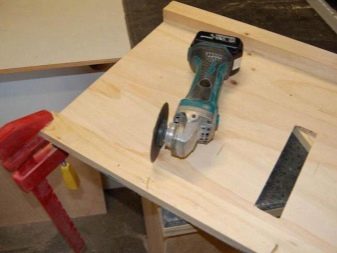
Tool required to make a miter saw:
- jigsaw or hacksaw;
- drill or screwdriver;
- two drills - 3 mm and 6-8 mm;
- plastic tightening clamp.


Build process. The future pendulum frame of the miter saw should be positioned on a firm, level, non-wobbly surface. A workbench table or a separately assembled structure can be used. The height of the plane on which the product will stand must be sufficient for comfortable work. The miter saw blade is always positioned at the edge of the table or workbench. This fact is taken into account when assembling a homemade miter saw.


The size of the working plane of the machine is determined by the size, weight of the grinder and the purpose of its use. For the smallest angle grinder, a 50x50 cm fiberboard sheet is suitable.It must be fixed on the workbench in such a way that one of its edges protrudes 15 cm above the floor.A rectangular cutout is made in the middle of the protruding part, designed to lower the cutting element of the grinder into it. The width of the cutout varies from 10 to 12 cm, the length is 15 cm.
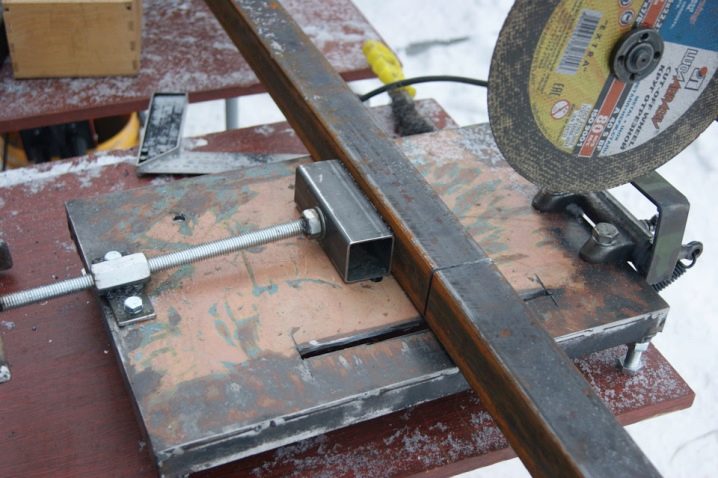
On one side there will be a machine operator, on the other - a piece of a piano loop 5-6 cm wide is fixed. The canopy, like all other wooden parts, is fastened with self-tapping screws. To do this, a 3 mm hole is drilled in the workpiece - this is necessary so that the self-tapping screw does not destroy the wooden material. Another hole is drilled in the same hole - 6 mm in diameter and 2-3 mm in depth - a sweat for the head of the self-tapping screw, which should not protrude above the working plane.

A bar or a rectangular piece of fiberboard is screwed to the moving part of the loop. Another blank of a similar profile is attached to it at an angle of 90 degrees - the part on which the grinder will be fixed. In this connection, you can use a reinforced mounting angle - this will reduce the backlash of the structure and eliminate the occurrence of errors when cutting.
The angle grinder is attached to the last bar from the bottom. To do this, a hole is drilled in it with a diameter equal to the diameter of the threaded hole in the grinder. A bolt of the appropriate diameter and length is threaded into it. Any discrepancies in the dimensions of the frame and grinder are compensated for by additional washers, grovers, gaskets. Its gearbox must be set in such a way that the direction of movement of the cutting disc is directed towards the operator of the machine.

The back of the grinder is attracted to the support bar with a plastic clamp. The start button must remain accessible for emergency shutdown of the power tool. A 5x5 cm wooden bar is screwed to the plane of the working area, designed to be used as a stop for cutting a workpiece made of wood or metal. Its presence will ensure smooth cutting and no beating of the material. The structure in question upside down and with a fixed grinder can be used as a homemade sawmill. Depending on the intended purpose, it is possible to manufacture a portal frame for a grinder.
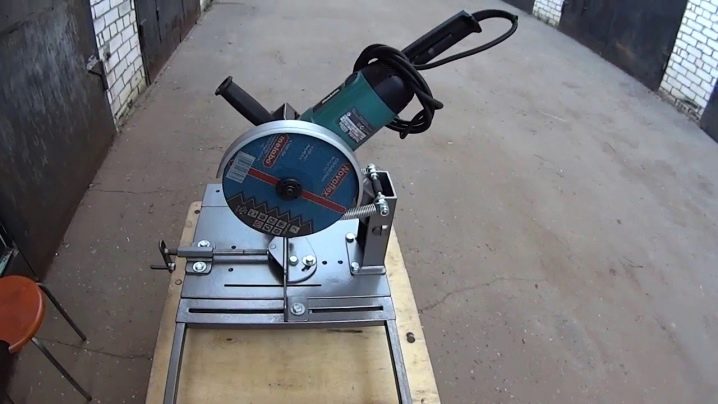
The above-described model of a miter saw based on a grinder is shown in the following photo.
There are also more complex modifications of the grinder to the miter saw. Factory variations are also available.

What else can you make?
The design of the grinder allows you to modify it yourself into many other tools.
Grain crusher
The grain crusher is made of a round drum (from a broken or old crusher) with a perforated removable bottom, a plastic vent (from an ordinary canister with a cut off bottom) and a grinder - the leading structural element. The shaft of the angle grinder is placed into the drum through the hole in the center of its upper part. In this position, its body is attached to the drum (the method of attachment is individual). A screw-shaped knife is attached to the gearbox shaft from the inside of the drum. It can be made from a circular saw cut-off wheel for wood. The knife is fixed with a fixing nut.

A plastic grain hopper is also installed at the top of the drum body. Through it, grain is fed, falling onto a rotating knife. The latter is crushed and poured out through the bottom perforation. The size of the grinding fraction depends on the size of the holes in the bottom. The photo below shows a model of a homemade grain crusher and drawings for its manufacture.


Wood shredder
The shredder of branches and grass is a garden device that allows you to turn small branches and thick-stemmed weeds into a fine-grained form used for various agricultural purposes. When making such a tool, it is worth using only a large grinder operating at high speeds. To prevent overloads and breakage of angle grinders, an additional gear system is used, which greatly increases the grinding effect. The device is mounted on a sturdy metal frame that can withstand high vibration and displacement loads. Such a device is shown in the photo below.

Electric saw
An electric saw from a grinder is made using a tire from a chainsaw of the appropriate size. Since it is not possible to use an automatic rotation stop mechanism in a self-made design, special attention is paid to the design of a protective casing. According to a similar principle, a reciprocating saw based on a grinder can be designed with your own hands. The chain saw is shown in the photo below.

Lathe
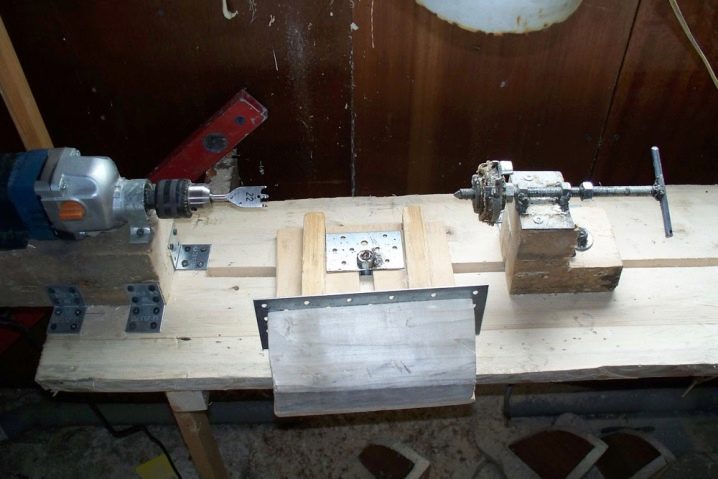
A lathe for wood from a grinder is one of the most difficult ways to modify the latter. For its manufacture, a large number of materials and various components are used. An example of a design is shown in the photo below.
Lopper
This is a tool that is designed using a benzoin trimmer, or rather, a gimbal. The principle of its operation is preserved - only the driving unit and the cutting part itself change.
Instead of a line for cutting grass, a chain saw bar mount is installed.

Safety engineering
When modernizing angle grinders with your own hands, it is very important to observe safety precautions. Any changes made to the design of the device are a violation of the approved technical standards. Given this fact, it is worth protecting yourself from the negative consequences of using a converted tool. For this, personal protective equipment is used - headphones, a shield-mask, glasses, gloves. The basic rules of operation of this or that power tool are observed. Preservation of life and health during work is a priority factor.
For information on how to make a frame from a grinder, see the next video.


The comment was sent successfully.