We make a press from a jack with our own hands
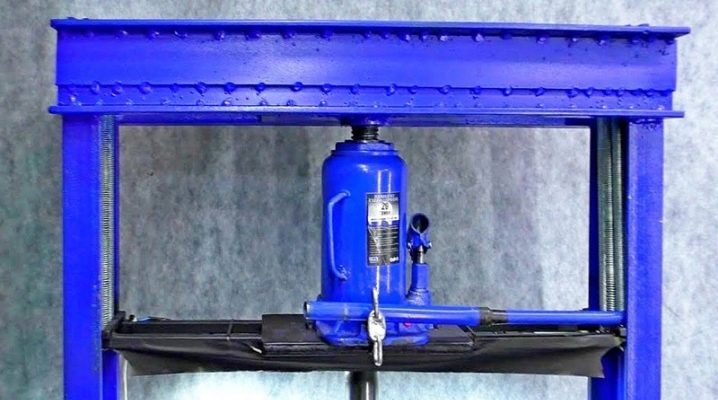
A hydraulic press made from a jack is not only a powerful tool used in any production, but a conscious choice of a garage or home craftsman, who urgently needed a tool to create multi-ton pressure in a small limited location. The unit will help, for example, when briquetting combustible waste for incineration in a furnace.
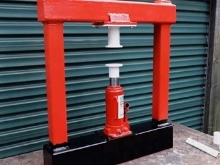
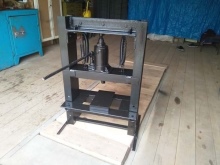
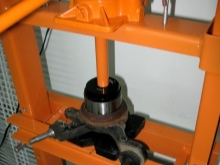
Jack selection
The hydraulic press is usually made on the basis of a glass or bottle type hydraulic jack. The use of a rack and pinion screw is justified only in structures that work purely on the basis of mechanics, the disadvantage of which is the loss of not 5% of the efforts applied by the master, but much more, for example, 25%. Using a mechanical jack is not always a justified decision: it can just as well be replaced, for example, by a large locksmith vice, installed vertically.
It is preferable to choose a hydraulic type jack from those models that are capable of lifting about 20 tons. Many home craftsmen who made a press from such a jack on their own took it with a margin of safety (lifting): they often got into their hands models that are enough to lift a non-passenger car , but a wagon or a trailer, for example, from "Scania" or "KamAZ".
Such a decision is commendable: taking the most powerful jack is a profitable business, and, thanks to its load capacity, it will serve not 10 years, but the whole future life of the owner of a homemade hydraulic press. This means that the load is about three times less than the permissible one. This product will wear out more slowly.


Most mid-range hydraulic jacks - single vessel, with a single stem. They have, in addition to simplicity and reliability, at least 90% efficiency: losses in the transmission of power by hydraulics are small. A fluid - for example, transmission or engine oil - is almost impossible to compress, and besides, it seems to be a little springy, generally retaining at least 99% of its volume. Thanks to this property, the engine oil transfers the force to the rod almost "intact".
Mechanics based on eccentrics, bearings, levers are not capable of giving such small losses as a liquid used as a transfer material substance... For a more or less serious effort, it is recommended to purchase a jack that develops a pressure of at least 10 tons - this will be the most effective. Less powerful jacks, if they are in the range of the nearest auto shop, are not recommended - the weight (pressure) is too small.


Tools and materials
Take care of the availability of a drawing of the future installation: there are many ready-made developments on the Internet. Despite the presence of slightly different models of jacks, choose the one with a large "leg" - a platform for resting on the ground. The difference in designs, for example, with a smaller "foot" ("bottle bottom" with a massive wide base) is due to marketing tricks: do not skimp on the design. If an unsuccessfully selected model breaks suddenly at the moment of the highest developed with the help of effort, then you will not only lose the main actuator, but you can also be injured.
To make the bed, you need a channel of sufficient power - wall thickness is desirable not less than 8 mm. If you take a thinner-walled workpiece, then it can bend or burst.Do not forget: ordinary steel, from which water pipes, bathtubs and other plumbing are made, is brittle enough when struck with a powerful sledgehammer: from overvoltage it not only bends, but also bursts, which can result in injury to the master.
For the manufacture of the entire bed, it is advisable to take a four-meter channel: at the very first stage of the technical process, it will be sawn.
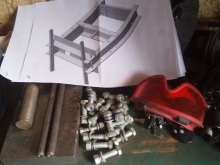

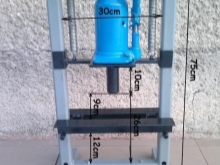
Finally, the return mechanism will require strong enough springs. Of course, springs like those used to cushion railway cars are useless, but they shouldn't be thin and small either. Select those that have sufficient force to pull the pressing (movable) platform of the installation to its original position when the force applied by the jack is "bled".
Supplement your consumables with the following items as well:
- thick-walled professional pipe;
- corner 5 * 5 cm, with a steel thickness of about 4.5 ... 5 mm;
- strip steel (flat bar) with a thickness of 10 mm;
- a pipe cut with a length of up to 15 cm - the jack rod must enter into it;
- 10 mm steel plate, size 25 * 10 cm.

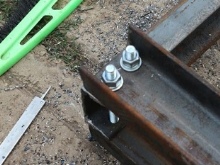

As tools:
- welding inverter and electrodes with a pin section of about 4 mm (a maximum operating current of up to 300 amperes must be maintained - with a margin so that the device itself does not burn out);
- a grinder with a set of thick-walled cutting discs for steel (a diamond-coated disc can also be used);
- square ruler (right angle);
- ruler - "tape measure" (construction);
- level gauge (at least - bubble hydrolevel);
- locksmith's vice (it is advisable to do the work on a full-fledged workbench), powerful clamps (those that are already "sharpened" to maintain a right angle are recommended).
Do not forget to check the serviceability of protective equipment - welding helmet, goggles, respirator and the suitability of gloves made of coarse and thick fabrics.
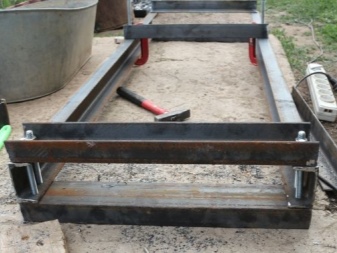

Manufacturing technology
A do-it-yourself press from a jack is made in a garage or workshop. The hydraulic press you decide to make is relatively small and simple compared to its industrial counterparts.
With a certain skill in working with electric welding equipment, it will not be difficult to weld the frame and the reciprocating emphasis. To make a great hydraulic press, you have to go through several successive stages.


Assembling the frame
Follow these steps to assemble the frame.
- Mark and cut the channel, the professional pipe and the thick-walled corner profile into blanks, referring to the drawing. Saw out the plates as well (if you haven't prepared them).
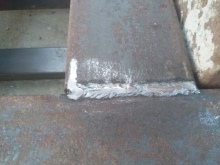
- Assemble the base: weld the required blanks using the double-sided seam method. Since the depth of sticking (penetration) of the so-called. The "weld pool" (zone of molten steel) does not exceed 4-5 mm for 4-mm electrodes; penetration is also required from the opposite side. From which side to cook - it does not matter at all, the main thing is that the blanks are securely fixed, located, initially tacked. Welding is carried out in two stages: first, tacking is performed, then the main part of the seam is applied. If you do not grab it, then the assembled structure will lead to the side, because of which the crooked assembly will have to be cut at the place of penetration, aligned (sharpened) and welded again. Avoid fatal assembly errors.
- Having assembled the base, weld the sidewalls and the upper crossbar of the bed. During the assembly process, after each seam, tacks, control the squareness. Cutting of parts before welding is carried out butt-cutting. As an alternative to welding - bolts and nuts, press and lock washers at least M-18.
- Make a movable bar using a professional pipe or a section of a channel. Weld in the center of the sliding stop a piece of pipe that contains the stem.
- To prevent the stem with the stop from deflecting, make guides for it based on strip steel. The length of the guides and the outer length of the body are equal. Attach the rails to the sides of the movable stop.
- Make a removable stop. Cut holes in the guide rails to adjust the height of the working area. Then install the springs and the jack itself.
Hydraulic jacks do not always work upside down. Then the jack is fixed motionlessly on the upper beam, while the lower beam is used as a support for the workpieces being processed. In order for the press to work in this way, it is necessary to remake the jack for it.


Alteration of the jack
Modification of hydraulics is carried out in the following way.
- Install a 0.3 L expansion container - the filler channel of the jack is connected with a simple transparent hose. It is fixed by means of clamps.
- If the previous method is not suitable, then disassemble the jack, drain the oil and pump it through the main hydraulic unit. Remove the clamping nut, swing the outer vessel with a rubber mallet and remove it. Since the vessel is not completely filled, then, being turned upside down, it loses the flow of oil. To eliminate this cause, install a tube that takes the entire length of the glass.
- If for some reason this method does not suit you either, then install an additional beam on the press... The requirement for it is slipping along the guides and the possession of an end-to-end fit, due to which, when the pressure rises, the jack will remain in its workplace. Turn it over and fix it with M-10 bolts to the post.
After pumping up the pressure, the downforce will be such that the jack will not fly off.

Creating pressure shoes
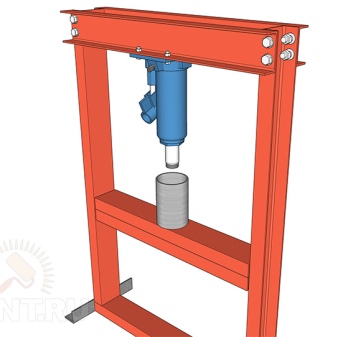
The jacking rod does not have a sufficient cross-section. He will need a larger area of pressure pads. If this is not ensured, then working with massive parts will become difficult. The upper pressure block has the ability to hold onto the stem using a multi-piece mount. In fact, a blind hole is cut in this part, where the same rod will enter with a small gap. Here, springs are hooked into the holes cut separately. Both platforms are cut and assembled from channel sections or four corner blanks, resulting in a rectangular box with open sides.
Cooking is carried out using continuous seams on both sides. One open edge is welded using a square cut. The inside of the box is filled with M-500 concrete... When the concrete hardens, the part is welded on the other side, resulting in a pair of non-deformable pressure pieces. To install the resulting structure on a jack, a piece of pipe is welded on top under its stem. To keep the latter there even more securely, a washer with a hole for the center of the rod is fixed at the bottom of the resulting glass. In this case, the platform from below is installed on a movable crossbar. The best option is to weld on two corner pieces or pieces of a smooth rod that do not allow the pressure pad to move to the side.

Adjustable support beam
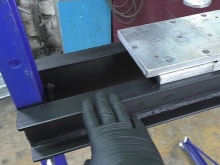
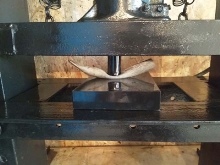
The lower crossbar does not differ significantly from the upper one - the same dimensions in the section. The only difference is in design. To do this, you need to make a support platform. It is made from a pair of U-sections turned with the ribbed side outward. These sides are attached on both sides of the stops and are welded in the center using angle or reinforcing spacers. An unoccupied area runs along the central zone of the crossbar - which is why it will be necessary to make a support block from below. She, in turn, rests against a space equal to the half-width of each of the shelves. Offset supports are welded in the center of the bottom blank.
However, the adjustable bar can be fixed with powerful smooth rods.To implement this method of fastening, cut a number of notches located next to each other on the vertical channel parts of the machine. They should be parallel to each other.
The diameter of the rod, which was cut into spacers, is not less than 18 mm - this section sets an acceptable margin of safety for this part of the machine.


Return mechanism
In order for the return springs to function properly, increase their number to six if possible - they will cope with the large weight of the upper pressure pad, into which concrete was recently poured. The ideal option is to use springs to return the moving part (door) of the gate.
If the upper block is missing, attach the springs to the jack rod. Such a fastening is realized using a thick washer with an inner diameter smaller than the cross-section of the stem itself. You can fix the springs using the holes along the edges located in this washer. They are held on the top bar by welded hooks. The vertical position of the springs is unnecessary. If they turned out to be long, then by placing them under a degree, and not strictly straight, it is possible to remove this defect.


Additional settings
A home-made garage mini-press can also work in the case when the jack extends the rod to a shorter distance, no less effectively. The shorter the stroke of the rod, the faster the parts to be processed are pressed against the stationary platform (anvil).
- Mount a piece of rectangular or square tubing on the anvil. It is not necessary to "tightly" weld it there - you can make a removable increment of the site.
- The second way is as follows... Place a height-adjustable bottom support on the press. It must be secured to the sidewalls with bolted connections. Make holes in the sidewall for these bolts. The height of their location is selected based on the tasks.
- Finally, in order not to remodel the press, use replaceable plates, playing the role of additional steel gaskets.
The last version of the revision of the machine is the cheapest and most versatile.


For information on how to make a press from a jack with your own hands, see the next video.


The comment was sent successfully.