Pile-screw foundation device: how to build a foundation on your own?
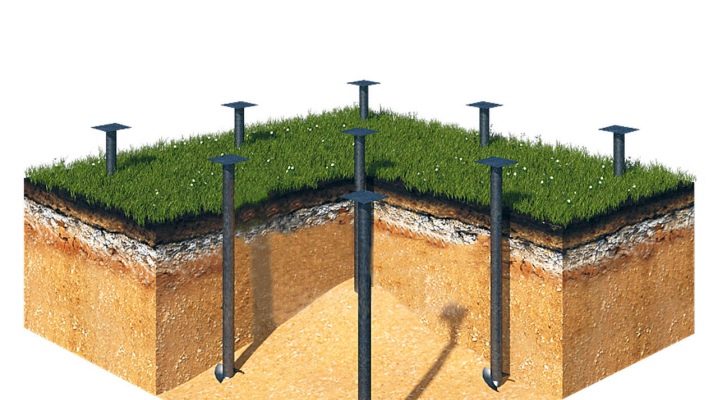
Every home foundation must be built and designed with great care. This fully applies to the option with screw piles. The apparent simplicity of their installation actually hides many subtleties and nuances that simply cannot be ignored without the risk of facing unpleasant consequences.
Manufacturing: stages
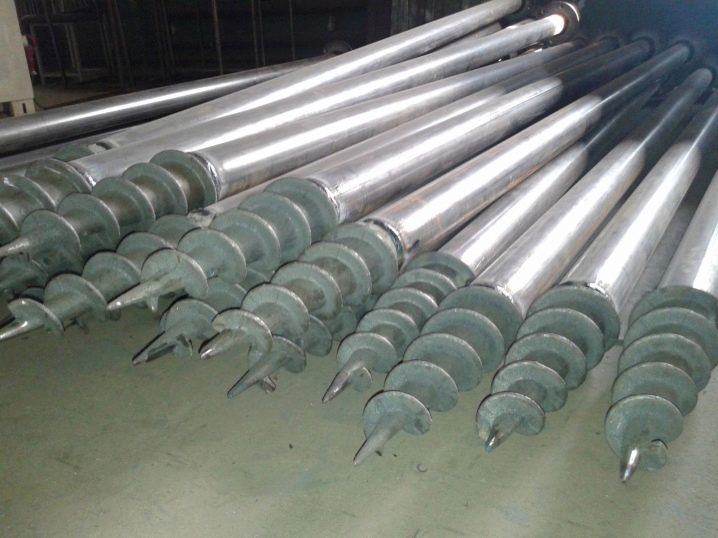
Pile-type supports can be made by hand. But it must be admitted that such work is not easy and requires a lot of experience, a thorough study of the specifics of the problem. In order for the fastening part to easily enter the ground, it is necessary to carefully calculate the inclination of the spiral blade, its attachment to the tip cone. The situation is aggravated by the complete absence of state standards and the absence of reference products. You cannot buy or receive one pile and make others according to its model - even leading manufacturers often sell low-quality goods.
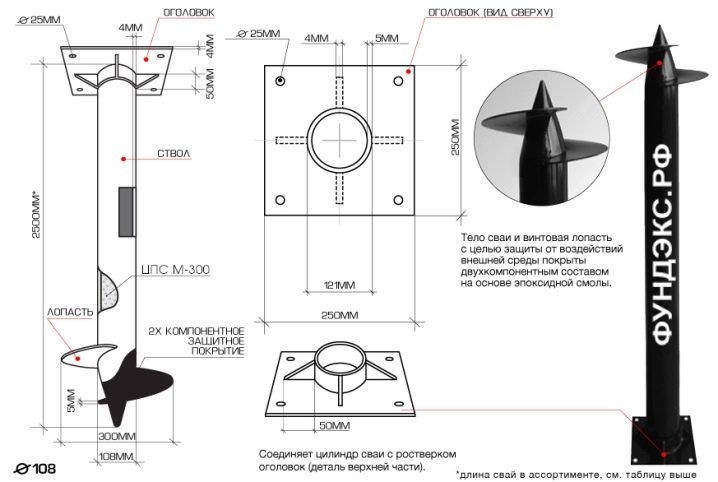
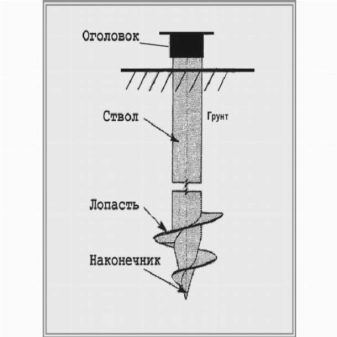
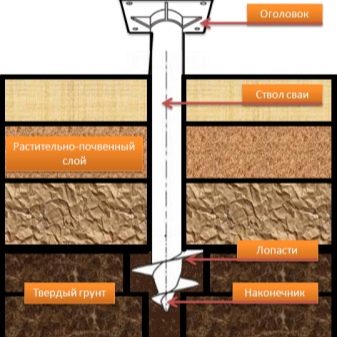
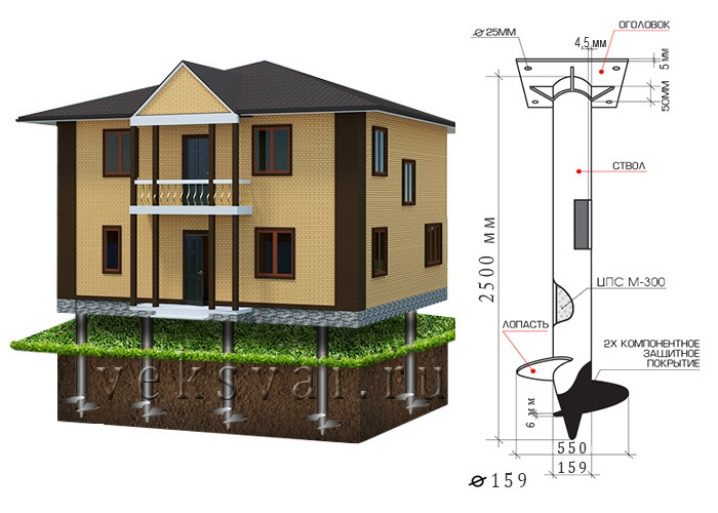
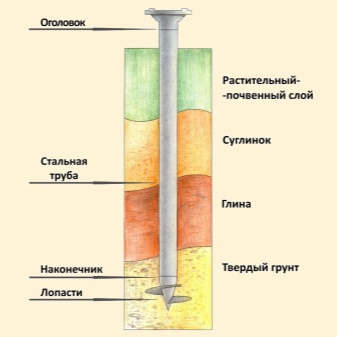
The typical composition of the structure is as follows:
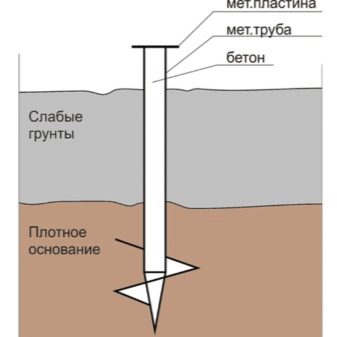
- body - a pipe with a diameter of 7.6–35 cm with a wall thickness of 0.4 cm;
- tips obtained by welding or casting spikes, the length of which is 2 own diameters, or cones;
- blades - spirals with one or two leads, and, as an option, a pair of screws 40–70 cm apart;
- the head is used in combination with wood grillages.
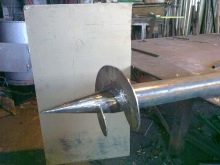
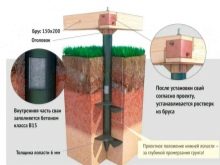
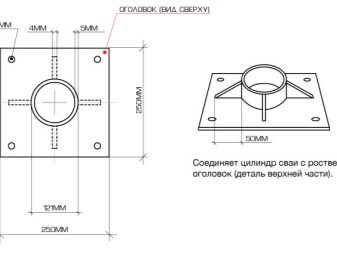
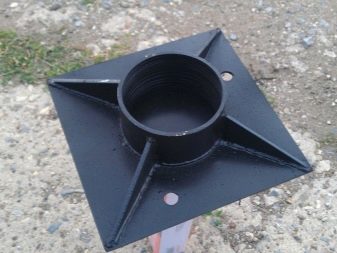
A typical head is made as a plate with special holes and a number of stiffeners. This plate is welded to a coil made from a pipe with an inner diameter slightly larger than the outer shell of the pile. Attention: in case of self-production of screw supports, it is worth using drawings distributed by any manufacturer. Then the risk of errors with the blade size is eliminated, the number of welds is reduced. The fewer such connections, the fewer weak areas around them.
According to professionals, it is worth choosing pipes manufactured in accordance with GOST 8732 and 19281 or by replacing them TU St20 and 09G2S. These materials are characterized by a light cut and a simple curvature of the petals. It is most convenient to form a tip from them. Homemade screw piles are mostly made with a length of 2 to 3 m, if it is required to reach bearing layers of soil at a considerable depth, after screwing in, add a pipe 150-200 cm long. Speaking about accessories, one cannot fail to mention the tips.
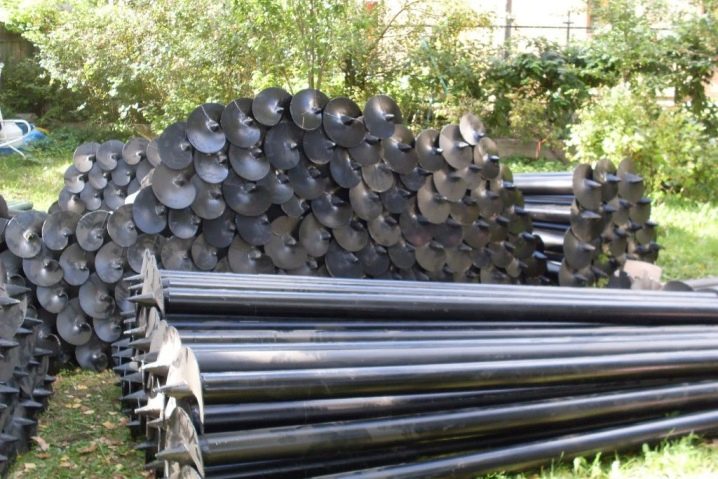
They are made of three different types, the approach concerns not only the nuances of the technology, but also the size of the part used. So, peaks of a welded design or those obtained from a pipe "body" will best pass through dense soil. But it will be easier to pierce the sandy massif, peat deposits and sandy loam with cruciform tips. How long the foundation will last does not depend on the type of peak. But clear differences are found when comparing the tightening force on the lever.
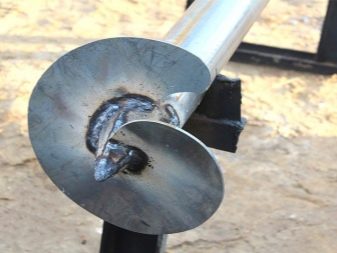
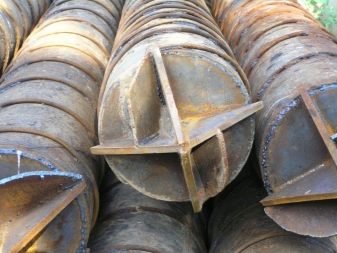
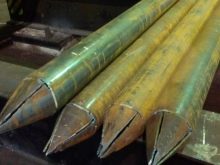
The use of a tubular body implies building it up by two diameters., since one of the ends of the workpiece becomes the tip of the future pile. Start by slicing a template. According to this template, the edge of the workpiece is marked into sectors. When cutting a pipe, chalk lines become a guide for the formation of jagged petals.Further, such petals are bent in the form of a strict cone, and the top is exactly aligned with the axis of the pipe; having finished this manipulation, the fragments are welded using the double seam method.
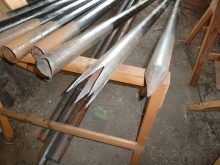
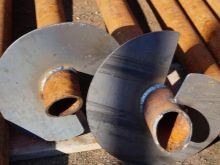
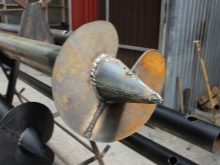
If the pipe diameter is 10.8–20 cm, five petals are prepared. With its smaller size (from 7.6 to 8.9 cm), four fragments are enough.
In addition to the welding machine, normal operation requires the use of tools such as:
- plasma cutting machine;
- gas cutter;
- grinder with equipment for cuts in metal.



These cutting units are interchangeable, but it is recommended to always have at least two options at hand at the same time, and preferably all three. Then, in the event of any malfunction or difficulty, there will be no hitch in the work. Then, using the peaks obtained, you can quickly submerge them to the required depth, pushing small stones and crushing large stones. If you have to build small architectural forms and light buildings, you can use welded tips obtained in a similar way. Recommendation: Blade docking works best with the lances from the tube lobes, rather than those obtained from sheet steel.
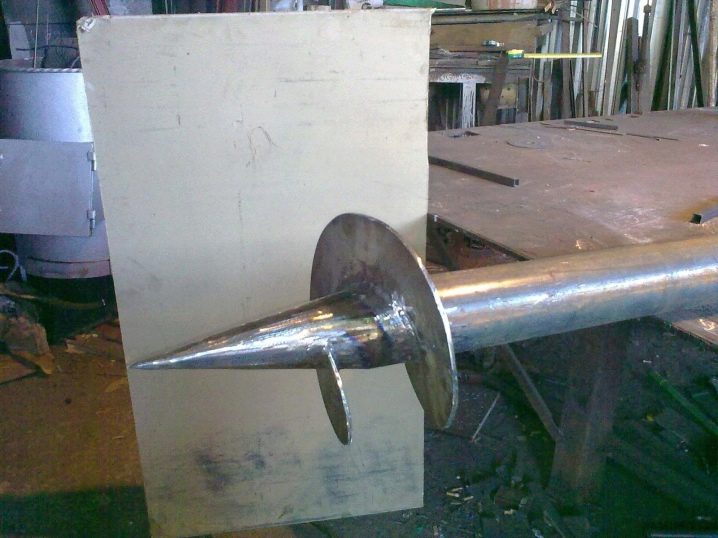
There is another approach that uses a slightly different scheme. The details are cut in the form of a triangle, complemented by stiffeners and a round plate that plugs the pipe at one end. When assembling, a large triangle and a pair of ribs are placed on top of the plug, attached to the plate at an angle of 90 degrees. You need to tack with welding at several points at once. The final fastening is done as a double seam.
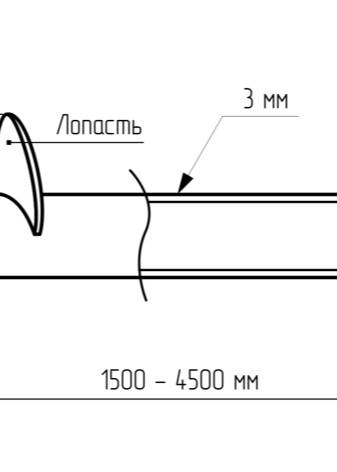
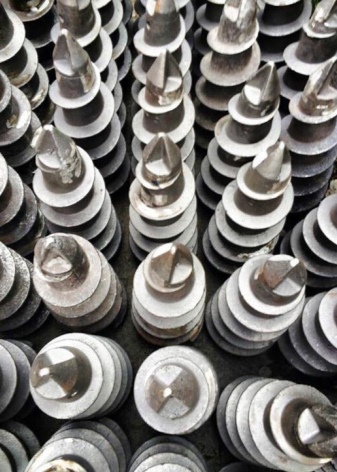
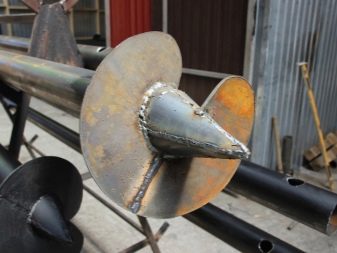
A cruciform tip requires auger blades to be attached above the lance. Therefore, high permeability of various breeds is achieved due to the increased tightening force. As for the blades, you can simplify screwing them into the ground by placing a screw at the very bottom of the tip, leaving at least 2/3 of the length on top. The exemplary blade pitch is 50–70 mm. To obtain the blades, sheet steel with a large thickness of at least 0.5 cm is used.
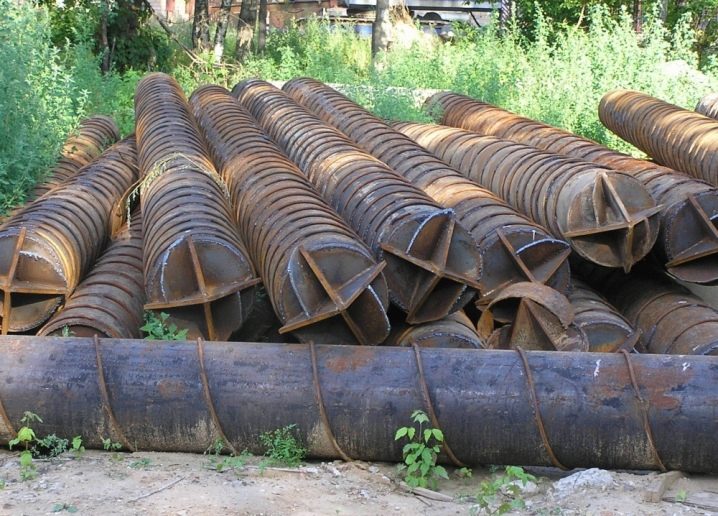
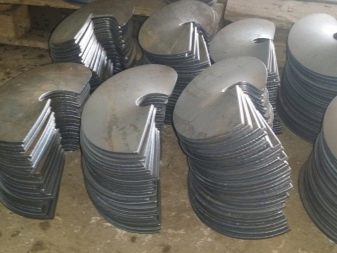
A solid single-run propeller requires the blades to be spread using a crowbar or pry bar to the chosen pitch. If the structure is formed from several blanks at once, it is much more correct to cut single segments (no more than ½ circle). Separate sections are sequentially welded to the peak or to the body of the pile. The first approach does not make it possible to create a complex screw, however, it provides a stable geometry of the structure. In the second scheme, the assembly of the auger with several passes does not present any particular difficulties, but you need to carefully monitor so that the appearance of the spiral is not disturbed.
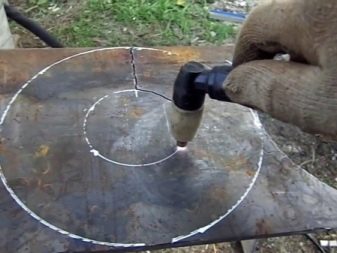
Before manual cutting, the workpieces are marked with an outer diameter of 150-300 mm, it depends on the load on the pile, most often they are limited to a corridor from 200 to 250 mm. They try to equate the inner diameter with the outer dimension of the pipe. The drawing of the segment connecting the circle in the cavity and outside is carried out in a randomly selected place, but it is still worth approaching this work more carefully. It is necessary to cut parts with a plasma cutter from a sheet with a thickness of 0.5–0.7 cm; instead of a plasma cutter, you can take a gas cutter. When working, they carefully look to ensure that the width of the cut is taken into account, and the seat is processed properly.
During the wiring, the area opposite to the cut site is clamped in a vice and pushed apart with a pry bar or a crowbar. When there is no vice, you can simply use a gap in massive steel structures. But in any case, it is worth constantly observing whether the normal pitch of the screw is ensured at the auger or not. Other options can be used to produce piles with multiple runs. So, in one of them, the marking of the inner diameter is made the same as the outer size of the pipe (200-300 mm).
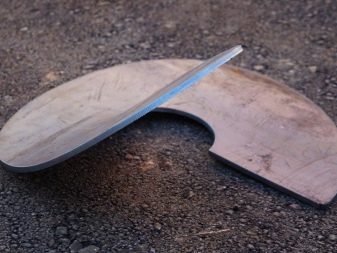
The ring resulting from such a marking is divided by a pair of segments into semirings of identical size.True shape cutting implies the ability to perform actions in any sequence, but this requires a professional-grade tool. The method of "installation on a pile" assumes that the initial half-ring is grabbed according to the screw markings and the observance of the right angle is verified. If everything is correct, other half rings are placed along the same line - as many as it is planned to make turns. Attention: a slight deflection of the half-rings is allowed to more accurately match their design dimensions and geometry.
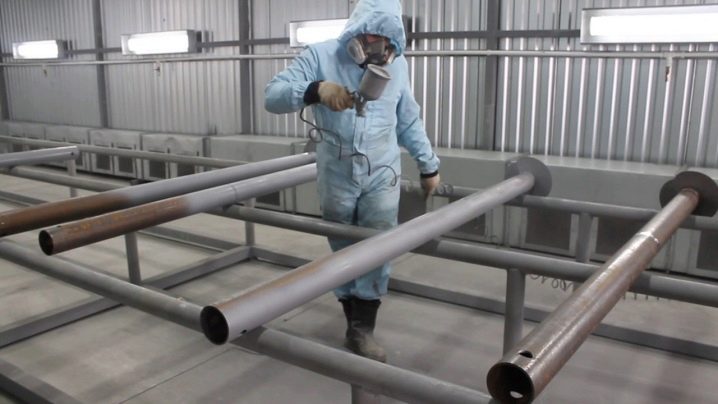
No matter how well the pipe itself is made, anti-corrosion protection is also very important. According to the results of special engineering surveys, it was found that the annual loss of piles and their blades is 0.01 mm of walls, and this is in almost ideal conditions. If the soil is very chemically active, if the effects are large, wear can accelerate significantly.
After descaling and when machining completely new pipes, the following can be used:
- two-component enamel is made specifically for underground metal products, service life - at least 60 years;
- enamel based on polyurethane requires preliminary application of VL05 primer, will last at least three decades;
- fiberglass. Before applying it, you will have to treat the base with a cold zinc coating. The total service life (theoretically calculated) reaches 3-4 centuries, stable resistance to electrochemical corrosion is ensured.
But fiberglass can hardly be called an affordable material. In order to save money, complex paintwork materials based on epoxy resin are most often used. As for the original steel, the standard St20 or GOST 8732-74 allows you to count on the reliable operation of the supporting element in ordinary home construction. Only at a very high load or under severe operating conditions it makes sense to focus on GOST 19281. For the most part, the corresponding piles are used in industrial and multi-storey construction, for the development of a personal plot, their characteristics are excessive. Regardless of the type of supports used, their length is selected in such a way as to accurately reach the layer of solid soil.
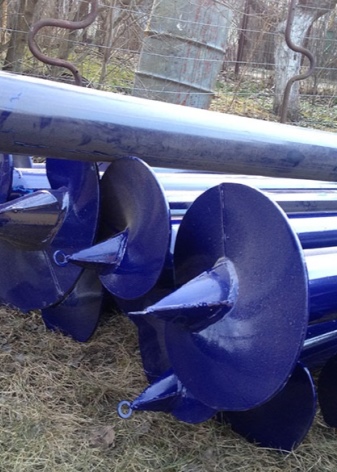

In this case, it is required not only to reach it, but also to leave a reserve for deepening by 30–35 cm. When it is planned to remove the piles higher above the ground, you can even further increase such a gap. Timely headroom allows you to avoid the subsequent tedious build-up and associated potential errors. To determine the required pipe diameter when making it independently, as well as when selecting ready-made structures, it is worth considering the norms of SNiP 2.02.03-85. Yes, it is quite difficult, but it will help to do everything very accurately and clearly.
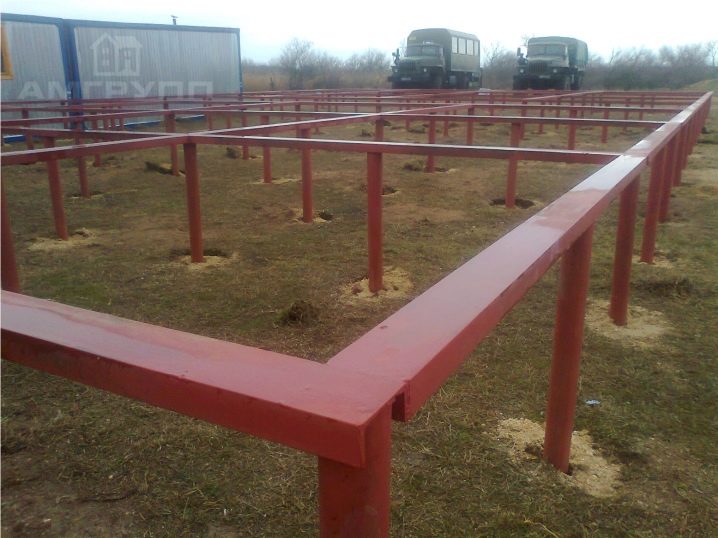
Most often, pipes with a diameter of 4.7-7.6 cm are used in the construction of light types of fences and barrier structures. By increasing it to 7.7–8.9 cm, you can be sure of the stability of a brick bath, a capital gazebo or a powerful brick fence. But for frame structures, for log cabins and houses in two, three floors, it is recommended to use piles with a diameter of 10.8 cm. You should not always strive for the maximum value, since this only entails unjustified consumer costs. Important: in artisanal conditions, it is extremely difficult to make piles larger than 10.8 cm.

For such products, reinforced blades need to be mounted, and only industrial production can make them with high quality. In addition, increasing the diameter complicates the formation of the screw. At the same time, the walls of the trunk, even under the lightest buildings on favorable ground, cannot be thinner than 0.4 cm. When choosing the desired thickness in a particular case, it is recommended not to forget that the bend of the cone will have to be provided with hammer blows. So the principle "the more the better" does not work here either.
Advantages and disadvantages
The undoubted advantages of the pile-screw base for the house are the following:
- the ability to do without special machines for a small scale of work;
- exclusion of formwork and plinth;
- the same quality work in any season;
- providing ventilation under the floor of the house;
- the ability to dismantle any structural element.
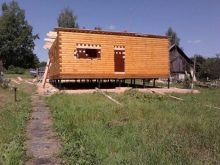
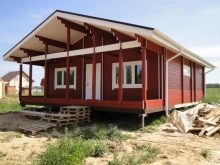
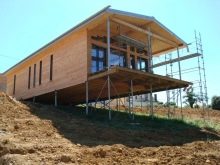
But even such an attractive solution has a number of disadvantages. It cannot be erected on rocks, and regardless of the quality of protection, one has to reckon with the risk of corrosion all the time. The level of load on the foundation is limited; in addition, screw piles are much more demanding on the quality of work. The slightest deviation from normal technology can provoke the failure of the supports, their bending or pushing upward. These negative aspects, however, do not allow ignoring the fact that the screw substrate is good on the banks of rivers and lakes, on piers, in wooded areas, and so on.
Design features
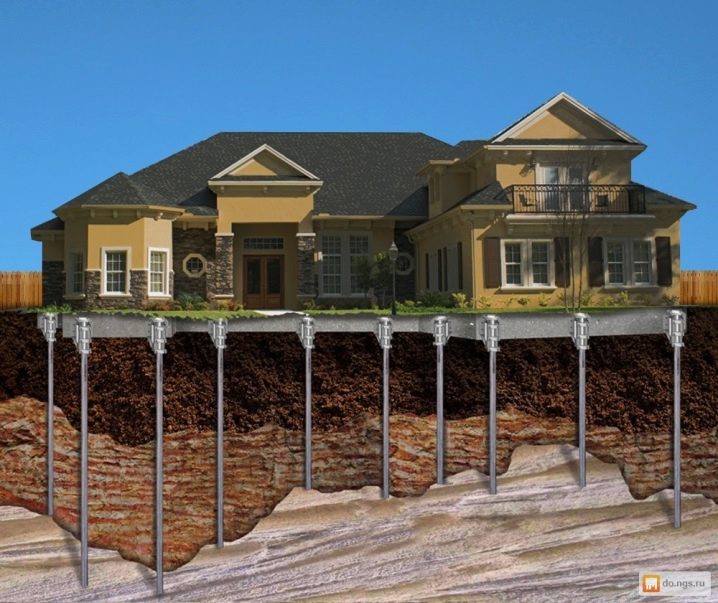
It will not be enough to simply prepare piles for work, even if they are very good. The device of the pile-screw foundation under the house has a number of specific features that cannot be ignored. Screw piles, which outwardly resemble huge screws, are immune to soil freezing and can be penetrated to various depths. Screwing into soil of any kind is facilitated by a pointed end with a cutting part. Piles compact the soil around them and effectively suppress heaving.
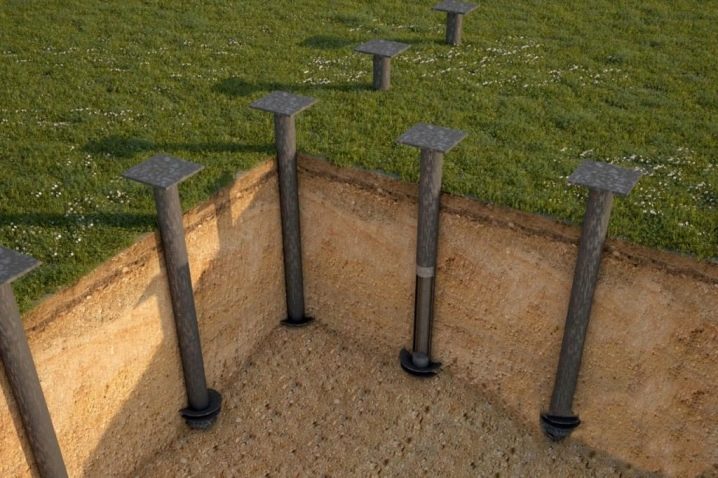
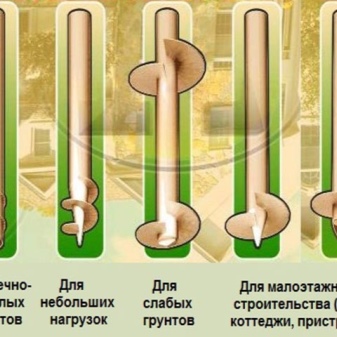
Corrosion resistance is largely determined by the type of protective coating used. Polymers provide the best cover, but they are extremely difficult to apply to metal. The use of screw piles for temporary and auxiliary structures, for the infrastructure of personal plots is widespread. The foundation of them can withstand a total load of 50 tons, and a single pile can easily withstand pressures up to 9 tons throughout its normal service life. When a temporary structure is no longer needed or must be moved to another place, even transported, you can take the pile with you and save on materials for the foundation. By the type of the tip used, the screw designs are divided into elements with a narrow and wide blade, and the latter are still divided into elements with one or two turns.
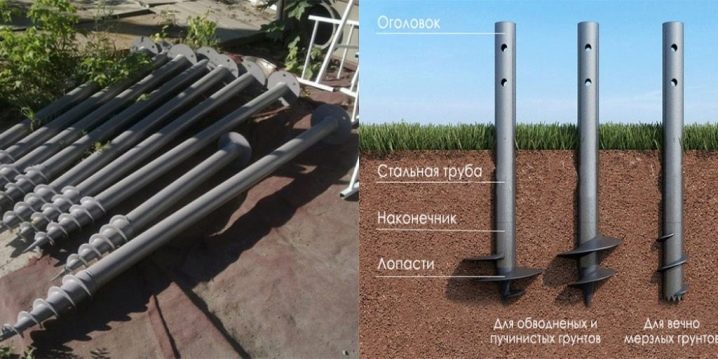
A single-turn product is equipped with only one turn, hence the name. Its top is equipped with special holes that allow you to fix and use the drill. Single loop solutions are preferred in the construction of fences and small structures. The wide blade is attractive during the construction of a two-story house, as well as for any work in areas with unstable soil. The stability of the fastening increases markedly. But even among the piles with narrow blades there is a gradation - into multi-turn and tubular.
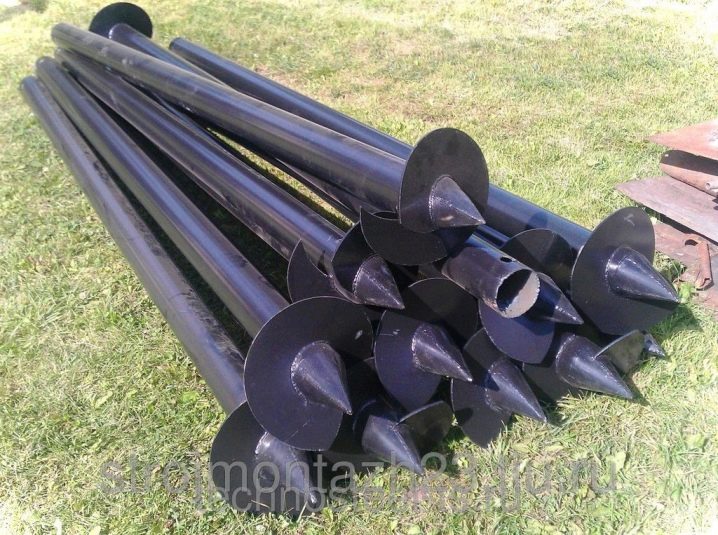
The presence of several turns allows the formation of pointed tips. This solution allows you to successfully pierce even very dense soil. The tubular product is preferable during the winter months when the ground is frozen and poorly processed. Special holes let the ground through. Having gone inside, it makes the whole structure much more stable than in a full-bodied version.
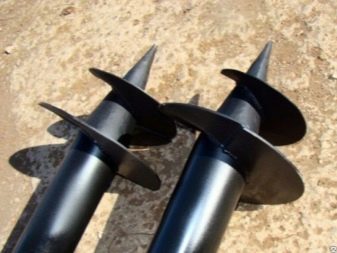
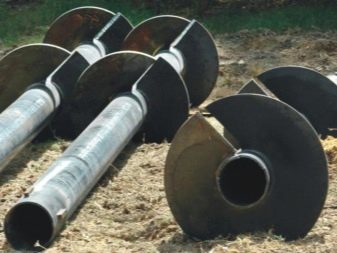
In order to exclude mistakes, it is important to remember that even those formally belonging to the same category, Russian and foreign piles may differ from each other. The choice of a suitable solution should only be made after consultation with geologists and engineers.
The following factors are taken into account:
- soil characteristics;
- the level of penetration of cold into the ground;
- climatic properties of the area;
- the height of the location of groundwater.
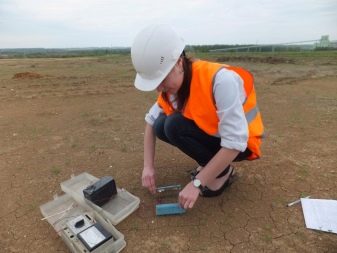

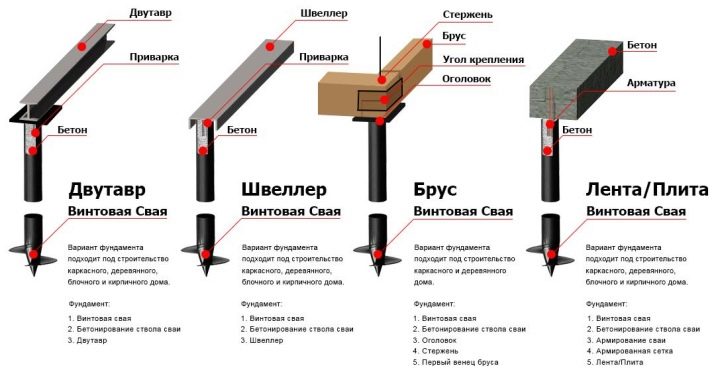
The installed piles are in any case required to be concreted. This will help fix the support in the soil and at the same time protect it from corrosion processes. Coniferous wood can be used as strapping. It is recommended to take blocks for strapping that are noticeably wider than the piles to be mounted.The cone-shaped tip is placed on piles filled with cement, and if the cut is made oblique, when twisting the support block must be filled with soil.
Varieties of piles
What are they?
Galvanized piles are characterized by increased reliability and excellent durability. Zinc can be applied using hot and cold techniques. But even such a good layer will require a special anti-corrosion treatment. Hot preparation is considered the best because this finish will reduce scratches and other defects during the installation process. The galvanized pile performs well in the construction of aboveground structures and, if necessary, ensure the highest environmental performance.
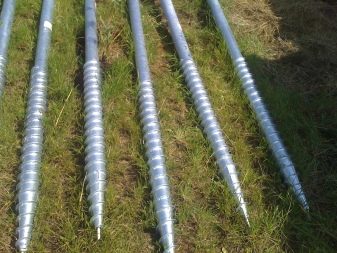
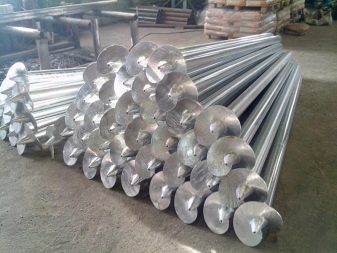
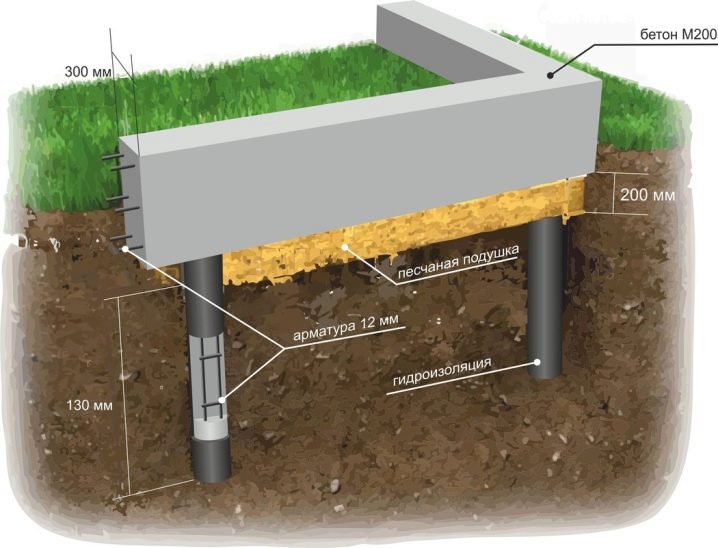
In most cases, for concreting screw supports, concretes of low grades of the category (M200 and M300) are taken. M200 solution is used for one-story and two-story buildings with light and medium ceilings. Cast and welded lugs are two key options with which screw piles are fitted. Welded technology implies the attachment of metal blades 0.3–0.5 cm; it is cheaper than casting or concrete products, but the reliability is still insufficient. When screwed into solid substrates, sometimes destruction or even separation of parts from each other occurs.
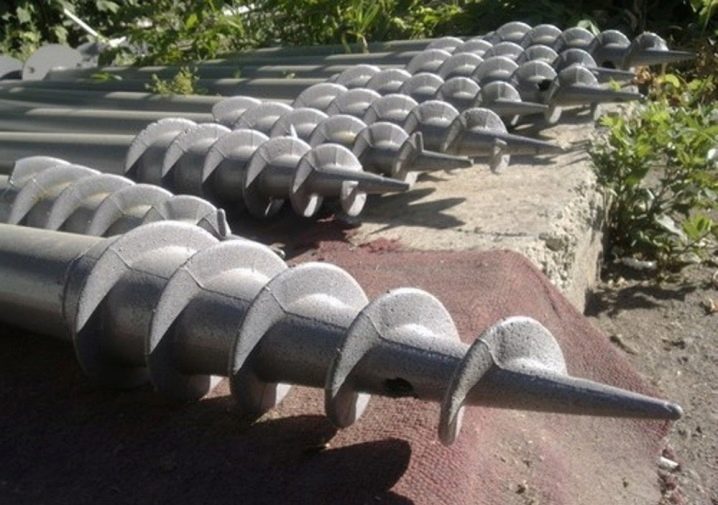
The cast version has another advantage: it is made much more accurate, grade 25 steel is used for work. Heat treatment of castings is mandatory, which increases the strength of the structures. Cast tips are equipped with blades with a base thickness of 1.3 cm, and the closer to the edge, the thinner the product turns out to be. Such a solution allows you to confidently pass even very difficult soil masses, there is no need for early loosening. The spread in magnitude will be minimal, the behavior of the piles during installation will be completely predictable for developers.
For what soil?
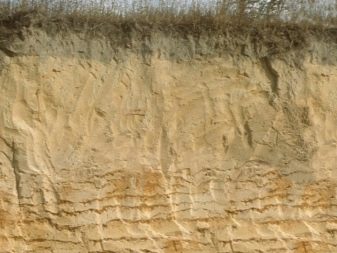
Galvanized elements can be embedded in any kind of soil, for this purpose they are equipped with cone-shaped tips. The use of such supports is quite possible even in mountainous areas. Attention: piles with a screw cannot be mounted in the ground, composed of coarse rocks and rocky inclusions. A coarse-grained base is considered to be one that is formed from mechanically unattached fragments of rocky stones and weathering rocks. In such a soil, from 50% of the total mass and volume falls on debris larger than 0.2 cm.
The reason for the ban is simple - large chunks of stone can damage even the most durable metals and alloys. It should be borne in mind that when problem mineral structures are located deeper than 150 cm, installation is usually not difficult. But the final decision should be made only by qualified engineers, since the slightest misstep can lead to serious consequences. Sandy soil is more conducive to screw piles and usually does not bring any unpleasant surprises. Already at a depth of 1.5 m, the strength of the substrate material most often allows the building to be supported as reliably as possible.
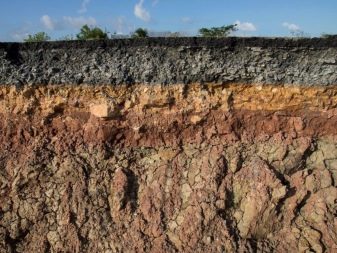
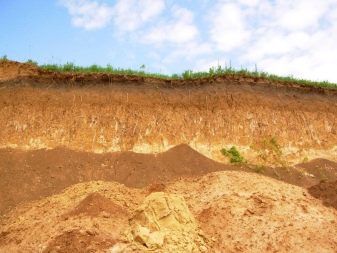
Dusty clays are somewhat less suitable because they tend to swell very significantly. Sandy loam and loam in this regard is slightly better, but inferior to the sandy base. The problem can be solved by increasing the depth of implementation. If the blades abut against strong material, the piles will precisely hold in place and will be able to maintain the integrity of the house for many years. As for collapsible soils, construction on them is extremely difficult, and you will definitely have to carry out test drilling and evaluate the properties of soils.
Design and calculation
Having chosen a suitable option for the execution of piles, you need to start calculating their linear parameters and drawing up projects, and forming drawings.
Only careful calculations allow you to choose the following:
- the required height of structures;
- the total number of supports;
- the diameter of each of them;
- the depth of the bookmark;
- the amount of expenses for the construction of the foundation.
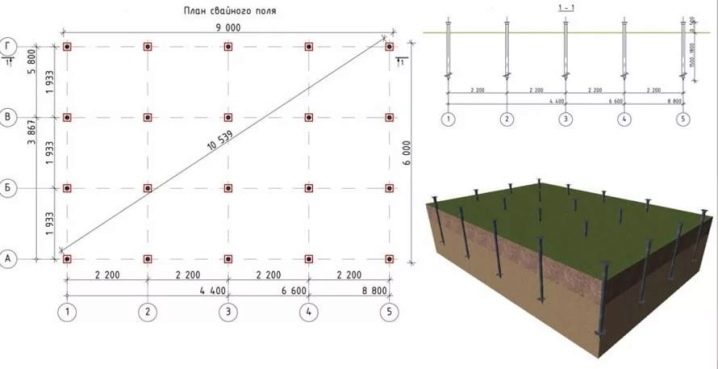
The sequence of calculations is not determined arbitrarily, it is very clearly fixed in SNiP 2.02.03.85. According to this standard, when determining the required properties of a structure, one cannot be limited only to data on the terrain and the depth of groundwater circulation. It is extremely important to focus on the real amount of precipitation falling in a certain climatic zone. If for some reason it is impossible to perform a high-quality geodetic survey, you have to take the minimum design load as a basis. The number of screw piles is determined by multiplying the total load by the result of dividing the reliability factor by the maximum permissible load level.

It is recommended that the load on each of the piles be proportional to the total load from the structure. Proper construction, in accordance with GOST standards, always provides for an even distribution of loads under load-bearing walls and under areas of increased pressure. In addition, the roll force is analyzed. In many cases, it is possible to guarantee the service life of a building not less than a certain level only when contacting specialists. A simpler technique for determining the dimensions and physical parameters of structures is to use special software.
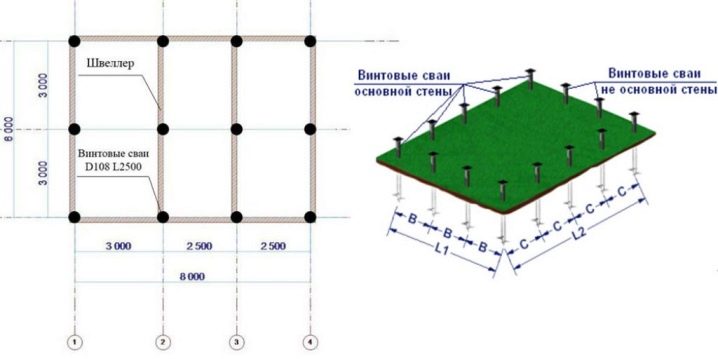
When calculating the generated load, it is required to take into account the mass of the floors and the operating pressure from the people in the house, from their property. At the same time, professional architects do not forget about the load generated by wind gusts, building draft and temperature jerks. Piles with a wide blade and a cast tip are considered the best solution for low-rise buildings on relatively plain ground. If we take designs with many blades placed at different levels, this will help to withstand even very powerful loads in difficult soil. Products of variable perimeter are included in the project if it is necessary to solve a specific range of tasks; Finally, a narrow blade with a cast, toothed end will handle rocky ground and even permafrost well.
Pile shafts are considered the least reliable solution.obtained from a seam pipe by welding the blades. It is permissible to use such structures only with a limited amount of loads and on "good" soil. It is believed that a pile with a diameter of 8.9 cm with a blade size of 25 cm is capable of withstanding a maximum of 5000 kg. This is exactly the operational load created by a one-story frame-panel house. The design with a diameter of 10.8 cm with a blade of 30 cm can easily withstand up to 7000 kg, that is, it is already suitable for two-story timber and block buildings.
When it is planned to use aerated concrete blocks and bricks for building a house, the project provides for the use of piles with a diameter of 13.3 cm with a blade 35 cm wide.
Long-term practice has made it possible to formulate universal requirements for the length of the supports, namely:
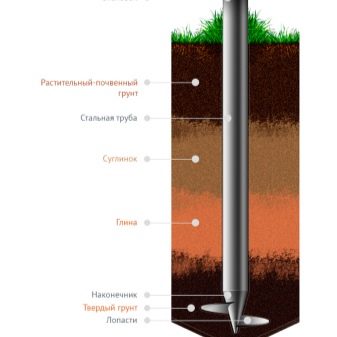
- a rod 250 cm long is introduced into loams located up to 100 cm from the surface;
- such a pile is introduced into loose soils and quicksands, which is capable of reaching a dense mass;
- the difference in areas with uneven terrain can be up to 50 cm.
If, according to the results of the calculations, it turns out that this difference will have to be made larger, you really need to either abandon the use of piles altogether, or carefully level the unevenness of the relief, remove excess soil or add in the lowlands. When it is planned to put a frame made of wood or a block house on top, the distance can be from 2 to 2.5 m. A little further, you can push apart the supports that are exposed under buildings made of logs and beams. In order for everything to be reliable and to serve for a long time, it is impossible to raise the base higher than 0.6 m. Along the length of the piles, a margin of 200-300 mm is left.
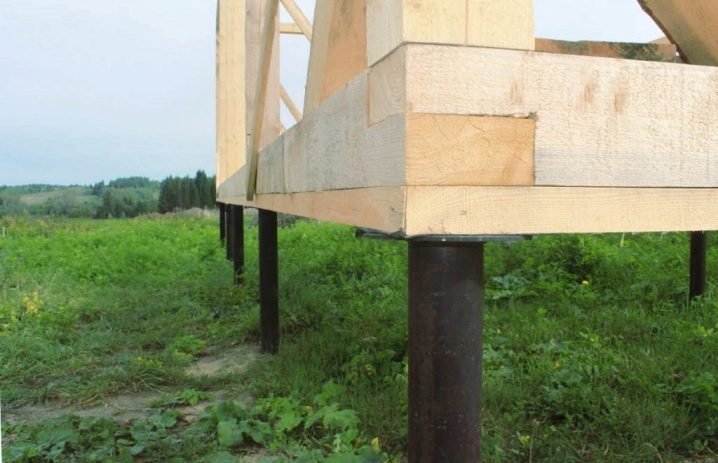
When drawing up a project, special attention should be paid to the most problematic areas.Typically, these are the corners of buildings and the intersections between the load-bearing wall and internal partitions. The loads arising at the entrance groups and along the perimeter are quite high. Entering to hold the stove and fireplace requires a minimum of two piles. At least one support should be placed under the load-bearing walls in those places where the mezzanine and balcony are located.
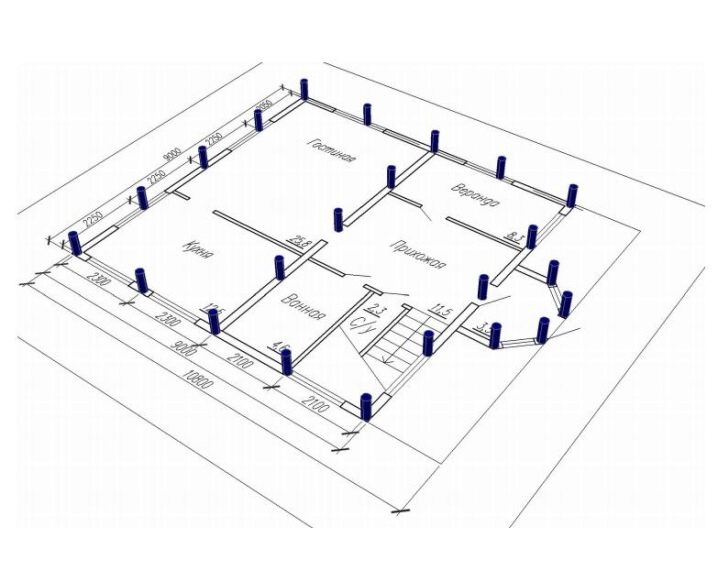
If from real operating conditions it is necessary to add the number of screw piles in comparison with the calculated one, you should not be afraid of such a step. On the contrary, the increased strength will provide real cost savings, since the building quality will be optimal for the entire period of use. When calculating a grillage of any type and height, it is calculated as carefully as possible how the foundation as a whole and each corner will be pressed through. Additionally, the bending energy is calculated. In the variant with a high type of grillage, 100% of the load is imposed on the piles, and therefore an accurate calculation without outside help, or at least without specialized software, will be quite difficult.
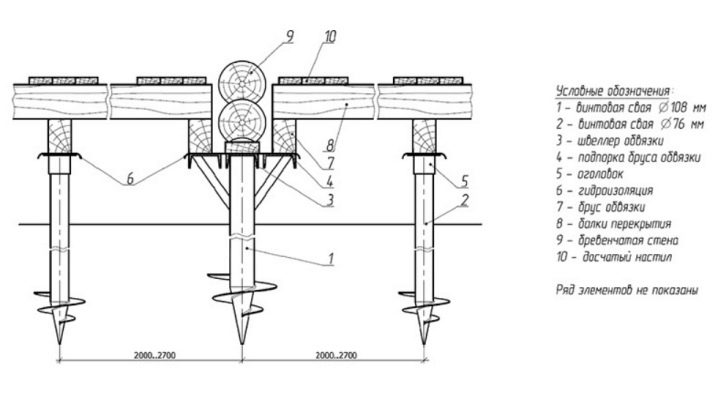
Preparation
The most careful calculations and the most well-thought-out projects will not give a positive result if you approach pile driving thoughtlessly. Although their developers and manufacturers are actively introducing solutions into their designs that make it possible to compensate for some of the construction errors, it is better to install supports under a house or other structure according to all the rules. And this means thorough preparation of the site, even when "only" a bathhouse or a garage is being built. The matter is not limited to geological exploration and collecting data on the desired type of piles, the required depth of their laying, and so on. Sometimes it is necessary to screw in or drive in the pile elements in the form of a sample in order to better evaluate the characteristics of a particular site through experience.
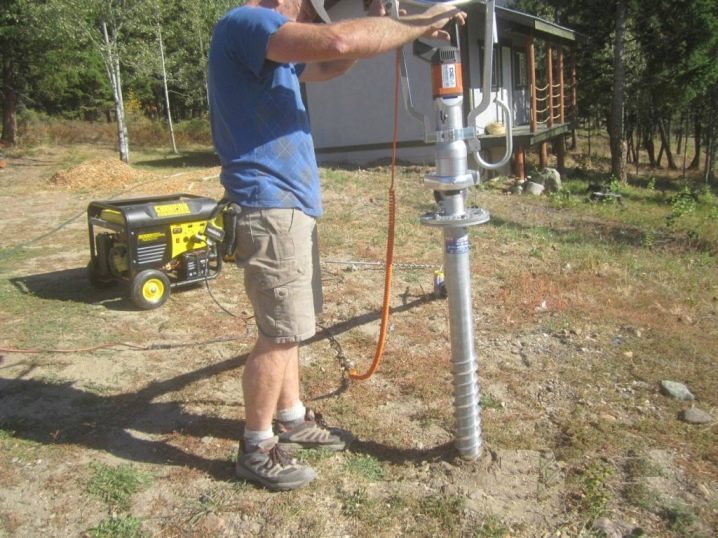
On construction sites with strong soil, it will be enough to level the area, remove all bushes, trees, grasses and their roots, remove debris of any kind. But where the land is loose, very soft or not too stable, you will need to level the site. In areas where groundwater is high, preparation often involves defrosting and drainage. To ensure the absence of any kind of vegetation under the house, sometimes it is even necessary to remove the fertile layer, removing 200-300 mm of soil mass from the surface.
The importance of the initial clearance is not only that it opens up opportunities for construction work. This is the only way to mark the zero level correctly and begin the countdown of the tiers of the building as a whole from it. The markup is carried out not only on the plan, but also on the ground. Stretching the rope or wire held by stakes will help make it more obvious and easier to use. An easier option is to dig small depressions filled with lime. Lines connecting anchor points are drawn directly on the surface using shovels and other entrenching tools.
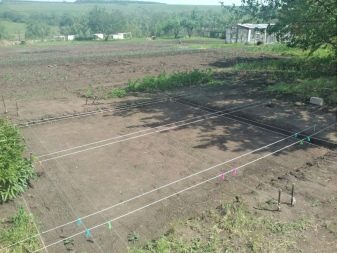
Having drawn the lines, they and the boundary points must be checked again with the drawing and plans. It is better to spend even a few hours on it than to grieve for years afterwards about the mistake. Regardless of the strength of the piles to be mounted, the likelihood of their destruction from external influences will have to be taken into account. Experienced builders always take maximum care of protecting the supports from water ingress and soil migration. Even the insulation of the area under the house is quite justified.
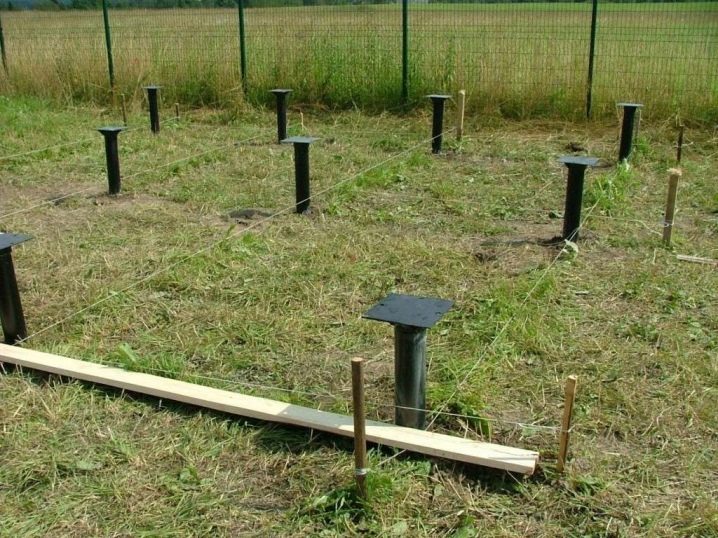
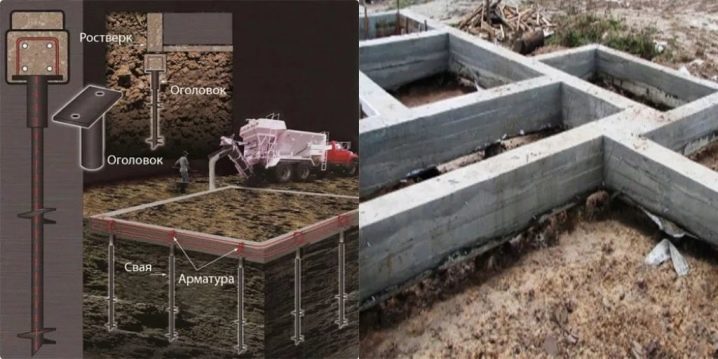
When it is decided to pour the tape over the pile foundation, the entire section up to its bottom is saturated with soil mass. Before pouring the mixture itself, it is required to cover the free spaces on the piles with a layer of primer or other means of waterproofing. This will provide an air cushion between the building and the ground for the thickness of the tape. Only when all this has been done, you can proceed to work on installing the foundation itself.To do it manually or using special equipment - this must be decided in each case individually.
Installation
Technology
Knowledge of pile installation technology is essential for any developer. If you make a mistake, you can face a decrease in the working life and with a decrease in the strength of the base. The depth of the layer with the required bearing capacity must be determined below the freezing mark. When purchasing piles taking into account such a depth, it is required to take into account the rise of 50 cm above the ground, which allows leveling the pile field.
The axes of the bearing walls are marked immediately after that, along with them, the marking is carried out for any structures that create a load, such as:
- porch;
- staircase in the house;
- stove or fireplace.
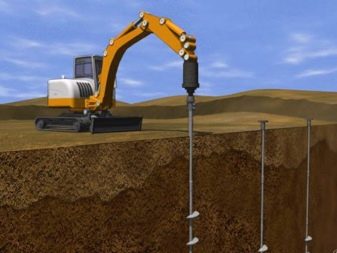
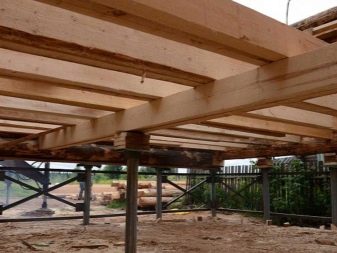
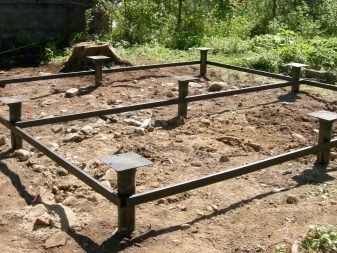
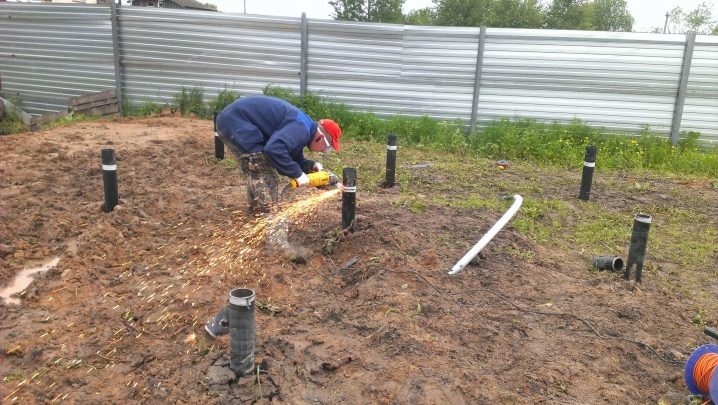
Self-made or purchased piles are required to be immersed in pre-drilled leading holes. The ends protruding outward are cut to a common horizontal level. The strapping is carried out using a grillage and stiffening parts, but it is necessary to resort to both elements only when the piles are more than 1.5 m above the ground. Piles that do not have a zinc coating must be concreted from the inside to prevent corrosion. This requirement is important even for structures with a polymer or fiberglass layer, which cannot be monolithic inside the pipe for technical reasons.
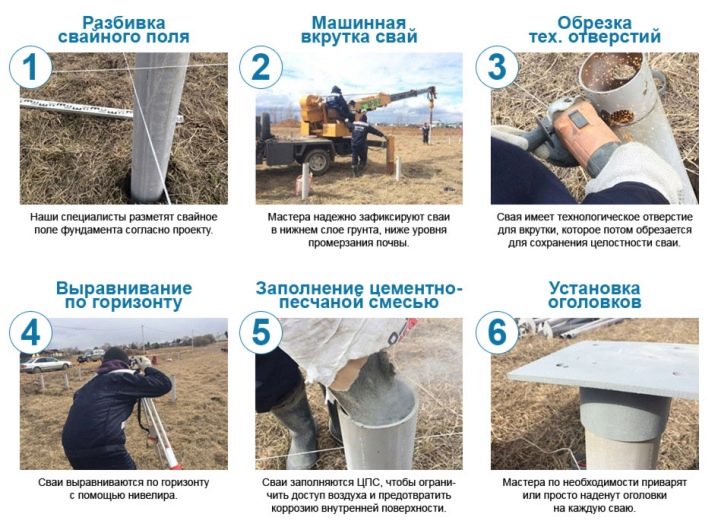
The role of experimental twists is great, they complement the picture that geological surveys give, and in some cases they allow you to completely refuse to pay for the assistance of geologists. One pile is introduced in turn in several selected places in order to finally determine the depth of the bearing soil. Additionally, it is found out whether there is a perch, how strong it is, whether there is a waterproof soil below. Having dealt with all these points, you should proceed to the marking, which is carried out with cords along the rags. The points where the centers of the piles are to be entered must be marked with crosses.
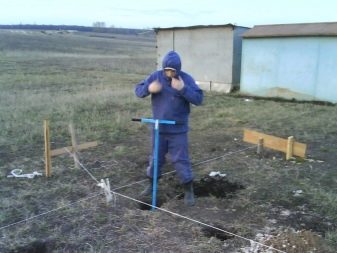
Guiding holes are drilled along these crosses or pits are dug out. Twisting the lighthouse piles (corner), placed at the junction of the walls, is the first thing to do. Only this technique guarantees the coincidence of the real and design contours of the building. Minor deviations of individual supports are eliminated by means of heads with extended platforms. It is quite difficult to do without leading holes; they greatly simplify both the vertical positioning of tubular structures and the introduction of spirals into the ground.
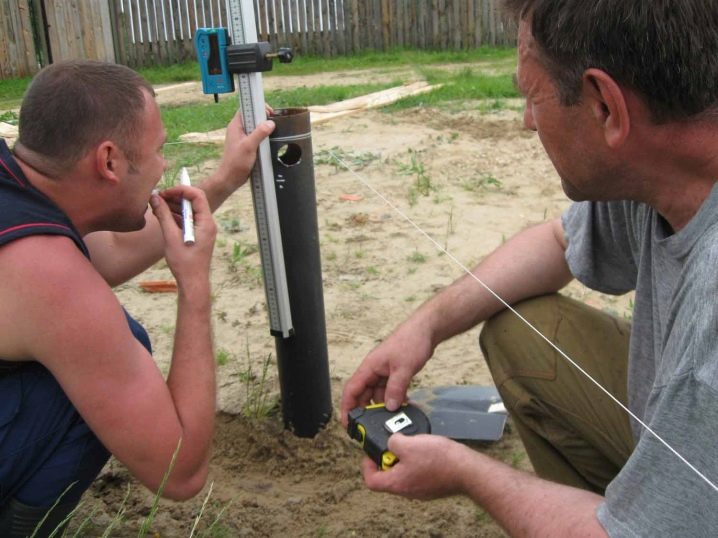
The maximum permissible error when using lighthouse piles does not exceed 50 mm. At intermediate points, the support blocks can be installed with less rigidity. However, if all the beacons are made correctly, the probable deviation will be within the limits without additional efforts. The pile field at the installation site of a capital furnace or other heavy hearth should have at least 4 piles with a grillage in the form of a slab. There must also be a pile under stationary pumps over 400 kg.
If a backup generator is planned to be installed on top, the top of the grillage is covered with vibration isolating tape. Depending on the estimated mass, 2 or 4 piles are placed under the internal stairs. The foundation under the porch is formed strictly individually, while paying attention to the geometry and nuances of the design, to the layout of the house and the arrangement of the adjacent territory, including the blind area. The main thing is not to forget about all these piles, so that you do not have to screw them in haste, opening the rough floors and breaking the already debugged system. At this stage of work, it is necessary to deal with the installation of utilities, with their thermal insulation and with the addition of heating cables.
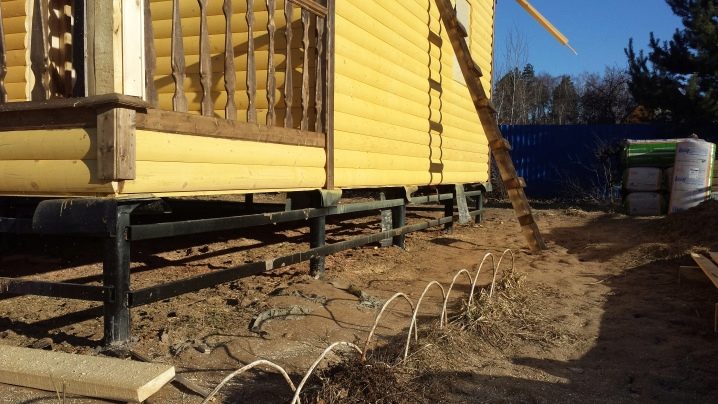
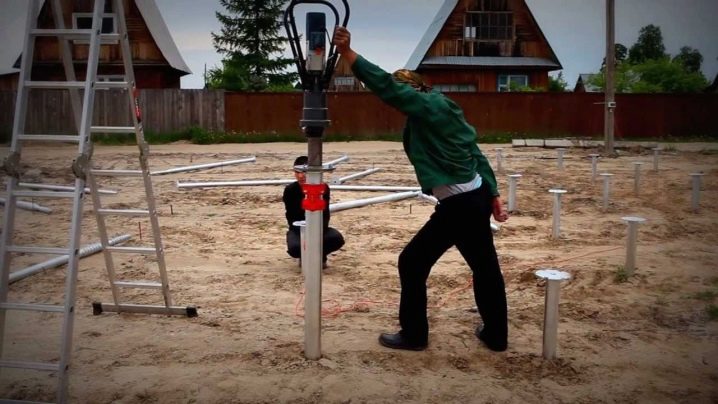
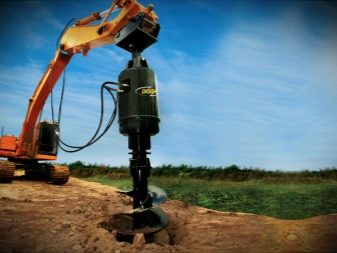
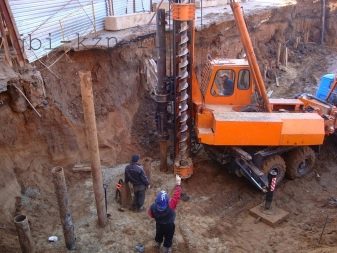
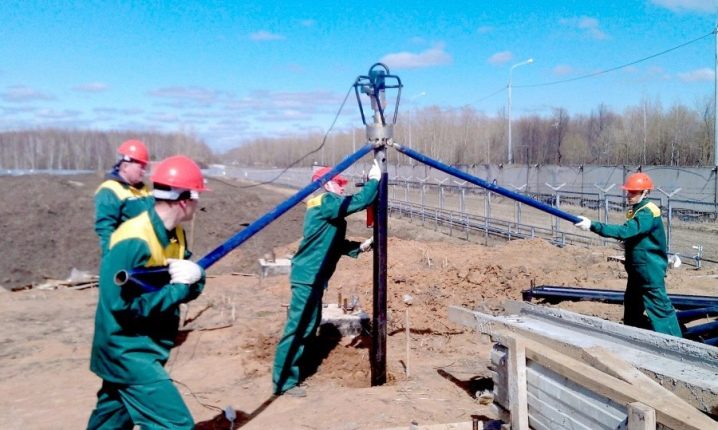
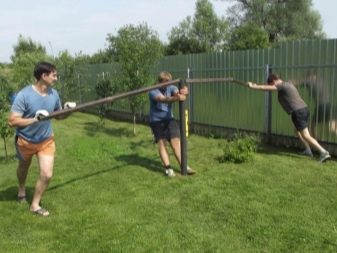
It is quite expensive to screw the piles into the foundation using special equipment., therefore, almost every developer prefers other options. Completely manual work requires the participation of three people, the SVS rotates with two of them, and the third controls.Having mechanized the process (using a drill with a planetary gear), you can limit yourself to two participants. One monitors the verticality of the entry of the product, while the other facilitates the initial stage of implementation. Despite the increased labor costs, a completely manual technique is more practical, it allows you to immediately identify the entrance to the bearing strata by an increase in the pulling force.
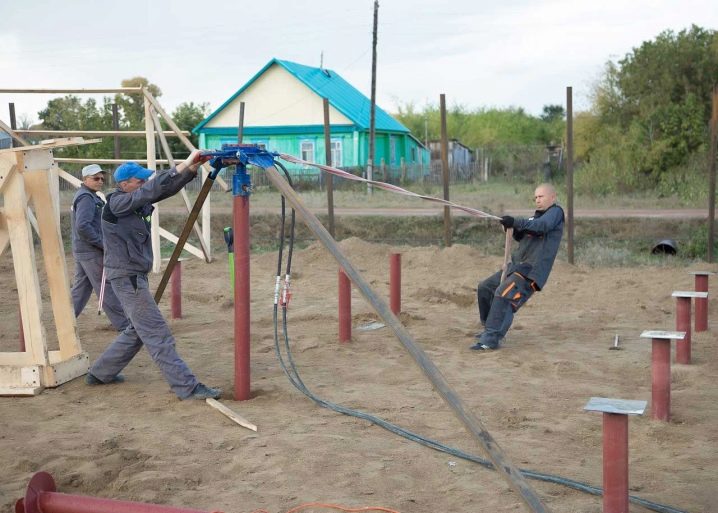
To reduce construction costs, you need to immediately, at the time of design, decide whether headpieces are needed or not. But it is useful to take into account that a significant deviation from the normal axis during operation will still force the installation of these elements. There is no need to put the heads above the grillages made of metal and reinforced concrete. Since the welding of the heads to the piles forms corrosive pockets, it is required to use paints containing zinc and aluminum for protection. They perform their function only when slag and scale are removed from the surface.
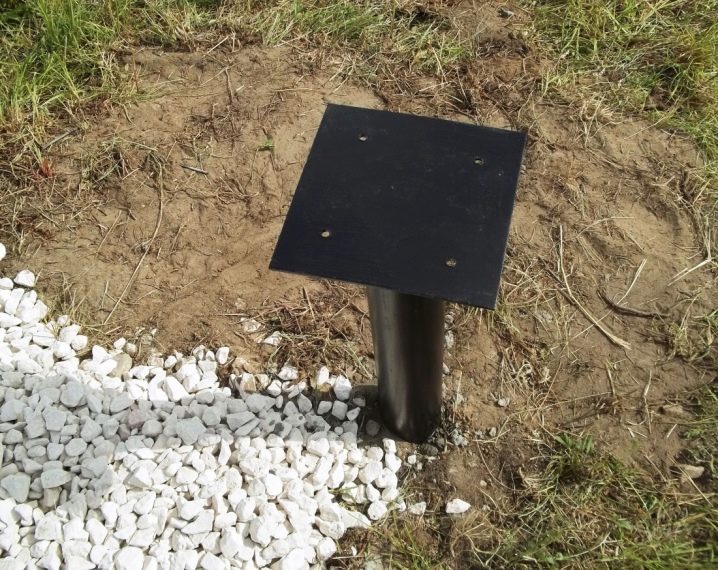
Screwing in a pile can cause the top to move to the side. The plates help align the wall axes when the pile floor is tied with a grillage. A head cannot be dispensed with where a grillage made of wood cannot be fixed on a round pipe. And it is also useful where beams are used from channels welded to the edge, the support area of which must be increased, otherwise it will not be possible to form welds. As for pushing the piles apart from the wall axis, the head helps to correct defects up to 100 mm in both directions.
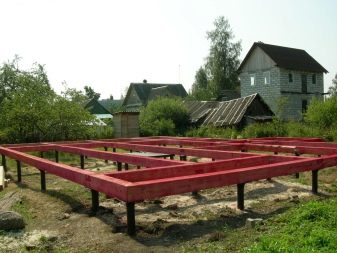
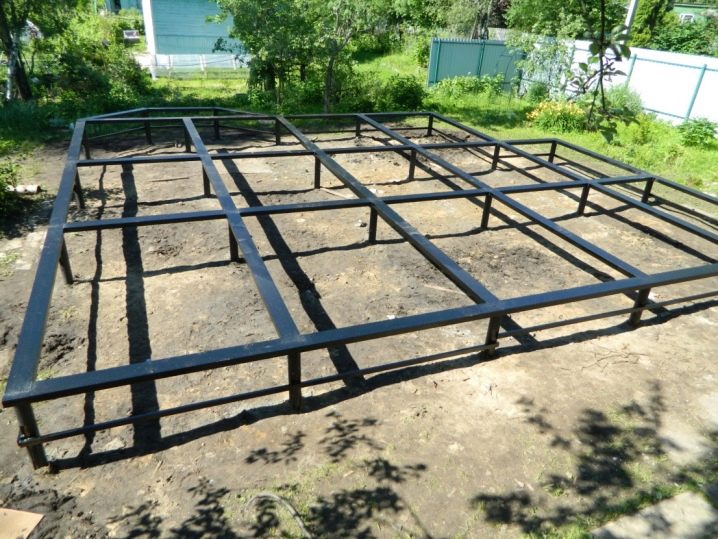
In any other case, there is no need to use welded plates. The foundation of the SVF under a brick house necessarily requires a monolithic grillage. Under log cabins and two-story, three-story frame houses, the reserve of the fortress is achieved by means of an I-beam or channel bars. When it is planned to put light housing at the top, you can limit yourself to timber strapping or boards. Monolithic grillages are created with formwork, reinforcement is carried through the pile bodies, it is walled up in concrete along with the heads.
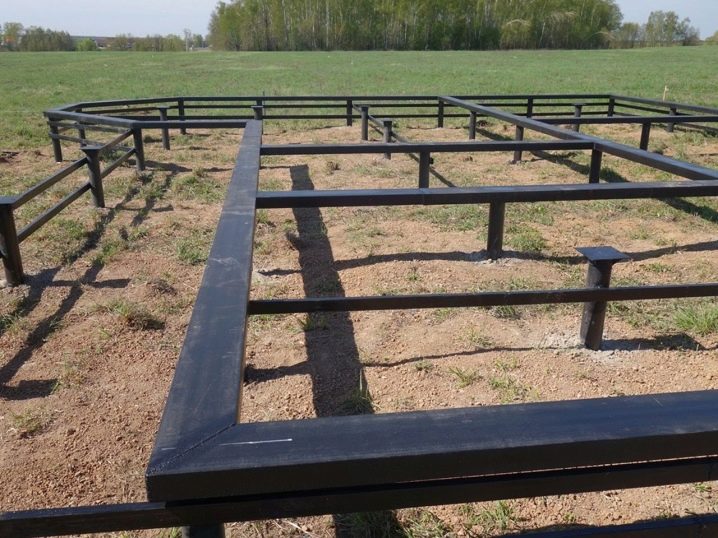
I-beams and channels must be welded to piles without tops. When the pile field turned out to be on a slope with a change in height of more than 150 cm from one opposite wall to another, one cannot do without reinforcing strapping with rigid struts or vertical connecting elements. Flanges are needed to attach them. This technology guarantees a total foundation resource of at least 70 years.
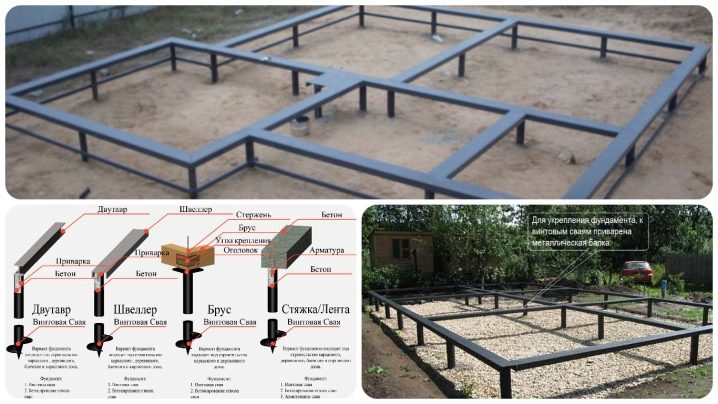
Work order
When all the necessary data has been collected and the freezing depth has been estimated, it is required to free the construction site from everything that may interfere with work, even to a small extent. Additionally, the steel grade is checked and the parameters of the necessary pipes are specified. When marking the territory, you can focus on the drawings of both the house as a whole and its first floor. A pile with a transitional head at the top is pre-mounted in a certain hole and fixed through the hole. When it becomes difficult to rotate the protruding levers, pipe levers are used.
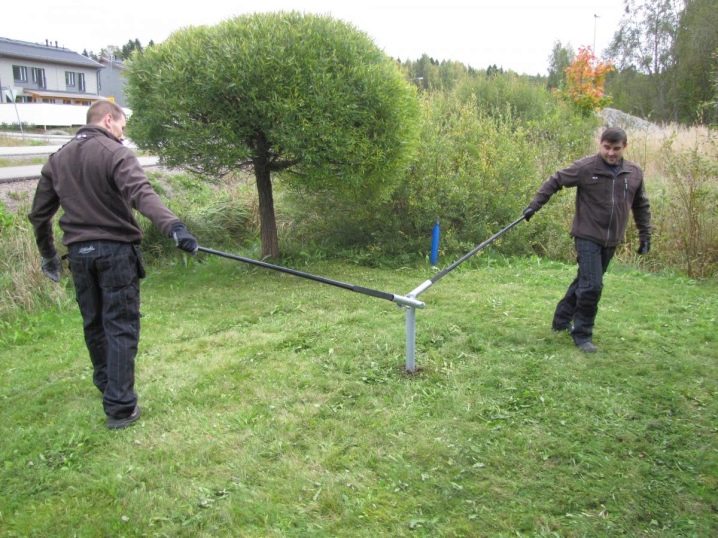
When the pile sinks, the heads are changed to shorter ones. If it was not possible to pass the freezing line, the reason may lie in a hard stone. He is simply bypassed, moving alongside. So the support is moved if necessary until the barrier is broken. The screwed-in piles are cut to one horizontal and saturated with a concrete solution.
You can see the details of how to tighten the screw piles in this video.


The comment was sent successfully.