All about leveling a wooden floor with plywood
Modern decorative floor coverings require a high-quality preparation of the sub-floor for installation. The finishing floor in a house or apartment, as a rule, requires additional leveling, since its surface is often imperfect. Parquet board, carpet, linoleum and laminate have a high susceptibility to a flat surface. Plywood will help to level the floor and prepare it for the flooring. This woodworking product has a high degree of reliability and a long service life.
The ways
When choosing a technique for leveling the subfloor, it is necessary to determine the degree of its unevenness. With differences in unevenness, which are from 5 to 10 mm, before laying the plywood flooring, it will be necessary to perform an adjusting and supporting frame. The following methods of installing plywood flooring have proven themselves best.


Fastening plywood to the base of the floor
To perform the work, plywood sheets are cut to size 60 by 60 cm or other dimensions convenient for the master. A jigsaw or circular saw is used to cut the material. Finished sheets are stacked on top of each other. For 2-3 days at room temperature, the sheets are allowed to stand and level out.
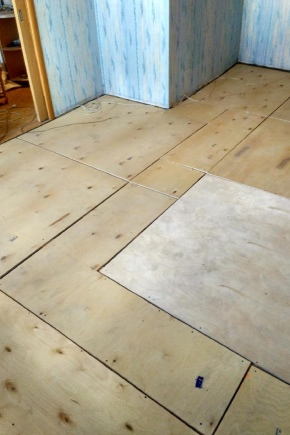
Having previously examined the surface of the base of the floor, they proceed to the next stage of work - they determine the distribution scheme of plywood sheets. They will need to be laid with a breakdown of the seams in a checkerboard pattern. It will be necessary to leave gaps between the sheets, about 3-5 mm, it is recommended to indent the sheets from the wall to 7-10 mm. After preliminary layout, the plywood sheets must be numbered, then removed from their places and, before laying, they must be sanded with an electric grinder.
Further, the surface of the subfloor is cleaned of debris and dust. According to the preliminary layout, sheets of plywood are laid on the base. The material is fixed to the floor with long self-tapping screws. The length of the hardware should exceed the thickness of the material by 3-5 mm. The caps of the self-tapping screws must be completely drowned in the material; for this, a drill with the possibility of countersinking is used. Each plywood sheet is attached to at least 5 hardware, one of which is located in the center of the sheet, and the rest - at its corners.


Plywood flooring on studs with height adjustment
This method is considered the fastest and least expensive in terms of execution time. This technique is used for large differences in the surface of the subfloor. Special anchors are screwed into the base plane at an equal distance relative to each other. The plywood sheets are pushed onto the adjustable anchor pins through the previously drilled holes. Next, using the building level, the subfloor is leveled by twisting the anchor and fixing the result with the nuts located on the working body of the adjustable studs.


Subfloor placed on logs
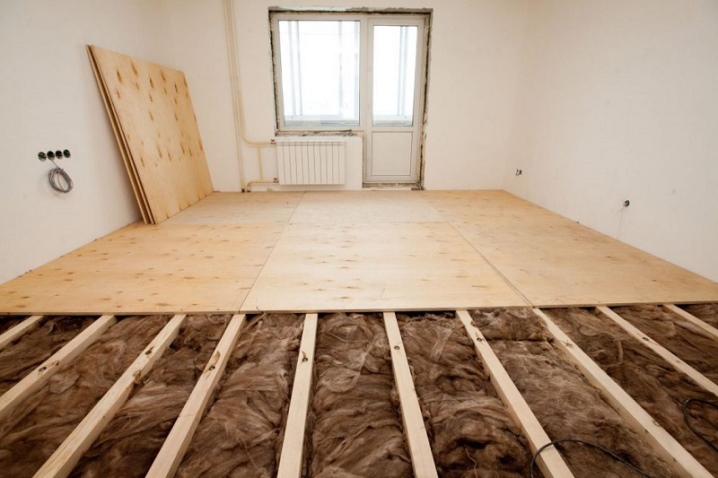
For the manufacture of this preparatory floor covering, thick (15-22 mm) plywood sheets are used. They make it possible to create a reliable and solid base, located on logs, which are pre-laid on the base with a distance of 50 cm from each other. Soundproofing material or mineral insulation can be laid in the gaps between the lags.
The process of laying plywood on logs is as follows: pre-restore the surface of the subfloor, filling all chips, pits, cracks. Then, polyethylene is placed on the surface cleaned of debris as a waterproofing layer. The next layer is a layer of sound insulation or felt pads are made in those places where the logs will be fixed. Wooden blocks, the length of which is 2 m and the width of 50 mm, are laid strictly according to the building level in the horizontal direction.
In the same way, the vertical transverse parts of the lathing are laid. Fasten wooden parts with metal corners. The size of the lathing cells must correspond to the dimensions of the plywood sheet. Thermal insulation is placed in the crate cells, and then the entire surface is covered with polyethylene, fixing the film to the crate with a stapler. Pre-cut plywood sheets are laid on the finished crate and fixed with self-tapping screws.
You can lay the sub floor yourself, but for work you will need to prepare the necessary tools and hardware.



What is required?
To perform each of the methods of laying the subfloor, you must prepare a set of tools. Their list is as follows:
- tape measure, pencil, meter ruler;
- self-tapping screws, screws, nails, dowel-nails;
- electric drill, screwdriver;
- hammer;
- jigsaw or circular saw;
- Sander;
- building level;
- putty;
- sandpaper;
- notched trowel made of rubber.
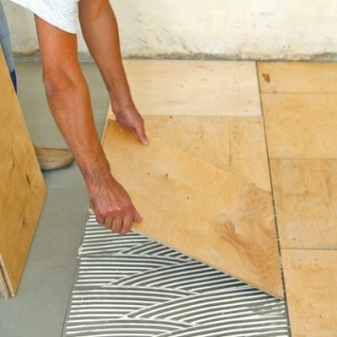
In some cases, plywood sheets are laid on a concrete base or old wooden floorboards using an adhesive.
Additionally, the sheets are fixed using dowel-nails.


How to lay it correctly?
Leveling a wooden floor in a house with plywood may well be done by hand, without the involvement of expensive specialists. If the level differences do not exceed 2-3 mm, the plywood sheets are fastened to the old wooden floor. For this, sheets can be attached over old boards. Before laying the plywood flooring on the plank flooring, you need to level the boards using a sander.
Subfloor sheets can be put in place and glued on. Sometimes in a private house, such a composition is also applied to an uneven floor, if the differences are quite insignificant. In this case, the glue will act as a substrate that will hide the irregularities. In this case, plywood must be glued according to the same rules as when installing along the crate. Before installing the flooring, it is sometimes necessary to remove the paintwork from the boards if it has poor adhesion to the adhesive. As a glue, use PVA, intended for carpentry work, or liquid nails.
When it is required to lay plywood as a base under linoleum or laminate, sheets are used, the thickness of which is from 10 to 14 mm.
Laying the log is also performed using plywood - using an ax or chisel, the sheets are split and spacers are made to level the height of the structure.


Markup
Before starting work, determine the degree of unevenness of the base. If the subfloor is to be laid on top of the old floorboards, you need to find the highest point of their outer bulging:
- using the level, all protruding points of the floor are determined;
- the distance of the conventional ray from the highest point to the wall is measured;
- the measurement results are marked on a reduced-scale room diagram;
- determine the upper point from which the construction of the lathing structure will be carried out.
After taking measurements and building a plan of the lathing on the plan, mark the placement of the leveling gaskets and their size. Next, a diagram of the location of the lag or adjustable pins and plywood sheets is applied.

Cut open
To create a subfloor, plywood is laid under a decorative floor covering, taking into account the following nuances:
- the direction of the grain of the material should be located in the transverse direction from the existing floorboards;
- for the convenience of work, a standard plywood sheet is cut into 4 identical parts.
In rectangular rooms, sheets are placed from the far corner of a solid wall. If the room is trapezoidal, proceed as follows before cutting:
- count the number of plywood sheets that need to be placed in one row;
- 1 sheet is taken away from the resulting number, while the plywood plates are laid out, starting from the middle of the room;
- the remaining scraps of plywood material after cutting are used to close the side gaps of the deck.
After cutting the plywood sheets, it is necessary to prepare the lining for the sheathing. They are used in strips 10 cm wide and made from plywood scraps.
If the plywood is too thick, it is split into thinner pieces.


Styling
There are several ways to secure sub-flooring. Here are the most common and simplest methods of getting the job done.
- Application of an adhesive base. This method justifies itself from an economic point of view and is used without fail in cases where the floor surface will be used quite intensively. To save glue, it can only be applied around the perimeter of the board, as well as at the points of contact of the plywood with the spacers or crossbars of the sheathing. When applying glue, it is advisable to additionally place the glue spot in the center of the sheet. Before starting work, you must carefully study the instructions for the adhesive composition. Some types of glue must be allowed to stand for some time before contact with the work surface to start the polymerization process.
- Fastening sheets using self-tapping screws. Hardware for fastening sheets of the subfloor is used in order, their distance between each other should be within 15 cm in a row. The distance between the rows is made within 40 cm. The rows are spaced evenly, moving along the shortest side of the plywood sheet. In addition to orderly fastening, there is also a cross fastening method. According to this technique, self-tapping screws are placed around the entire perimeter of the plywood with a pitch of 15 cm, as well as along the diagonals of a rectangular sheet.
When screwing the fastener into the plywood sheet, the self-tapping screw should be placed at right angles to the material. To completely hide the screw head, a landing device is preliminarily prepared for it. Plywood sheets are laid with a gap of 5-7 mm from each other. This must be done so that at high humidity, the material, having gained moisture, does not swell and hump.
It is also necessary to indent the sheet from the wall, it is recommended to leave a gap of 7-10 mm.

Sealing of seams
After the plywood subfloor deck has been laid, the expansion joints remaining during installation must be repaired. If it is planned to lay a laminate or parquet board on the subfloor, but the sealing of the seams is not essential, in the case of linoleum or carpet, the uncovered seams of the subfloor will eventually be visible through the laid decorative material.
Sealing of sub-floor joints is carried out with wood putty or filled with acrylic sealant. The use of a sealant for these works is more preferable, since after putty, after a while, the floors sometimes begin to creak. The work on sealing the seams is carried out with a rubber spatula, leveling the surface until a smooth, uniform canvas is obtained.
Thus, you can remove all defects that have arisen during the installation of the subfloor.


You can learn how to put plywood on a wooden floor in the video below.


The comment was sent successfully.